

Recommandé (gratuit) : Tutoriel Uni-App
Répertoire d'articles
Cet article présente principalement l'application étendue de l'interface : les interfaces liées aux appareils incluent l'obtention d'informations sur le système, l'état du réseau, les appels, la numérisation des codes QR, etc. ; barre déroulante pour actualiser et extraire pour charger davantage Implémentation ; utiliser la compilation conditionnelle pour obtenir une compatibilité multi-terminal des petits programmes, des applications, etc. ; retour interactif des boîtes d'invite, du chargement, des fenêtres contextuelles modales, etc.
1. L'interface relative à l'appareil1. Les informations système
l'interface est utilisée pourasynchrone Obtenir des informations sur le système.
Les paramètres communs et les significations de OBJECT sont les suivants :uni.getSystemInfo(OBJECT)Les paramètres communs et les significations renvoyés par le succès sont les suivants :
| 参数名 | 类型 | 是否必填 | 说明 |
|---|---|---|---|
| success | Function | 是 | 接口调用成功的回调 |
| fail | Function | 否 | 接口调用失败的回调函数 |
| complete | Function | 否 | 接口调用结束的回调函数(调用成功、失败都会执行) |
<template>
	<view>
		<button type="primary" @click="getinfo">获取系统信息</button>
	</view></template><script>
	export default {
		data() {
			return {
			}
		},
		onLoad() {
		},
		onShow() {
			console.log('index onshow')
		},
		onHide() {
			console.log('index onhide')
		},
		methods: {
			getinfo: function(){
				uni.getSystemInfo({
					success:function(res){
						console.log(res)
					}
				})
			}
		}
}</script><style></style>affiche :
| 参数 | 说明 |
|---|---|
| brand | 手机品牌 |
| model | 手机型号 |
| pixelRatio | 设备像素比 |
| screenWidth | 屏幕宽度 |
| screenHeight | 屏幕高度 |
| windowWidth | 可使用窗口宽度 |
| windowHeight | 可使用窗口高度 |
| windowTop | 可使用窗口的顶部位置 |
| windowBottom | 可使用窗口的底部位置 |
| version | 引擎版本号 |
En plus d'utiliser 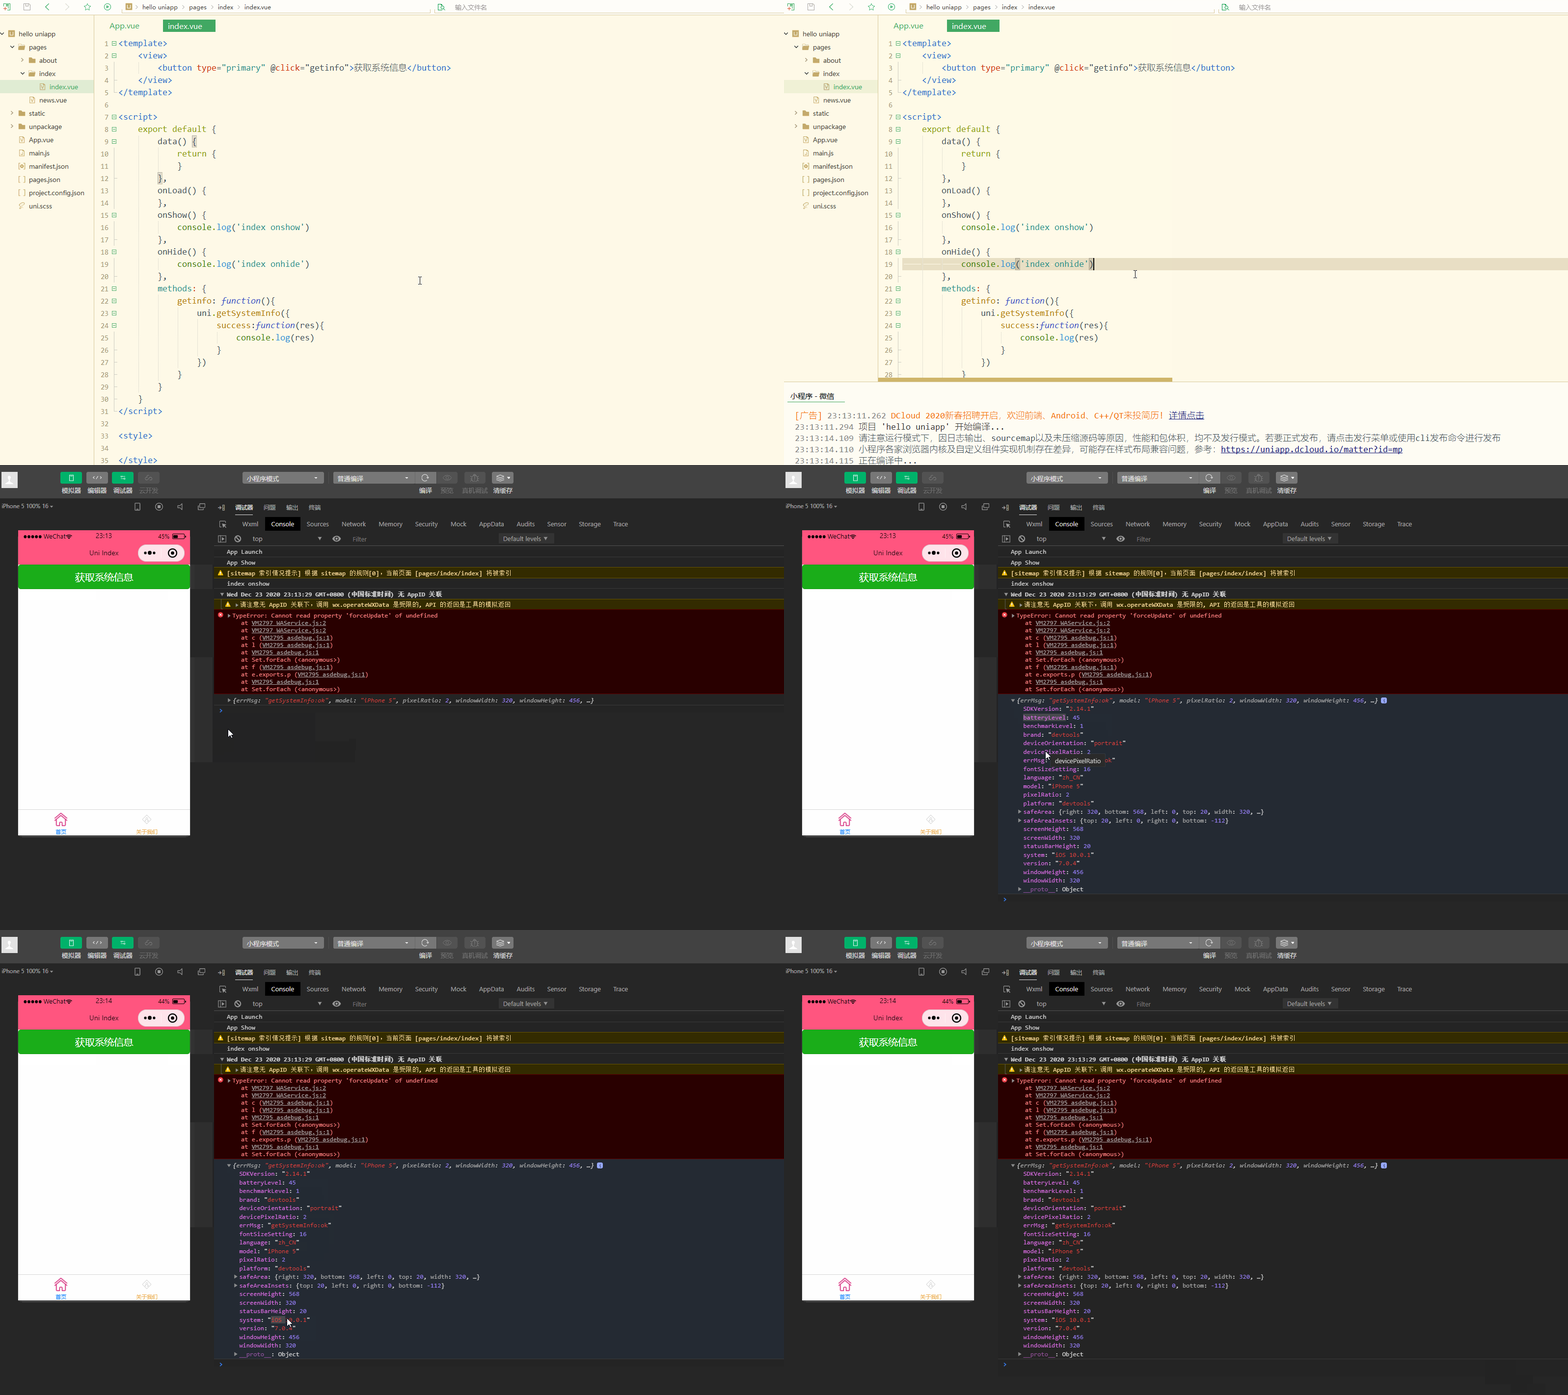 pour obtenir des informations sur l'appareil de manière asynchrone, vous pouvez également utiliser
uni.getSystemInfo(OBJECT)uni.getSystemInfoSync()2. L'état du réseau uni.canIUse(String)
est utilisé pour obtenir le type de réseau. Les paramètres courants d'OBJECT sont les suivants :
uni.getNetworkType(OBJECT) est utilisé pour surveiller les changements d'état du réseau.
Les paramètres de retour CALLBACK et leurs significations sont les suivants :
| 参数名 | 类型 | 必填 | 说明 |
|---|---|---|---|
| success | Function | 是 | 接口调用成功,返回网络类型 networkType |
| fail | Function | 否 | 接口调用失败的回调函数 |
| complete | Function | 否 | 接口调用结束的回调函数(调用成功、失败都会执行) |
如下:
<template>
	<view>
		<button type="primary" @click="getNetworkType">获取网络类型</button>
	</view></template><script>
	export default {
		data() {
			return {}
		},
		onLoad() {
		},
		onShow() {
			console.log('index onshow')
		},
		onHide() {
			console.log('index onhide')
		},
		methods: {
			getNetworkType: function(){
				uni.getNetworkType({
					success:function(res){
						console.log(res.networkType);
					}
				});
				uni.onNetworkStatusChange(function(res){
					console.log(res)
				})
			},
		}
}</script><style></style>显示: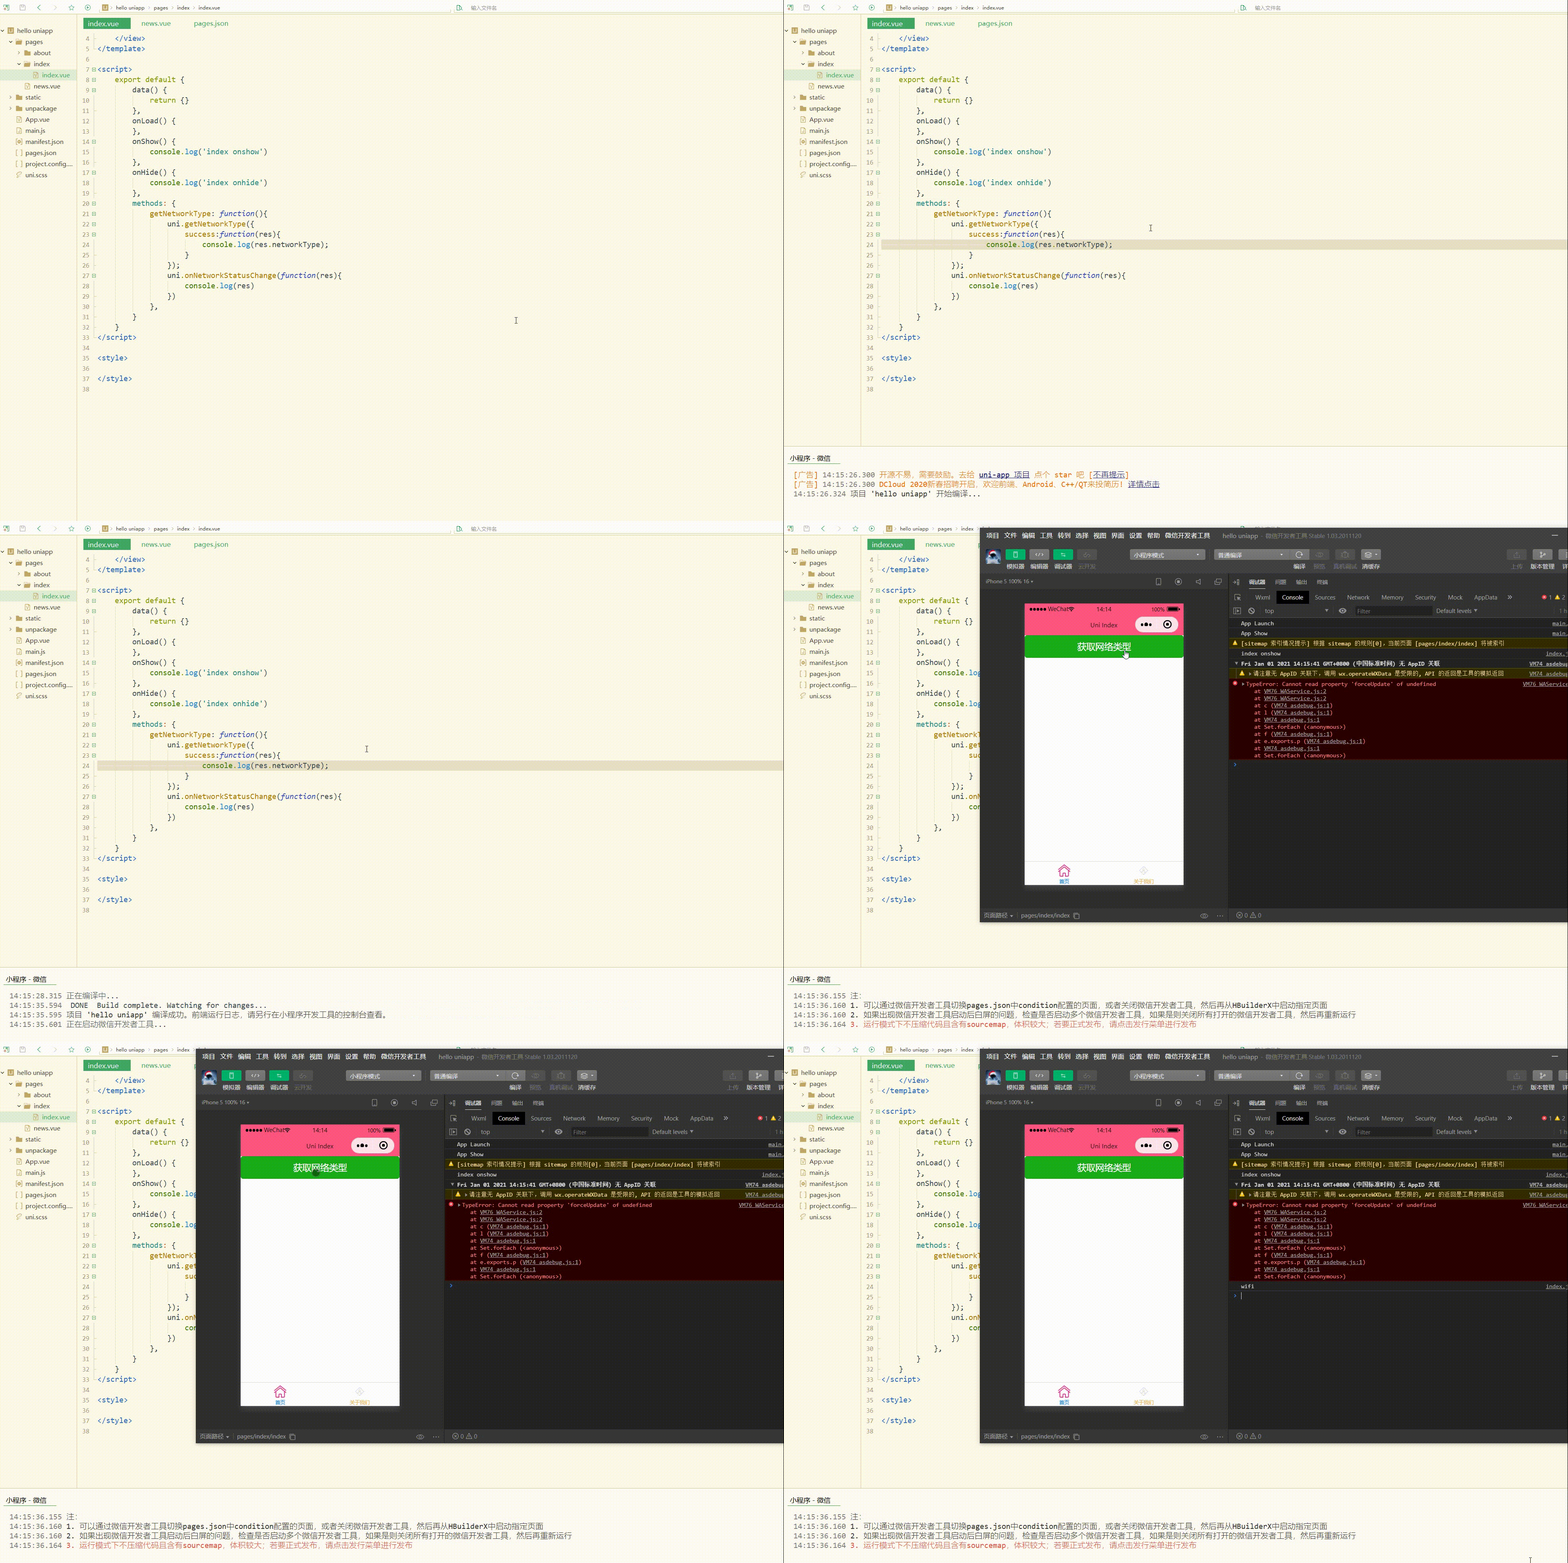
可以看到,获取到了当前的网络类型。
3.加速度计
uni.onAccelerometerChange(CALLBACK)用于监听加速度数据,频率为5次/秒,接口调用后会自动开始监听,可使用uni.offAccelerometer取消监听。
CALLBACK 返回参数和含义如下:
| 参数 | 类型 | 说明 |
|---|---|---|
| x | Number | X 轴 |
| y | Number | Y 轴 |
| z | Number | Z 轴 |
uni.startAccelerometer(OBJECT)用于开始监听加速度数据。
OBJECT参数和含义如下:
| 参数名 | 类型 | 默认 | 必填 | 说明 |
|---|---|---|---|---|
| interval | String | normal | 否 | 接口调用成功的回调 |
| success | Function | 无 | 否 | 接口调用成功的回调 |
| fail | Function | 无 | 否 | 接口调用失败的回调函数 |
| complete | Function | 无 | 否 | 接口调用结束的回调函数(调用成功、失败都会执行) |
uni.stopAccelerometer(OBJECT)用于停止监听加速度数据。
OBJECT 参数和含义如下:
| 参数名 | 类型 | 必填 | 说明 |
|---|---|---|---|
| success | Function | 否 | 接口调用成功的回调 |
| fail | Function | 否 | 接口调用失败的回调函数 |
| complete | Function | 否 | 接口调用结束的回调函数(调用成功、失败都会执行) |
4.拨打电话
uni.makePhoneCall(OBJECT)用于拨打电话。
OBJECT 参数如下:
| 参数名 | 类型 | 必填 | 说明 |
|---|---|---|---|
| phoneNumber | String | 是 | 需要拨打的电话号码 |
| success | Function | 否 | 接口调用成功的回调 |
| fail | Function | 否 | 接口调用失败的回调函数 |
| complete | Function | 否 | 接口调用结束的回调函数(调用成功、失败都会执行) |
如下:
<template>
	<view>
		<button type="primary" @click="tel">拨打电话</button>
	</view></template><script>
	export default {
		data() {
			return {}
		},
		onLoad() {
		},
		onShow() {
			console.log('index onshow')
		},
		onHide() {
			console.log('index onhide')
		},
		methods: {
			tel: function(){
				uni.makePhoneCall({
					phoneNumber: '10086'
				})
			},
		}
}</script><style></style>显示: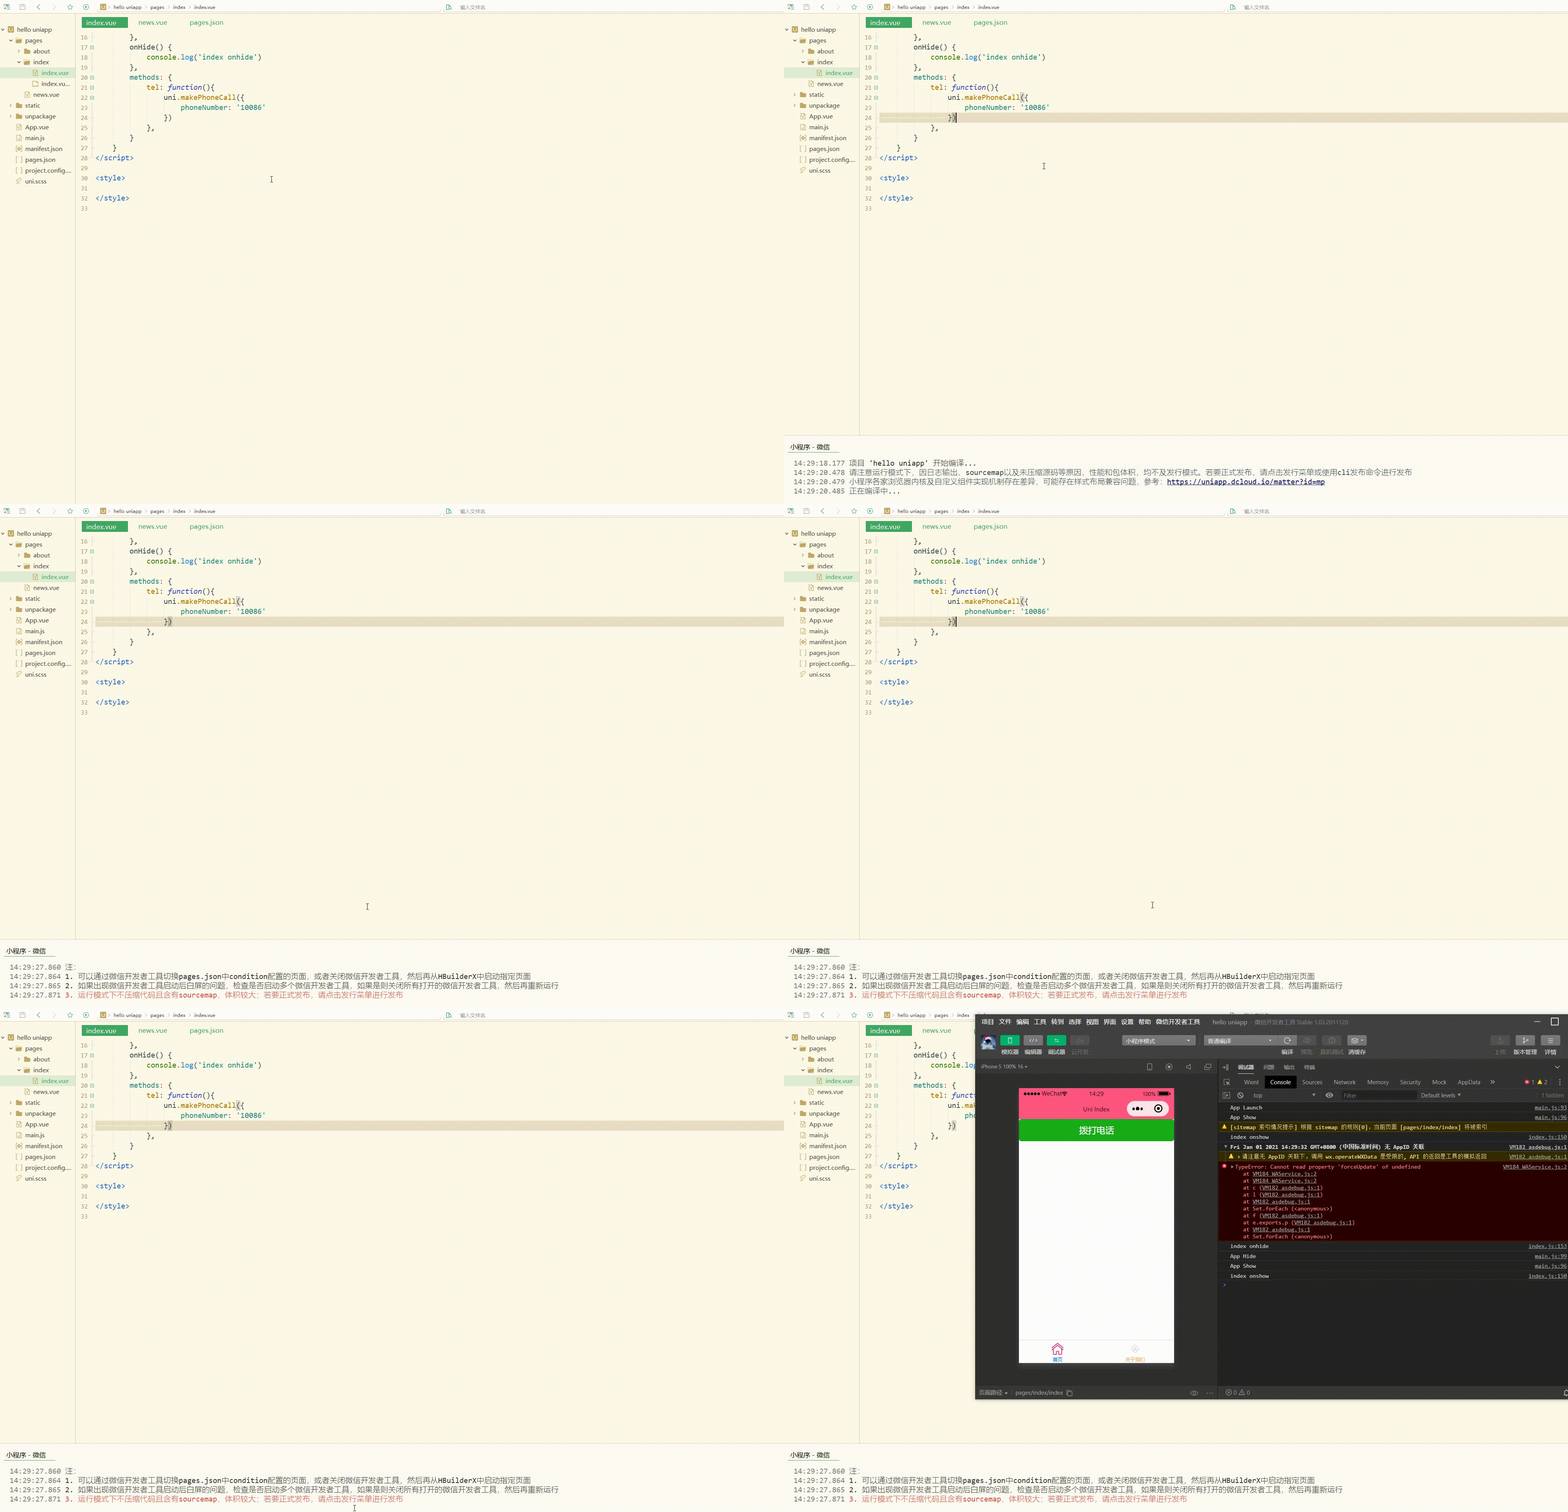
可以看到,模拟了拨打电话。
除了拨打电话,还可以实现发送短信等。
5.扫码
uni.scanCode(OBJECT)用于调起客户端扫码界面,并在扫码成功后返回对应的结果。
OBJECT 参数及其含义如下:
| 参数名 | 类型 | 必填 | 说明 |
|---|---|---|---|
| onlyFromCamera | Boolean | 否 | 是否只能从相机扫码,不允许从相册选择图片 |
| scanType | Array | 否 | 扫码类型,参数类型是数组,二维码是’qrCode’,一维码是’barCode’,DataMatrix是‘datamatrix’,pdf417是‘pdf417’ |
| success | Function | 否 | 接口调用成功的回调 |
| fail | Function | 否 | 接口调用失败的回调函数(识别失败、用户取消等情况下触发) |
| complete | Function | 否 | 接口调用结束的回调函数(调用成功、失败都会执行) |
其中,success 返回参数如下:
| 参数 | 说明 |
|---|---|
| result | 所扫码的内容 |
| scanType | 所扫码的类型 |
| charSet | 所扫码的字符集 |
| path | 当所扫的码为当前应用的合法二维码时,会返回此字段,内容为二维码携带的 path |
简单使用如下:
<template>
	<view>
		<button type="primary" @click="sca">扫描二维码</button>
	</view></template><script>
	export default {
		data() {
			return {}
		},
		onLoad() {
		},
		onShow() {
			console.log('index onshow')
		},
		onHide() {
			console.log('index onhide')
		},
		methods: {
			sca: function(){
				uni.scanCode({
					success:function(res){
						console.log(res)
					}
				})
			},
		}
}</script><style></style>6.剪贴板
uni.setClipboardData(OBJECT)用于设置系统剪贴板的内容。
OBJECT参数和含义如下:
| 参数名 | 类型 | 必填 | 说明 |
|---|---|---|---|
| data | String | 是 | 需要设置的内容 |
| success | Function | 否 | 接口调用成功的回调 |
| fail | Function | 否 | 接口调用失败的回调函数 |
| complete | Function | 否 | 接口调用结束的回调函数(调用成功、失败都会执行) |
uni.getClipboardData(OBJECT)用于获取系统剪贴板内容。
OBJECT 参数和含义如下:
| 参数名 | 类型 | 必填与否 | 说明 |
|---|---|---|---|
| success | Function | 否 | 接口调用成功的回调 |
| fail | Function | 否 | 接口调用失败的回调函数 |
| complete | Function | 否 | 接口调用结束的回调函数(调用成功、失败都会执行) |
如下:
<template>
	<view>
		<button type="primary" @click="sca">复制文字</button>
		<text>{{txt}}</text>
	</view></template><script>
	var _self;
	export default {
		data() {
			return {
				txt: "hello"
			}
		},
		onLoad() {
			_self = this
		},
		onShow() {
			console.log('index onshow')
		},
		onHide() {
			console.log('index onhide')
		},
		methods: {

			sca: function(){
				uni.setClipboardData({
					data: 'https://blog.csdn.net/CUFEECR',
					success:function(res){
						console.log(res);
						uni.getClipboardData({
							success:function(gres){
								console.log(gres.data)
								_self.txt = gres.data							}
						})
					}
				})
			},
		}
}</script><style></style>显示: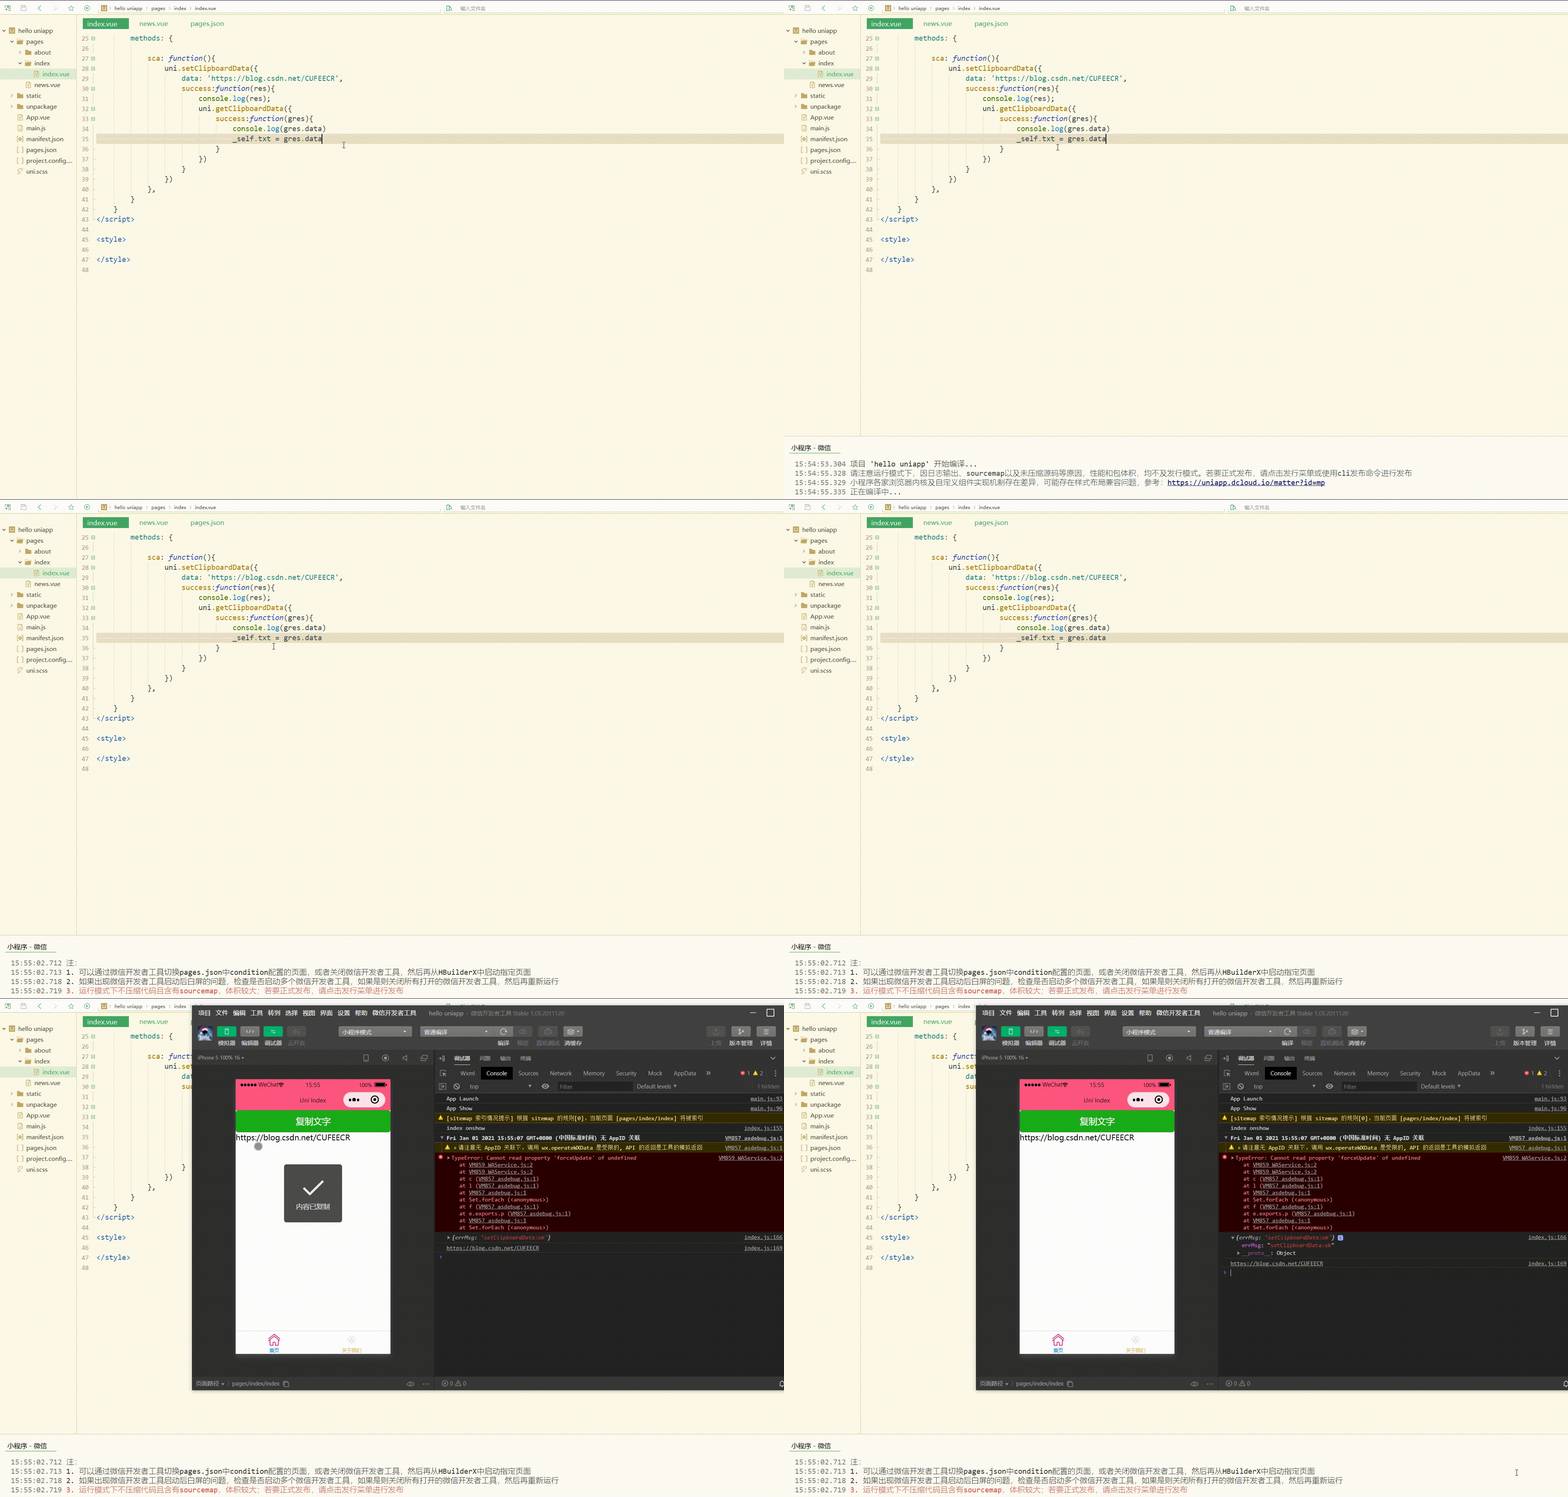
7.屏幕
uni.setScreenBrightness(OBJECT)用于设置屏幕亮度。
OBJECT 参数如下:
| 参数名 | 类型 | 必填与否 | 说明 |
|---|---|---|---|
| value | Number | 是 | 屏幕亮度值,范围 0~1,0 最暗,1 最亮 |
| success | Function | 否 | 接口调用成功的回调 |
| fail | Function | 否 | 接口调用失败的回调函数 |
| complete | Function | 否 | 接口调用结束的回调函数(调用成功、失败都会执行) |
uni.getScreenBrightness(OBJECT)用于获取屏幕亮度。
OBJECT 参数如下:
| 参数名 | 类型 | 必填与否 | 说明 |
|---|---|---|---|
| success | Function | 否 | 接口调用成功的回调 |
| fail | Function | 否 | 接口调用失败的回调函数 |
| complete | Function | 否 | 接口调用结束的回调函数(调用成功、失败都会执行) |
uni.setKeepScreenOn(OBJECT)用于设置是否保持常亮状态。仅在当前应用生效,离开应用后设置失效。
OBJECT 参数如下:
| 参数名 | 类型 | 必填与否 | 说明 |
|---|---|---|---|
| keepScreenOn | Boolean | 是 | 是否保持屏幕常亮 |
| success | Function | 否 | 接口调用成功的回调 |
| fail | Function | 否 | 接口调用失败的回调函数 |
| complete | Function | 否 | 接口调用结束的回调函数(调用成功、失败都会执行) |
例如:
<template>
	<view>
		<button type="primary" @click="srn">设置屏幕亮度</button>
	</view></template><script>
	var _self;
	export default {
		data() {
			return {
				txt: "hello"
			}
		},
		onLoad() {
			_self = this
		},
		onShow() {
			console.log('index onshow')
		},
		onHide() {
			console.log('index onhide')
		},
		methods: {
			srn: function(){
				uni.setScreenBrightness({
					value: 0.1,
					success:function(){
						console.log('set success')
					}
				})
			},
		}
}</script><style></style>7.振动
uni.vibrate(OBJECT)用于使手机发生振动。
OBJECT 参数如下:
| 参数名 | 类型 | 必填与否 | 说明 |
|---|---|---|---|
| success | Function | 否 | 接口调用成功的回调 |
| fail | Function | 否 | 接口调用失败的回调函数 |
| complete | Function | 否 | 接口调用结束的回调函数(调用成功、失败都会执行) |
uni.vibrateLong(OBJECT) est utilisé pour faire vibrer le téléphone pendant une longue période (400 ms), uni.vibrateShort(OBJECT) est utilisé pour faire vibrer le téléphone pendant une courte période (15 ms), et les paramètres OBJET sont les mêmes que uni.vibrate(OBJECT) .
8. Contacts mobiles
uni.addPhoneContact(OBJECT)Après l'appel, l'utilisateur peut choisir d'utiliser le formulaire comme méthode "Nouveau contact" ou "Ajouter aux contacts existants". , écrivez-le dans le carnet d'adresses du système de téléphonie mobile et complétez l'ajout de contacts et d'informations de contact dans le carnet d'adresses du téléphone mobile.
| 参数名 | 类型 | 必填与否 | 说明 |
|---|---|---|---|
| photoFilePath | String | 否 | 头像本地文件路径 |
| lastName | String | 否 | 姓氏 |
| firstName | String | 是 | 名字 |
| mobilePhoneNumber | String | 否 | 手机号 |
| workPhoneNumber | String | 否 | 工作电话 |
| String | 否 | 电子邮件 | |
| url | String | 否 | 网站 |
| success | Function | 否 | 接口调用成功的回调 |
| fail | Function | 否 | 接口调用失败的回调函数 |
| complete | Function | 否 | 接口调用结束的回调函数(调用成功、失败都会执行) |
2. Paramètres de navigation
Auparavant, la barre de navigation était implémentée via la configuration, mais elle n'était pas assez flexible. Dans ce cas, vous pouvez utiliser le. interface pour implémenter la barre de navigation.
uni.setNavigationBarTitle(OBJECT) est utilisé pour définir dynamiquement le titre de la page actuelle.
Les paramètres OBJECT sont les suivants :
| 参数名 | 类型 | 必填与否 | 说明 |
|---|---|---|---|
| title | String | 是 | 页面标题 |
| success | Function | 否 | 接口调用成功的回调 |
| fail | Function | 否 | 接口调用失败的回调函数 |
| complete | Function | 否 | 接口调用结束的回调函数(调用成功、失败都会执行) |
uni.setNavigationBarColor(OBJECT) est utilisé pour définir la couleur de la barre de navigation de la page. Si vous devez définir la couleur avant d'entrer dans la page, veuillez retarder l'exécution pour éviter qu'elle ne soit écrasée par la logique de réglage des couleurs dans le cadre.
Les paramètres OBJECT sont les suivants :
| 参数名 | 类型 | 必填与否 | 说明 |
|---|---|---|---|
| frontColor | String | 是 | 前景颜色值,包括按钮、标题、状态栏的颜色,仅支持 #ffffff 和 #000000 |
| backgroundColor | String | 是 | 背景颜色值,有效值为十六进制颜色 |
| animation | Object | 否 | 动画效果,{duration,timingFunc} |
| success | Function | 否 | 接口调用成功的回调函数 |
| fail | Function | 否 | 接口调用失败的回调函数 |
| complete | Function | 否 | 接口调用结束的回调函数(调用成功、失败都会执行) |
uni.showNavigationBarLoading(OBJECT) est utilisé pour afficher l'animation de chargement de la barre de navigation sur la page actuelle, et uni.hideNavigationBarLoading(OBJECT) masque l'animation de chargement de la barre de navigation sur la page actuelle.
Leurs paramètres OBJET sont les suivants :
| 参数名 | 类型 | 必填与否 | 说明 |
|---|---|---|---|
| success | Function | 否 | 接口调用成功的回调函数 |
| fail | Function | 否 | 接口调用失败的回调函数 |
| complete | Function | 否 | 接口调用结束的回调函数(调用成功、失败都会执行) |
示例如下:
<template>
	<view>
		<button type="primary" @click="setTitle">设置标题</button>
	</view></template><script>
	var _self;
	export default {
		data() {
			return {
				txt: "hello"
			}
		},
		onLoad() {
			uni.showNavigationBarLoading();
		},
		onShow() {
			console.log('index onshow')
		},
		onHide() {
			console.log('index onhide')
		},
		methods: {
			setTitle: function(){
				uni.setNavigationBarTitle({
					title: 'hello...'
				});
				uni.hideNavigationBarLoading();
			},
		}
}</script><style></style>显示: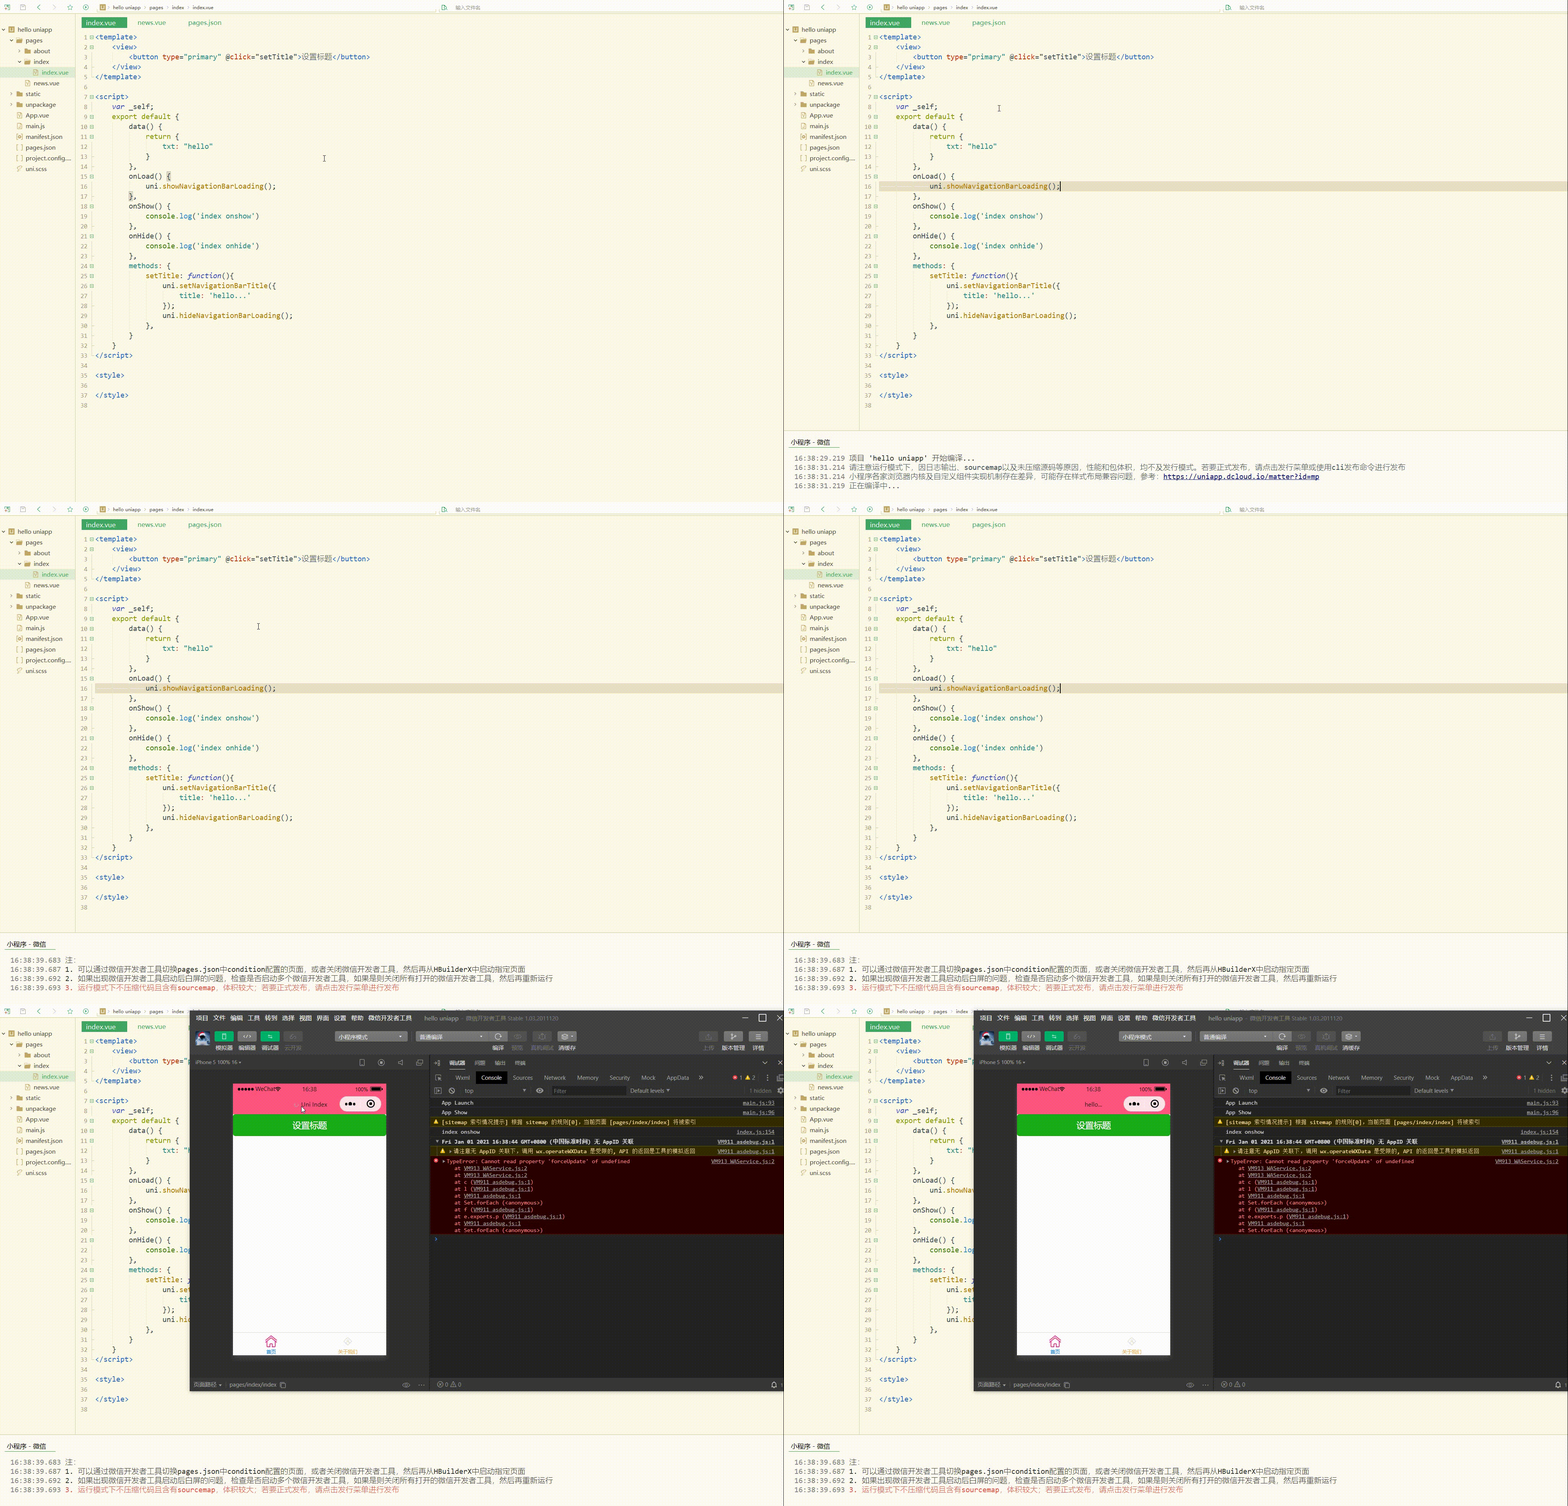
可以看到,实现了设置标题和控制加载。
三、下拉和上拉
1.下拉刷新
onPullDownRefresh是一个处理函数,和onLoad等生命周期函数同级,用于监听该页面用户下拉刷新事件。
使用前,需要在 pages.json 里,找到的当前页面的pages节点,并在 style 选项中开启 enablePullDownRefresh;
当处理完数据刷新后,uni.stopPullDownRefresh 可以停止当前页面的下拉刷新。
uni.startPullDownRefresh(OBJECT)用于开始下拉刷新,调用后触发下拉刷新动画,效果与用户手动下拉刷新一致。
| 参数名 | 类型 | 必填与否 | 说明 |
|---|---|---|---|
| success | Function | 否 | 接口调用成功的回调函数 |
| fail | Function | 否 | 接口调用失败的回调函数 |
| complete | Function | 否 | 接口调用结束的回调函数(调用成功、失败都会执行) |
uni.stopPullDownRefresh()用于停止当前页面下拉刷新。
如下:
<template>
	<view>
		<view v-for="(item, index) in newslist" class="newslist">{{item}}</view>
	</view></template><script>
	var _self;
	export default {
		data() {
			return {
				newslist: []
			}
		},
		onLoad() {
			_self = this
		},
		onShow() {
			console.log('index onshow')
		},
		onHide() {
			console.log('index onhide')
		},
		onPullDownRefresh() {
			this.getNews()
		},
		methods: {
			getNews: function() {
				uni.showNavigationBarLoading();
				uni.request({
					url: 'https://demo.hcoder.net/index.php?user=hcoder&pwd=hcoder&m=list1&page=1',
					success:function(res){
						console.log(res);
						var newslist = res.data.split('--hcSplitor--');
						_self.newslist = newslist;
						uni.stopPullDownRefresh();
						uni.hideNavigationBarLoading();
					}
				})
			}
		}
	}</script><style>
	.newslist {
		line-height: 2em;
		padding: 20px;
}</style>显示: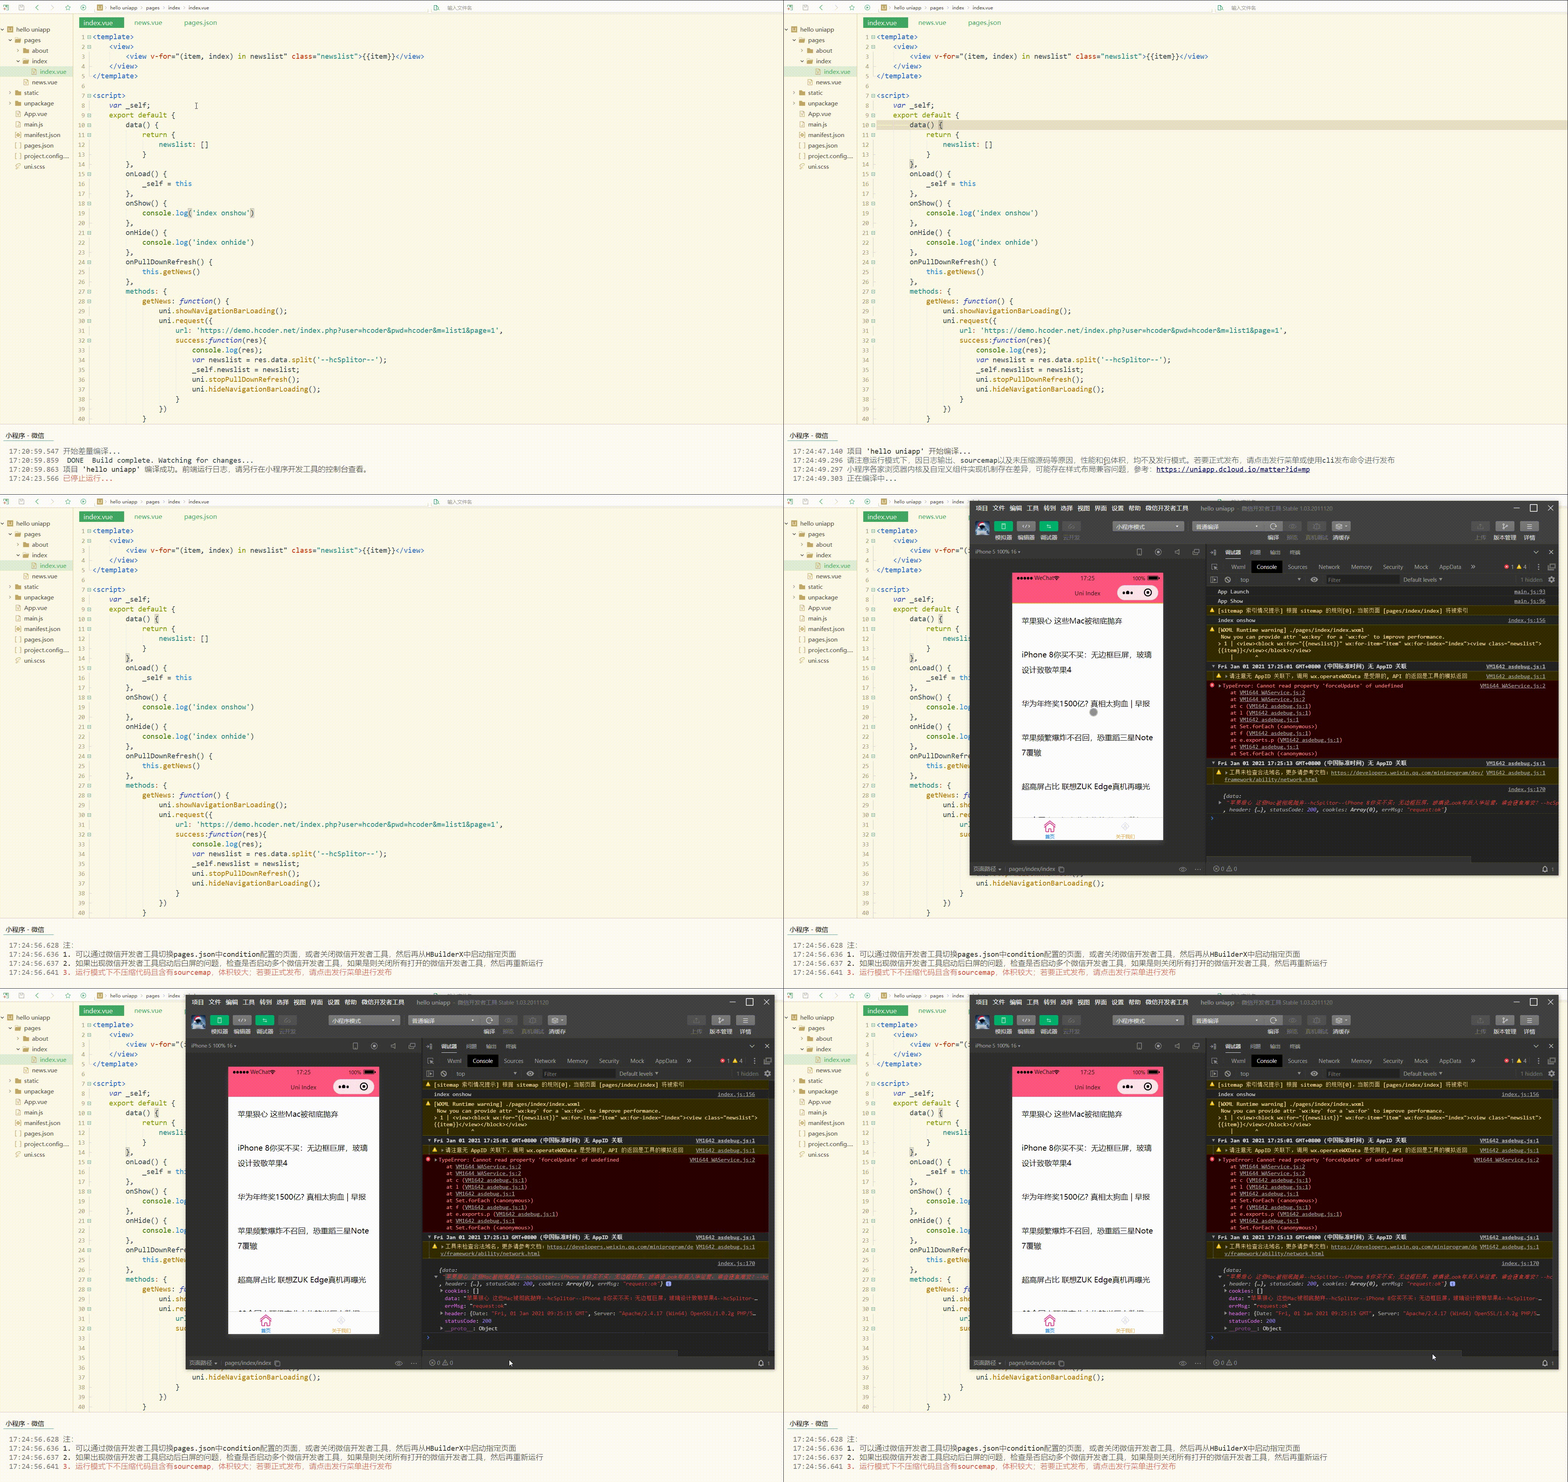
可以看到,实现了下拉刷新加载数据。
2.案例–上拉加载更多
上拉加载更多有两种实现方式:
这里使用第二种方式,即生命周期函数onReachBottom来实现,即滚动条滚动到底部时触发事件。
初步实现如下:
<template>
	<view>
		<view v-for="(item, index) in newslist" class="newslist">{{item}}</view>
	</view></template><script>
	// 添加page全局变量
	var _self, page;
	export default {
		data() {
			return {
				newslist: []
			}
		},
		onLoad() {
			_self = this
		},
		onShow() {
			console.log('index onshow')
		},
		onHide() {
			console.log('index onhide')
		},
		onPullDownRefresh() {
			this.getNews()
		},
		onReachBottom() {
			this.getMoreNews()
		},
		methods: {
			getNews: function() {
				page = 1;
				uni.showNavigationBarLoading();
				uni.request({
					url: 'https://demo.hcoder.net/index.php?user=hcoder&pwd=hcoder&m=list1&page='+page,
					success:function(res){
						console.log(res);
						var newslist = res.data.split('--hcSplitor--');
						_self.newslist = _self.newslist.concat(newslist);
						uni.stopPullDownRefresh();
						uni.hideNavigationBarLoading();
						page++;
					}
				})
			},
			getMoreNews: function() {
				uni.showNavigationBarLoading();
				uni.request({
					url: 'https://demo.hcoder.net/index.php?user=hcoder&pwd=hcoder&m=list1&page='+page,
					success:function(res){
						console.log(res);
						uni.hideNavigationBarLoading();
						if(res.data == null){
							return false
						};
						var newslist = res.data.split('--hcSplitor--');
						_self.newslist = newslist;
						uni.stopPullDownRefresh();
						page++;
					}
				})
			}
		}
	}</script><style>
	.newslist {
		line-height: 2em;
		padding: 20px;
}</style>其中,添加全局变量page用于指定需要请求的数据的页数;
定义函数分别实现第一次获取数据和加载更多数据。
显示: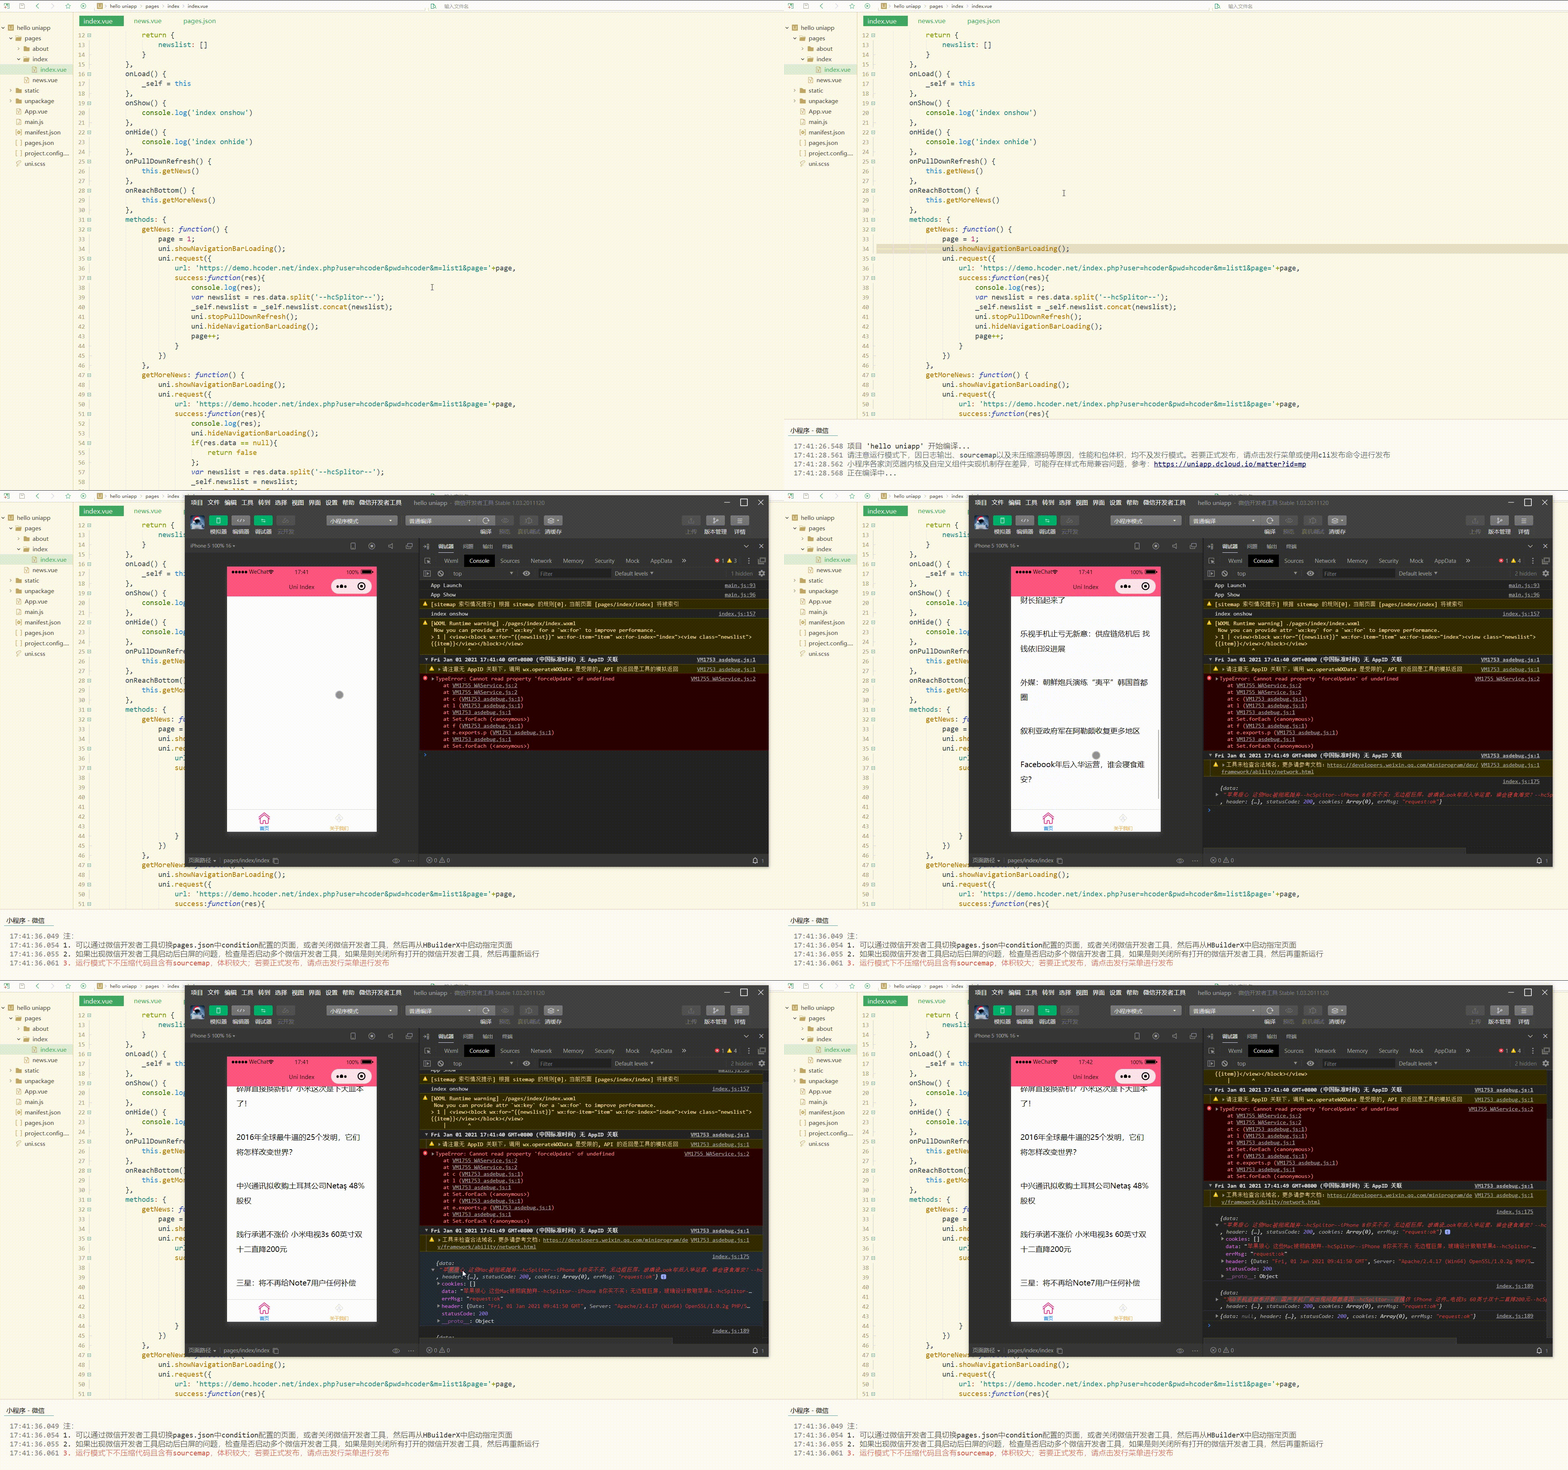
可以看到,加载了2页数据后,就不能再加载数据了。
此时还可以进行完善,如添加“加载更多”文本提示。
如下:
<template>
	<view>
		<view v-for="(item, index) in newslist" class="newslist">{{item}}</view>
		<view class="loading">{{loadingText}}</view>
	</view></template><script>
	// 添加page、timer全局变量
	var _self, page, timer = null;
	export default {
		data() {
			return {
				newslist: [],
				loadingText: "下拉加载"
			}
		},
		onLoad() {
			_self = this
		},
		onShow() {
			console.log('index onshow')
		},
		onHide() {
			console.log('index onhide')
		},
		onPullDownRefresh() {
			this.getNews()
		},
		onReachBottom() {
			if(timer != null){
				clearTimeout(timer)
			};
			timer = setTimeout(function(){
				_self.getMoreNews()
			}, 500);
		},
		methods: {
			getNews: function() {
				page = 1;
				uni.showNavigationBarLoading();
				uni.request({
					url: 'https://demo.hcoder.net/index.php?user=hcoder&pwd=hcoder&m=list1&page='+page,
					success:function(res){
						console.log(res);
						var newslist = res.data.split('--hcSplitor--');
						_self.newslist = _self.newslist.concat(newslist);
						uni.stopPullDownRefresh();
						uni.hideNavigationBarLoading();
						page++;
					}
				})
			},
			getMoreNews: function() {
				if(_self.loadingText == "已加载完毕"){
					return false
				};
				_self.loadingText = "加载中";
				uni.showNavigationBarLoading();
				uni.request({
					url: 'https://demo.hcoder.net/index.php?user=hcoder&pwd=hcoder&m=list1&page='+page,
					success:function(res){
						console.log(res);
						uni.hideNavigationBarLoading();
						if(res.data == null){
							_self.loadingText = "已加载完毕";
							return false
						};
						var newslist = res.data.split('--hcSplitor--');
						_self.newslist = newslist;
						uni.stopPullDownRefresh();
						_self.loadingText = "加载更多";
						page++;
					}
				})
			}
		}
	}</script><style>
	.newslist {
		line-height: 2em;
		padding: 20px;
	}
	.loading {
		line-height: 2em;
		text-align: center;
		color: #DD524D;
		margin-top: 30px;
}</style>使用延时器让页面先渲染完,再加载数据;
同时在getMoreNews函数中,先判断是否加载完毕,如果已加载完毕则可以不再执行该函数。
显示: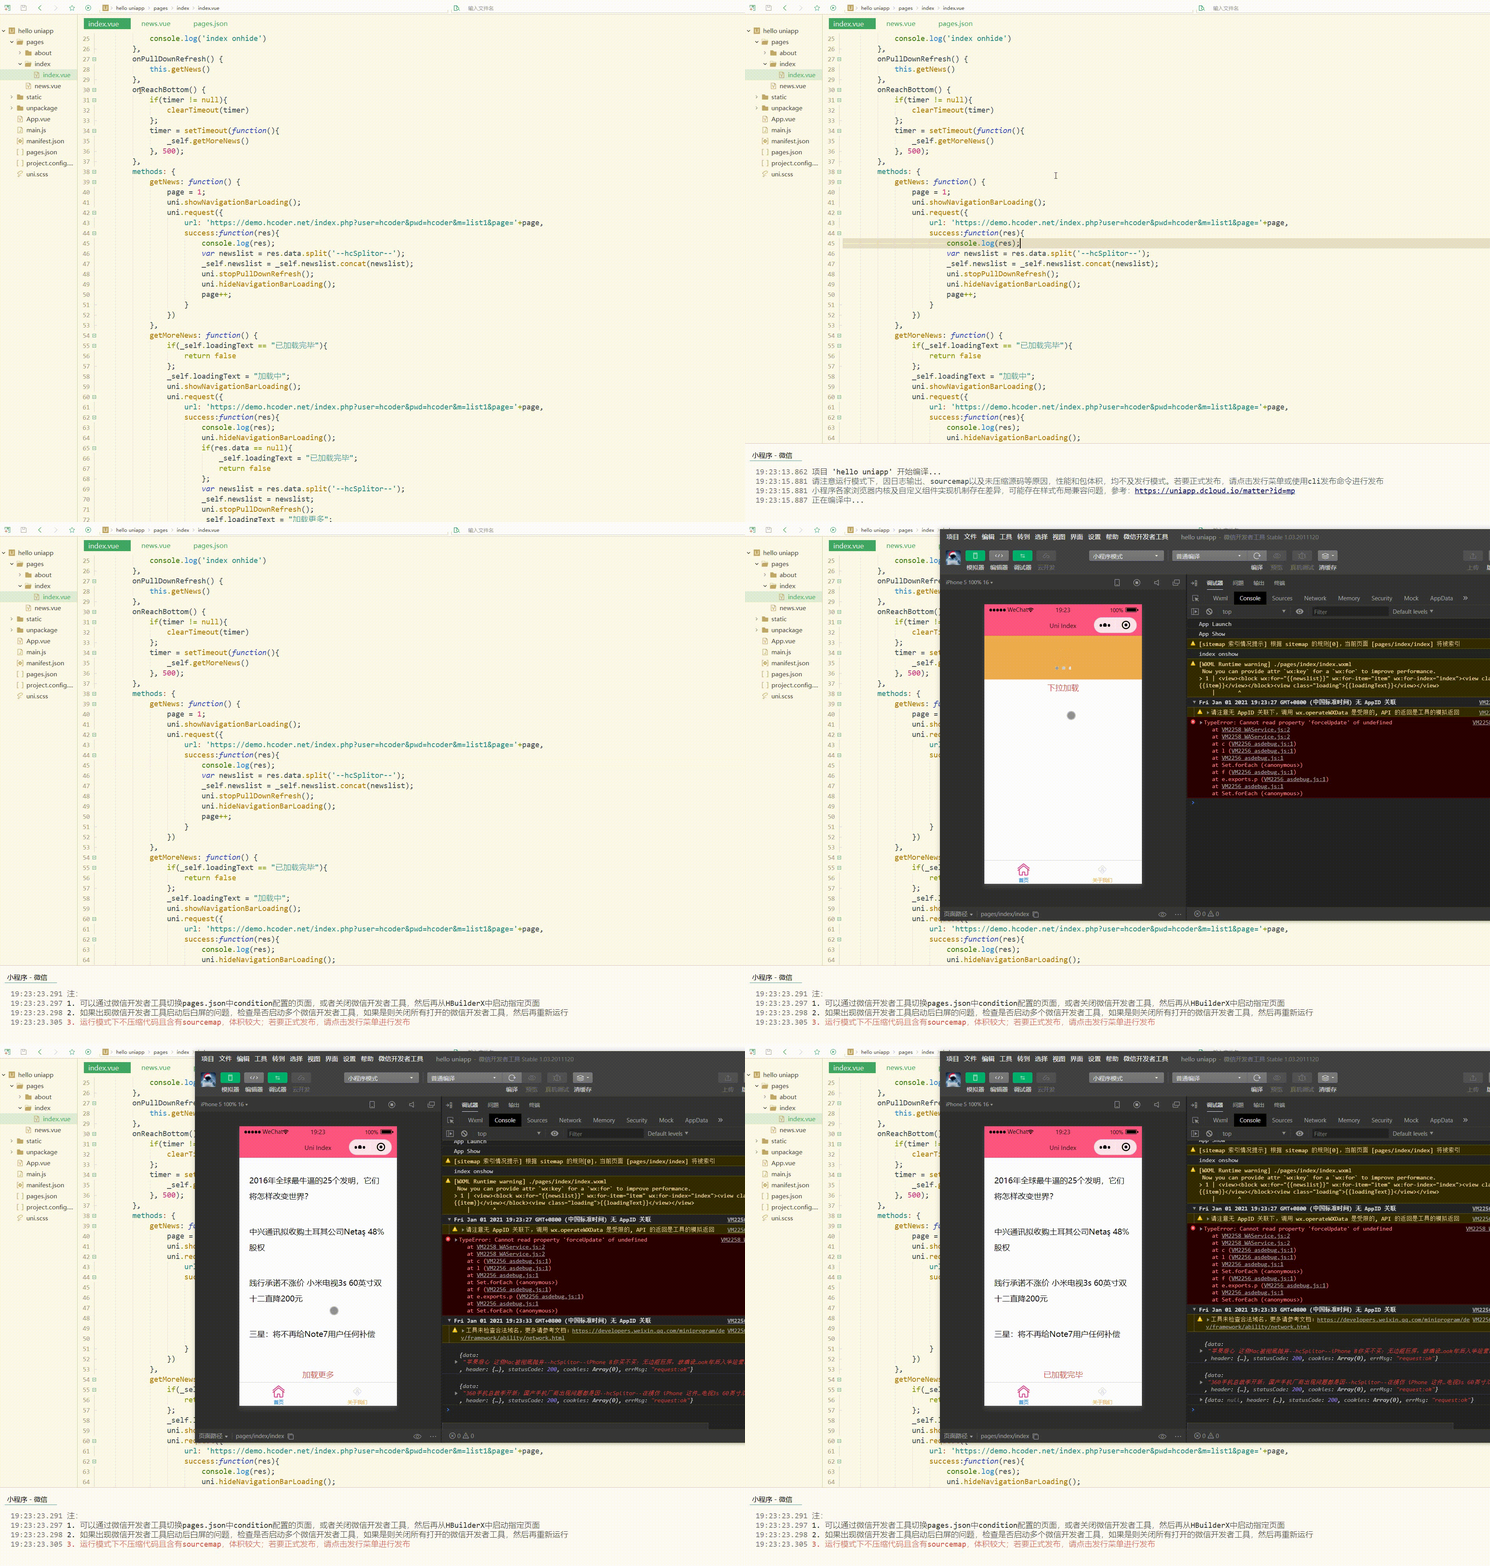
显然,此时表现更好。
四、跨端兼容
很多时候,每个平台有自己的一些特性,小程序和APP上实现是有一定区别的,可能不一定能兼容所有平台。
此时需要使用条件编译,即用特殊的注释作为标记,在编译时根据这些特殊的注释,将注释里面的代码编译到不同平台,即使用#ifdef、#ifndef和#endif来判断平台类型,其中:
| 符号 | 含义 |
|---|---|
| #ifdef | if defined 仅在某平台存在 |
| #ifndef | if not defined 除了某平台均存在 |
| %PLATFORM% | 平台名称 |
对于API、组件、样式等,有不同的注释方式,具体如下:
| 方式 | 适用平台 |
|---|---|
| API和pages.json |
// #ifdef PLATFORM和// #endif
|
| 组件 |
<!-- #ifdef PLATFORM -->和<!-- #endif -->
|
| 样式 |
/* #ifdef PLATFORM */和/* #endif */
|
测试如下:
<template>
	<view>
		<!-- #ifdef MP-WEIXIN -->
		<view class="wx">微信小程序</view>
		<!-- #endif -->
		<!-- #ifdef APP-PLUS -->
		<view class="h5">H5+APP</view>
		<!-- #endif -->
	</view></template><script>
	export default {
		data() {
			return {
			}
		},
		onLoad() {
			//#ifdef MP-WEIXIN
			console.log('wx...')
			//#endif
			//#ifdef APP-PLUS
			console.log('app...')
			//#endif
		},
		onShow() {
			console.log('index onshow')
		},
		onHide() {
			console.log('index onhide')
		},
		methods: {
		}
}</script><style></style>显示: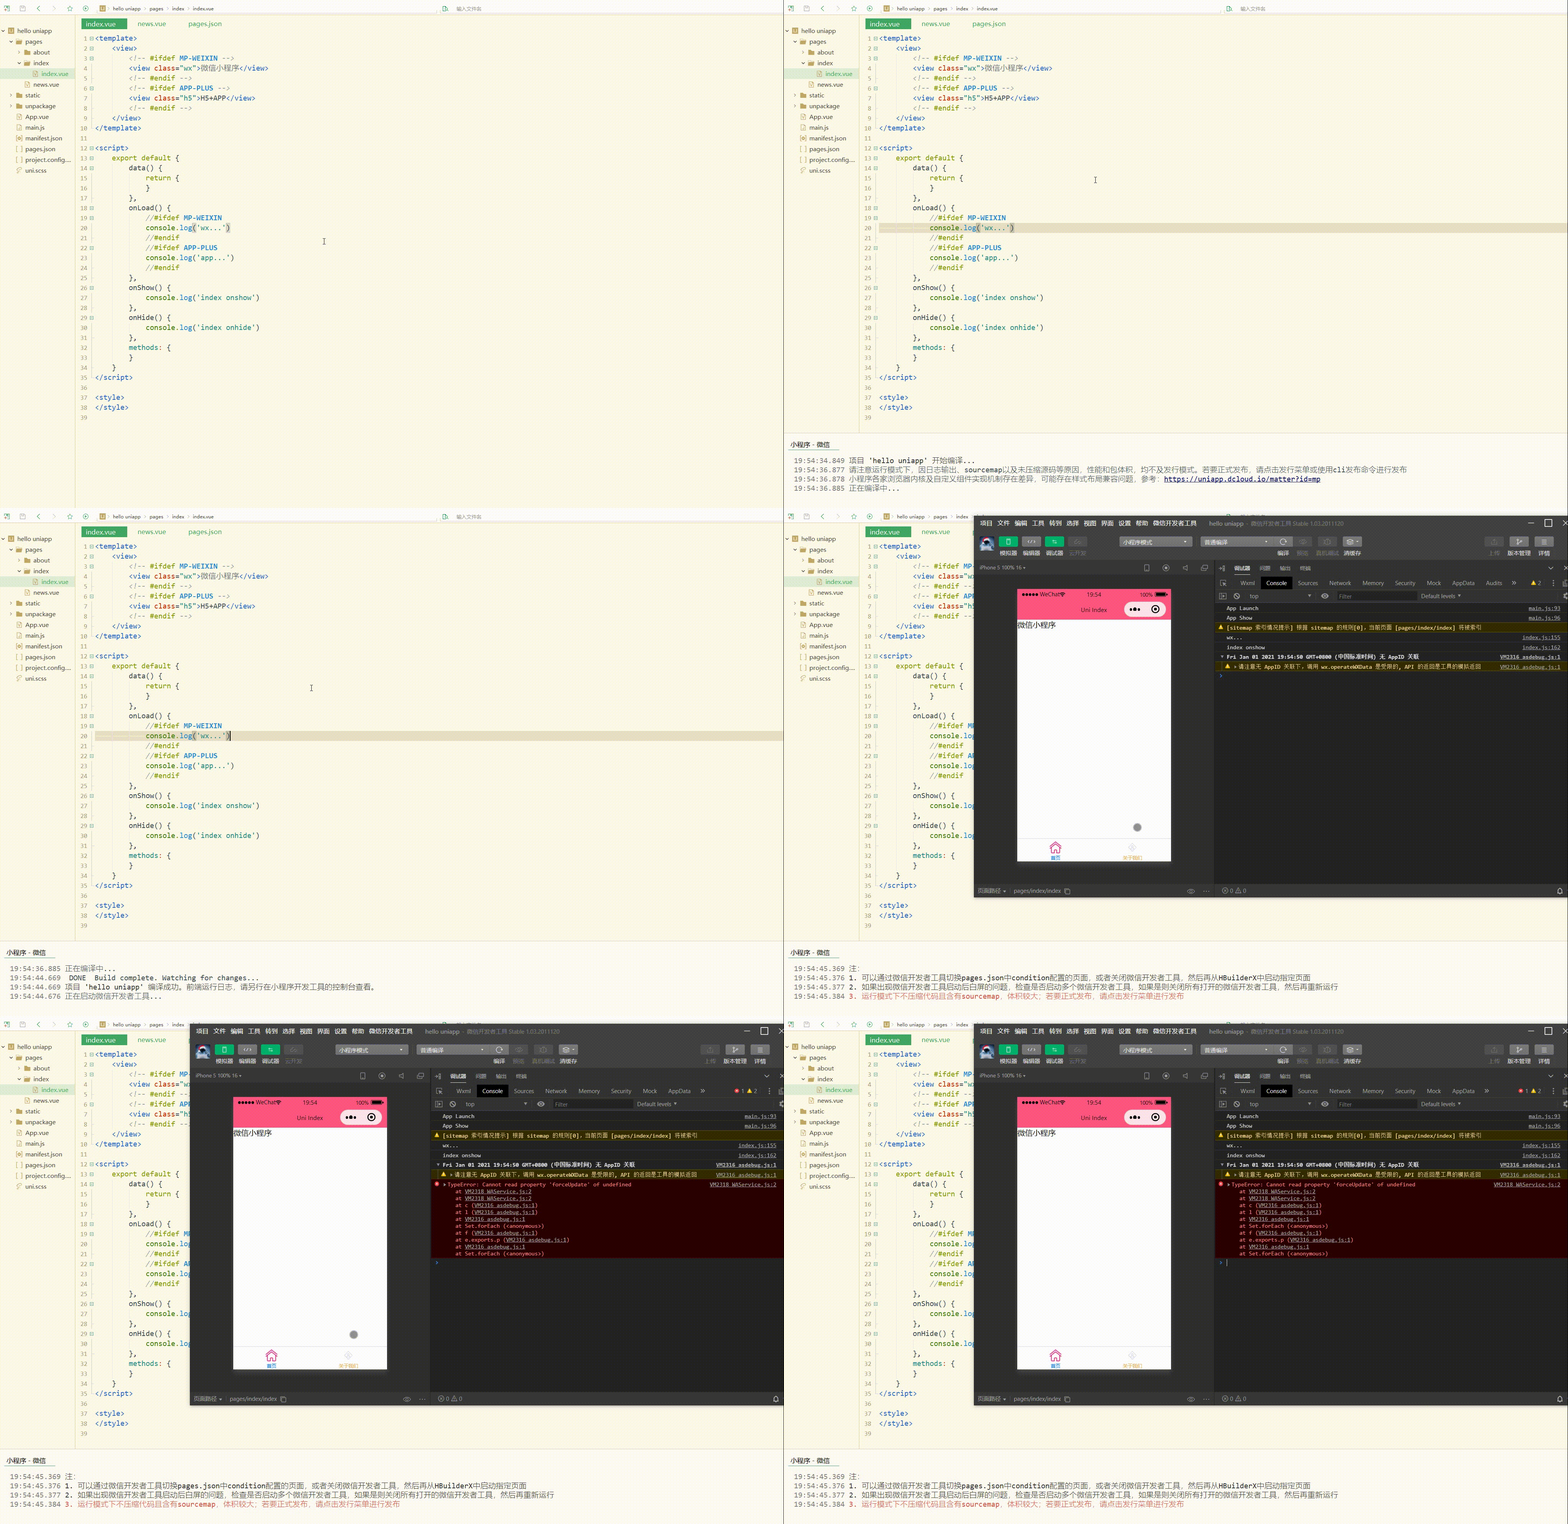
显然,判断出了当前为微信小程序平台。
五、交互反馈
交互反馈包括提示框、加载等的设置。
1.uni.showToast(OBJECT)和uni.hideToast()
分别用于显示和隐藏消息提示框。
OBJECT参数和含义如下:
| 参数名 | 类型 | 必填与否 | 说明 |
|---|---|---|---|
| title | String | 是 | 提示的内容,长度与 icon 取值有关 |
| icon | String | 否 | 图标,有效值详见下方说明。 |
| image | String | 否 | 自定义图标的本地路径 |
| mask | Boolean | 否 | 是否显示透明蒙层,防止触摸穿透,默认:false |
| duration | Number | 否 | 提示的延迟时间,单位毫秒,默认:1500 |
| position | String | 否 | 纯文本轻提示显示位置,填写有效值后只有 title 属性生效, 有效值详见下方说明。 |
| success | Function | 否 | 接口调用成功的回调函数 |
| fail | Function | 否 | 接口调用失败的回调函数 |
| complete | Function | 否 | 接口调用结束的回调函数(调用成功、失败都会执行) |
2.uni.showLoading(OBJECT)和uni.hideLoading()
前者用于显示 loading 提示框,需主动调用后者才能关闭提示框。
OBJECT参数和含义如下:
| 参数名 | 类型 | 必填与否 | 说明 |
|---|---|---|---|
| title | String | 是 | 提示的内容 |
| mask | Boolean | 否 | 是否显示透明蒙层,防止触摸穿透,默认:false |
| success | Function | 否 | 接口调用成功的回调函数 |
| fail | Function | 否 | 接口调用失败的回调函数 |
| complete | Function | 否 | 接口调用结束的回调函数(调用成功、失败都会执行) |
测试如下:
<template>
	<view>
		<button type="default" @click="showToast">显示提示框</button>
		<button type="default" @click="showLoading">显示并关闭Loading提示框</button>
	</view></template><script>
	export default {
		data() {
			return {
			}
		},
		onLoad() {
		},
		onShow() {
			console.log('index onshow')
		},
		onHide() {
			console.log('index onhide')
		},
		methods: {
			showToast: function(){
				uni.showToast({
					title: 'hello...',
					icon: 'success'
				})
			},
			showLoading: function(){
				uni.showLoading({
					title: 'loading...',
					mask: true,
					success:function(){
						setTimeout(function(){
							uni.hideLoading()
						}, 3000)
					}
				})
			}
		}
}</script><style></style>显示: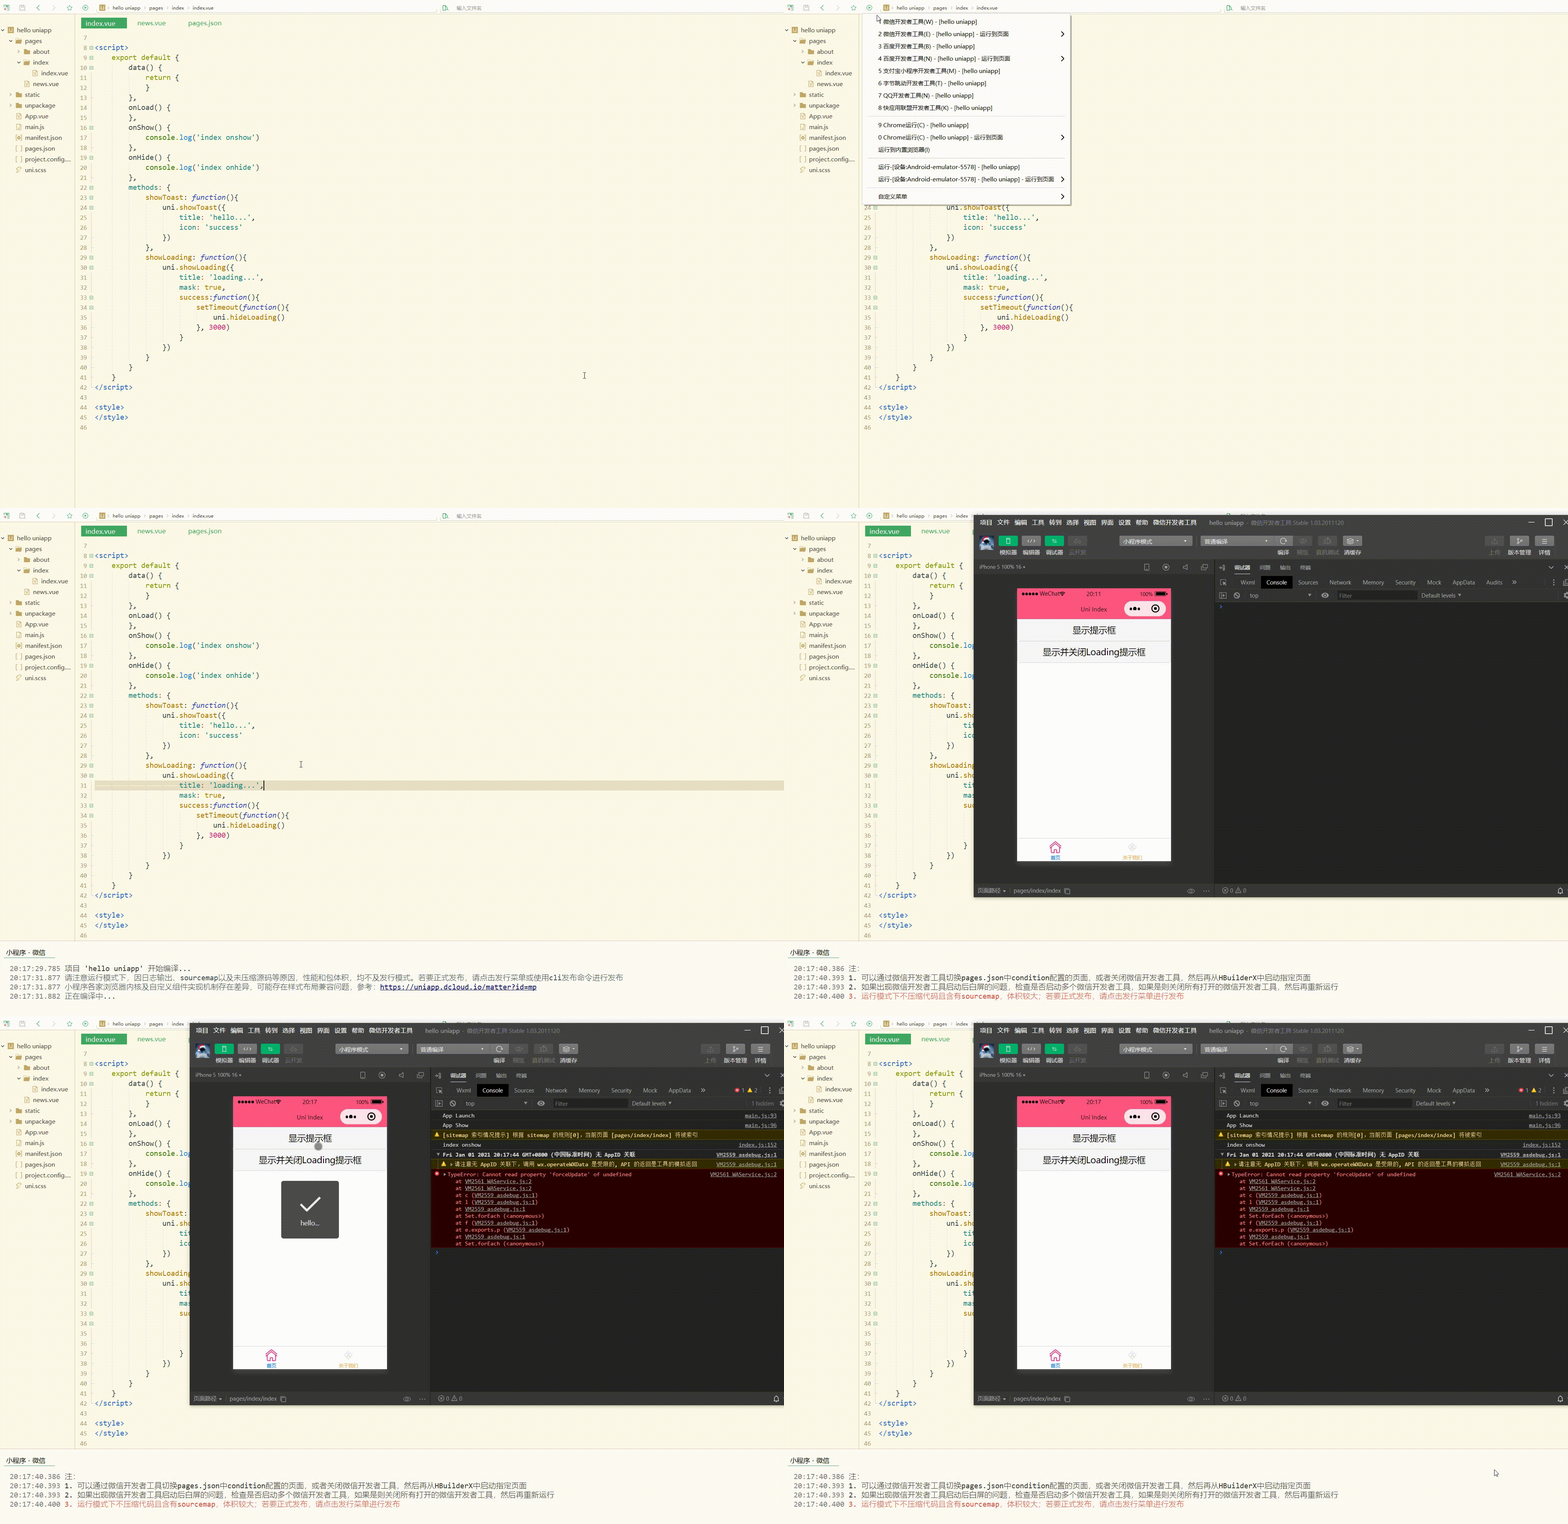
可以看到,可正常显示、关闭提示框和loading。
3.uni.showModal(OBJECT)
用于显示模态弹窗,类似于标准 html 的消息框alert、confirm。
OBJECT参数和含义如下:
| 参数名 | 类型 | 必填与否 | 说明 |
|---|---|---|---|
| title | String | 否 | 提示的标题 |
| content | String | 否 | 提示的内容 |
| showCancel | Boolean | 否 | 是否显示取消按钮,默认为 true |
| cancelText | String | 否 | 取消按钮的文字,默认为"取消",最多 4 个字符 |
| cancelColor | HexColor | 否 | 取消按钮的文字颜色,默认为"#000000" |
| confirmText | String | 否 | 确定按钮的文字,默认为"确定",最多 4 个字符 |
| confirmColor | HexColor | 否 | 确定按钮的文字颜色,H5平台默认为"#007aff",微信小程序平台默认为"#3CC51F",百度小程序平台默认为"#3c76ff" |
| fail | Function | 否 | 接口调用失败的回调函数 |
| complete | Function | 否 | 接口调用结束的回调函数(调用成功、失败都会执行) |
4.uni.showActionSheet(OBJECT)
用于显示操作菜单。
OBJECT参数和含义如下:
| 参数名 | 类型 | 必填与否 | 说明 |
|---|---|---|---|
| itemList | Array | 是 | 按钮的文字数组 |
| itemColor | HexColor | 否 | 按钮的文字颜色,字符串格式,默认为"#000000" |
| success | Function | 否 | 接口调用成功的回调函数,详见返回参数说明 |
| fail | Function | 否 | 接口调用失败的回调函数 |
| complete | Function | 否 | 接口调用结束的回调函数(调用成功、失败都会执行) |
测试如下:
<template>
	<view>
		<button type="default" @click="showModal">显示模态弹窗</button>
		<button type="default" @click="showActionSheet">显示操作菜单</button>
	</view></template><script>
	var actions = ['Music', 'Reading'];
	export default {
		data() {
			return {
			}
		},
		onLoad() {
		},
		onShow() {
			console.log('index onshow')
		},
		onHide() {
			console.log('index onhide')
		},
		methods: {
			showModal: function(){
				uni.showModal({
					title: 'hello...',
					content: 'Modal Window',
					success:function(res){
						if(res.confirm){
							console.log('Confirm')
						}else if(res.cancel){
							console.log('Cancel')
						}
					}
				})
			},
			showActionSheet: function(){
				uni.showActionSheet({
					itemList: actions,
					success:function(res){
						console.log(actions[res.tapIndex])
					},
					fail:function(res){
						console.log(res.errMsg)
					}
				})
			}
		}
}</script><style></style>显示: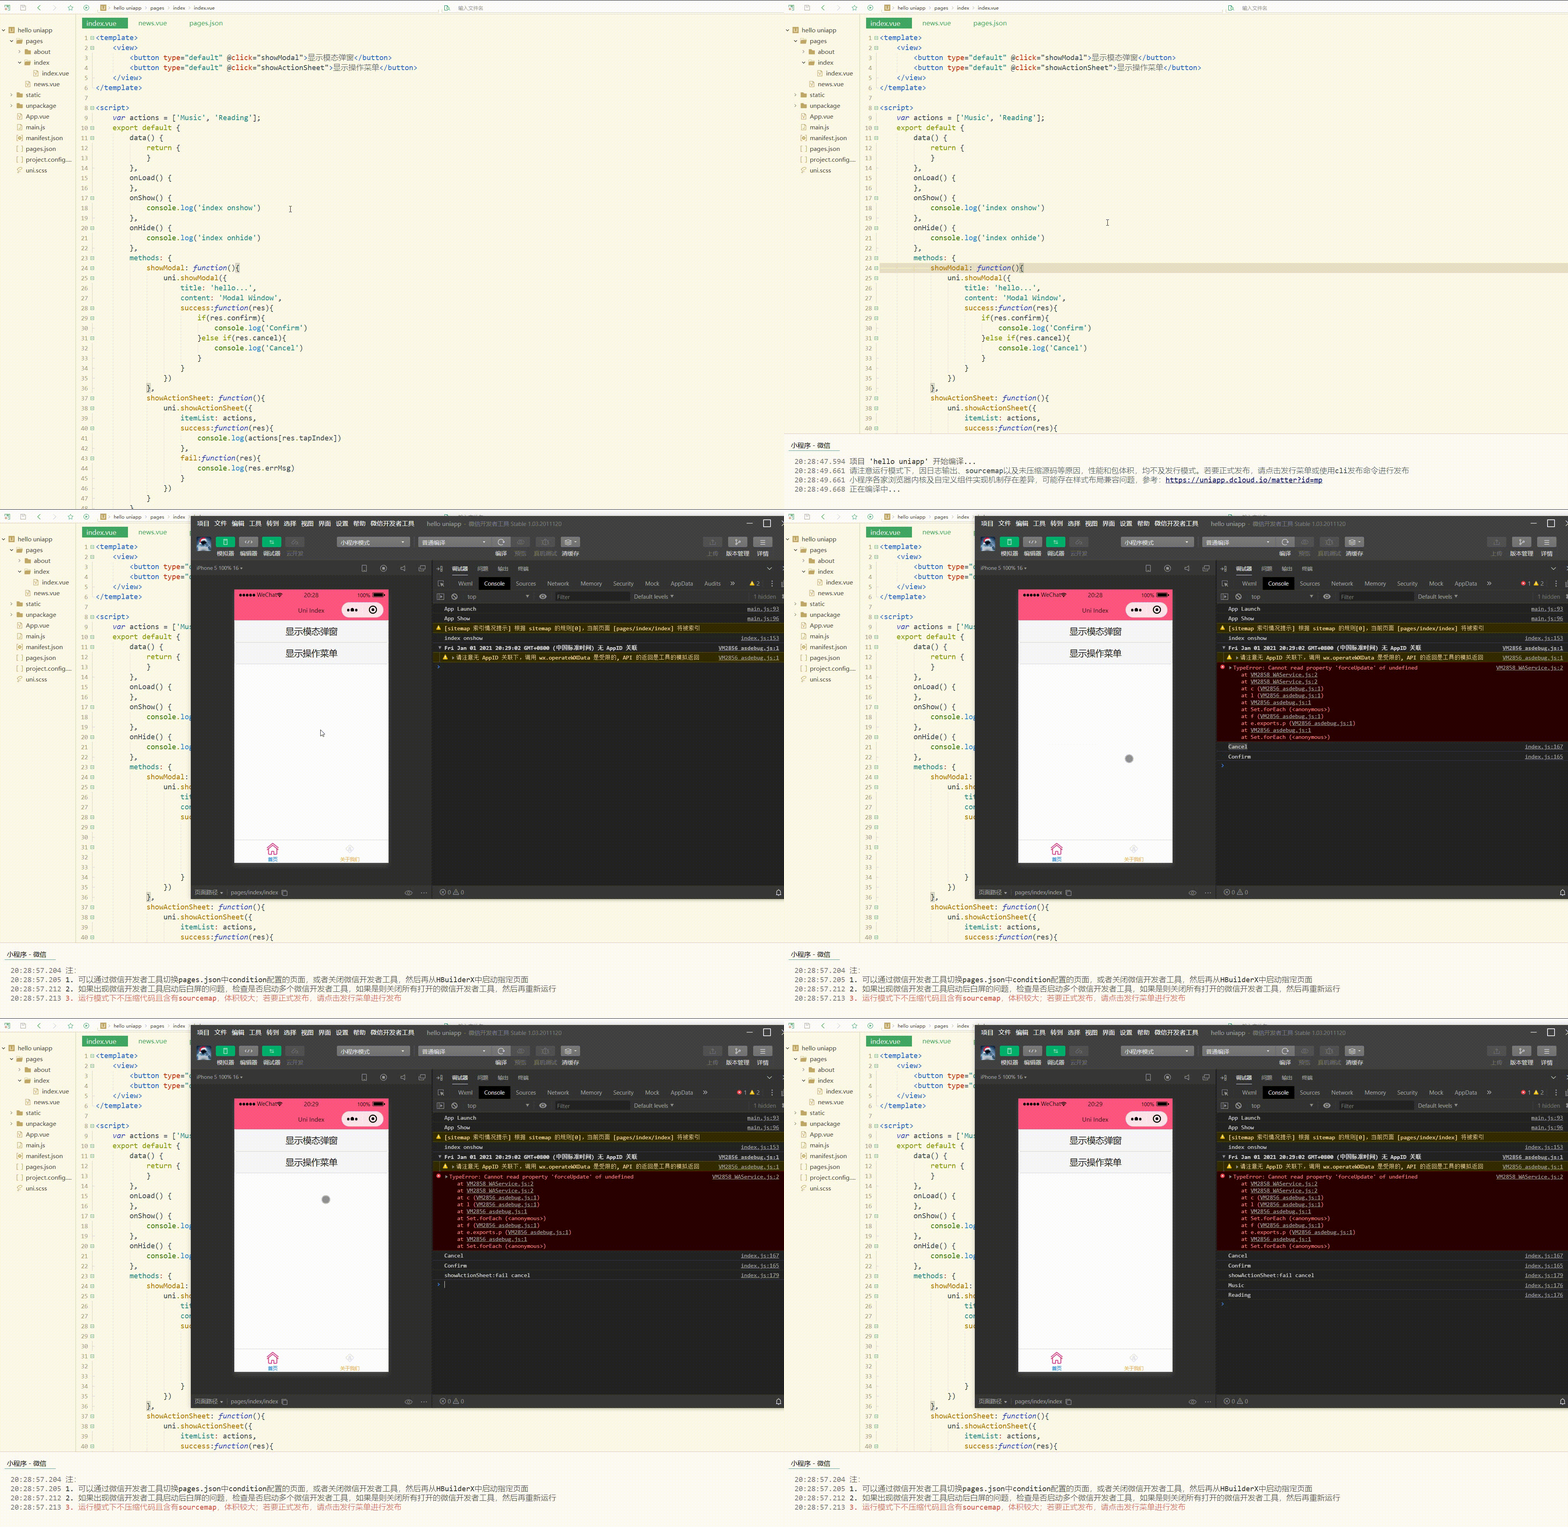
可以看到,可以对模态弹窗和操作菜单进行操作。
总结
uni-app的家口为开发者提供了丰富的功能,包括设备、界面等,我们只需要直接调用即可实现所需功能,减少了自己开发的麻烦,有利于快速开发。
更多精品文章敬请关注uni-app开发教程栏目!
Ce qui précède est le contenu détaillé de. pour plus d'informations, suivez d'autres articles connexes sur le site Web de PHP en chinois!
 La différence entre Fahrenheit et Celsius
 Le rôle de la fonction float() en python
 Configurer l'environnement d'exécution Java
 Que faire si le dossier des documents apparaît lorsque l'ordinateur est allumé
 Le rôle de l'enregistrement d'un serveur cloud
 Comment acheter du Ripple en Chine
 Utilisation des commandes NTSD
 La base de données phpstudy ne peut pas démarrer la solution
 Utilisation de l'image d'arrière-plan