
Retrofit est un outil client HTTP de type sécurisé adapté à Android et Java. Il compte déjà 39 000+étoiles sur Github. Sa plus grande fonctionnalité est qu'il prend en charge le lancement de requêtes HTTP via l'interface, de la même manière que nous utilisons Feign pour appeler l'interface du microservice. Android和Java且类型安全的HTTP客户端工具,在Github上已经有39k+Star。其最大的特性的是支持通过接口的方式发起HTTP请求,类似于我们用Feign调用微服务接口的那种方式。
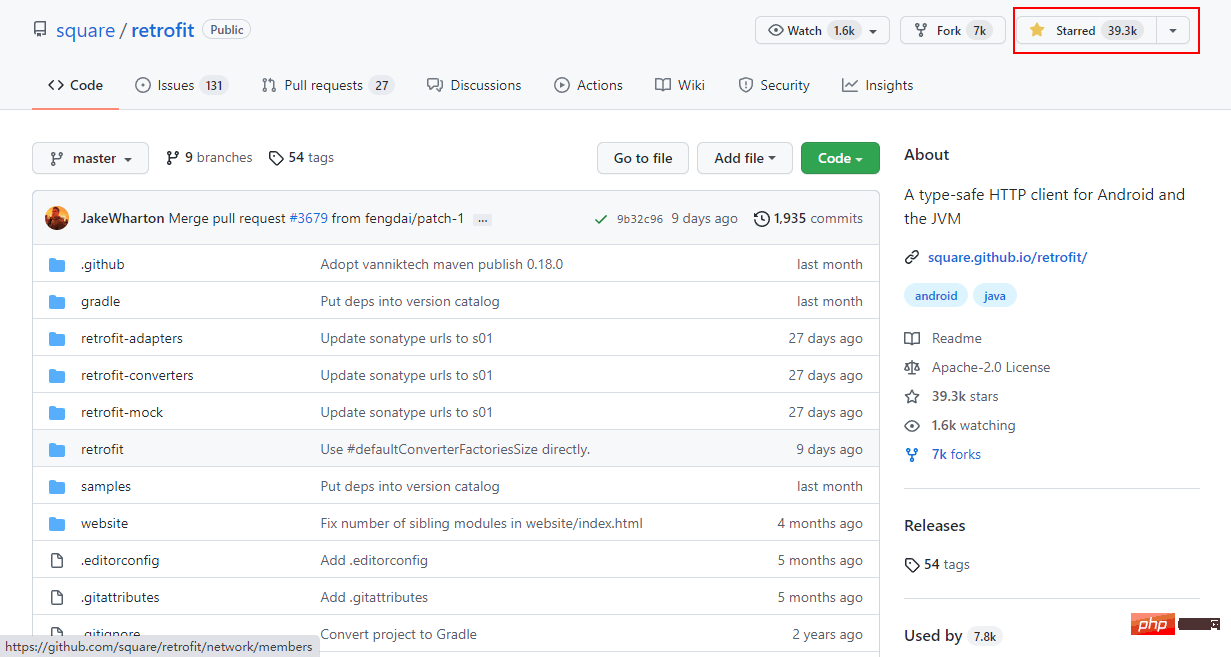
SpringBoot是使用最广泛的Java开发框架,但是Retrofit官方并没有提供专门的Starter。于是有位老哥就开发了retrofit-spring-boot-starter,它实现了Retrofit与SpringBoot框架的快速整合,并且支持了诸多功能增强,极大简化开发。今天我们将使用这个第三方Starter来操作Retrofit。
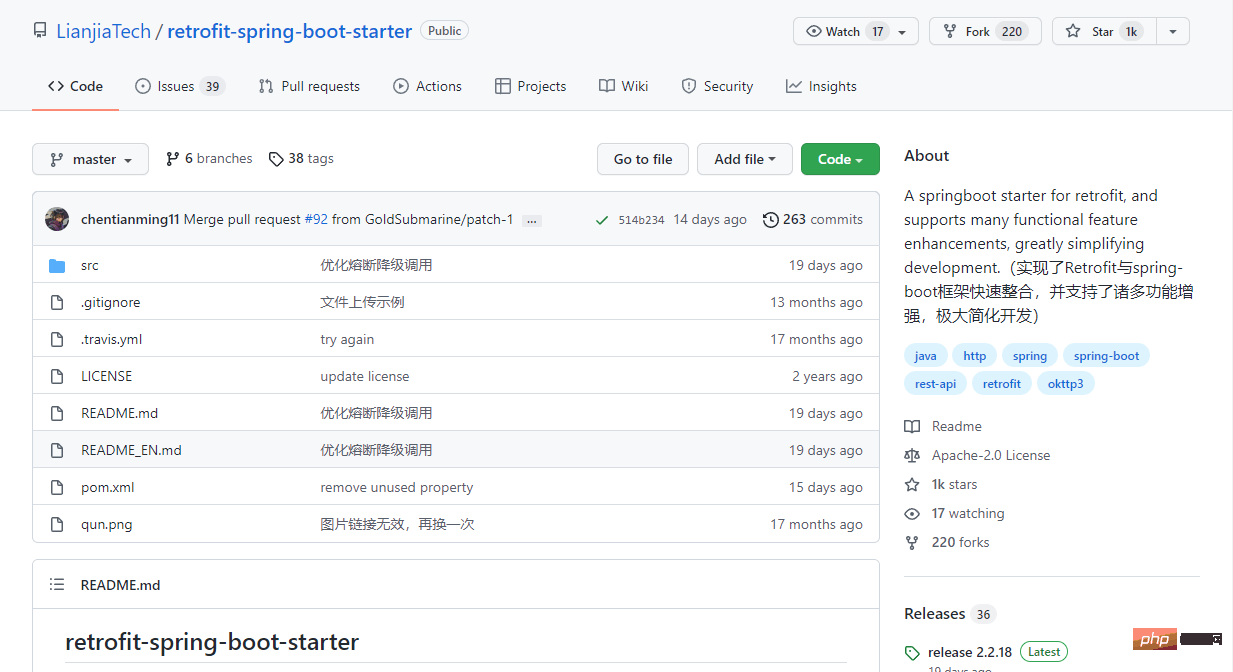
在SpringBoot中使用Retrofit是非常简单的,下面我们就来体验下。
依赖集成
有了第三方Starter的支持,集成Retrofit仅需一步,添加如下依赖即可。
<!--Retrofit依赖-->
<dependency>
    <groupId>com.github.lianjiatech</groupId>
    <artifactId>retrofit-spring-boot-starter</artifactId>
    <version>2.2.18</version>
</dependency>下面以调用mall-tiny-swagger中的接口为例,我们来体验下Retrofit的基本使用。
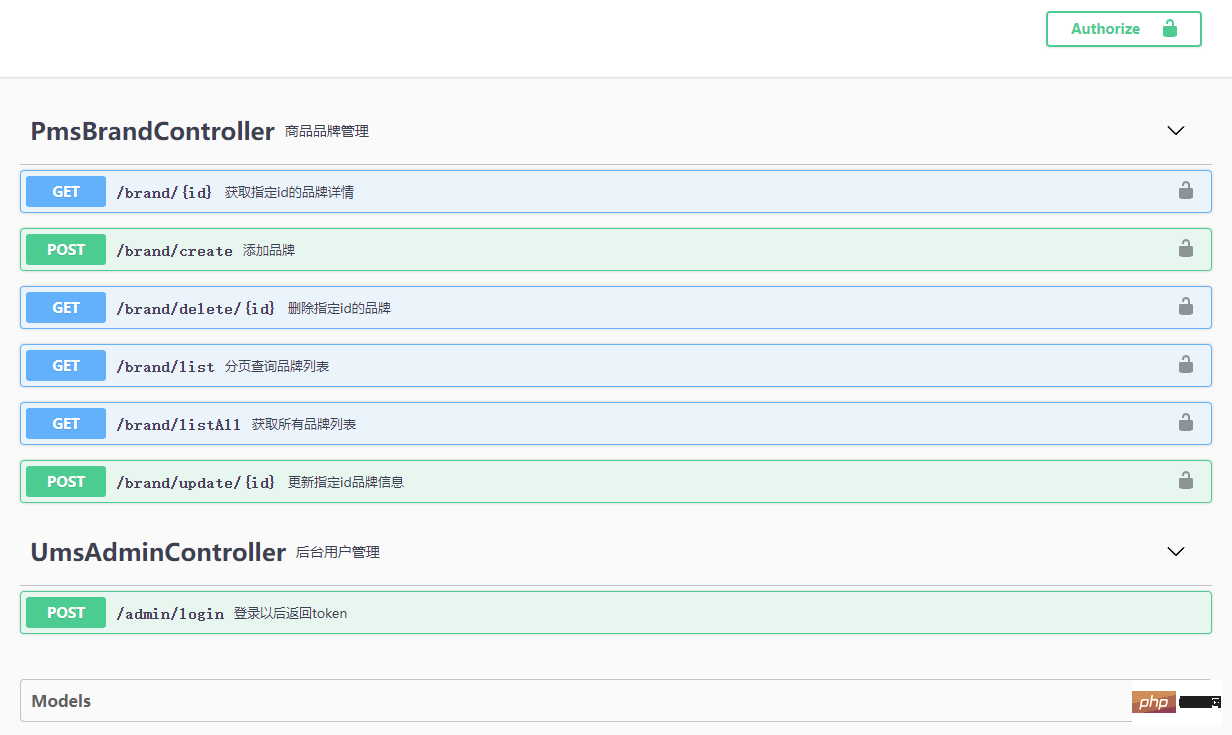
首先我们准备一个服务来方便远程调用,使用的是之前的mall-tiny-swagger这个Demo,打开Swagger看下,里面有一个登录接口和需要登录认证的商品品牌CRUD接口,
我们先来调用下登录接口试试,在application.yml中配置好mall-tiny-swagger的服务地址;
remote:
  baseUrl: http://localhost:8088/
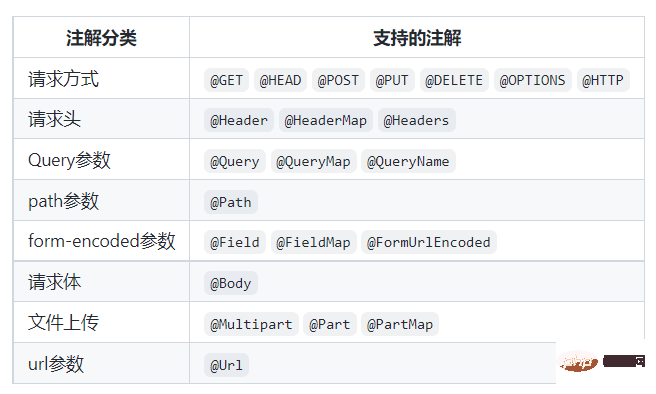
再通过@RetrofitClient声明一个Retrofit客户端,由于登录接口是通过POST表单形式调用的,这里使用到了@POST和@FormUrlEncoded注解;
/**
 * 定义Http接口,用于调用远程的UmsAdmin服务
 * Created by macro on 2022/1/19.
 */
@RetrofitClient(baseUrl = "${remote.baseUrl}")
public interface UmsAdminApi {
    @FormUrlEncoded
    @POST("admin/login")
    CommonResult<LoginInfo> login(@Field("username") String username, @Field("password") String password);
}如果你不太明白这些注解是干嘛的,看下下面的表基本就懂了,更具体的话可以参考Retrofit官方文档;
接下来在Controller中注入UmsAdminApi,然后进行调用即可;
/**
 * Retrofit测试接口
 * Created by macro on 2022/1/19.
 */
@Api(tags = "RetrofitController", description = "Retrofit测试接口")
@RestController
@RequestMapping("/retrofit")
public class RetrofitController {
    @Autowired
    private UmsAdminApi umsAdminApi;
    @Autowired
    private TokenHolder tokenHolder;
    @ApiOperation(value = "调用远程登录接口获取token")
    @PostMapping(value = "/admin/login")
    public CommonResult<LoginInfo> login(@RequestParam String username, @RequestParam String password) {
        CommonResult<LoginInfo> result = umsAdminApi.login(username, password);
        LoginInfo loginInfo = result.getData();
        if (result.getData() != null) {
            tokenHolder.putToken(loginInfo.getTokenHead() + " " + loginInfo.getToken());
        }
        return result;
    }
}为方便后续调用需要登录认证的接口,我创建了TokenHolder这个类,把token存储到了Session中;
/**
 * 登录token存储(在Session中)
 * Created by macro on 2022/1/19.
 */
@Component
public class TokenHolder {
    /**
     * 添加token
     */
    public void putToken(String token) {
        RequestAttributes ra = RequestContextHolder.getRequestAttributes();
        HttpServletRequest request = ((ServletRequestAttributes) ra).getRequest();
        request.getSession().setAttribute("token", token);
    }
    /**
     * 获取token
     */
    public String getToken() {
        RequestAttributes ra = RequestContextHolder.getRequestAttributes();
        HttpServletRequest request = ((ServletRequestAttributes) ra).getRequest();
        Object token = request.getSession().getAttribute("token");
        if(token!=null){
            return (String) token;
        }
        return null;
    }
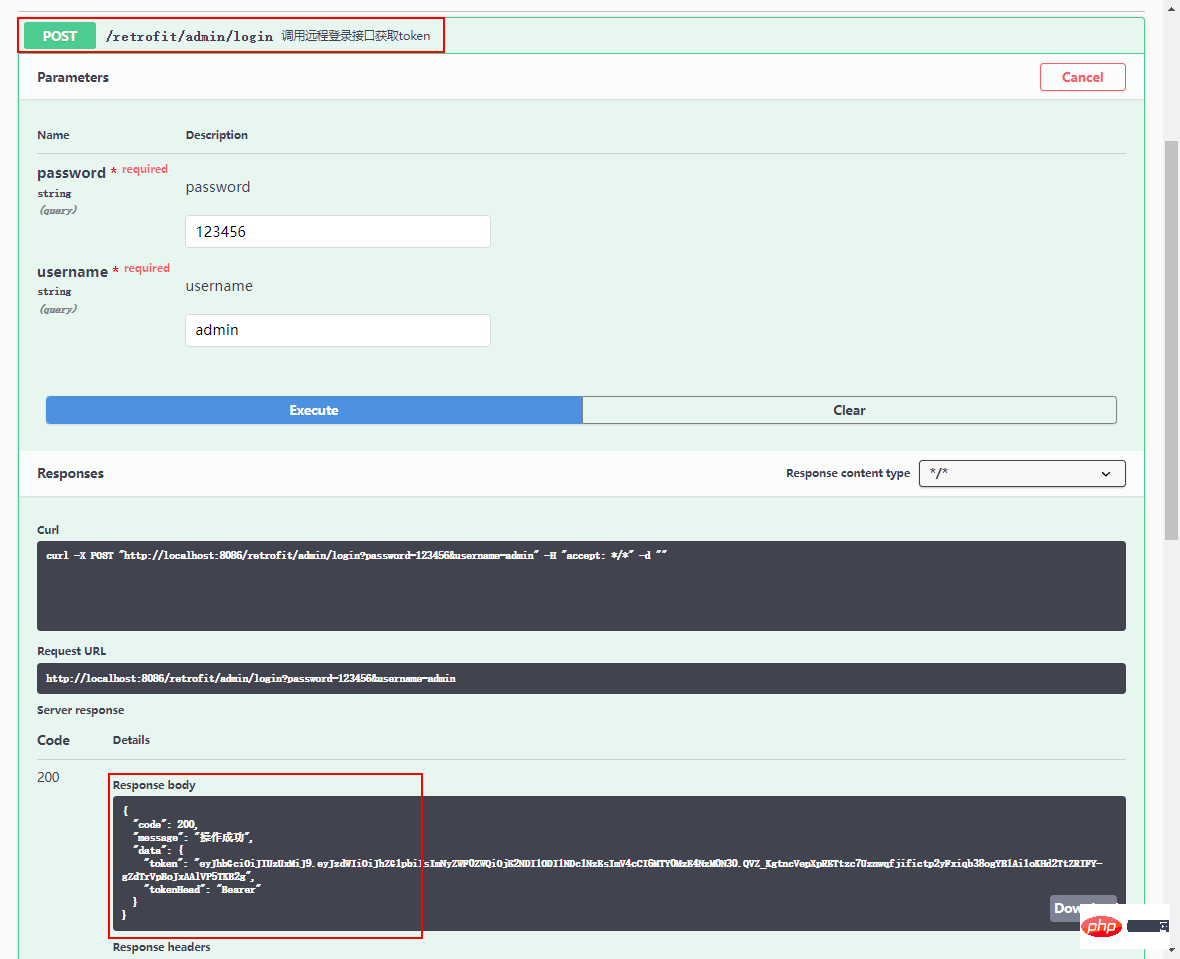
}接下来通过Swagger进行测试,调用接口就可以获取到远程服务返回的token了,访问地址:http://localhost:8086/swagger-ui/
商品品牌管理接口,需要添加登录认证头才可以正常访问,我们可以使用Retrofit中的注解式拦截器来实现。
首先创建一个注解式拦截器TokenInterceptor继承BasePathMatchInterceptor,然后在doIntercept方法中给请求添加Authorization头;
/**
 * 给请求添加登录Token头的拦截器
 * Created by macro on 2022/1/19.
 */
@Component
public class TokenInterceptor extends BasePathMatchInterceptor {
    @Autowired
    private TokenHolder tokenHolder;
    @Override
    protected Response doIntercept(Chain chain) throws IOException {
        Request request = chain.request();
        if (tokenHolder.getToken() != null) {
            request = request.newBuilder()
                    .header("Authorization", tokenHolder.getToken())
                    .build();
        }
        return chain.proceed(request);
    }
}创建调用品牌管理接口的客户端PmsBrandApi,使用@Intercept注解配置拦截器和拦截路径;
/**
 * 定义Http接口,用于调用远程的PmsBrand服务
 * Created by macro on 2022/1/19.
 */
@RetrofitClient(baseUrl = "${remote.baseUrl}")
@Intercept(handler = TokenInterceptor.class, include = "/brand/**")
public interface PmsBrandApi {
    @GET("brand/list")
    CommonResult<CommonPage<PmsBrand>> list(@Query("pageNum") Integer pageNum, @Query("pageSize") Integer pageSize);
    @GET("brand/{id}")
    CommonResult<PmsBrand> detail(@Path("id") Long id);
    @POST("brand/create")
    CommonResult create(@Body PmsBrand pmsBrand);
    @POST("brand/update/{id}")
    CommonResult update(@Path("id") Long id, @Body PmsBrand pmsBrand);
    @GET("brand/delete/{id}")
    CommonResult delete(@Path("id") Long id);
}再在Controller中注入PmsBrandApi实例,并添加方法调用远程服务即可;
/**
 * Retrofit测试接口
 * Created by macro on 2022/1/19.
 */
@Api(tags = "RetrofitController", description = "Retrofit测试接口")
@RestController
@RequestMapping("/retrofit")
public class RetrofitController {
    @Autowired
    private PmsBrandApi pmsBrandApi;
    @ApiOperation("调用远程接口分页查询品牌列表")
    @GetMapping(value = "/brand/list")
    public CommonResult<CommonPage<PmsBrand>> listBrand(@RequestParam(value = "pageNum", defaultValue = "1")
                                                        @ApiParam("页码") Integer pageNum,
                                                        @RequestParam(value = "pageSize", defaultValue = "3")
                                                        @ApiParam("每页数量") Integer pageSize) {
        return pmsBrandApi.list(pageNum, pageSize);
    }
    @ApiOperation("调用远程接口获取指定id的品牌详情")
    @GetMapping(value = "/brand/{id}")
    public CommonResult<PmsBrand> brand(@PathVariable("id") Long id) {
        return pmsBrandApi.detail(id);
    }
    @ApiOperation("调用远程接口添加品牌")
    @PostMapping(value = "/brand/create")
    public CommonResult createBrand(@RequestBody PmsBrand pmsBrand) {
        return pmsBrandApi.create(pmsBrand);
    }
    @ApiOperation("调用远程接口更新指定id品牌信息")
    @PostMapping(value = "/brand/update/{id}")
    public CommonResult updateBrand(@PathVariable("id") Long id, @RequestBody PmsBrand pmsBrand) {
        return pmsBrandApi.update(id,pmsBrand);
    }
    @ApiOperation("调用远程接口删除指定id的品牌")
    @GetMapping(value = "/delete/{id}")
    public CommonResult deleteBrand(@PathVariable("id") Long id) {
        return  pmsBrandApi.delete(id);
    }
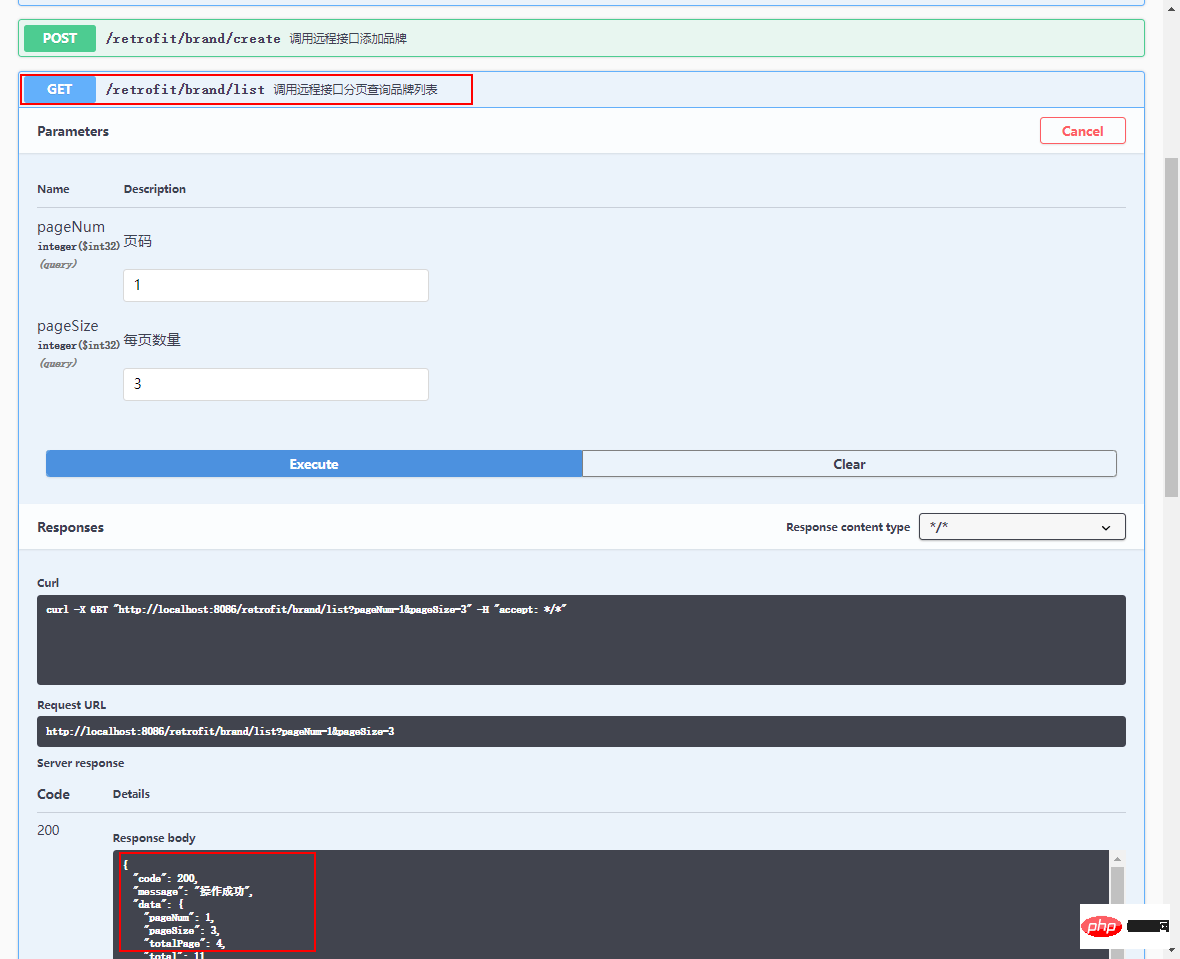
}在Swagger中调用接口进行测试,发现已经可以成功调用。
如果你想给所有请求都加个请求头的话,可以使用全局拦截器。
创建SourceInterceptor类继承BaseGlobalInterceptor接口,然后在Header中添加source请求头。
/**
 * 全局拦截器,给请求添加source头
 * Created by macro on 2022/1/19.
 */
@Component
public class SourceInterceptor extends BaseGlobalInterceptor {
    @Override
    protected Response doIntercept(Chain chain) throws IOException {
        Request request = chain.request();
        Request newReq = request.newBuilder()
                .addHeader("source", "retrofit")
                .build();
        return chain.proceed(newReq);
    }
}Retrofit的配置很多,下面我们讲讲日志打印、全局超时时间和全局请求重试这三种最常用的配置。
日志打印 默认配置下Retrofit使用basic日志策略,打印的日志非常简单;

我们可以将application.yml中的retrofit.global-log-strategy属性修改为body
 SpringBoot est le framework de développement Java le plus utilisé, mais Retrofit ne fournit pas officiellement de Starter dédié. Ainsi, un vieil homme a développé
 retrofit-spring-boot-starter, qui a réalisé l'intégration rapide du framework Retrofit et SpringBoot, et a pris en charge de nombreuses améliorations fonctionnelles, simplifiant considérablement le développement. Aujourd'hui, nous utiliserons ce Starter tiers pour exploiter le Retrofit. 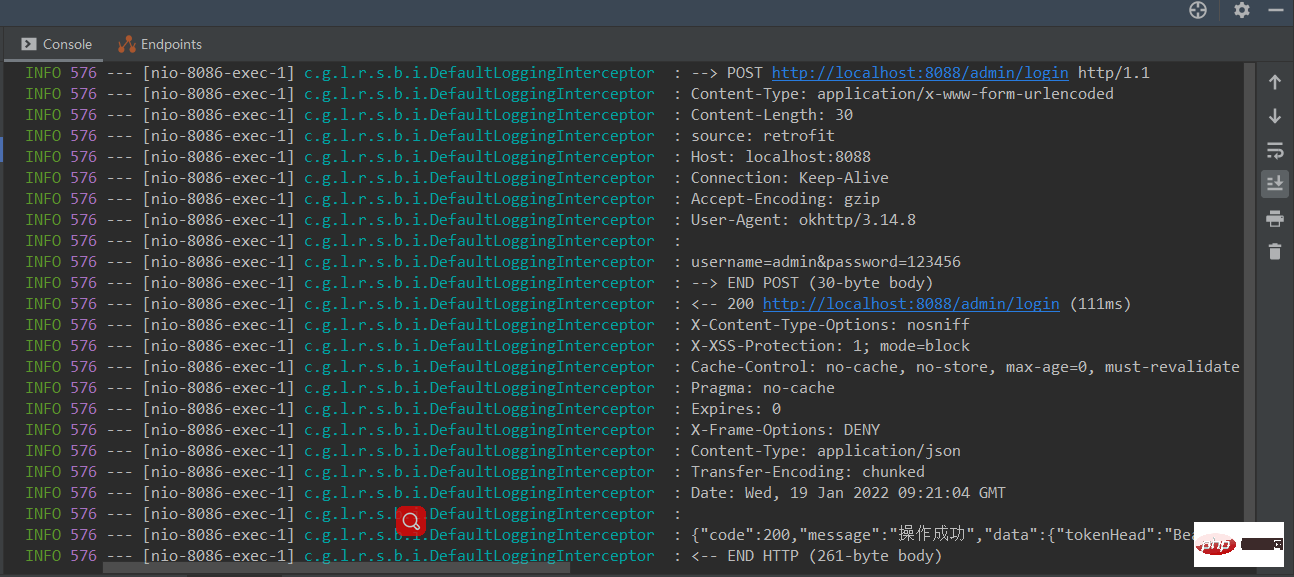

Utiliser
Intégration des dépendances
retrofit:
  # 日志打印配置
  log:
    # 启用日志打印
    enable: true
    # 日志打印拦截器
    logging-interceptor: com.github.lianjiatech.retrofit.spring.boot.interceptor.DefaultLoggingInterceptor
    # 全局日志打印级别
    global-log-level: info
    # 全局日志打印策略
global-log-strategy: bodyCe qui suit est un exemple d'appel de l'interface dans mall-tiny-swagger. Expérimentons l'utilisation de base de Retrofit.
mall-tiny-swagger Open Swagger et jetons un œil à l'interface de connexion et à la marque de produit CRUD qui nécessite une authentification de connexion. . Interface, 🎜🎜 🎜🎜 Essayons d'abord d'appeler l'interface de connexion et configurons l'adresse de service de
 mall-tiny-swagger dans application.yml 🎜retrofit: # 全局连接超时时间 global-connect-timeout-ms: 3000 # 全局读取超时时间 global-read-timeout-ms: 3000 # 全局写入超时时间 global-write-timeout-ms: 35000 # 全局完整调用超时时间 global-call-timeout-ms: 0
@RetrofitClient ; Déclarez un client Retrofit Puisque l'interface de connexion est appelée via le formulaire POST, les annotations @POST et @FormUrlEncoded sont utilisées ici 🎜retrofit:
# 重试配置
retry:
# 是否启用全局重试
enable-global-retry: true
# 全局重试间隔时间
global-interval-ms: 100
# 全局最大重试次数
global-max-retries: 2
# 全局重试规则
global-retry-rules:
- response_status_not_2xx
- occur_exception
# 重试拦截器
retry-interceptor: com.github.lianjiatech.retrofit.spring.boot.retry.DefaultRetryInterceptor 🎜🎜Ensuite, injectez
 UmsAdminApi dans le Contrôleur, puis appelez-le ;🎜rrreee 🎜Afin de faciliter les appels ultérieurs aux interfaces qui nécessitent une authentification de connexion, j'ai créé la classe TokenHolder et stocké le jeton dans la session 🎜rrreee🎜 Ensuite, testez via Swagger ; , et vous pouvez obtenir le service distant en appelant l'interface Le token est renvoyé, adresse d'accès : http://localhost:8086/swagger-ui/🎜🎜 🎜
🎜TokenInterceptor et héritez de BasePathMatchInterceptor, puis ajoutez Authorization à la requête dans la méthode doIntercept header; 🎜rrreee🎜 Créez un client PmsBrandApi qui appelle l'interface de gestion de marque, et utilisez l'annotation @Intercept pour configurer l'intercepteur et le chemin d'interception 🎜rrreee🎜 Puis injectez < ; codez dans l'instance Controller >PmsBrandApi et ajoutez une méthode pour appeler le service distant 🎜rrreee🎜Appelez l'interface dans Swagger pour tester et constater qu'elle peut être appelée avec succès. 🎜🎜 🎜
🎜SourceInterceptor pour hériter de l'interface BaseGlobalInterceptor, puis ajoutez l'en-tête de requête source dans l'en-tête. 🎜rrreee🎜Retrofit propose de nombreuses configurations. Parlons des trois configurations les plus couramment utilisées : l'impression du journal, le délai d'attente global et la nouvelle tentative globale de requête. 🎜🎜Dans la configuration par défaut de l'impression des journaux, Retrofit utilise la stratégie de journalisation
basic, et les journaux imprimés sont très simples 🎜🎜 🎜🎜Nous pouvons mettre
 retrofit.global- dans <code>application .yml L'attribut log-strategy est remplacé par body pour imprimer le journal le plus complet ; 🎜rrreee🎜Après avoir modifié la stratégie d'impression du journal, les informations du journal sont plus complètes ; 🎜🎜🎜🎜🎜Retrofit prend en charge quatre types de stratégie d'impression de journaux : 🎜🎜🎜🎜NONE : ne pas imprimer les journaux ; 🎜🎜🎜🎜BASIC : imprimer uniquement les enregistrements de demande de journal ;HEADERS:打印日志请求记录、请求和响应头信息;
BODY:打印日志请求记录、请求和响应头信息、请求和响应体信息。
有时候我们需要修改一下Retrofit的请求超时时间,可以通过如下配置实现。
retrofit:
  # 全局连接超时时间
  global-connect-timeout-ms: 3000
  # 全局读取超时时间
  global-read-timeout-ms: 3000
  # 全局写入超时时间
  global-write-timeout-ms: 35000
  # 全局完整调用超时时间
  global-call-timeout-ms: 0
retrofit-spring-boot-starter支持请求重试,可以通过如下配置实现。
retrofit:
  # 重试配置
  retry:
    # 是否启用全局重试
    enable-global-retry: true
    # 全局重试间隔时间
    global-interval-ms: 100
    # 全局最大重试次数
    global-max-retries: 2
    # 全局重试规则
    global-retry-rules:
      - response_status_not_2xx
      - occur_exception
    # 重试拦截器
retry-interceptor: com.github.lianjiatech.retrofit.spring.boot.retry.DefaultRetryInterceptor重试规则global-retry-rules支持如下三种配置。
RESPONSE_STATUS_NOT_2XX:响应状态码不是2xx时执行重试;
OCCUR_IO_EXCEPTION:发生IO异常时执行重试;
OCCUR_EXCEPTION:发生任意异常时执行重试。
Ce qui précède est le contenu détaillé de. pour plus d'informations, suivez d'autres articles connexes sur le site Web de PHP en chinois!
 Étapes de création du projet SpringBoot
 Solution http500
 Comment résoudre l'erreur de requête http 415
 Solution d'erreur HTTP 503
 Quelle est la différence entre j2ee et springboot
 Étapes pour supprimer l'un des systèmes doubles
 La différence entre Unix et Linux
 Quels sont les paramètres du chapiteau ?