Comment utiliser les threads utilisateur et les threads démon en Java
1. Thread utilisateur par défaut
Qu'il s'agisse d'un thread ou d'un pool de threads dans le langage Java , la valeur par défaut est le fil utilisateur , les fils utilisateur sont donc également appelés fils de discussion ordinaires.
En prenant le thread comme exemple, si vous souhaitez vérifier si un thread est un thread démon, il vous suffit d'interroger en appelant la méthode isDaemon() si la requête. la valeur est false signifie qu'il ne s'agit pas d'un thread démon et qu'il appartient naturellement au thread utilisateur <code>isDaemon() 方法查询即可,如果查询的值为 false 则表示不为守护线程,自然也就属于用户线程了,
如下代码所示:
public static void main(String[] args) throws InterruptedException {
    Thread thread = new Thread(new Runnable() {
        @Override
        public void run() {
            System.out.println("我是子线程");
        }
    });
    System.out.println("子线程==守护线程:" + thread.isDaemon());
    System.out.println("主线程==守护线程:" + Thread.currentThread().isDaemon());
}以上程序的执行结果为:

从上述结果可以看出,默认情况下主线程和创建的新线程都为用户线程。
PS:Thread.currentThread() 的意思是获取执行当前代码的线程实例。
2.主动修改为守护线程
守护线程(Daemon Thread)也被称之为后台线程或服务线程,守护线程是为用户线程服务的,当程序中的用户线程全部执行结束之后,守护线程也会跟随结束。
守护线程的角色就像“服务员”,而用户线程的角色就像“顾客”,当“顾客”全部走了之后(全部执行结束),那“服务员”(守护线程)也就没有了存在的意义,所以当一个程序中的全部用户线程都结束执行之后,那么无论守护线程是否还在工作都会随着用户线程一块结束,整个程序也会随之结束运行。
那如何将默认的用户线程修改为守护线程呢?
这个问题要分为两种情况来回答,首先如果是线程,则可以通过设置 setDaemon(true) 方法将用户线程直接修改为守护线程,而如果是线程池则需要通过 ThreadFactory 将线程池中的每个线程都为守护线程才行,接下来我们分别来实现一下。
2.1 设置线程为守护线程
如果使用的是线程,可以通过 setDaemon(true) 方法将线程类型更改为守护线程,如下代码所示:
 public static void main(String[] args) throws InterruptedException {
     Thread thread = new Thread(new Runnable() {
         @Override
         public void run() {
             System.out.println("我是子线程");
         }
     });
     // 设置子线程为守护线程
     thread.setDaemon(true);
     System.out.println("子线程==守护线程:" + thread.isDaemon());
     System.out.println("主线程==守护线程:" + Thread.currentThread().isDaemon());
}以上程序的执行结果为:
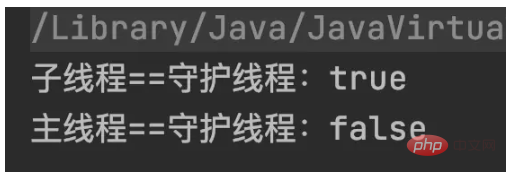
2.2 设置线程池为守护线程
要把线程池设置为守护线程相对来说麻烦一些,需要将线程池中的所有线程都设置成守护线程,这个时候就需要使用 ThreadFactory 来定义线程池中每个线程的线程类型了,具体实现代码如下:
// 创建固定个数的线程池
ExecutorService threadPool = Executors.newFixedThreadPool(10, new ThreadFactory() {
    @Override
    public Thread newThread(Runnable r) {
        Thread t = new Thread(r);
        // 设置线程为守护线程
        t.setDaemon(false);
        return t;
    }
});如下图所示:
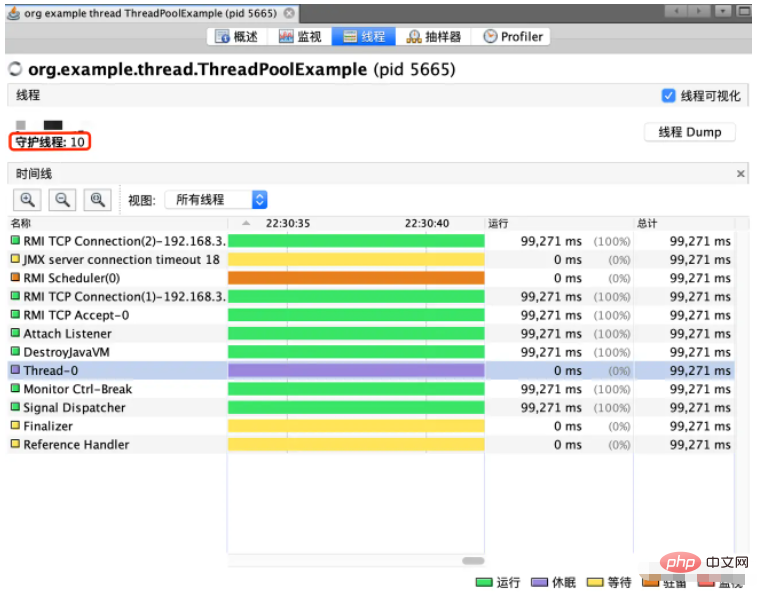
如上图所示,可以看出,整个程序中有 10 个守护线程都是我创建的。其他几种创建线程池的设置方式类似,都是通过 ThreadFactory 统一设置的,这里就不一一列举了。
3.守护线程 VS 用户线程
通过前面的学习我们可以创建两种不同的线程类型了,那二者有什么差异呢?接下来我们使用一个小示例来看一下。
下面我们创建一个线程,分别将这个线程设置为用户线程和守护线程,在每个线程中执行一个 for 循环,总共执行 10 次信息打印,每次打印之后休眠 100 毫秒,来观察程序的运行结果。
3.1 用户线程
新建的线程默认就是用户线程,因此我们无需对线程进行任何特殊的处理,执行 for 循环即可(总共执行 10 次信息打印,每次打印之后休眠 100 毫秒),实现代码如下:
/**
 * Author:Java中文社群
 */
public class DaemonExample {
    public static void main(String[] args) throws InterruptedException {
        Thread thread = new Thread(new Runnable() {
            @Override
            public void run() {
                for (int i = 1; i <= 10; i++) {
                    // 打印 i 信息
                    System.out.println("i:" + i);
                    try {
                        // 休眠 100 毫秒
                        Thread.sleep(100);
                    } catch (InterruptedException e) {
                        e.printStackTrace();
                    }
                }
            }
        });
        // 启动线程
        thread.start();
    }
}以上程序执行结果如下:
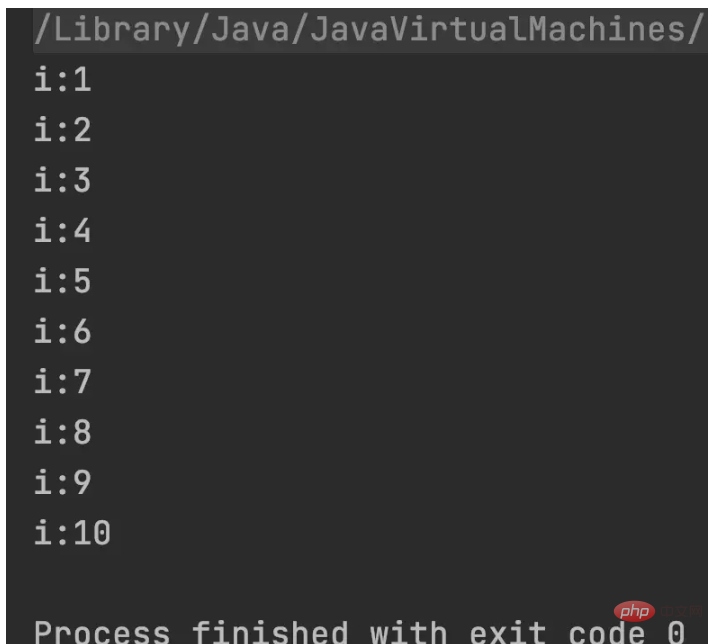
从上述结果可以看出,当程序执行完 10 次打印之后才会正常结束进程。
3.2 守护线程
/**
 * Author:Java中文社群
 */
public class DaemonExample {
    public static void main(String[] args) throws InterruptedException {
        Thread thread = new Thread(new Runnable() {
            @Override
            public void run() {
                for (int i = 1; i <= 10; i++) {
                    // 打印 i 信息
                    System.out.println("i:" + i);
                    try {
                        // 休眠 100 毫秒
                        Thread.sleep(100);
                    } catch (InterruptedException e) {
                        e.printStackTrace();
                    }
                }
            }
        });
        // 设置为守护线程
        thread.setDaemon(true);
        // 启动线程
        thread.start();
    }
}以上程序执行结果如下:

从上述结果可以看出,当线程设置为守护线程之后,整个程序不会等守护线程 for
public static void main(String[] args) throws InterruptedException {
    Thread thread = new Thread(new Runnable() {
        @Override
        public void run() {
            for (int i = 1; i <= 10; i++) {
                // 打印 i 信息
                System.out.println("i:" + i + ",isDaemon:" +
                            Thread.currentThread().isDaemon());
                try {
                    // 休眠 100 毫秒
                    Thread.sleep(100);
                } catch (InterruptedException e) {
                    e.printStackTrace();
                }
            }
        }
    });
    // 启动线程
    thread.start();
    // 设置为守护线程
    thread.setDaemon(true);
} #🎜🎜##🎜🎜# Comme le montrent les résultats ci-dessus, #🎜🎜#Par défaut, le fil de discussion principal et le nouveau fil de discussion créé sont tous deux des fils de discussion utilisateur#🎜 🎜#. #🎜🎜#
#🎜🎜#PS : Thread.currentThread() signifie obtenir l'instance de thread qui exécute le code actuel. #🎜🎜##🎜🎜#2. Changez-le activement en fil de démon #🎜🎜##🎜🎜#Daemon Thread (Daemon Thread) est également appelé fil d'arrière-plan ou fil de service, #🎜🎜#Daemon. thread Il sert les threads utilisateur Lorsque tous les threads utilisateur du programme sont exécutés, le thread démon se terminera également. #🎜🎜##🎜🎜#Le rôle du thread démon est comme un "serveur", et le rôle du thread utilisateur est comme un "client". Lorsque tous les "clients" partent (toute exécution se termine), le " waiter" (thread démon) ) n'a aucun sens d'existence, donc lorsque tous les threads utilisateur d'un programme terminent leur exécution, peu importe si le thread démon fonctionne toujours ou non, il se terminera avec les threads utilisateur, et le programme entier sera finissent également de courir. #🎜🎜##🎜🎜##🎜🎜#Alors comment changer le thread utilisateur par défaut en thread démon ? #🎜🎜##🎜🎜##🎜🎜#Cette question peut recevoir une réponse dans deux situations. Premièrement, s'il s'agit d'un fil de discussion, vous pouvez directement modifier le fil de l'utilisateur en définissant le
setDaemon(true). Méthode thread démon, et s'il s'agit d'un pool de threads, vous devez utiliser ThreadFactory pour faire de chaque thread du pool de threads un thread démon. Ensuite, nous l'implémenterons séparément. #🎜🎜#2.1 Définir le thread comme thread démon
#🎜🎜#Si vous utilisez un thread, vous pouvez changer le type de thread en thread démon via lesetDaemon(true)< /code> method,# 🎜🎜#Le code suivant est affiché : #🎜🎜##🎜🎜#<div class="code" style="position:relative; padding:0px; margin:0px;"><div class="code" style="position:relative; padding:0px; margin:0px;"><pre class='brush:php;toolbar:false;'>public static void main(String[] args) throws InterruptedException {
Thread thread = new Thread(new Runnable() {
@Override
public void run() {
Thread thread2 = new Thread(new Runnable() {
@Override
public void run() {
}
});
System.out.println("守护线程的子线程 thread2 isDaemon:" +
thread2.isDaemon());
}
});
// 设置为守护线程
thread.setDaemon(true);
// 启动线程
thread.start();
Thread.sleep(1000);
}</pre><div class="contentsignin">Copier après la connexion</div></div><div class="contentsignin">Copier après la connexion</div></div>#🎜🎜##🎜🎜#Le résultat de l'exécution du programme ci-dessus est : #🎜🎜##🎜🎜## 🎜🎜#<img src="/static/imghw/default1.png" data-src="https://img.php.cn/upload/article/000/887/227/168394848954238.png" class="lazy" alt="Comment utiliser les threads utilisateur et les threads démon en Java" />#🎜 🎜#<h4 id="Définir-le-pool-de-threads-sur-le-thread-démon">2.2 Définir le pool de threads sur le thread démon</h4>#🎜🎜#Il est relativement difficile de définir le pool de threads en tant que thread démon. Tous les threads du pool de threads doivent être définis comme des threads démon. dans ce cas, vous devez utiliser <code>ThreadFactory</code > Pour définir le type de thread de chaque thread dans le pool de threads, le code d'implémentation spécifique est le suivant : #🎜🎜#<div class="code" style="position:relative; padding:0px; margin:0px;"><div class="code" style="position:relative; padding:0px; margin:0px;"><pre class='brush:php;toolbar:false;'>public static void main(String[] args) throws InterruptedException {
Thread thread = new Thread(new Runnable() {
@Override
public void run() {
for (int i = 1; i <= 10; i++) {
// 打印 i 信息
System.out.println("i:" + i);
try {
// 休眠 100 毫秒
Thread.sleep(100);
} catch (InterruptedException e) {
e.printStackTrace();
}
}
}
});
// 设置为守护线程
thread.setDaemon(true);
// 启动线程
thread.start();
// 等待线程执行完
thread.join();
System.out.println("子线程==守护线程:" + thread.isDaemon());
System.out.println("主线程==守护线程:" + Thread.currentThread().isDaemon());
}</pre><div class="contentsignin">Copier après la connexion</div></div><div class="contentsignin">Copier après la connexion</div></div>#🎜🎜##🎜🎜# as ci-dessous : #🎜🎜##🎜🎜##🎜🎜#< img alt="Comment utiliser threads utilisateur et threads démons en Java" />#🎜🎜##🎜🎜 #Comme le montre l'image ci-dessus, on peut voir qu'il y a 10 threads démons dans l'ensemble du programme créé par moi. Plusieurs autres paramètres de création de pools de threads sont similaires et ils sont tous définis uniformément via <code>ThreadFactory, je ne les listerai donc pas un par un ici. #🎜🎜##🎜🎜#3. Thread démon VS thread utilisateur #🎜🎜##🎜🎜#Grâce à l'apprentissage précédent, nous pouvons créer deux types de threads différents. Jetons ensuite un coup d'œil à l'aide d'un petit exemple. #🎜🎜##🎜🎜# Ensuite, nous créons un thread, définissons ce thread comme thread utilisateur et thread démon respectivement, exécutons une boucle for dans chaque thread et exécutons l'impression des informations 10 fois au total. pendant 100 millisecondes après chaque impression pour observer les résultats d'exécution du programme. #🎜🎜#3.1 Thread utilisateur
#🎜🎜#Le thread nouvellement créé est le thread utilisateur par défaut, nous n'avons donc pas besoin d'effectuer de traitement spécial sur le thread, exécutez simplement lepour boucle (Un total de 10 impressions d'informations sont effectuées, en veille pendant 100 millisecondes après chaque impression), #🎜🎜#Le code d'implémentation est le suivant : #🎜🎜##🎜🎜#public class DaemonExample {
private static final int count = 100000;
public static void main(String[] args) throws InterruptedException {
// 定义任务
Runnable runnable = new Runnable() {
@Override
public void run() {
for (int i = 0; i < count; i++) {
System.out.println("执行线程:" + Thread.currentThread().getName());
}
}
};
// 创建守护线程 t1
Thread t1 = new Thread(runnable, "t1");
// 设置为守护线程
t1.setDaemon(true);
// 启动线程
t1.start();
// 创建用户线程 t2
Thread t2 = new Thread(runnable, "t2");
// 启动线程
t2.start();
}
} #🎜🎜##🎜🎜# Il ressort des résultats ci-dessus que le processus ne se terminera normalement que lorsque le programme aura exécuté 10 impressions. . #🎜🎜#
Thread démon 3.2
public class DaemonExample {
private static final int count = 100000;
public static void main(String[] args) throws InterruptedException {
// 定义任务
Runnable runnable = new Runnable() {
@Override
public void run() {
for (int i = 0; i < count; i++) {
System.out.println("执行线程:" + Thread.currentThread().getName());
}
}
};
// 创建守护线程 t1
Thread t1 = new Thread(runnable, "t1");
// 设置为守护线程
t1.setDaemon(true);
// 启动线程
t1.start();
// 创建用户线程 t2
Thread t2 = new Thread(runnable, "t2");
// 设置 t2 的优先级为最高
t2.setPriority(Thread.MAX_PRIORITY);
// 启动线程
t2.start();
}
} #🎜🎜##🎜🎜# As Comme le montrent les résultats ci-dessus, lorsque le thread est défini comme thread démon, l'ensemble du programme n'attendra pas que le thread démon
 for boucle 10 fois avant de se fermer. Au lieu de cela, lorsque le thread principal se termine. , le thread démon n'exécute la boucle qu'une seule fois, puis se termine. À partir de là, nous pouvons voir la différence entre les threads démon et les threads utilisateur. #🎜🎜#3.3 小结
守护线程是为用户线程服务的,当一个程序中的所有用户线程都执行完成之后程序就会结束运行,程序结束运行时不会管守护线程是否正在运行,由此我们可以看出守护线程在 Java 体系中权重是比较低的。
4.守护线程注意事项
守护线程的使用需要注意以下三个问题:
守护线程的设置
setDaemon(true)必须要放在线程的start()之前,否则程序会报错。在守护线程中创建的所有子线程都是守护线程。
使用
jojn()方法会等待一个线程执行完,无论此线程是用户线程还是守护线程。
接下来我们分别演示一下,以上的注意事项。
4.1 setDaemon 执行顺序
当我们将 setDaemon(true) 设置在 start() 之后,如下代码所示:
public static void main(String[] args) throws InterruptedException {
Thread thread = new Thread(new Runnable() {
@Override
public void run() {
for (int i = 1; i <= 10; i++) {
// 打印 i 信息
System.out.println("i:" + i + ",isDaemon:" +
Thread.currentThread().isDaemon());
try {
// 休眠 100 毫秒
Thread.sleep(100);
} catch (InterruptedException e) {
e.printStackTrace();
}
}
}
});
// 启动线程
thread.start();
// 设置为守护线程
thread.setDaemon(true);
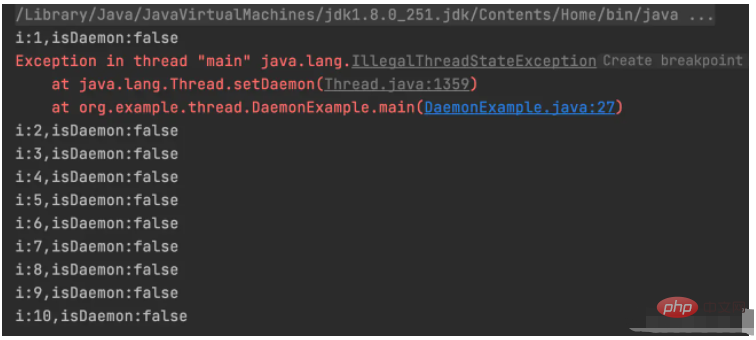
}以上程序执行结果如下:

从上述结果可以看出,当我们将 setDaemon(true) 设置在 start() 之后,不但程序的执行会报错,而且设置的守护线程也不会生效。
4.2 守护线程的子线程
public static void main(String[] args) throws InterruptedException {
Thread thread = new Thread(new Runnable() {
@Override
public void run() {
Thread thread2 = new Thread(new Runnable() {
@Override
public void run() {
}
});
System.out.println("守护线程的子线程 thread2 isDaemon:" +
thread2.isDaemon());
}
});
// 设置为守护线程
thread.setDaemon(true);
// 启动线程
thread.start();
Thread.sleep(1000);
}以上程序执行结果如下:

从上述结果可以看出,守护线程中创建的子线程,默认情况下也属于守护线程。
4.3 join 与守护线程
通过 3.2 部分的内容我们可以看出,默认情况下程序结束并不会等待守护线程执行完,而当我们调用线程的等待方法 join() 时,执行的结果就会和 3.2 的结果有所不同,下面我们一起来看吧,
示例代码如下:
public static void main(String[] args) throws InterruptedException {
Thread thread = new Thread(new Runnable() {
@Override
public void run() {
for (int i = 1; i <= 10; i++) {
// 打印 i 信息
System.out.println("i:" + i);
try {
// 休眠 100 毫秒
Thread.sleep(100);
} catch (InterruptedException e) {
e.printStackTrace();
}
}
}
});
// 设置为守护线程
thread.setDaemon(true);
// 启动线程
thread.start();
// 等待线程执行完
thread.join();
System.out.println("子线程==守护线程:" + thread.isDaemon());
System.out.println("主线程==守护线程:" + Thread.currentThread().isDaemon());
}以上程序执行结果如下:
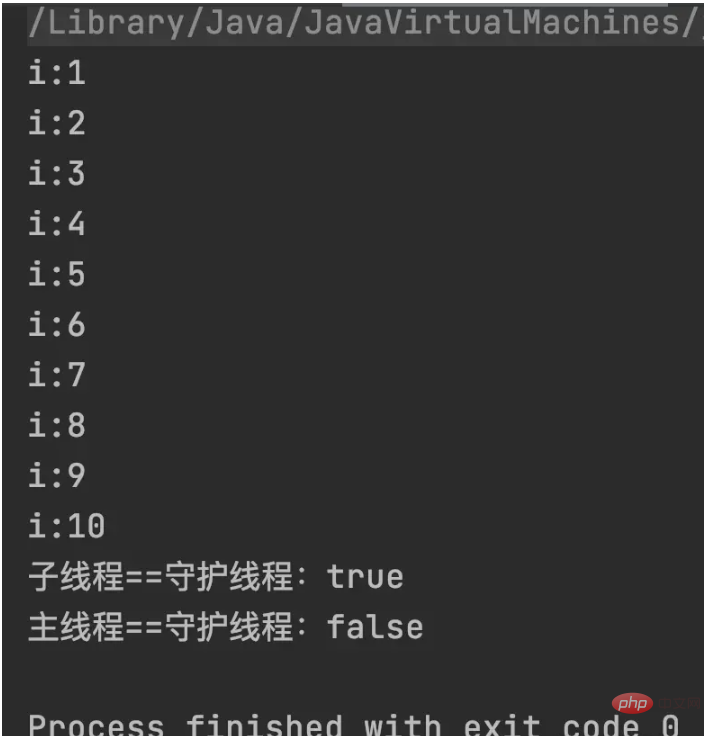
通过上述结果我们可以看出,即使是守护线程,当程序中调用 join() 方法时,程序依然会等待守护线程执行完成之后再结束进程。
5.守护线程应用场景
守护线程的典型应用场景就是垃圾回收线程,当然还有一些场景也非常适合使用守护线程,比如服务器端的健康检测功能,对于一个服务器来说健康检测功能属于非核心非主流的服务业务,像这种为了主要业务服务的业务功能就非常合适使用守护线程,当程序中的主要业务都执行完成之后,服务业务也会跟随者一起销毁。
6.守护线程的执行优先级
首先来说,线程的类型(用户线程或守护线程)并不影响线程执行的优先级,如下代码所示,定义一个用户线程和守护线程,分别执行 10 万次循环,通过观察最后的打印结果来确认线程类型对程序执行优先级的影响。
public class DaemonExample {
    private static final int count = 100000;
    public static void main(String[] args) throws InterruptedException {
        // 定义任务
        Runnable runnable = new Runnable() {
            @Override
            public void run() {
                for (int i = 0; i < count; i++) {
                    System.out.println("执行线程:" + Thread.currentThread().getName());
                }
            }
        };
        // 创建守护线程 t1
        Thread t1 = new Thread(runnable, "t1");
        // 设置为守护线程
        t1.setDaemon(true);
        // 启动线程
        t1.start();
        // 创建用户线程 t2
        Thread t2 = new Thread(runnable, "t2");
        // 启动线程
        t2.start();
    }
}以上程序执行结果如下:
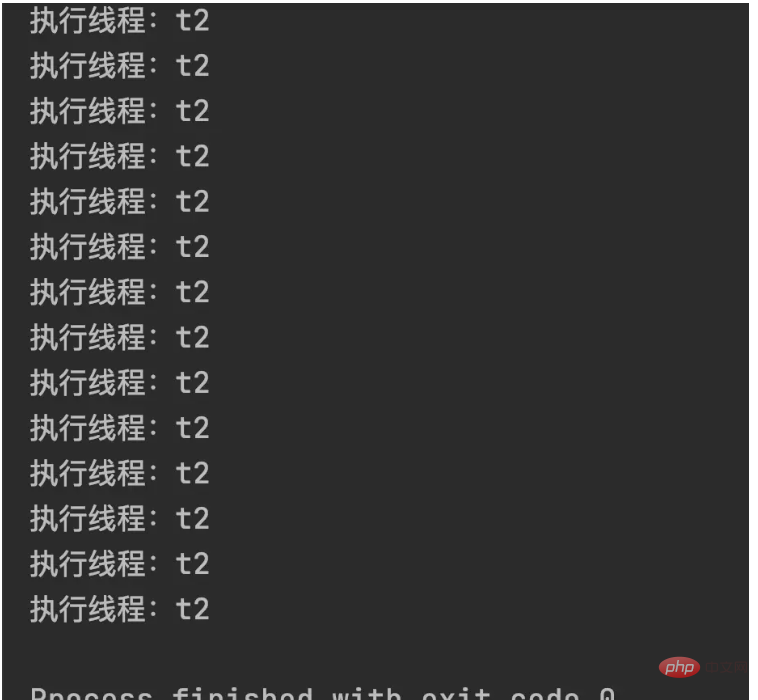
通过上述结果可以看出,线程的类型不管是守护线程还是用户线程对程序执行的优先级是没有任何影响的,而当我们将 t2 的优先级调整为最大时,整个程序的运行结果就完全不同了,
如下代码所示:
public class DaemonExample {
    private static final int count = 100000;
    public static void main(String[] args) throws InterruptedException {
        // 定义任务
        Runnable runnable = new Runnable() {
            @Override
            public void run() {
                for (int i = 0; i < count; i++) {
                    System.out.println("执行线程:" + Thread.currentThread().getName());
                }
            }
        };
        // 创建守护线程 t1
        Thread t1 = new Thread(runnable, "t1");
        // 设置为守护线程
        t1.setDaemon(true);
        // 启动线程
        t1.start();
        // 创建用户线程 t2
        Thread t2 = new Thread(runnable, "t2");
        // 设置 t2 的优先级为最高
        t2.setPriority(Thread.MAX_PRIORITY);
        // 启动线程
        t2.start();
    }
}以上程序执行结果如下:
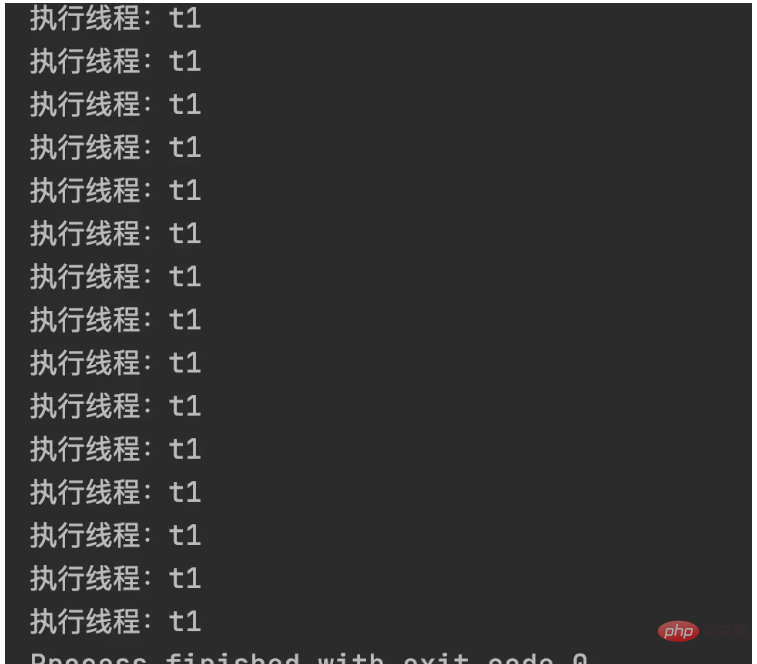
00000000 通过上述的结果可以看出,程序的类型和程序执行的优先级是没有任何关系,当新创建的线程默认的优先级都是 5 时,无论是守护线程还是用户线程,它们执行的优先级都是相同的,当将二者的优先级设置不同时,执行的结果也会随之改变(优先级设置的越高,最早被执行的概率也越大)。
Ce qui précède est le contenu détaillé de. pour plus d'informations, suivez d'autres articles connexes sur le site Web de PHP en chinois!

Outils d'IA chauds

Undresser.AI Undress
Application basée sur l'IA pour créer des photos de nu réalistes

AI Clothes Remover
Outil d'IA en ligne pour supprimer les vêtements des photos.

Undress AI Tool
Images de déshabillage gratuites

Clothoff.io
Dissolvant de vêtements AI

Video Face Swap
Échangez les visages dans n'importe quelle vidéo sans effort grâce à notre outil d'échange de visage AI entièrement gratuit !

Article chaud

Outils chauds

Bloc-notes++7.3.1
Éditeur de code facile à utiliser et gratuit

SublimeText3 version chinoise
Version chinoise, très simple à utiliser

Envoyer Studio 13.0.1
Puissant environnement de développement intégré PHP

Dreamweaver CS6
Outils de développement Web visuel

SublimeText3 version Mac
Logiciel d'édition de code au niveau de Dieu (SublimeText3)
 Nombre parfait en Java
Aug 30, 2024 pm 04:28 PM
Guide du nombre parfait en Java. Nous discutons ici de la définition, comment vérifier le nombre parfait en Java ?, des exemples d'implémentation de code.
 Weka en Java
Aug 30, 2024 pm 04:28 PM
Guide de Weka en Java. Nous discutons ici de l'introduction, de la façon d'utiliser Weka Java, du type de plate-forme et des avantages avec des exemples.
 Numéro de Smith en Java
Aug 30, 2024 pm 04:28 PM
Guide du nombre de Smith en Java. Nous discutons ici de la définition, comment vérifier le numéro Smith en Java ? exemple avec implémentation de code.
 Questions d'entretien chez Java Spring
Aug 30, 2024 pm 04:29 PM
Dans cet article, nous avons conservé les questions d'entretien Java Spring les plus posées avec leurs réponses détaillées. Pour que vous puissiez réussir l'interview.
 Break or Return of Java 8 Stream Forach?
Feb 07, 2025 pm 12:09 PM
Java 8 présente l'API Stream, fournissant un moyen puissant et expressif de traiter les collections de données. Cependant, une question courante lors de l'utilisation du flux est: comment se casser ou revenir d'une opération FOREAK? Les boucles traditionnelles permettent une interruption ou un retour précoce, mais la méthode Foreach de Stream ne prend pas directement en charge cette méthode. Cet article expliquera les raisons et explorera des méthodes alternatives pour la mise en œuvre de terminaison prématurée dans les systèmes de traitement de flux. Lire plus approfondie: Améliorations de l'API Java Stream Comprendre le flux Forach La méthode foreach est une opération terminale qui effectue une opération sur chaque élément du flux. Son intention de conception est
 Horodatage à ce jour en Java
Aug 30, 2024 pm 04:28 PM
Guide de TimeStamp to Date en Java. Ici, nous discutons également de l'introduction et de la façon de convertir l'horodatage en date en Java avec des exemples.
 Programme Java pour trouver le volume de la capsule
Feb 07, 2025 am 11:37 AM
Les capsules sont des figures géométriques tridimensionnelles, composées d'un cylindre et d'un hémisphère aux deux extrémités. Le volume de la capsule peut être calculé en ajoutant le volume du cylindre et le volume de l'hémisphère aux deux extrémités. Ce tutoriel discutera de la façon de calculer le volume d'une capsule donnée en Java en utilisant différentes méthodes. Formule de volume de capsule La formule du volume de la capsule est la suivante: Volume de capsule = volume cylindrique volume de deux hémisphères volume dans, R: Le rayon de l'hémisphère. H: La hauteur du cylindre (à l'exclusion de l'hémisphère). Exemple 1 entrer Rayon = 5 unités Hauteur = 10 unités Sortir Volume = 1570,8 unités cubes expliquer Calculer le volume à l'aide de la formule: Volume = π × r2 × h (4
 Créer l'avenir : programmation Java pour les débutants absolus
Oct 13, 2024 pm 01:32 PM
Java est un langage de programmation populaire qui peut être appris aussi bien par les développeurs débutants que par les développeurs expérimentés. Ce didacticiel commence par les concepts de base et progresse vers des sujets avancés. Après avoir installé le kit de développement Java, vous pouvez vous entraîner à la programmation en créant un simple programme « Hello, World ! ». Une fois que vous avez compris le code, utilisez l'invite de commande pour compiler et exécuter le programme, et « Hello, World ! » s'affichera sur la console. L'apprentissage de Java commence votre parcours de programmation et, à mesure que votre maîtrise s'approfondit, vous pouvez créer des applications plus complexes.


