
Comme nous le savons tous, Dans un système Linux, tout est un fichier !
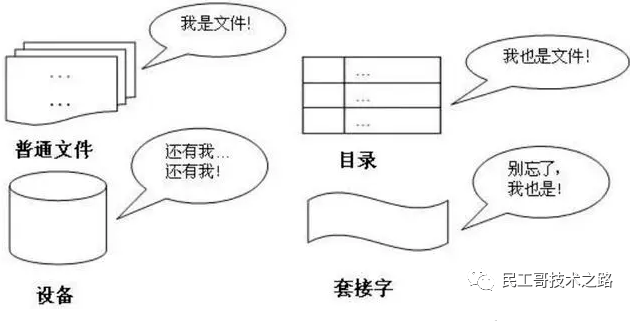
Ainsi, le fonctionnement et la gestion des fichiers sont particulièrement importants dans les systèmes Linux. Aujourd'hui, je vais vous présenter une commande de gestion de fichiers mv.
Cet article explique principalement l'utilisation spécifique de la commande mv et les points auxquels il convient de prêter attention dans la pratique. Étudions et apprenons ensemble la commande mv à travers théorie + exemples.
La commande mv est l'abréviation de move et est également l'une des commandes couramment utilisées dans les systèmes Linux. La commande mv est souvent utilisée pour déplacer et renommer des fichiers ou des répertoires. Ou déplacez un fichier d'un répertoire à un autre. Si vous déplacez un fichier vers un fichier cible existant, le contenu du fichier cible sera écrasé par le contenu du fichier.
Si la source est un fichier et la cible est un répertoire, mv déplacera l'emplacement du fichier. Si la source est un répertoire, la cible ne peut être qu'un répertoire (pas un fichier), et mv renommera le répertoire.
Lorsque vous utilisez la commandemv pour déplacer des fichiers, il y aura les 4 résultats différents suivants si les cibles sont différentes :
mv [选项] 源文件或目录 目标文件或目录
mv [options] source destination
-b   #当目标文件存在时,覆盖之前创建一个备份
-f   #如果移动的文件或目录与目标重复,则直接覆盖(无需确认)
-i   #交互式操作,覆盖前会提示用户进行确认操作,用户通过输入Y/N来确认是否覆盖
-u   #若目标文件已存在,且与需移动的文件同名,只有在源文件比目标文件较新时,才会更新目标文件
-t   #指定mv的目标目录,此选项使用于移动多个文件到一个目录的情况,目标文件在前,源文件在后。
-S:#为备份文件指定(自定义的)后缀
-n  #不覆盖任何现有文件
-T  #将目标当作普通文件,而不是目录
-v  #详细输出命令的执行过程信息
Format de commande : mv 源文件 目标文件 或 mv 源目录 目标目录
Remarque : Lorsque nous utilisons cette commande, nous devons nous assurer que le fichier source (répertoire) et le fichier cible (répertoire) sont dans le même répertoire, et que le fichier cible (répertoire) n'existe pas, sinon l'effet de l'utilisation de cette commande sera Renommer se transforme en déplacement de fichiers (répertoires).
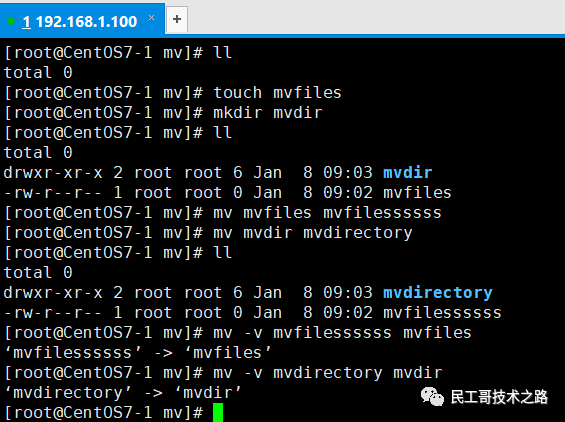
Tout d'abord, nous créons les fichiers et répertoires nécessaires aux tests
[root@CentOS7-1 mv]# ll
total 0
[root@CentOS7-1 mv]# touch mvfiles
[root@CentOS7-1 mv]# mkdir mvdir
[root@CentOS7-1 mv]# ll
total 0
drwxr-xr-x 2 root root 6 Jan  8 09:03 mvdir
-rw-r--r-- 1 root root 0 Jan  8 09:02 mvfiles
Effectuer une opération de renommage
[root@CentOS7-1 mv]# mv mvfiles mvfilessssss
[root@CentOS7-1 mv]# mv mvdir mvdirectory
[root@CentOS7-1 mv]# ll
total 0
drwxr-xr-x 2 root root 6 Jan  8 09:03 mvdirectory
-rw-r--r-- 1 root root 0 Jan  8 09:02 mvfilessssss
Si vous avez besoin du processus d'exécution de la commande, vous pouvez ajouter des paramètres-v
[root@CentOS7-1 mv]# mv -v mvfilessssss mvfiles
‘mvfilessssss’ -> ‘mvfiles’
[root@CentOS7-1 mv]# mv -v mvdirectory mvdir
‘mvdirectory’ -> ‘mvdir’
Format de commande : mv 源文件(目录)1 源文件(目录)2 目标目录 或 mv *文件(目录) 目标目录
Il existe deux façons de déplacer plusieurs fichiers (répertoires) en même temps :
注意:目标目录下如果存在相同的文件名或目录名,容易误操作将同名文件或目录覆盖。
创建测试用的文件和目录
[root@CentOS7-1 mv]# touch 1.txt 2.txt 3.txt
[root@CentOS7-1 mv]# mkdir 1 2 3
[root@CentOS7-1 mv]# ll
total 0
drwxr-xr-x 2 root root 6 Jan  8 09:20 1
-rw-r--r-- 1 root root 0 Jan  8 09:19 1.txt
drwxr-xr-x 2 root root 6 Jan  8 09:20 2
-rw-r--r-- 1 root root 0 Jan  8 09:19 2.txt
drwxr-xr-x 2 root root 6 Jan  8 09:20 3
-rw-r--r-- 1 root root 0 Jan  8 09:19 3.txt
移动文件
[root@CentOS7-1 mv]# mv -v 1.txt 2.txt 3.txt /root/mv1/
‘1.txt’ -> ‘/root/mv1/1.txt’
‘2.txt’ -> ‘/root/mv1/2.txt’
‘3.txt’ -> ‘/root/mv1/3.txt’
[root@CentOS7-1 mv]# ll /root/mv1/
total 0
-rw-r--r-- 1 root root 0 Jan  8 09:19 1.txt
-rw-r--r-- 1 root root 0 Jan  8 09:19 2.txt
-rw-r--r-- 1 root root 0 Jan  8 09:19 3.txt

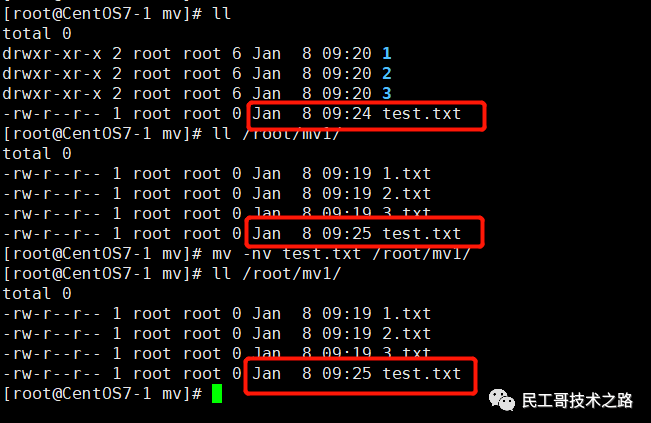
目录的移动其实也是一样操作,也非常的简单。如果目标位置有同名文件,我们不希望它被覆盖,可以加上 -n 选项
[root@CentOS7-1 mv]# ll
total 0
drwxr-xr-x 2 root root 6 Jan  8 09:20 1
drwxr-xr-x 2 root root 6 Jan  8 09:20 2
drwxr-xr-x 2 root root 6 Jan  8 09:20 3
-rw-r--r-- 1 root root 0 Jan  8 09:24 test.txt
[root@CentOS7-1 mv]# ll /root/mv1/
total 0
-rw-r--r-- 1 root root 0 Jan  8 09:19 1.txt
-rw-r--r-- 1 root root 0 Jan  8 09:19 2.txt
-rw-r--r-- 1 root root 0 Jan  8 09:19 3.txt
-rw-r--r-- 1 root root 0 Jan  8 09:25 test.txt
[root@CentOS7-1 mv]# mv -nv test.txt /root/mv1/
[root@CentOS7-1 mv]# ll /root/mv1/
total 0
-rw-r--r-- 1 root root 0 Jan  8 09:19 1.txt
-rw-r--r-- 1 root root 0 Jan  8 09:19 2.txt
-rw-r--r-- 1 root root 0 Jan  8 09:19 3.txt
-rw-r--r-- 1 root root 0 Jan  8 09:25 test.txt
这个操作只需要添加一个参数(-i)即可
[root@CentOS7-1 mv]# mv test.txt -v -i /root/mv1/
mv: overwrite ‘/root/mv1/test.txt’? y
‘test.txt’ -> ‘/root/mv1/test.txt’
[root@CentOS7-1 mv]# ll /root/mv1/
total 0
-rw-r--r-- 1 root root 0 Jan  8 09:19 1.txt
-rw-r--r-- 1 root root 0 Jan  8 09:19 2.txt
-rw-r--r-- 1 root root 0 Jan  8 09:19 3.txt
-rw-r--r-- 1 root root 0 Jan  8 09:24 test.txt
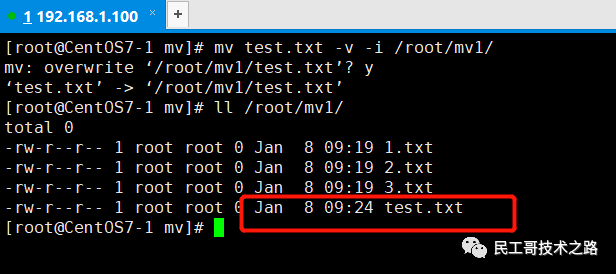
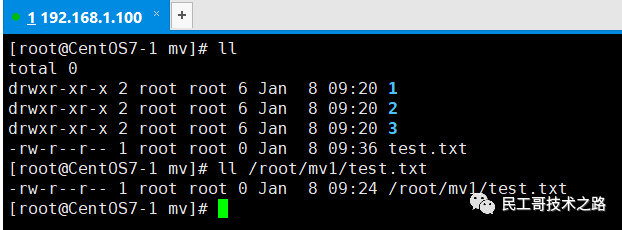
从上图中可以看出,mv 目录下的 test.txt 文件较新,如果我们执行反向操作,并且带上-u参数,来测试旧文件是否会覆盖掉新文件:
[root@CentOS7-1 mv]# mv -v -u /root/mv1/test.txt ./
[root@CentOS7-1 mv]# ll
total 0
drwxr-xr-x 2 root root 6 Jan  8 09:20 1
drwxr-xr-x 2 root root 6 Jan  8 09:20 2
drwxr-xr-x 2 root root 6 Jan  8 09:20 3
-rw-r--r-- 1 root root 0 Jan  8 09:36 test.txt
结果表明并没有覆盖掉新文件,接下来,我们测试仅当源文件(目录)较新时才覆盖这个功能。
[root@CentOS7-1 mv]# mv -v -u ./test.txt /root/mv1/
mv: overwrite ‘/root/mv1/test.txt’? y
‘./test.txt’ -> ‘/root/mv1/test.txt’
[root@CentOS7-1 mv]# ll /root/mv1/
total 0
-rw-r--r-- 1 root root 0 Jan  8 09:19 1.txt
-rw-r--r-- 1 root root 0 Jan  8 09:19 2.txt
-rw-r--r-- 1 root root 0 Jan  8 09:19 3.txt
-rw-r--r-- 1 root root 0 Jan  8 09:36 test.txt
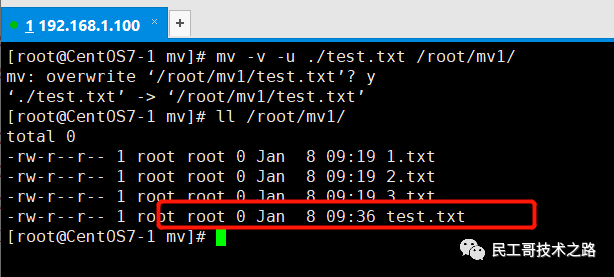
从上图结果中可以看出覆盖成功,这种操作可以用在大量文件移动时,也可以用在更新文件或目录时。
[root@CentOS7-1 mv]# cat test1.txt
1
[root@CentOS7-1 mv]# cat test2.txt
2
如果test2.txt存在,原来的文件会被备份
[root@CentOS7-1 mv]# mv -v -b test1.txt test2.txt
mv: overwrite ‘test2.txt’? y
‘test1.txt’ -> ‘test2.txt’ (backup: ‘test2.txt~’)
[root@CentOS7-1 mv]# ll
total 12
-rw-r--r-- 1 root root 2 Jan  8 09:49 test2.txt
-rw-r--r-- 1 root root 2 Jan  8 09:49 test2.txt~
-rw-r--r-- 1 root root 2 Jan  8 09:49 test3.txt
[root@CentOS7-1 mv]# cat test2.txt
1
[root@CentOS7-1 mv]# cat test2.txt~
2
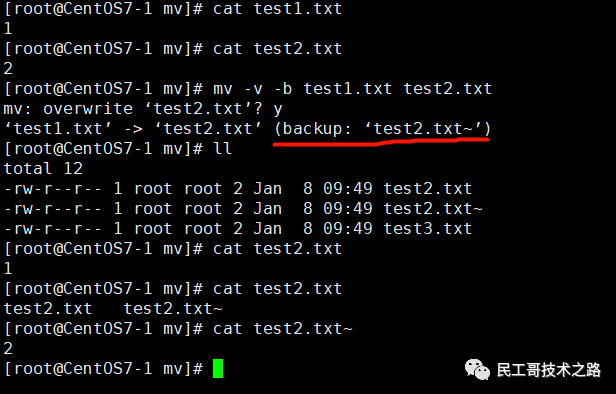
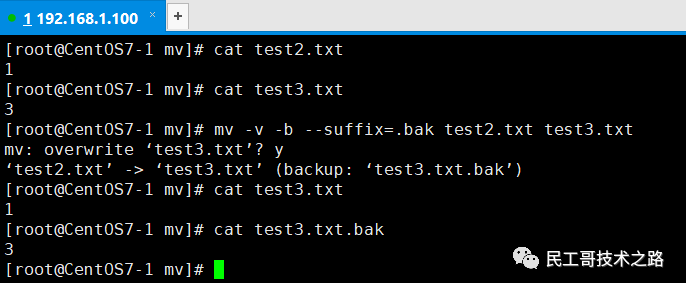
在备份的过程中,我们还可以通过参数--suffix=xxx来自定义文件的后缀名:
[root@CentOS7-1 mv]# cat test2.txt
1
[root@CentOS7-1 mv]# cat test3.txt
3
[root@CentOS7-1 mv]# mv -v -b --suffix=.bak test2.txt test3.txt
mv: overwrite ‘test3.txt’? y
‘test2.txt’ -> ‘test3.txt’ (backup: ‘test3.txt.bak’)
[root@CentOS7-1 mv]# cat test3.txt
1
[root@CentOS7-1 mv]# cat test3.txt.bak
3
Ce qui précède est le contenu détaillé de. pour plus d'informations, suivez d'autres articles connexes sur le site Web de PHP en chinois!