This article mainly introduces the example of HTML5 using html2canvas to implement browser screenshots. It is of great practical value. Friends who need it can refer to it.
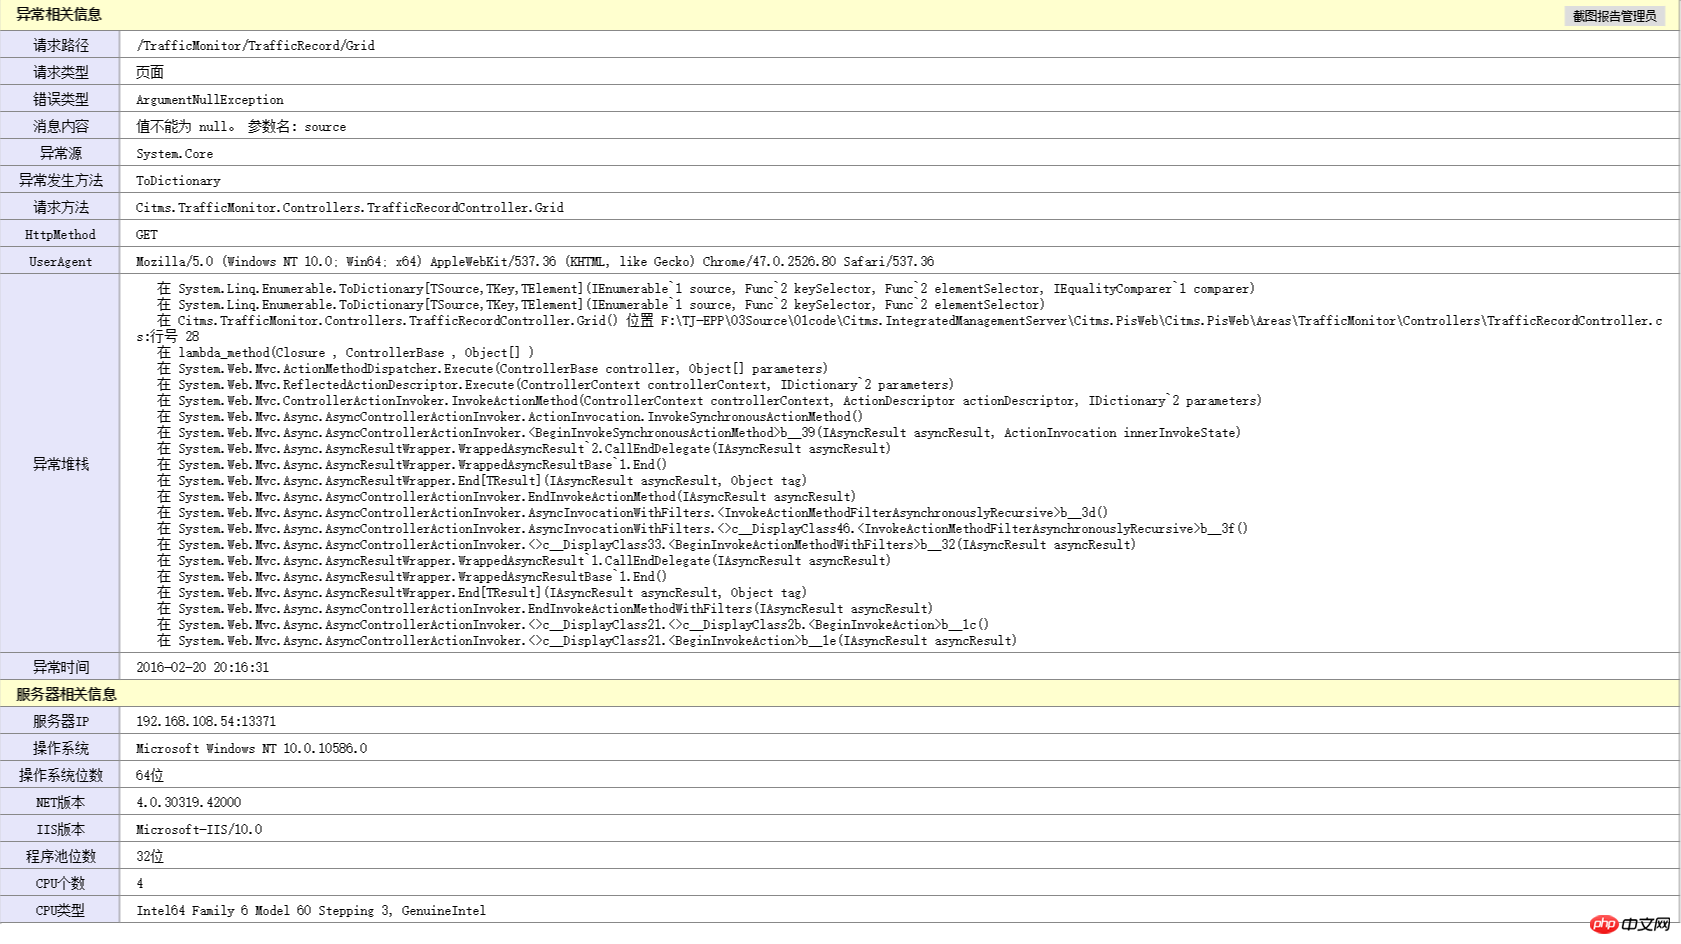
In order to solve the global exception information record in a recent project, I studied browsing The full-screen screenshot function of the device allows users to quickly take screenshots and send them to the administrator when they find an abnormality. The final recorded exception information is as follows. The above [Screenshot Report to Administrator] is implemented using the html2canvas front-end plug-in.

html2canvas introduction
In the past, we could only capture images through other screenshot tools. The functions of modern browsers have become more and more powerful. With the gradual popularization of H5, the browser itself can take screenshots. html2canvas is such a front-end plug-in. Its principle is to draw Dom nodes in Canvas. Although it is very convenient, it has the following limitations:
iframe is not supported
cross-domain images are not supported
Cannot be used in browser plug-ins
SVG images are not supported on some browsers
Flash is not supported
Does not support ancient browsers and IE. If you want to confirm whether a certain browser is supported, you can use it to visit http://deerface.sinaapp.com/ and try:)
Since my usage scenario is very simple, record the exception information, and the exception page is also defined by myself, then html2canvas is enough to use.
Usage examples
Just reference jquery and html2canvas, and the code is also very simple. I am using html2canvas version 0.5.0 here
 html2canvas($("#tbl_exception"), {
         onrendered: function (canvas) {
             var url = canvas.toDataURL();
              //以下代码为下载此图片功能
             var triggerDownload = $("<a>").attr("href", url).attr("download", getNowFormatDate()+"异常信息.png").appendTo("body");
               triggerDownload[0].click();
               triggerDownload.remove();
           }
});The first parameter is the Dom object to be screenshot, and the second parameter is the callback after the rendering is completed canvas object.
| Name | Type | Default | Description |
|---|---|---|---|
| allowTaint | boolean | false | Whether to allow cross-origin images to taint the canvas |
| background | string | #fff | Canvas background color, if none is specified in DOM. Set undefined for transparent |
| height | number | null | Define the heigt of the canvas in pixels. If null, renders with full height of the window. |
| letterRendering | boolean | false | Whether to render each letter seperately. Necessary ifletter-spacing is used. |
| logging | boolean | false | Whether to log events in the console. |
| proxy | string | undefined | Url to the proxy which is to be used for loading cross-origin images. If left empty, cross-origin images won't be loaded. |
| taintTest | boolean | true | Whether to test each image if it taints the canvas before drawing them |
| timeout | number | 0 | Timeout for loading images, in milliseconds. Setting it to 0 will result in no timeout. |
| width | number | null | Define the width of the canvas in pixels. If null, renders with full width of the window. |
| useCORS | boolean | false | Whether to attempt to load cross-origin images as CORS served, before reverting back to proxy |
Problem Analysis
After introducing the use, talk about the problems you encountered during use. Screenshots can only capture the content of the current screen. After checking the plug-in source code and debugging, I found the solution. The source code and modified code are posted below
Source code:
 return renderDocument(node.ownerDocument, options, node.ownerDocument.defaultView.innerWidth, node.ownerDocument.defaultView.innerHeight, index).then(function(canvas) {
        if (typeof(options.onrendered) === "function") {
            log("options.onrendered is deprecated, html2canvas returns a Promise containing the canvas");
            options.onrendered(canvas);
        }
        return canvas;
});Modified code:
   //2016-02-18修改源码,解决BUG 对于部分不能截屏不能全屏添加自定义宽高的参数以支持
    var width = options.width != null ? options.width : node.ownerDocument.defaultView.innerWidth;
    var height = options.height != null ? options.height : node.ownerDocument.defaultView.innerHeight;
    return renderDocument(node.ownerDocument, options, width, height, index).then(function (canvas) {
        if (typeof(options.onrendered) === "function") {
            log("options.onrendered is deprecated, html2canvas returns a Promise containing the canvas");
            options.onrendered(canvas);
        }
        return canvas;
});Mainly allows users to customize the width and height of the Dom object that needs to be intercepted when calling. The current calling method is as follows
            $("#btn_screen").on("click", function () {
                html2canvas($("#tbl_exception"), {
                    height: $("#tbl_exception").outerHeight() + 20,
                    onrendered: function (canvas) {
                        var url = canvas.toDataURL();
                        //以下代码为下载此图片功能
                        var triggerDownload = $("<a>").attr("href", url).attr("download", getNowFormatDate()+"异常信息.png").appendTo("body");
                        triggerDownload[0].click();
                        triggerDownload.remove();
                    }
                });
});and above That’s the entire content of this article. I hope it will be helpful to everyone’s study. For more related content, please pay attention to the PHP Chinese website!
Related recommendations:
html Introduction to implementing screenshots based on canvas
HTML5 page style to implement messages and replies
The above is the detailed content of html5 uses html2canvas to implement browser screenshots. For more information, please follow other related articles on the PHP Chinese website!


