 Web Front-end
 H5 Tutorial
 Code examples of canvas, drag-and-drop events, and audio and video in H5
Code examples of canvas, drag-and-drop events, and audio and video in H5
This article introduces you to the code examples of canvas, drag-and-drop events, and audio and video in H5. It has certain reference value. Friends in need can refer to it. I hope it will be helpful to you.
1. Drag and drop events
1.1 Set drag
Set a draggable to true for the label, and the label can be dragged
1.2 Drag event
1.2.1 Drag element event (the event object is the dragged element)
- ##ondragstart Triggered before dragging
- ondragend Triggers when dragging ends
- ondrag Triggers continuously between before dragging and dragging ends
<p draggable="true"><img src="/static/imghw/default1.png"  data-src="images/225.jpg"  class="lazy"   alt=""   style="max-width:90%" ></p>
   <script>
       var  box = document.querySelector("p");
       box.ondragstart = function(){
           console.log("我被拖拽了!");
       }
       box.ondrag = function(){
           console.log("我在被拖拽的过程中");
       }
       box.ondragend = function(){
           console.log("拖拽结束了!");
       }
</script> ##1.2.2 Target element event (common interpretation: it means where the dragged element is placed)
- ondragenter Triggered when entering the target element, equivalent to mouserover
- ondragover Triggered continuously between entering the target and leaving the target
- ondragleave triggers when leaving the target element, equivalent to mouseout
- ondrop triggers when releasing the mouse on the target element (to trigger the drop event, the default event must be blocked during ondragover time)
- 1.2.3 dataTransfer object under even
- setData(): Set data key and value (must be strings)
- getData(): Get data and get the corresponding value according to the key value
- effectAllowed: The cursor style displayed when dragging to the corresponding area (none, copy , copyLink, copyMove, link, linkMove, move, all, and uninitialized)
- setDragImage() (only supports Firefox when the passed node is hidden)
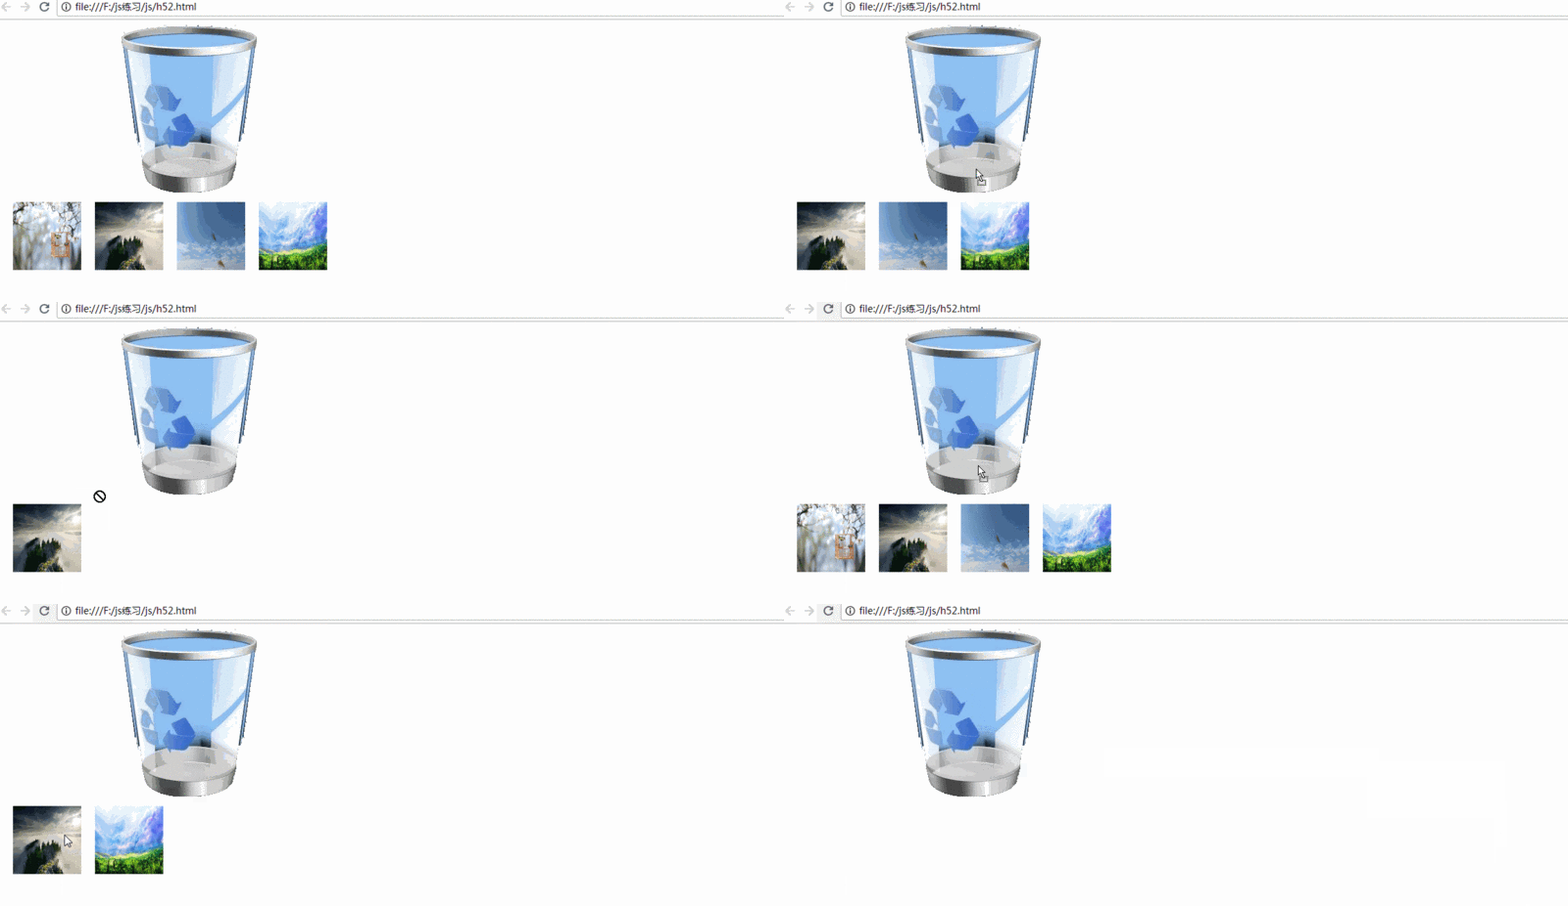
Small case:
     #box{margin-left:150px;}
#box1 img{display: block;width:100px;height:100px;float:left;margin-left:20px;} <p id="box"><img src="/static/imghw/default1.png" data-src="images/回收站.png" class="lazy" alt=""></p>
<p id="box1">
<img src="/static/imghw/default1.png" data-src="images/唯美1.jpg" class="lazy" alt="Code examples of canvas, drag-and-drop events, and audio and video in H5" >
<img src="/static/imghw/default1.png" data-src="images/唯美2.jpg" class="lazy" alt="Code examples of canvas, drag-and-drop events, and audio and video in H5" >
<img src="/static/imghw/default1.png" data-src="images/唯美3.jpg" class="lazy" alt="Code examples of canvas, drag-and-drop events, and audio and video in H5" >
<img src="/static/imghw/default1.png" data-src="images/唯美4.jpg" class="lazy" alt="Code examples of canvas, drag-and-drop events, and audio and video in H5" >
</p>
<script type="text/javascript">
//获取 垃圾箱对象
var box = document.querySelector("#box");
//获取图片列表对象
var imgList = document.querySelectorAll("img");
//获取图片列表的父元素
var box1 = document.querySelector("#box1");
//遍历图片,并且增加拖拽开始事件
imgList.forEach(function(item,index){
item.ondragstart = function(event){
event.dataTransfer.setData("name",index);
}
});
//阻止冒泡
box.ondragover = function(event){
event.preventDefault();
};
box.ondrop = function(event){
// 获取拖拽元素的编号
var index = event.dataTransfer.getData("name");
box1.removeChild(imgList[index]);
};
</script>Example renderings:
 ##1.3 External drag and drop files
files (Get external dragged files and return a filesList list)
length (event.dataTransfer.files.length)
Type(event.dataTransfer.files[0].type) For example: the picture is (image/jpeg)- FileReader object (read file information)
- Method 1: readAsDataURL(): The parameter is the file object to be read, and the file is read as DataUrl Method 2: Onload() event function: When the function file reading is completed successfully time to trigger this event. (this.result is used to obtain the read file data. If it is a picture, the image data in base64 format will be returned)
Small case: Drag and drop file upload:
#box{width:200px;height:200px;line-height:200px;text-align:center;border:5px dashed #eeee;background:pink;} <p id="box">请将图片拖到此区域</p>
<p id="imgs"></p>
<script>
var box = document.querySelector("#box");
var imgList = document.querySelector("#imgs");
box.ondragover = function(event){
event.preventDefault();
};
box.ondrop = function(event){
event.preventDefault();
// 获取外部拖拽的文件
var fileList = event.dataTransfer.files;
for( var i = 0;i < fileList.length; i++){
if(fileList[i].type.indexOf("image")>-1){
var fd = new FileReader();
//读取文件对象
fd.readAsDataURL(fileList[i]);
fd.onload = function(){
//创建一个图片节点
var img = document.createElement("img");
img.src = this.result;
img.width = "200";
img.height = "200";
imgs.appendChild(img);
}
}
}
};
</script>
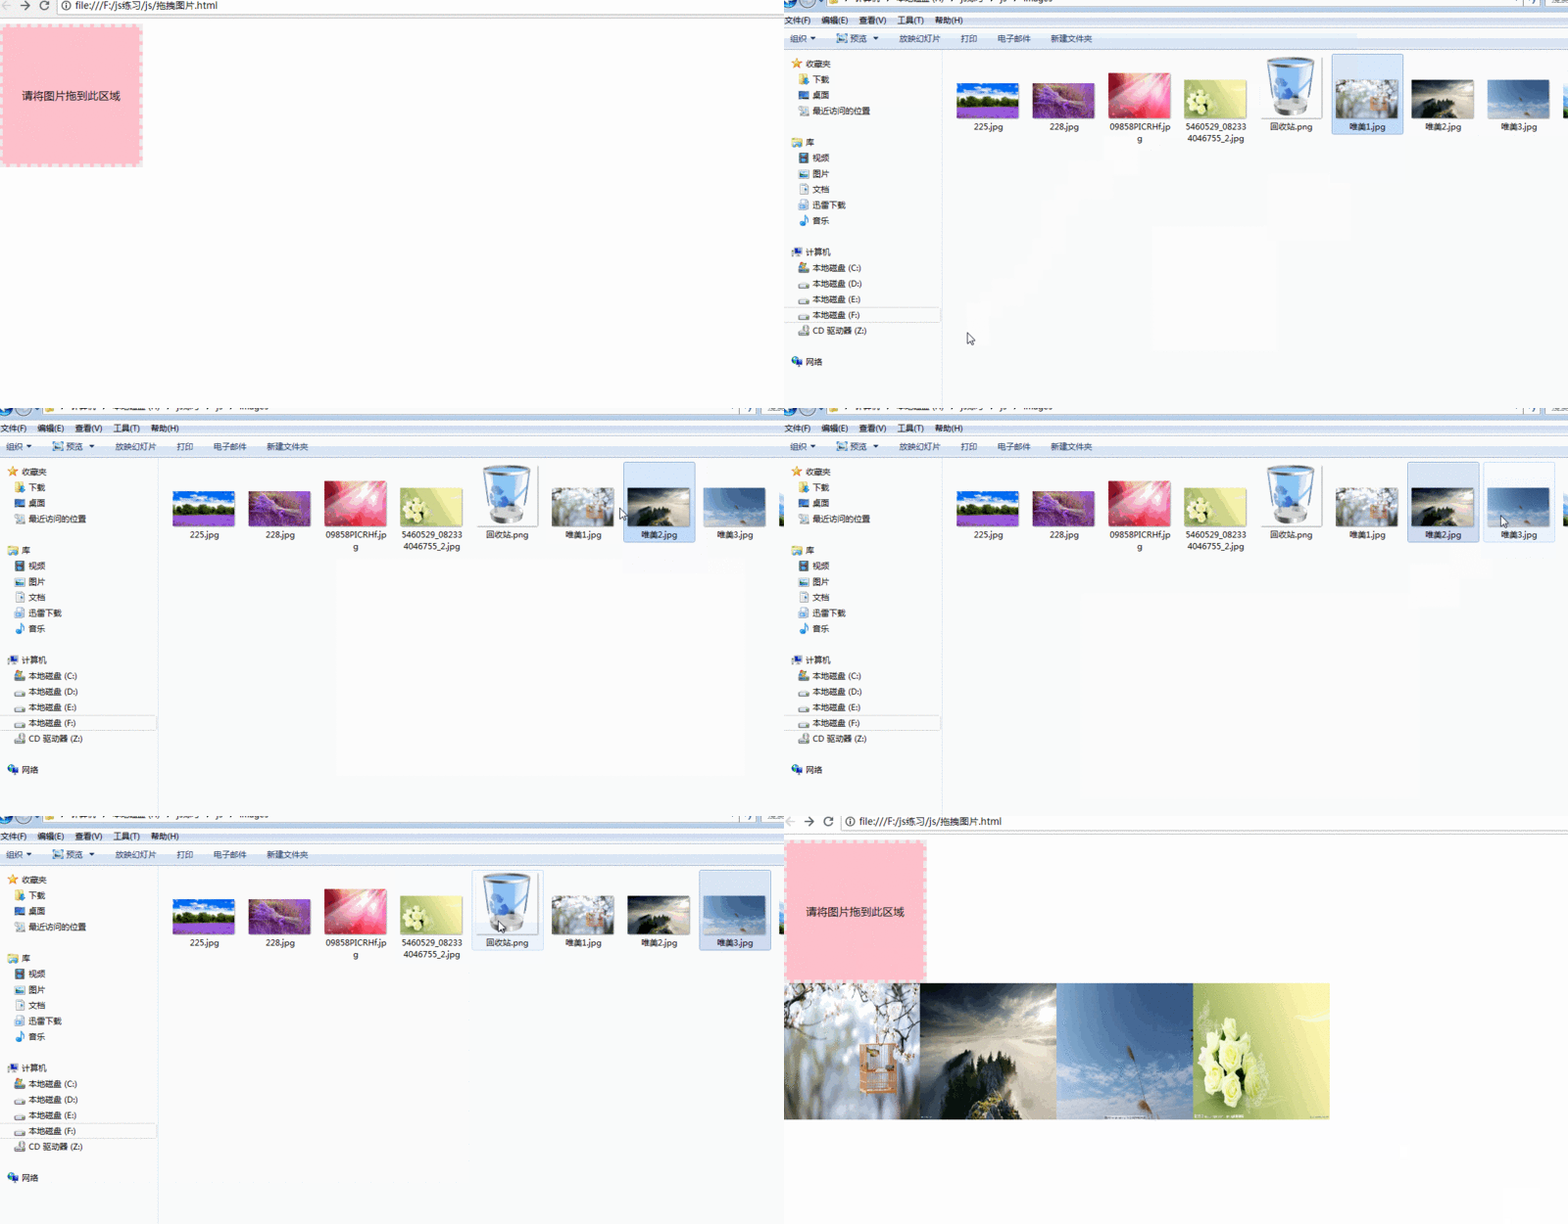 2. canvas
2.1 What is canvas?
canvas is a new tag provided by HTML5
- canvas is a rectangular area of canvas that can be painted on with JavaScript
- The canvas tag uses JavaScript to draw images on the web page and does not have the drawing function itself
- canvas has a variety of drawing paths, rectangles, circles , characters and how to add images
- Web pages before HTML5 can only use some fixed-style tags: such as p, p, h1, etc., but with canvas Web pages can be enriched Colorful
- #2.2 Application areas of canvas
Games. Canvas is more three-dimensional and more sophisticated than Flash in terms of web-based image display. Canvas games are better in terms of fluency and cross-platform
- Visualized data. Data charts, such as: Baidu's echart
- banner advertisement: In the glorious era of Flash, smartphones had not yet appeared. Now and in the future era of smartphones, HTML5 technology can play a huge role in banner advertising. It is perfect to use Canvas to achieve dynamic advertising effects
- 2.3 canvas drawing basics
2.3.1 Attributes and syntax of canvas tag
The tag name canvas needs to be closed. It is an ordinary html tag
- You can set the width and height attributes, but the attribute value unit must be px, otherwise it will be ignored
- width and hegiht :Default 300*150 pixels
- Note: 1. Do not use CSS to control its width and height, or the image will stretch out
2.重新设置canvas标签的宽高属性会让画布擦除所有的内容
3.可以给canvas画布设置背景色
2.4 canvas绘图上下文 (context)
上下文:上知天文,下知地理。是所有的绘制操作api的入口或者集合。
Canvas自身无法绘制任何内容。Canvas的绘图是使用JavaScript操作的
Context对象就是JavaScript操作Canvas的接口
使用[CanvasElement].getContext(‘2d’)来获取2D绘图上下文
    <canvas></canvas>
    <script>
        var cas = document.querySelector("canvas");
        var ctx = cas.getContext("2d");
</script>2.5 基本的绘制路径
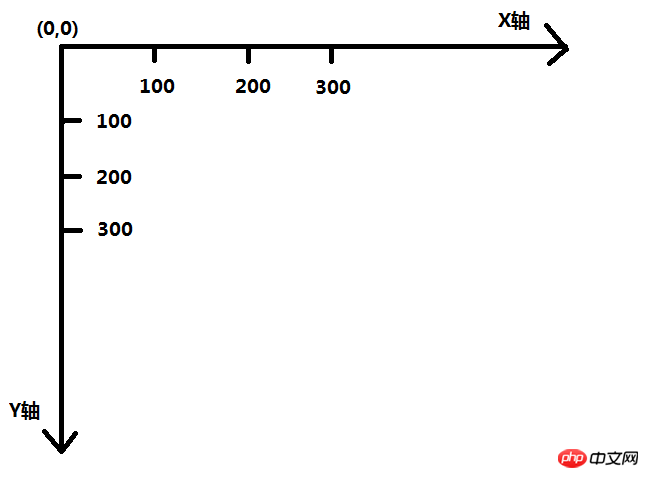
2.5.1 canvas 坐标系
canvas 的坐标系从最左上角开始(0,0) .X 向右增大,Y向下增大
2.5.2 设置绘制起点(moveTo)
语法:ctx.moveTo(x,y)
解释:设置上下文绘制路径的起点。相当于移动画笔到某个位置
参数:x,y都是相对于canvas盒子的最左上角
注意:1. 绘制线段钱必须先设置起点,不然绘制无效
2.如果不设置起点,就会使用lineTo 的坐标当做moveTo
2.5.3 绘制直线(lineTo)
语法:ctx.lineTo(x,y)
解释:从x,y的位置绘制一条直线到起点或者上一个线头点
x,y 线头点坐标
绘制第一条直线:
        <canvas width="200"  style="max-width:90%"></canvas>
    <script type="text/javascript">
        //获取canvas 节点
        var cas = document.querySelector("canvas");
        cas.style.border = "1px solid red";
        // 获取canvas 的上下文信息,首先获取一个对象,然后在这个对象里面画画
        var  cts = cas.getContext("2d");
        //起点位置
        cts.moveTo(50, 50);
        // 终点位置
        cts.lineTo(100,100);
        // 开始描边
        cts.stroke();
    </script>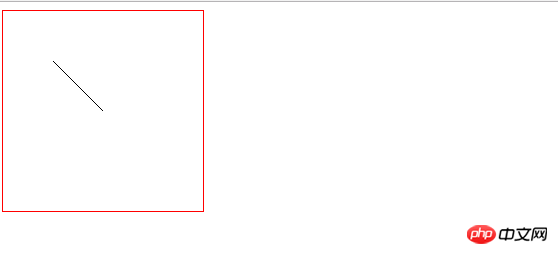
2.5.4 路径的开始与闭合
开始路径:ctx.beginPath();
闭合路径:ctx.closePath();
解释:如果复杂路径绘制,必须使用路径开始和结束,闭合路径会自动把最后的线头和开始的线头连在一起
beginPath: 核心的作用是将不同绘制的形状进行隔离,每次执行此方法,表示重新绘制一个路径,跟之前绘制的墨迹可以进行分开样式设置和管理
画一个三角形:
       <canvas width="200"  style="max-width:90%"></canvas>
    <script type="text/javascript">
        //获取canvas 节点
        var cas = document.querySelector("canvas");
        cas.style.border = "1px solid red";
        // 获取canvas 的上下文信息,首先获取一个对象,然后在这个对象里面画画
        var  cts = cas.getContext("2d");
        cts.beginPath();
        //起点位置
        cts.moveTo(50, 50);
        // 终点位置
        cts.lineTo(100,100);
        cts.lineTo(200,100);
        cts.lineTo(50,50);
        // 开始描边
        cts.stroke();
        cts.closePath();
    </script>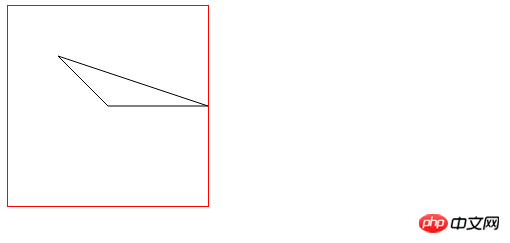
2.5.5 描边(stroke)
语法:ctx.stroke();
解释:根据路径绘制线。路径只是草稿,真正绘制线必须执行stroke
canvas 绘制的基本步骤
获得上下文 →canvasElem.getContext('2d');
开始路径规划 →ctx.beginPath()
移动起始点 → ctx.moveTo(x, y)
绘制线(矩形、圆形、图片...) → ctx.lineTo(x, y)
闭合路径 → ctx.closePath();
绘制描边 → ctx.stroke();
语法:ctx.fill();
解释:填充是将闭合路径的内容填充具体的颜色。默认黑色
语法:ctx.rect(x, y, width, height)
解释:x, y是矩形左上角坐标, width和height都是以像素计
rect方法只是规划了矩形的路径,并没有填充和描边
语法: ctx.strokeRect(x, y, width, height)
语法2:ctx.fillRect(x, y, width, height)
语法:ctx.clearRect(x,y,w,h);
解释:清除某个矩形内的绘制的内容,相当于橡皮擦
语法:ctx.arc(x, y, r, sAngle, eAngle, counterclockwise)
解释:x,y 圆心坐标,r 半径大小,sAngle:绘制开始的角度。圆心到最右边点为0度,顺时针方向弧度增大。eAngle:结束的角度,注意是弧度( π)。counterclockwise:是否是逆时针,true是逆时针,false:顺时针
弧度和角度的转换公式: rad = deg*Math.PI/180
var img = document.getElementById("imgId")
var img = new Image();//这个就是 img标签的dom对象
语法:context.drawImage(img,x,y);
解释:x,y绘制的是图片左上角的坐标,img 是绘制图片的 dom 对象
语法:context.drawImage(img,x,y,width,height)
解释:width绘制图片的宽度,height 绘制图片的高度
注意:如果指定宽高,最好成比例,不然图片会被拉伸
等比公式:设置高 = 原高度 * 设置宽/ 原宽度
语法:context.drawImage(img,sx,sy,swidth,sheight,x,y,width,height);
参数说明:sx,sy裁剪的左上角坐标,swidth:裁剪图片的宽度,sheight:裁剪的高度。
audio
video
source
<source src=”sr1”></srouce> 使用source标签可以设置多个源
Copy after logincontrols:显示或隐藏用户控制界面
autoplay:媒体是否自动播放
loop:媒体是否循环播放
currentTime : 目前播放的时间点
duration:媒体总时间(只读)
volume:0.0-1.0的音量相对值
muted:是否静音
paused:媒体是否暂停(只读)
ended:媒体是否播放完毕(只读)
error:媒体发生错误的时候,返回错误代码(只读)
currentSrc:以字符串的形式返回媒体地址(只读)
play:媒体播放
pause:媒体暂停
load:重新加载媒体
补充知识点:addEventListener(type, fn, false)
捕获阶段:先由文档的根节点document往事件触发对象,从外向内捕获事件对象
目标阶段:到达目标事件位置(事发地),触发事件
冒泡阶段:再从目标事件位置往文档的根节点方向回溯,从内向外冒泡事件对象
注意: 当事件触发在目标阶段时,会根据事件注册的先后顺序执行,在其他两个阶段注册顺序不影响事件执行顺序。也就是说如果该处既注册了冒泡事件,也注册了捕获事件,则按照注册顺序执行。
2.5.6 绘制表格
    <canvas width="600"  style="max-width:90%"></canvas>
    <script>
        var cas = document.querySelector("canvas");
        cas.style.border = "1px solid red";
        // 获取上下文信息
        var ctx = cas.getContext("2d");
        var rectH = 10;
        var rectW = 10;
        ctx.lineWidth = 0.3;
        // 绘制水平线
        for(var i= 0;i < cas.height/rectH; i++){
            ctx.moveTo(0,i*rectH);
            ctx.lineTo(cas.width, i*rectH);
        }
        // 绘制垂直线
        for(var i = 0; i < cas.width/rectW; i++){
            ctx.moveTo(i*rectH,0);
            ctx.lineTo(i*rectH,cas.width);
        }
        ctx.stroke();
    </script>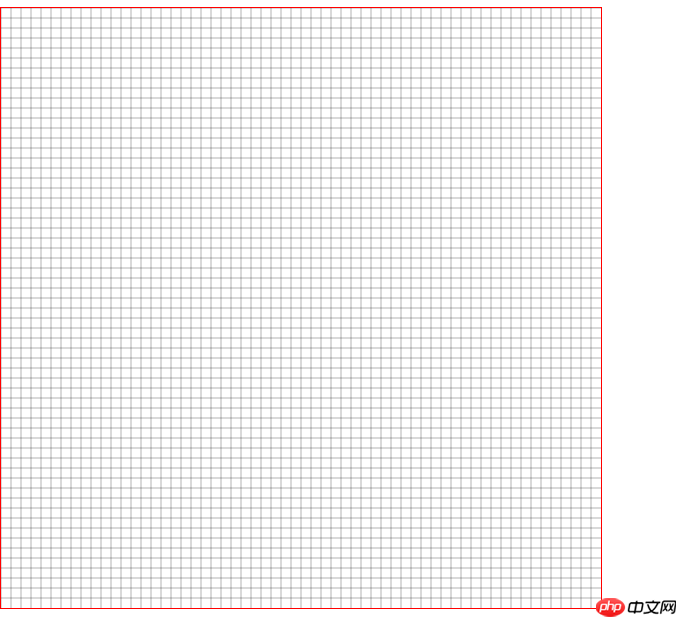
2.5.7 填充(fill)
eg:
    <canvas width="600"  style="max-width:90%"></canvas>
    <script type="text/javascript">
    // 获取节点对象
        var cas = document.querySelector("canvas");
    // 获取上下文
        var cat = cas.getContext("2d");
    // 填充颜色为红色
        cat.fillStyle = "red";
    // 开始 绘制
        cat.beginPath();
    // 绘制描边的颜色为蓝色
        cat.strokeStyle = "blue";
    // 设置起点的位置
        cat.moveTo(50,50);
    // 设置第二个点的位置
        cat.lineTo(200,200);
    // 设置第三个点的位置
        cat.lineTo(50,200);
    // 定义填充,如果不写,会出错
        cat.fill();
        cat.closePath();
    // 结束绘制
        cat.stroke();
    </script>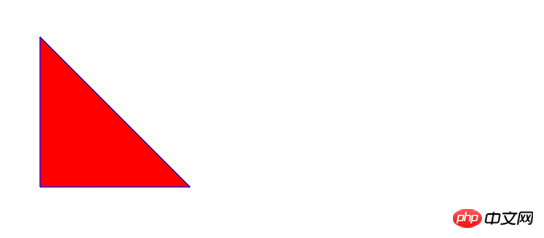
2.5.8 快速创建矩形(rect() 方法)
     <canvas width="200"  style="max-width:90%"></canvas>
    <script>
        var cas = document.querySelector("canvas");
        var cat = cas.getContext("2d");
        cat.rect(50, 50, 100,100);
        cat.fillStyle = "pink";
        cat.fill();
        cat.strokeStyle = "yellow";
        cat.stroke();
    </script>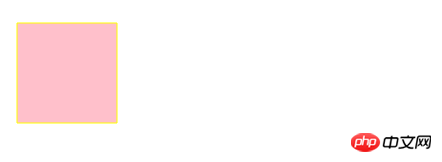
2.5.9 快速创建描边矩形和填充矩形
注意此方法绘制完路径后立即进行stroke绘制
此方法执行完成后。立即对当前矩形进行fill填充
eg:
     <canvas width="200"  style="max-width:90%"></canvas>
    <script>
        var cas = document.querySelector("canvas");
        var cat = cas.getContext("2d");
        cat.strokeRect(50, 50, 100, 100);
        cat.stroke();
    </script>
eg:
      <canvas width="200"    style="max-width:90%"></canvas>
    <script>
        var cas = document.querySelector("canvas");
        var cat = cas.getContext("2d");
        cat.fillRect(50, 50, 100, 100);
        cat.stroke();
    </script>
2.5.10 清除矩形(clearRect())
2.6 绘制圆形
2.6.1 概述:arc() 方法创建弧/曲线(用于创建圆或部分圆)
eg:
     <canvas width="200"  style="max-width:90%"></canvas>
    <script>
        var cas = document.querySelector("canvas");
        cas.style.border = "1px solid red";
        var cat = cas.getContext("2d");
        cat.arc(100, 100, 100, 0, 2*Math.PI,false);
        cat.fillStyle = "skyblue";
        cat.fill();
        cat.stroke();
    </script>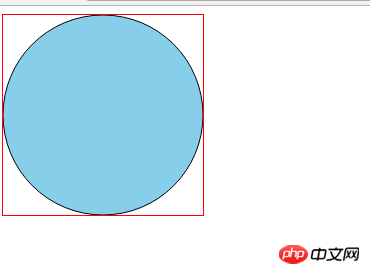
绘制扇形占比
eg:
     <canvas width="200"  style="max-width:90%"></canvas>
    <script>
        var cas = document.querySelector("canvas");
        var cat =cas.getContext("2d");
        cat.beginPath();
        cat.fillStyle = "pink";
        cat.moveTo(100,100);
        cat.arc(100,100,100,0,70*Math.PI/180,true);
        cat.closePath();
        cat.fill();
        cat.stroke();
        cat.beginPath();
        cat.moveTo(100,100);
        cat.arc(100,100,100,0,200*Math.PI/180,false);
        cat.fillStyle = "red";
        cat.closePath();
        cat.fill();
        cat.stroke();
        cat.beginPath();
        cat.moveTo(100,100);
        cat.arc(100,100,100,0,90*Math.PI/180,false);
        cat.fillStyle = "blue";
        cat.closePath();
        cat.fill();
        cat.stroke();
    </script>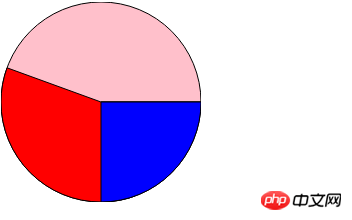
2.7 绘制图片
2.7.1 用JS创建 img 对象
img.src = "imgs/arc.gif";
img.alt = "文本信息";
img.onload = function() {
    //图片加载完成后,执行此方法
Copy after login
2.7.2 基本绘制图片的方式
eg:
    <canvas width="200" height="200"></canvas>
    <script>
    // 创建对象
        var cas = document.querySelector("canvas");
      // 创建上下文
        var cat = cas.getContext("2d");
      // 创建图片对象
        var img = new Image();
        img.src = "images/唯美1.jpg";
        img.onload = function(){
            cat.drawImage(img, 50,50);
        }
    </script>
2.7.3 在画布上绘制图像,并规定图像的宽度和高度
eg:
    <canvas width="600"  style="max-width:90%"></canvas>
   <script>
       var cas = document.querySelector("canvas");
       var cat = cas.getContext("2d");
       var img = new Image();
       img.src = "images/唯美1.jpg";
       img.onload = function(){
           // 图片的原始的宽高为 500 * 313
           cat.drawImage(img, 0,0,400,313*400/500);
       }
   </script>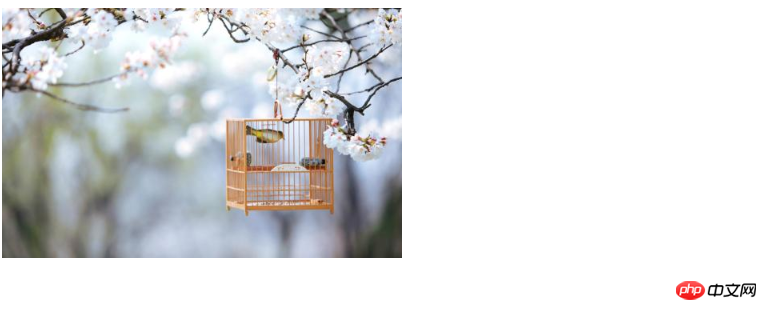
2.7.4 图片裁剪,并在画布上定位被裁剪的部分
eg:
     <canvas width="600"  style="max-width:90%"></canvas>
    <script>
        var cas = document.querySelector("canvas");
        var cat = cas.getContext("2d");
        var img = new Image();
        img.src = "images/唯美1.jpg";
        img.onload = function(){
            cat.drawImage(img, 20,20,200,200,0,0,100,100);
        }
    </script>
三、音视频
3.1 使用标签
音频标签 , 使用 controls = "" 将控件展示出来
视频标签,使用 controls = "" 将控件展示出来
3.2 音视频元素( 用来控制音视频 )
3.2.1 标签属性
eg:
    <audio src="yinping/johann_sebastian_bach_air.mp3" autoloop loop controls></audio>
 <script>
     var auo = document.querySelector("audio");
     window.onload = function(){
        setInterval(function(){
            auo.play();
        },1000);
     }
注意:autoplay 属性在谷歌浏览器中不支持,所以小编在这里用了一个setInterval方法,这个属性在火狐浏览器中是可以实现的。
3.2.2 音视频在js中DOM的属性和方法
eg:
<video id="v1" src="res/fun.mp4" ></video>
<input type="button" value="我要暂停" id="btn1">
<input type="button" value="我要播放" id="btn2">
<input type="button" value="我要切换视频" id="btn3">
<script type="text/javascript">
window.onload = function() {
var v1 = document.getElementById("v1");
var btn1 = document.getElementById("btn1");
var btn2 = document.getElementById("btn2");
btn2.addEventListener('click', function() {
v1.play();
})
btn1.onclick = function() {
v1.pause();
}
btn3.onclick = function() {
v1.src = "res/1.mp4";
v1.play();
}
}
</script>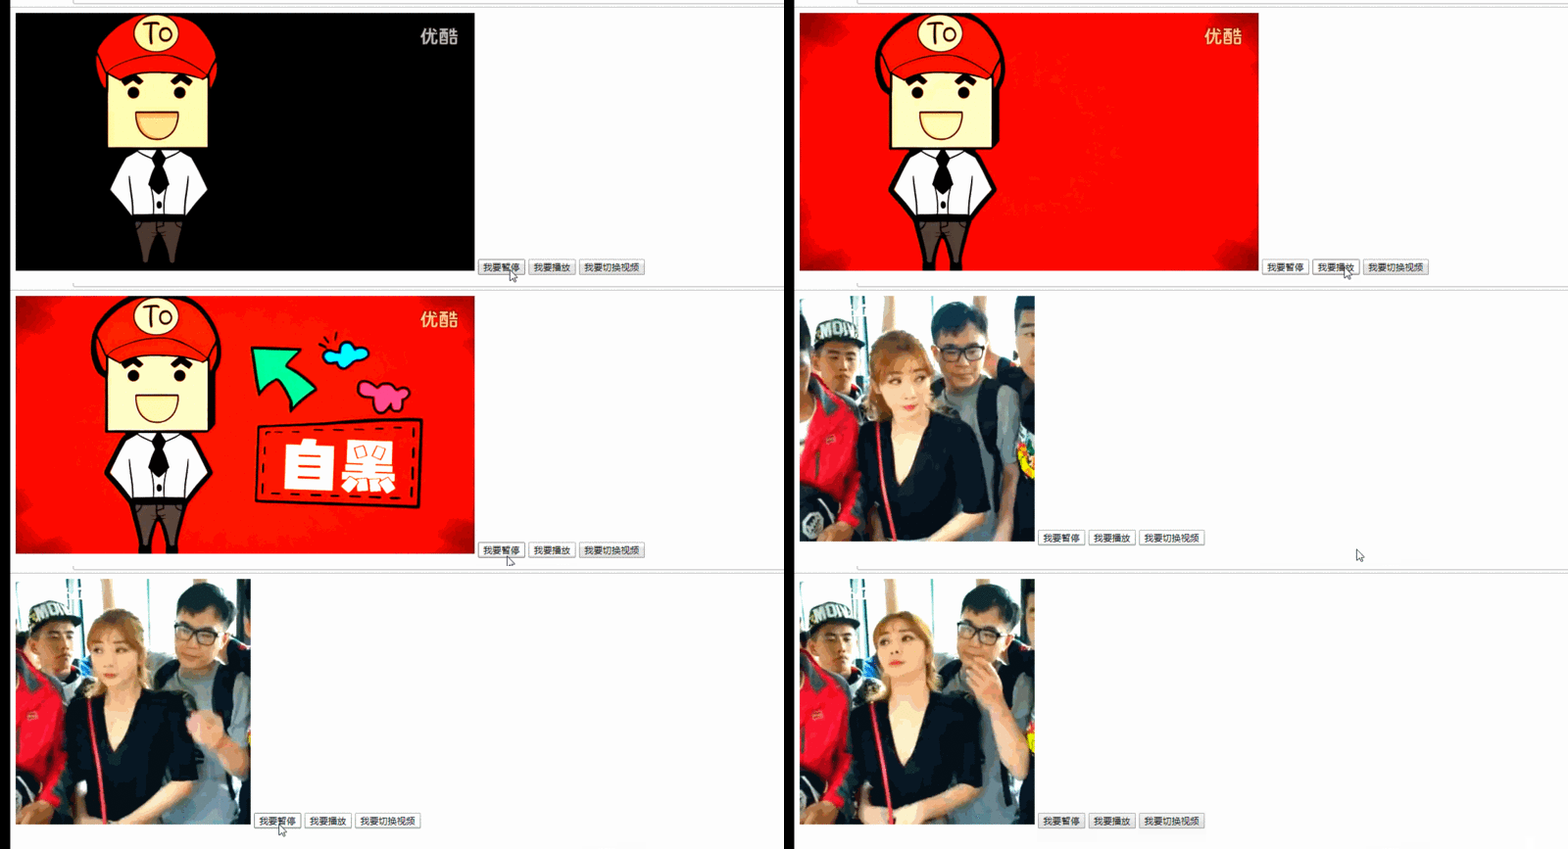
3.2.3 事件绑定
false,表示不使用捕获(useCapture)
#### 3.2.3.1 DOM事件的三个阶段
3.2.4 音视频绑定事件
    <video controls="" src="res/1.mp4" id="v1"></video>
    <script type="text/javascript">
        window.onload = function() {
            // 获取到相应的DOM节点
            var v1 = document.getElementById("v1");
            // 给dom节点绑定事件
            v1.addEventListener("ended", function() {
                alert("请选择下一个视频");
            })
        }
    </script>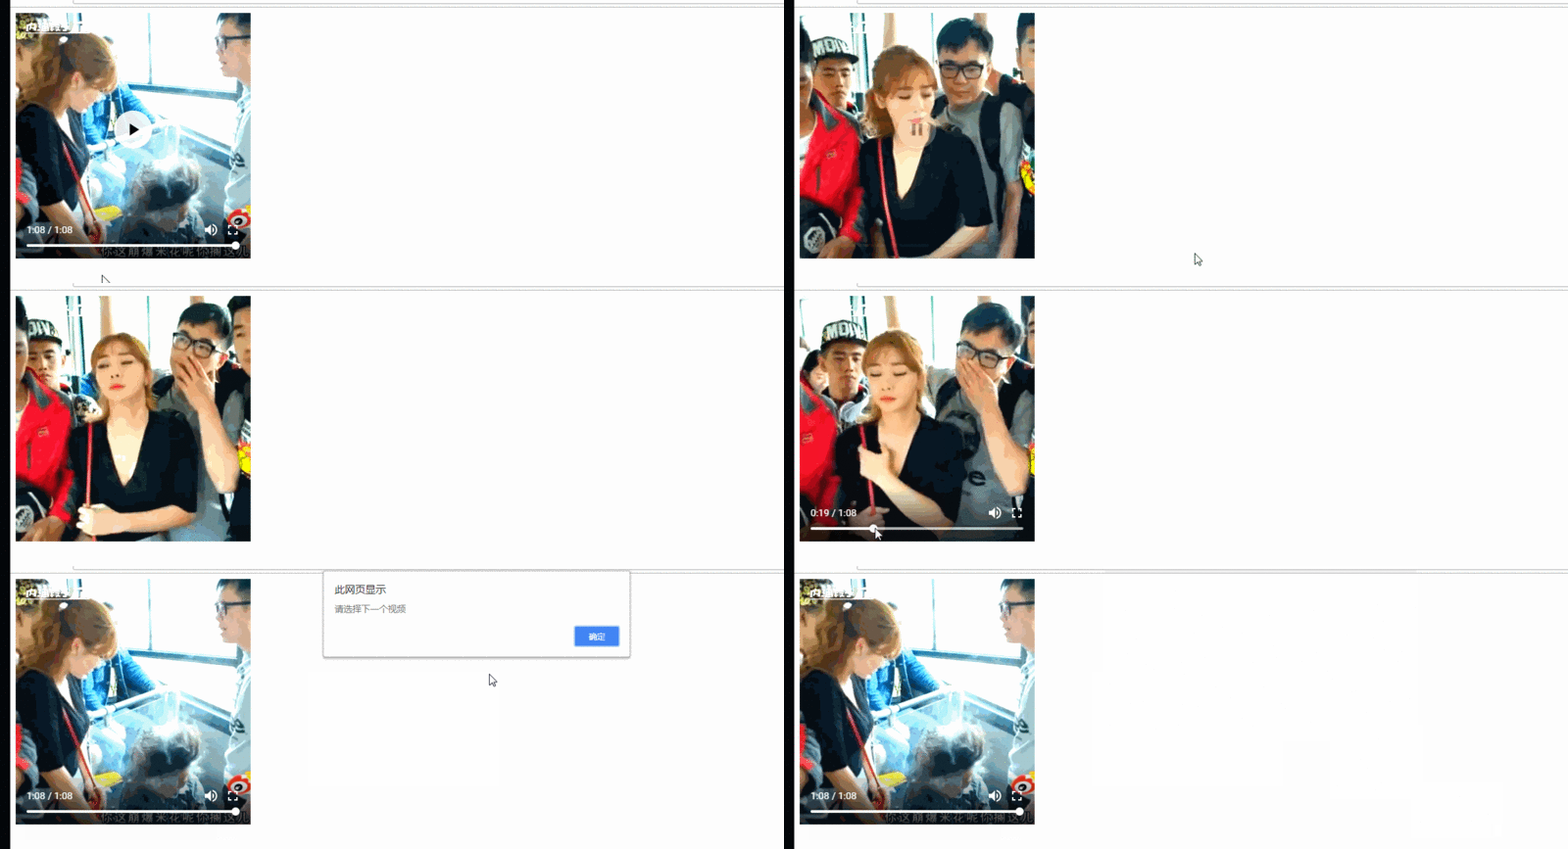
3.2.5 音视频的事件绑定
loadstart 开始加载
progress 运行的进度
suspend
emptied
stalled
play 播放
pause 暂停
loadedmetadata
loadeddata
waiting 等待
playing
canplay
canplaythrough
seeking
seeked
timeupdate
ended 结束
ratechange
durationchange
Volumechange
相关推荐:
The above is the detailed content of Code examples of canvas, drag-and-drop events, and audio and video in H5. For more information, please follow other related articles on the PHP Chinese website!

Hot AI Tools

Undresser.AI Undress
AI-powered app for creating realistic nude photos

AI Clothes Remover
Online AI tool for removing clothes from photos.

Undress AI Tool
Undress images for free

Clothoff.io
AI clothes remover

Video Face Swap
Swap faces in any video effortlessly with our completely free AI face swap tool!

Hot Article

Hot Tools

Notepad++7.3.1
Easy-to-use and free code editor

SublimeText3 Chinese version
Chinese version, very easy to use

Zend Studio 13.0.1
Powerful PHP integrated development environment

Dreamweaver CS6
Visual web development tools

SublimeText3 Mac version
God-level code editing software (SublimeText3)

Hot Topics
 1664
1664
 14
14
 1423
1423
 52
52
 1317
1317
 25
25
 1268
1268
 29
29
 1243
1243
 24
24
 How to use bootstrap in vue
Apr 07, 2025 pm 11:33 PM
Using Bootstrap in Vue.js is divided into five steps: Install Bootstrap. Import Bootstrap in main.js. Use the Bootstrap component directly in the template. Optional: Custom style. Optional: Use plug-ins.
 Understanding HTML, CSS, and JavaScript: A Beginner's Guide
Apr 12, 2025 am 12:02 AM
WebdevelopmentreliesonHTML,CSS,andJavaScript:1)HTMLstructurescontent,2)CSSstylesit,and3)JavaScriptaddsinteractivity,formingthebasisofmodernwebexperiences.
 The Roles of HTML, CSS, and JavaScript: Core Responsibilities
Apr 08, 2025 pm 07:05 PM
HTML defines the web structure, CSS is responsible for style and layout, and JavaScript gives dynamic interaction. The three perform their duties in web development and jointly build a colorful website.
 React's Role in HTML: Enhancing User Experience
Apr 09, 2025 am 12:11 AM
React combines JSX and HTML to improve user experience. 1) JSX embeds HTML to make development more intuitive. 2) The virtual DOM mechanism optimizes performance and reduces DOM operations. 3) Component-based management UI to improve maintainability. 4) State management and event processing enhance interactivity.
 Is h5 same as HTML5?
Apr 08, 2025 am 12:16 AM
"h5" and "HTML5" are the same in most cases, but they may have different meanings in certain specific scenarios. 1. "HTML5" is a W3C-defined standard that contains new tags and APIs. 2. "h5" is usually the abbreviation of HTML5, but in mobile development, it may refer to a framework based on HTML5. Understanding these differences helps to use these terms accurately in your project.
 What Does H5 Refer To? Exploring the Context
Apr 12, 2025 am 12:03 AM
H5referstoHTML5,apivotaltechnologyinwebdevelopment.1)HTML5introducesnewelementsandAPIsforrich,dynamicwebapplications.2)Itsupportsmultimediawithoutplugins,enhancinguserexperienceacrossdevices.3)SemanticelementsimprovecontentstructureandSEO.4)H5'srespo
 HTML: The Structure, CSS: The Style, JavaScript: The Behavior
Apr 18, 2025 am 12:09 AM
The roles of HTML, CSS and JavaScript in web development are: 1. HTML defines the web page structure, 2. CSS controls the web page style, and 3. JavaScript adds dynamic behavior. Together, they build the framework, aesthetics and interactivity of modern websites.
 The Future of HTML: Evolution and Trends in Web Design
Apr 17, 2025 am 12:12 AM
The future of HTML is full of infinite possibilities. 1) New features and standards will include more semantic tags and the popularity of WebComponents. 2) The web design trend will continue to develop towards responsive and accessible design. 3) Performance optimization will improve the user experience through responsive image loading and lazy loading technologies.


