

Windows 11 で Hyper-V を無効または削除する方法

Hyper-V は Windows 11 コンピューターにプリインストールされています。この仮想化ツールは OS の Home エディションではそのままでは利用できませんが、バッチ スクリプトを使用してインストールできます。
残念ながら、Hyper-V は、VMWare Workstation、VirtualBox、エミュレーターなどの他の仮想化ツールを含む、PC 上のサードパーティ アプリと競合する可能性があります。その結果、アプリ、PC ゲーム、またはハードウェア チューニング ユーティリティを起動しようとすると、「Hyper-V が検出されました」というエラーが発生する可能性があります。
幸いなことに、Windows 11 では、従来の Windows の機能ダイアログ、コマンド プロンプト、PowerShell を使用して Hyper-V を無効にすることができます。
Hyper-V を無効にする必要がある理由
設計上、プロセッサーで利用可能な統合仮想化拡張機能 (Intel VT-x や AMD-V など) を使用できる仮想化ツールは 1 つだけです。 VMware WorkStation や Virtual Box などのサードパーティの仮想化ソフトウェアを使用する必要がある場合は、Hyper-V ハイパーバイザーを無効にする必要があります。
Windows セキュリティのコア分離の一部である Device Guard、Credential Guard、メモリ整合性機能など、ハイパーバイザーに依存する他の機能も無効にする必要がある場合があります。
Windows 11 で Hyper-V が実行されているかどうかを確認する方法

システム情報アプリにアクセスして、Hyper-V 仮想化が実行されているかどうかを確認できます。これは、Hyper-V ハイパーバイザーを無効にした後または無効にする前に、その状態を確認する必要がある場合に役立ちます。
コンピューター上の Hyper-V ハイパーバイザーの状態を確認するには:
- Win + R を押して [ファイル名を指定して実行] を開きます。
- 「msinfo32.exe」と入力し、「OK」をクリックしてアプリを開きます。
- 次に、詳細タブの下部に次のエントリが利用可能かどうかを確認します:
<code class="hljs ">A hypervisor has been detected. Features required for Hyper-V will not be displayed.</code>
ログイン後にコピー - 利用可能な場合は、以下で説明するように、Hyper-V、メモリ整合性、および Credential Guard 機能を無効にする必要があります。他の仮想化ツールではエラーは発生しません。
1. Windows のオプション機能を介して Hyper-V を無効にする方法
[Windows の機能] ダイアログを使用すると、Windows 11 でデフォルトで無効になっている機能を追加できます。これを使用して、Hyper-V などの一部の高度な機能を無効にすることもできます。
Hyper-V 検出エラーを修正するには、Hyper-V に加えて、仮想マシン プラットフォームと Windows ハイパーバイザー プラットフォーム機能を無効にする必要があることに注意してください。
[Windows の機能] ダイアログを使用して Hyper-V を無効にするには:
- Win + R キーを押して、[ファイル名を指定して実行] ダイアログを開きます。
- 「control」と入力し、「OK」をクリックしてコントロールパネルを開きます。
- コントロール パネルで、[プログラム] をクリックします。

- 次に、[プログラムと機能] をクリックします。
- 左側のペインで、[Windows の機能をオンまたはオフにする] をクリックします。


- [Windows の機能] ダイアログで、[Hyper-V] を見つけます。
- 機能を無効にするには、Hyper-V オプションのチェックを外します。
- 次に、下にスクロールして、仮想マシン プラットフォーム オプションと Windows ハイパーバイザー プラットフォーム オプションを見つけます。
- 両方のオプションの選択を解除し、[OK] をクリックします。
- Windows は、Hyper-V とその他の機能をシステムからアンインストールします。
- 完了したら、PC を再起動して変更を適用します。


2. BCDEDIT を使用して Hyper-V を無効にする方法

BCDEdit ツールを使用して、ブート構成で Hyper-V を無効にすることができます。これは、Hyper-V を完全にアンインストールするのではなく、非アクティブ化のみを行う場合に便利です。
BCDEdit を使用して Hyper-V を無効にするには:
- Press the Win key and type cmd.
- Right-click on the Command Prompt and select Run as administrator.
- In the Command Prompt window, type the following command and press Enter:
<code class="hljs sql">bcdedit /set hypervisorlaunchtype off</code>
ログイン後にコピー - When the success message appears, close the Command Prompt and restart your PC to apply the changes.
- If you need to activate Hyper-V again, use the following command:
<code class="hljs sql">bcdedit /set hypervisorlaunchtype auto</code>
ログイン後にコピー - Make sure to restart your PC to apply the changes.
Additionally, you can use the BCDEdit tool to perform other advanced tasks, such as deleting the old boot menu options and adding a safe mode shortcut to the Windows 11 boot menu.
3. How to Uninstall Hyper-V Using the Command Prompt

If the Windows Features dialog fails to remove Hyper-V, you can use the Command Prompt to disable the hypervisor. Here's how to do it:
- Open Command Prompt as administrator.
- In the Command Prompt window, type the following command and press Enter:
<code class="hljs bash">dism /online /disable-feature /featurename:Microsoft-hyper-v-all</code>
ログイン後にコピー - Upon execution, the DISM tool will disable Hyper-V and show the operation completed successfully message to indicate successful execution.
- Type exit, press Enter to close the Command Prompt, and restart your PC.
After the restart, you can run your games and other hypervisors without the error. If not, open the Windows Features dialog, disable the Virtual Machine Platform and Windows Hypervisor Platform options, and restart your PC to turn off Hyper-V Hypervisor.
4. How to Disable Hyper-V Using PowerShell

If you prefer PowerShell, use the WindowsOptionalFeature cmdlet to disable Hyper-V in Windows 11. To do this, launch PowerShell with admin privileges and execute the command. Here's how to do it:
- Press the Win key and type powershell.
- Right-click on PowerShell and select Run as administrator.
- Click Yes when prompted by User Account Control.
- In the PowerShell window, copy and paste the command below and press Enter:
<code class="hljs ">Disable-WindowsOptionalFeature -Online -FeatureName Microsoft-Hyper-V-All</code>
ログイン後にコピー - Wait for the process to complete. Once done, close PowerShell and restart your PC to apply the changes.
How to Uninstall the Hyper-V Virtual Network Adapter
During the restart following the uninstallation of Hyper-V, you may frequently encounter the message, "We couldn't complete the updates, undoing changes." To resolve this issue, ensure the Hyper-V virtual network adapters are deleted from your PC. You can delete the virtual network adapter from Device Manager.
To delete Hyper-V's virtual network adapters:
- Press Win + R to open Run.
- Type dvmgmt.msc and click OK to open Device Manager.
- In Device Manager, expand the Network Adapters section to locate the Hyper-V Virtual network adapters.
- If no virtual adapters associated with Hyper-V are listed, click View and select Show hidden devices.
- Right-click on the Hyper-V Virtual Ethernet Adapter and select Uninstall device.
Do not remove the Microsoft Wi-Fi Direct Virtual Adapter.
- Click Uninstall to confirm the action.
- Repeat the steps to delete all the virtual network adapters associated with Hyper-V.
- Once done, close Device Manager and restart your PC. Next, uninstall Hyper-V and check for any improvements.


How to Turn Off Virtualization-Based Security (Memory Integrity)
If you encounter the Hyper-V detected issue even after you disable Hyper-V, try to disable the Memory integrity feature in Windows Security. The Memory integrity feature is part of Core Isolation. It helps prevent hackers from accessing and infecting high-security processes using malicious code.
By default, Windows disables the Memory integrity feature to avoid conflict with apps and device drivers due to incompatibility issues. This can also cause issues with third-party virtualization tools and programs needing access to your system's virtualization hardware.
To turn off Memory integrity in Windows Security:
- Press Win + I to open the Settings app.
- In the left pane, click on the Privacy & security tab.
- Next, click on Windows Security.
- Under the Protection areas section, click on Device security.
- Next, click on Core isolation details under the Core isolation section.
- Toggle the switch under Memory integrity to turn it Off.
- Restart your PC to apply the changes.


How to Disable Device Guard and Credential Guard
Device Guard and Credential Guard don't play well with other virtualization software, including VMware Workstation. You may encounter an error saying Device Guard/Credential Guard is enabled when trying to power on the VMware Workstation.
Since you intend to use third-party virtualization software, you can safely disable Device Guard and Credential Guard using the Registry Editor.
That said, modifying the Windows Registry involves risk. We recommend you create a restore point and take a registry backup before attempting any modifications.
To disable Device Guard and Credential Guard:
- Press Win + R to open Run.
- Type regedit and click OK to open Registry Editor.
- In Registry Editor, navigate to the following location:
<code class="hljs ">HKEY_LOCAL_MACHINE\SYSTEM\CurrentControlSet\Control\Lsa</code>
ログイン後にコピー - In the right pane, locate the LsaCfgFlagsDWORD value. You'll need to create a new key if no such value exists.
- To create a new key, right-click the Lsa subkey in the left pane and select New < DWORD (32-bit)value. Rename the value as LsaCfgFlags.

- Next, double-click on LsaCfgFlags and type 0 in the Value data field.
- Click OK to save the changes.
- Next, in Registry Editor, navigate to the following location:
<code class="hljs ">HKEY_LOCAL_MACHINE\SYSTEM\CurrentControlSet\Control\DeviceGuard</code>
ログイン後にコピー - In the right pane, check if the EnableVirtualizationBasedSecurity value exists. If not, right-click the DeviceGuard subkey and select New > DWORD (32-bit) Value.
- Next, rename the key as EnableVirtualizationBasedSecurity and set its value to 0.
- Click OK to save the changes.


Restart your computer to apply the changes and disable Device Guard and Credential Guard. If you ever need to enable these features, modify the value data and change it to 1.
Disable Hyper-V in Windows 11 to Run Third-Party Virtualization Tools and Apps
Hyper-V is an excellent utility if you want an out-of-the-box virtualization solution. However, you must disable Hyper-V to use third-party virtualization software, including VirtualBox and WMware Workstation.
Fortunately, you can easily disable the Hyper-V Hypervisor and other Virtualization-based Security solutions to use third-party hypervisors without errors.
以上がWindows 11 で Hyper-V を無効または削除する方法の詳細内容です。詳細については、PHP 中国語 Web サイトの他の関連記事を参照してください。

ホットAIツール

Undresser.AI Undress
リアルなヌード写真を作成する AI 搭載アプリ

AI Clothes Remover
写真から衣服を削除するオンライン AI ツール。

Undress AI Tool
脱衣画像を無料で

Clothoff.io
AI衣類リムーバー

Video Face Swap
完全無料の AI 顔交換ツールを使用して、あらゆるビデオの顔を簡単に交換できます。

人気の記事
ホットツール

メモ帳++7.3.1
使いやすく無料のコードエディター

SublimeText3 中国語版
中国語版、とても使いやすい

ゼンドスタジオ 13.0.1
強力な PHP 統合開発環境

ドリームウィーバー CS6
ビジュアル Web 開発ツール

SublimeText3 Mac版
神レベルのコード編集ソフト(SublimeText3)
ホットトピック
 1673
1673
 14
1429
52
1333
25
1278
29
1257
24
14
1429
52
1333
25
1278
29
1257
24

 Windows KB5054979更新情報の更新コンテンツリスト
Apr 15, 2025 pm 05:36 PM
Windows KB5054979更新情報の更新コンテンツリスト
Apr 15, 2025 pm 05:36 PM
KB5054979は、Windows 11バージョン24H2のために、2025年3月27日にリリースされた累積セキュリティアップデートです。 .NETフレームワークバージョン3.5および4.8.1をターゲットにし、セキュリティと全体的な安定性を高めます。特に、更新はファイルと直接の問題に対処します
 Nanoleafは、技術の充電方法を変更したいと考えています
Apr 17, 2025 am 01:03 AM
Nanoleafは、技術の充電方法を変更したいと考えています
Apr 17, 2025 am 01:03 AM
Nanoleafのペグボードデスクドック:スタイリッシュで機能的なデスクオーガナイザー 同じ古い充電セットアップにうんざりしていませんか? Nanoleafの新しいPegboard Desk Dockは、スタイリッシュで機能的な代替品を提供しています。 この多機能デスクアクセサリーは、32のフルカラーRGBを誇っています
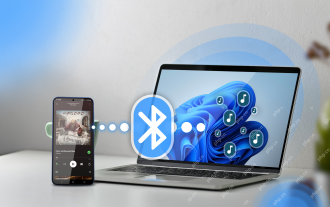 Windows11をBluetoothオーディオレシーバーとして使用する方法
Apr 15, 2025 am 03:01 AM
Windows11をBluetoothオーディオレシーバーとして使用する方法
Apr 15, 2025 am 03:01 AM
Windows 11 PCをBluetoothスピーカーに変え、お気に入りの音楽をお使いのお気に入りの音楽をお楽しみください!このガイドは、iPhoneまたはAndroidデバイスをコンピューターに簡単に接続してオーディオ再生を示します。 ステップ1:Bluetoothデバイスをペアリングします まず、PA
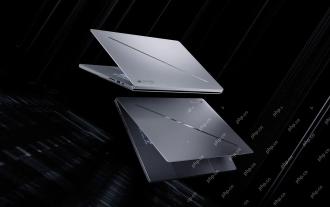 Asus&#039; Rog Zephyrus G14 OLEDゲームラップトップは300ドルです
Apr 16, 2025 am 03:01 AM
Asus&#039; Rog Zephyrus G14 OLEDゲームラップトップは300ドルです
Apr 16, 2025 am 03:01 AM
Asus Rog Zephyrus G14 Esportsラップトップ特別オファー! Asus Rog Zephyrus G14 Esportsラップトップを今すぐ購入して、300ドルのオファーをお楽しみください!元の価格は1999ドル、現在の価格はわずか1699ドルです!いつでもどこでも没入型ゲーム体験をお楽しみください。または、信頼できるポータブルワークステーションとして使用してください。 Best Buyは現在、この2024年14インチのAsus Rog Zephyrus G14 E-Sportsラップトップでオファーを提供しています。その強力な構成とパフォーマンスは印象的です。 このASUS ROG Zephyrus G14 E-Sportsラップトップはベストバイで16かかります
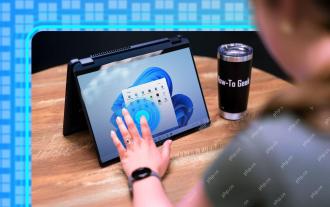 使用する必要がある5つの隠されたWindows機能
Apr 16, 2025 am 12:57 AM
使用する必要がある5つの隠されたWindows機能
Apr 16, 2025 am 12:57 AM
よりスムーズな体験のために、隠されたWindows機能のロックを解除してください! コンピューティングエクスペリエンスを大幅に向上させることができる驚くほど便利なWindows機能を発見してください。ベテランのWindowsユーザーでさえ、ここでいくつかの新しいトリックを見つけるかもしれません。 ダイナミックロック:自動
 Windows11でマウスの加速をオフにする方法(そしてなぜ)
Apr 15, 2025 am 06:06 AM
Windows11でマウスの加速をオフにする方法(そしてなぜ)
Apr 15, 2025 am 06:06 AM
マウスの精度の向上:Windows 11マウスの加速機能を無効にします マウスを数センチで移動する場合でも、マウスカーソルは画面上で速すぎますか?これがマウス加速関数です。この記事では、マウスの動きをよりよく制御するためにこの機能を無効にする方法について説明します。 マウスの加速を無効にするのは賢明ですか? Windowsシステムには、直接的な「マウス加速」オプションはありません。代わりに、それは「強化されたポインター精度」設定であり、マイクロソフトはマウス加速機能と見なしています。 この機能を有効にすると、マウスのDPI(インチあたりのドット)設定が有効になります。マウスの物理的な移動速度と、カーソルが画面上で移動する距離との関係を制御します。マウスをゆっくりと移動すると、Windowsは有効なDPIを減らし、カーソルの動きが短くなります
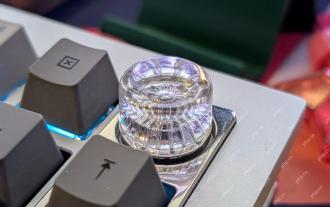 キーボードには大きなol&#039が必要です。ボリュームノブ
Apr 18, 2025 am 03:04 AM
キーボードには大きなol&#039が必要です。ボリュームノブ
Apr 18, 2025 am 03:04 AM
今日のタッチスクリーンの世界では、物理的なコントロールの満足のいく触覚フィードバックは歓迎すべき変化です。 そのため、大きなボリュームノブを備えたキーボードが驚くほど魅力的です。私は最近、これを直接経験しましたが、それは啓示でした。 のために
 マウスなしで右クリックする方法
Apr 18, 2025 pm 12:03 PM
マウスなしで右クリックする方法
Apr 18, 2025 pm 12:03 PM
マウスは、PCで作業を成し遂げるための重要なコンポーネントです。しかし、マウスの誤った状態で立ち往生している場合、右クリックできないなど、いくつかの問題に遭遇する可能性があります。しかし、良いニュースは、間違いなくtがあるということです
