

プロジェクターコネクタの接続方法と注意事項(シンプルで分かりやすいプロジェクターコネクタの接続手順)

テクノロジーの発展に伴い、プロジェクターは私たちの仕事やエンターテイメントに欠かせないものになりました。ただし、プロジェクターを適切に接続する方法は、多くの人にとって混乱する可能性があります。この記事では、プロジェクターのコネクターの接続方法を簡単で分かりやすく紹介し、簡単に接続を完了し、よりスムーズに投写するための注意事項を説明します。

1.VGA connector connection method
-The VGA connector is one of the most common projector connection interfaces.
-Connect the VGA output port of the computer to the VGA input port of the projector with a VGA cable.
-Pay attention to make sure the connection is firm and inserted in the correct direction.
2. HDMI connector connection method
-HDMI connector is a commonly used connection interface for modern projectors.
-Connect the HDMI output port of your computer or other device to the HDMI input port of the projector with an HDMI cable.
-Make sure to insert in the correct direction and make sure the connection is secure.
3.DVI connector connection method
-DVI connector is also a commonly used projector connector.
-Connect the DVI output port of the computer or other device to the DVI input port of the projector with a DVI cable.
-Be careful to avoid excessively twisting the connector when inserting to ensure good signal transmission.
4.USB connector connection method
-Some projectors can connect to computers or other devices through USB connectors.
-Connect the projector's USB input port to the computer's USB output port with a USB cable.
-Please make sure to use a high-quality USB cable to ensure stable signal transmission.
5. Wireless connection method
-Some projectors support wireless connection function.
-Connect your computer or other device with the projector via Wi-Fi or Bluetooth.
-Set up the correct network connections on the projector and device and follow the instructions to pair.
6. Pay Attention to Connector Types and Adapters
- When choosing connectors and adapters, pay attention to their type and compatibility.
- Different projectors may require different types of connectors and adapters.
-Before purchasing, understand the types of connectors required for your projector and equipment and make sure you purchase the correct accessories.
7. Confirm the input signal source
- Before connecting the projector, confirm the input signal source of the device you want to project.
-Different devices may have different input source options, such as computers, DVD players, game consoles, etc.
-Select the correct input source on the projector and connect the device to the corresponding connector.
8. Adjust resolution and screen ratio
- After connecting the projector, make sure the resolution and screen ratio of the computer or other device are compatible with the projector.
-Go into your device's display settings and select the appropriate resolution and screen ratio.
-This ensures that the projected content appears normally and without distortion.
9. Keep signal stable
-During the projector connector connection process, ensure stable signal transmission.
-Avoid cables that are too long or twisted to avoid affecting signal transmission quality.
-Regularly check the connectors and cables to make sure they are not damaged or loose.
10. Adjust projector settings
-After successful connection, adjust the projector settings as needed.
-Adjust parameters such as brightness, contrast, projection distance, etc. to obtain the best projection effect.
-Adjust the lens focus and projection angle according to the projection environment to obtain clear images.
11. Audio connection method
-If you need to play audio through the projector, you need to make an audio connection.
-Connect the audio device (such as a speaker) to the audio output port of the projector via an audio cable.
-Make sure the audio cable is plugged into the correct connector and adjust the volume control.
12. Projector remote control
-Some projectors are equipped with remote control functions such as remote control or mobile APP.
-After the connection is completed, try to use the remote control or APP to control the projector's switch, volume, screen switching and other functions.
-Learn about the remote control methods of the projector to improve the convenience of use.
13. Avoid short circuit and power issues
- When connecting the projector, make sure the device is turned off.
-Avoid touching the metal connectors during the connection process to avoid short circuits.
- Before connecting the power supply, check that all connectors are plugged in correctly and make sure the power cord is grounded.
14. Troubleshooting
-If you encounter problems after connecting, you can try to replug and unplug the connector and cable to check whether the connection is loose.
-Check whether the device and projector settings are correct, such as input signal source, resolution, etc.
-If the problem persists, you can refer to the user manuals of the device and projector, or consult a professional for troubleshooting.
15.
- Correctly connecting the projector connector is an important part of ensuring the projection effect.
-Selecting the appropriate connector type, confirming the input signal source, and adjusting device and projector settings are all keys to ensuring a successful connection.
-Following the correct connection methods and precautions can make your projection experience smoother and more enjoyable.
How to correctly connect the projector connector
In modern meetings, education and entertainment, projectors have become one of the necessary equipment. However, to ensure the effect and quality of projection, correctly connecting the projector's connector is a very critical step. This article will detail how to connect the projector connector correctly to ensure high-quality projection effects.
Understand the different types of projector connectors
Choose the appropriate connector
Check the interface between the projector and the connector
Be ready to connect the required wires
Turn off the projector and power supply
Insert the wires into the interface
Confirm that the connection is correct and then turn the power back on
Adjust the position of the projector and screen
Adjust resolution and display mode
Check the clarity and brightness of the picture
Adjust the size and position of the projected picture
Avoid interference sources that interfere with the signal
Clean connectors and cables regularly
Avoid frequent unplugging and plugging connectors
Keep an eye on the development and updates of new technologies
1. Understand different types of projector connectors
Projectors of different brands and models may use different types of connectors, common ones include HDMI, VGA, USB, etc. Before you connect, first understand the type of connector your projector requires.
2. Choose the appropriate connector
According to the interface type of the projector, select the appropriate connector to connect. Make sure the connector and projector interface are compatible to avoid unnecessary trouble.
3. Check the interface of the projector and the connector
Before making the connection, check whether the interface of the projector and the connector is normal and not damaged or dirty. Ensure that the interface is smooth to obtain high-quality connection results.
4. Prepare the required wires for connection
According to the connector type and the number of interfaces, prepare the required wires, such as HDMI cables, VGA cables, etc. Make sure the wire is of good quality and the right length for easy connection and use.
5. Turn off the projector and power supply
Be sure to turn off the projector and power supply completely before making connector connections. This is to avoid damage to the connector or projector due to excessive current.
6. Insert the cable into the interface
Insert one end of the cable into the corresponding interface of the projector, making sure that the plug and the interface are fully fitted and inserted firmly.
7. Confirm that the connection is correct and then turn the power back on.
After confirming that the connector is connected correctly, turn the power back on. The projector will automatically detect the connection and start displaying the picture.
8. Adjust the position of the projector and screen
Adjust the positions of the projector and screen as needed to ensure the best display range and angle of the projected image.
9. Adjust the resolution and display mode
Adjust the resolution and display mode of the projector according to your needs to obtain the best picture quality and display effect.
10. Check the clarity and brightness of the picture
By observing the clarity and brightness of the projected picture, adjust the focal length, contrast and other parameters of the projector to obtain the best display effect.
11. Adjust the size and position of the projected image
Adjust the size and position of the projected image through the projector's menu or remote control to adapt to different display needs.
12. Avoid interference sources that interfere with the signal
Before connecting the projector, make sure there are no sources of signal interference around you, such as TVs, speakers, etc. These sources of interference may affect the quality of the projected image.
13. Clean connectors and cables regularly
Regular cleaning of connectors and cables can ensure good quality connections. Use a clean cloth or special detergent for cleaning.
14. Avoid frequent plugging and unplugging of connectors
Avoid frequent plugging and unplugging of connectors to avoid damage or loosening of the connectors and affecting the connection quality.
15. Stay tuned for the development and updates of new technologies
With the continuous advancement of technology, the types and connection methods of projector connectors are also constantly updated. Pay attention to the development of new technologies in a timely manner to keep pace with the times.
Correctly connecting the projector connector is an important part of ensuring the projection effect and quality. By understanding the connector types, purchasing appropriate connectors, checking the interfaces, preparing wires, adjusting settings and other steps, you can achieve high-quality projection effects. Regular cleaning of connectors and cables, avoiding frequent plugging and unplugging of connectors, and paying attention to the development of new technologies are also important measures to ensure stable projection effects.
以上がプロジェクターコネクタの接続方法と注意事項(シンプルで分かりやすいプロジェクターコネクタの接続手順)の詳細内容です。詳細については、PHP 中国語 Web サイトの他の関連記事を参照してください。

ホットAIツール

Undresser.AI Undress
リアルなヌード写真を作成する AI 搭載アプリ

AI Clothes Remover
写真から衣服を削除するオンライン AI ツール。

Undress AI Tool
脱衣画像を無料で

Clothoff.io
AI衣類リムーバー

Video Face Swap
完全無料の AI 顔交換ツールを使用して、あらゆるビデオの顔を簡単に交換できます。

人気の記事
ホットツール

メモ帳++7.3.1
使いやすく無料のコードエディター

SublimeText3 中国語版
中国語版、とても使いやすい

ゼンドスタジオ 13.0.1
強力な PHP 統合開発環境

ドリームウィーバー CS6
ビジュアル Web 開発ツール

SublimeText3 Mac版
神レベルのコード編集ソフト(SublimeText3)
ホットトピック
 1670
1670
 14
1428
52
1329
25
1276
29
1256
24
14
1428
52
1329
25
1276
29
1256
24

 携帯電話のデスクトップアイコンの元の外観を復元する方法 (携帯電話のデスクトップアイコンの混乱の問題を簡単に解決します)
Sep 02, 2024 pm 03:05 PM
携帯電話のデスクトップアイコンの元の外観を復元する方法 (携帯電話のデスクトップアイコンの混乱の問題を簡単に解決します)
Sep 02, 2024 pm 03:05 PM
携帯電話を日常的に使用する過程で、携帯電話のデスクトップアイコンが乱雑で気になる状況に遭遇することがよくあります。ただし、いくつかの簡単な操作を行うと、携帯電話のデスクトップ アイコンの元の外観を簡単に復元できます。この記事では、この問題を解決するための効果的な方法をいくつか紹介します。デスクトップ レイアウトのバックアップ 携帯電話のデスクトップ アイコンを復元する前に、まず現在のデスクトップ レイアウトをバックアップする必要があります。電話機の設定を開き、[デスクトップと壁紙] オプションを見つけて、[バックアップと復元] ボタンをクリックし、[デスクトップ レイアウトのバックアップ] を選択すると、電話機は現在のデスクトップ レイアウトを自動的に保存します。システムに付属のアイコン マネージャーを使用します。ほとんどの携帯電話システムには、携帯電話のデスクトップ アイコンを復元するのに役立つアイコン マネージャー機能が用意されています。携帯電話の設定を開き、「アプリと通知」を見つけます
 Oppo 携帯電話のセーフティ モードを無効にする方法 (Oppo 携帯電話のセーフティ モードをすばやく簡単に無効にする)
Sep 02, 2024 pm 03:38 PM
Oppo 携帯電話のセーフティ モードを無効にする方法 (Oppo 携帯電話のセーフティ モードをすばやく簡単に無効にする)
Sep 02, 2024 pm 03:38 PM
場合によっては、Oppo 携帯電話がセーフ モードになり、携帯電話の機能を正常に使用できなくなることがあります。このような状況では、混乱や不安を感じるかもしれません。ただし、心配しないでください。この記事では、Oppo 携帯電話のセーフ モードを無効にして、携帯電話を再び使用できるようにするための簡単な方法をいくつか紹介します。 1. バッテリー残量を確認します。OPPO 携帯電話のバッテリー残量が低すぎると、携帯電話が自動的にセーフ モードになる可能性があります。携帯電話が完全に充電されていることを確認し、携帯電話を再起動してみてください。電源ボタンを長押しする 場合によっては、電源ボタンを長押しすると、OPPO 携帯電話がセーフ モードを終了できることがあります。電源ボタンを数秒間押し続けて、セーフ モードを終了できるかどうかを確認してください。音量キーを確認してください。 場合によっては、音量キーの間違った組み合わせを押すと、
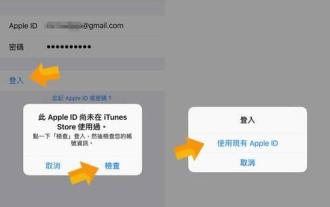 香港Apple ID登録の手順と注意点(香港Apple Storeならではのメリットを享受)
Sep 02, 2024 pm 03:47 PM
香港Apple ID登録の手順と注意点(香港Apple Storeならではのメリットを享受)
Sep 02, 2024 pm 03:47 PM
Appleの製品とサービスは、常に世界中のユーザーに愛され続けています。香港 Apple ID を登録すると、ユーザーはさらに便利になり、特典が得られます。香港 Apple ID の登録手順と注意点を見てみましょう。香港 Apple ID の登録方法 Apple デバイスを使用する場合、多くのアプリケーションや機能では、Apple ID を使用してログインする必要があります。香港からアプリケーションをダウンロードしたり、香港 AppStore の優待コンテンツを楽しみたい場合は、香港の Apple ID を登録することが非常に必要です。この記事では香港のApple IDの登録手順と注意点を詳しく解説します。手順: 言語と地域を選択します。Apple デバイスで「設定」オプションを見つけて、次のように入力します。
 Samsung モニターの画面がぼやける問題の解決策 (Samsung モニターの画面がぼやける現象に対処する方法)
Sep 04, 2024 pm 01:32 PM
Samsung モニターの画面がぼやける問題の解決策 (Samsung モニターの画面がぼやける現象に対処する方法)
Sep 04, 2024 pm 01:32 PM
技術の継続的な発展により、モニターは人々の日常生活や仕事に欠かせないものになりました。ただし、Samsung 製モニターで画面がぼやけるなどの問題が発生する場合があります。この記事では、この問題に適切に対処するのに役立つ一般的な解決策をいくつか紹介します。 1. 接続ケーブルがしっかりと接続されているかどうかを確認します。VGA、DVI、または HDMI ケーブルが損傷しておらず、モニター、コンピューター、またはその他のデバイスにしっかりと接続されていることを確認します。 - 接続ケーブルのインターフェースに緩みや汚れがないか確認し、必要に応じて清掃または交換してください。 2. 解像度とリフレッシュ レートを調整する - コンピュータ システムのモニタの解像度とリフレッシュ レートを調整して、モニタのデフォルト設定と一致するようにします。 - さまざまな設定を試して、画面がぼやける問題を解決できるかどうかを確認します。
 ナイキシューズの靴箱の本物と偽物の見分け方(簡単に見分けるコツをマスター)
Sep 02, 2024 pm 04:11 PM
ナイキシューズの靴箱の本物と偽物の見分け方(簡単に見分けるコツをマスター)
Sep 02, 2024 pm 04:11 PM
世界的に有名なスポーツブランドとして、ナイキのシューズは大きな注目を集めています。しかし、市場にはナイキの偽物の靴箱などの偽造品も多数出回っています。消費者の権利と利益を保護するには、本物の靴箱と偽物の靴箱を区別することが重要です。この記事では、本物の靴箱と偽物の靴箱を見分けるための簡単で効果的な方法をいくつか紹介します。 1: 外箱のタイトル ナイキの靴箱の外箱を観察すると、多くの微妙な違いを見つけることができます。ナイキの純正靴箱は通常、手触りが滑らかで、明らかな刺激臭のない高品質の紙素材を使用しています。本物の靴箱のフォントとロゴは通常、鮮明で詳細で、ぼやけや色の不一致はありません。 2: ロゴのホットスタンプのタイトル。ナイキの靴箱のロゴは通常、純正の靴箱のホットスタンプ部分に表示されます。
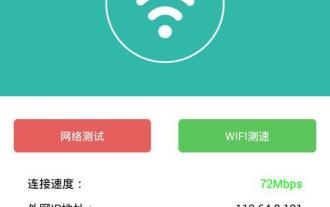 AndroidスマホでWiFiのパスワードを確認する方法(簡単な操作で接続中のWiFiのパスワードを簡単に取得できます)
Sep 02, 2024 pm 05:10 PM
AndroidスマホでWiFiのパスワードを確認する方法(簡単な操作で接続中のWiFiのパスワードを簡単に取得できます)
Sep 02, 2024 pm 05:10 PM
ワイヤレス ネットワークの普及により、さまざまな WiFi ネットワークに接続することが多くなりますが、特定の WiFi ネットワークのパスワードを忘れてしまうことがあります。この記事では、Android スマートフォンで接続されている WiFi のパスワードを確認し、簡単に取得して記録できる方法を紹介します。段落 1. システム設定から WiFi 設定ページに入ります。電話設定の [WiFi] オプションをクリックして、WiFi 設定ページに入ります。 2. 接続されている WiFi ネットワークを選択します。WiFi 設定ページで、接続されている WiFi ネットワークの名前を見つけてクリックします。 3. WiFi ネットワークの詳細ページに入ります。ポップアップ ウィンドウで、[ネットワークの詳細] または同様のオプションをクリックして、WiFi ネットワークの詳細ページに入ります。 4.接続されているWiFiの高速性を表示します
 最適なビデオ プレーヤー ソフトウェアを選択します (さまざまなビデオ プレーヤー ソフトウェアの長所と短所を比較します)
Sep 02, 2024 pm 03:03 PM
最適なビデオ プレーヤー ソフトウェアを選択します (さまざまなビデオ プレーヤー ソフトウェアの長所と短所を比較します)
Sep 02, 2024 pm 03:03 PM
インターネットとスマートデバイスの普及により、ビデオは人々の日常生活に欠かせないものになりました。ビデオ プレーヤー ソフトウェアを選択するときは、優れたユーザー エクスペリエンス、安定した再生パフォーマンスを提供し、さまざまな一般的なビデオ形式をサポートできることを期待します。この記事では、読者が自分のニーズに合ったソフトウェアを選択できるように、現在市販されているいくつかの有名なビデオプレーヤーソフトウェアを紹介し、機能と特徴に基づいて評価します。 1. 人気のビデオ プレーヤー ソフトウェアの紹介と比較 Windows Media Player: 使いやすく、Windows システムに付属、一般的な形式をサポート、機能は限定的 VLC Media Player: 強力なデコード機能、さまざまな形式を幅広くサポート、シンプルなインターフェイス PotPlayer: 高度にカスタマイズ可能 複数のサポートフォーマット
 カラーシリコン携帯電話ケースの掃除方法(簡単で実用的な掃除のヒントと注意事項)
Sep 02, 2024 pm 04:09 PM
カラーシリコン携帯電話ケースの掃除方法(簡単で実用的な掃除のヒントと注意事項)
Sep 02, 2024 pm 04:09 PM
色付きのシリコン製携帯電話ケースは、現代の携帯電話愛好家にとって一般的なアクセサリーの 1 つですが、一定期間使用すると、必然的に汚れやほこりが電話ケースに蓄積し、外観や衛生状態に影響を及ぼします。カラーシリコン携帯電話ケースを適切に掃除する方法は、すべての携帯電話ユーザーが知っておくべきことです。この記事では、カラーシリコン携帯電話ケースを簡単に掃除するための、簡単で実用的な掃除のヒントと注意事項を紹介します。 1. お手入れ前の準備 お手入れの前に、まず電話の電源が切れていることを確認し、電話を電話ケースから外してください。次に、柔らかい毛のブラシ、中性洗剤、ぬるま湯、清潔なタオルなどの道具を準備します。 2. 柔らかい毛のブラシを使用して、着色されたシリコン製の電話ケースの表面にあるほこりのほとんどを優しく取り除きます。電話ケースをペーパータオルの上に置きます。粉塵の飛散を防ぎます。欲しい
