

HTML で Web ページをデザインする

HTML はハイパーテキスト マークアップ言語として知られ、Web ページのデザインやコンテンツの構造化に使用される最も一般的な言語の 1 つです。 HTML は、タグ、要素、画像、およびいくつかの最新コンポーネントを使用して、Web ページをより魅力的でユーザーフレンドリーなものにします。
HTML と CSS を組み合わせることで、Web ページの外観を簡単にカスタマイズできます。 HTML は、World Wide Web 上で Web ページを適切に構造化する上で重要な役割を果たします。シンプルなテキストエディタを使用して編集できるため、ユーザーはいつでも必要に応じて変更を加えることができます。
HTML で Web ページをデザインするには? (ステップバイステップ)
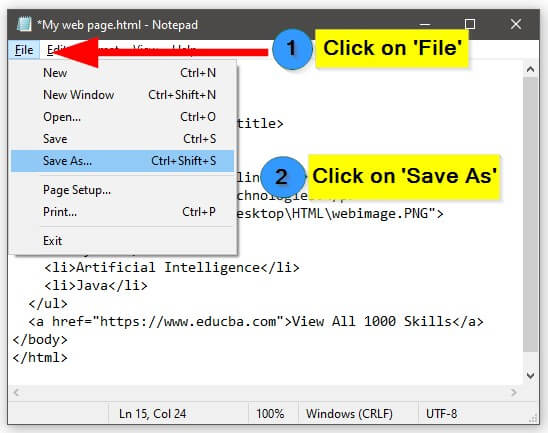
ステップ 1: プロジェクトをセットアップする
- Web ページのファイルを保存する新しいフォルダーをコンピューター上に作成します。

- HTML コードを作成するには、メモ帳、Sublime Text、Visual Studio Code などのテキスト エディターを開きます。

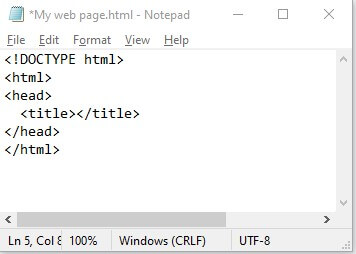
ステップ 2: HTML 構造から開始します
- HTML ファイルの先頭に 宣言を追加します。これにより、HTML5 を使用していることがブラウザに伝えられます。
- HTML の開始タグと終了タグを作成します: .
- HTML タグ内に、head の開始タグと終了タグを作成します: .
- head タグ内に、タイトルの開始タグと終了タグを追加します:
。ここにウェブページのタイトルを書きます。
ステップ 3: 本文にコンテンツを追加する
- head の終了タグの後に、body の開始タグと終了タグを作成します: 。ここに、Web ページに表示されるすべてのコンテンツを配置します。
- body タグ内で、見出し、段落、画像、リンクなどの要素の追加を開始できます。
- 見出しを追加するには、メイン見出しに タグを使用し、、 など、小見出しが続きます。
- 段落を追加するには、 を使用します。
- 画像を追加するには、
を使用します。タグを使用するには、src 属性を指定する必要があります。これには、画像ファイルの場所を指すファイル パスまたは URL が含まれている必要があります。
- リンクを追加するには、 タグと URL を指定する href 属性を使用します。
理解を深めるために、コードを次に示します。
<!DOCTYPE html>
<html>
<head>
<title>My First Web Page</title>
</head>
<body>
<h1>Unlock the Power of Online Learning</h1>
<p>Master 1000+ Tools & Technologies.</p>
<img src="C:\Users\Demo2\Desktop\HTML\webimage.PNG">
<ul>
<li>Python</li>
<li>Artificial Intelligence</li>
<li>Java</li>
</ul>
<a href="https://www.educba.com">View All 1000 Skills</a>
</body>
</html>
ステップ 4: HTML ファイルを保存します
- 以前に作成したフォルダーに、 .html 拡張子 を付けてファイルを保存します。
- my web page.html (通常、Web サイトのメイン ページとして使用されます) など、ファイルにわかりやすい名前を選択します。

ステップ 5: Web ページを表示する
- Chrome、Firefox、Safari などの Web ブラウザで HTML ファイルを開きます。

- 追加したコンテンツを示す以下の Web ページがブラウザに表示されるはずです。
出力:

ステップ 6: Web ページの強化を続ける
- 追加の HTML タグと属性を調べて、Web ページの構造とデザインをさらに強化します。
- Web ページのスタイルを設定し、視覚的に魅力的なものにするための CSS (カスケード スタイル シート) を学びます。
- フォーム、テーブル、マルチメディア要素など、より高度な HTML 機能を試してみましょう。
Web デザイン用の HTML タグと要素
ここでは、HTML で Web ページをデザインする際に重要な HTML タグと要素のリストを示します。
| HTML Tag/Element | Purpose | |||||||||||||||||||||||||||||||
to |
Define different levels of headings | |||||||||||||||||||||||||||||||
| Define paragraphs of text | ||||||||||||||||||||||||||||||||
| Create line breaks | ||||||||||||||||||||||||||||||||
| Create an ordered list | ||||||||||||||||||||||||||||||||
| Create an unordered list | ||||||||||||||||||||||||||||||||
| Define items within a list | ||||||||||||||||||||||||||||||||
| Create hyperlinks | ||||||||||||||||||||||||||||||||
| Insert images | ||||||||||||||||||||||||||||||||
Examples of Design Web Pages in HTMLLet’s create some web pages to see the resultant web page. Example #1: Travel WebpageHere, we will create an amazing travel webpage showcasing places to visit in Switzerland. We will set one background image and add some text using HTML Code and Styling. HTML Code: <head>
<style>
.card {
max-width: 380px;
margin: auto;
text-align: center;
}
#main {
background-image: url('switzerland.jpg');
background-repeat: no-repeat;
background-size: cover;
}
.price {
color: #f1294a;
font-size: 18px;
}
.card button {
padding: 10px;
color: white;
background-color: #f1294a;
text-align: center;
}
</style>
</head>
<body id="main">
<h2 style="text-align:center">Places to Visit in Switzerland</h2>
<div class="card">
<h1><b>Explore Switzerland</b></h1>
<h3 class="price">Starting from CHF 2000</h3>
<h2>
<ul>
<li>Zurich</li>
<li>Geneva</li>
<li>Lucerne</li>
<li>Interlaken</li>
<li>Zermatt</li>
</ul>
</h2>
<p><button>Book Here</button></p>
</div>
</body>ログイン後にコピー Output: Example #2: Feedback FormWe will build one Feedback form in the form of a web page in this example. <!DOCTYPE html>
<html>
<head>
<meta name="viewport" content="width=device-width, initial-scale=1">
<style>
body {
font-family: Arial, sans-serif;
}
input[type=text], select, textarea {
width: 100%;
padding: 8px;
border: 1px solid #ccc;
border-radius: 4px;
margin-top: 4px;
margin-bottom: 10px;
}
input[type=submit] {
background-color: #4CAF50;
color: white;
padding: 8px 12px;
border: none;
border-radius: 4px;
cursor: pointer;
}
.container {
width: 80%;
max-width: 500px;
margin: 0 auto;
border-radius: 6px;
background-color: #F2F2F2;
padding: 20px;
}
h3 {
text-align: center;
}
label {
font-weight: bold;
}
textarea {
resize: vertical;
}
/* Optional: Add additional styles to make it more visually appealing */
.container {
box-shadow: 0 2px 4px rgba(0, 0, 0, 0.1);
}
input[type=submit]:hover {
background-color: #45a049;
}
</style>
</head>
<body>
<h3>We Value Your Suggestions!</h3>
<div class="container">
<form>
<label for="fname">First Name</label>
<input type="text" id="fname" name="firstname" placeholder="Enter your name">
<label for="lname">Last Name</label>
<input type="text" id="lname" name="lastname" placeholder="Enter your last name">
<label for="email">Email</label>
<input type="text" id="email" name="email" placeholder="Enter your email here">
<label for="subject">Suggestion</label>
<textarea id="subject" name="subject" placeholder="Provide your suggestion" style="height: 100px"></textarea>
<input type="submit" value="Submit">
</form>
</div>
</body>
</html>ログイン後にコピー Output: Example #3: OTT Platform HomepageIn this example, we will create another web page that showcases an amazing homepage for an OTT platform. HTML Code: <!DOCTYPE html>
<html>
<head>
<title>My OTT Platform</title>
<style>
/* CSS styles for the website */
body {
font-family: Arial, sans-serif;
margin: 0;
padding: 0;
background-color: #000;
color: #fff;
}
header {
background-color: #e50914;
padding: 20px;
text-align: center;
}
header h1 {
margin: 0;
font-size: 28px;
text-transform: uppercase;
color: #fff;
}
nav {
background-color: #000;
padding: 10px;
text-align: center;
}
nav a {
text-decoration: none;
margin: 10px;
color: #fff;
font-weight: bold;
}
main {
padding: 20px;
}
footer {
background-color: #e50914;
padding: 20px;
text-align: center;
}
.video {
display: flex;
flex-wrap: wrap;
justify-content: center;
margin-bottom: 20px;
}
.video .thumbnail {
position: relative;
width: 250px;
height: 140px;
margin: 10px;
overflow: hidden;
transition: transform 0.3s;
background-color: #333;
}
.video .thumbnail img {
width: 100%;
height: 100%;
object-fit: cover;
}
.video .thumbnail:hover {
transform: scale(1.1);
}
.video .title {
position: absolute;
bottom: 0;
left: 0;
width: 100%;
background-color: rgba(0, 0, 0, 0.7);
color: #fff;
padding: 10px;
margin: 0;
font-weight: bold;
}
/* Additional styles for Netflix-like appearance */
header, nav, main, footer {
max-width: 1200px;
margin: 0 auto;
}
.video .thumbnail {
width: 275px;
height: 155px;
}
.video .title {
font-size: 14px;
padding: 8px;
}
</style>
</head>
<body>
<header>
<h1>Welcome to My OTT Platform</h1>
</header>
<nav>
<a href="#">Home</a>
<a href="#">Movies</a>
<a href="#">TV Shows</a>
<a href="#">Documentaries</a>
<a href="#">My Account</a>
</nav>
<main>
<h2>Trending Now</h2>
<div class="video">
<div class="thumbnail">
<img src="video5.jpg" alt="Video 5">
<div class="title">Movie1</div>
</div>
<div class="thumbnail">
<img src="video6.jpg" alt="Video 6">
<div class="title">Movie2</div>
</div>
<div class="thumbnail">
<img src="video7.jpg" alt="Video 7">
<div class="title">Movie3</div>
</div>
</div>
<h2>Top 3 Shows</h2>
<div class="video">
<div class="thumbnail">
<img src="video8.jpg" alt="Video 8">
<div class="title">Show1</div>
</div>
<div class="thumbnail">
<img src="video9.jpg" alt="Video 9">
<div class="title">Show2</div>
</div>
<div class="thumbnail">
<img src="video10.jpg" alt="Video 10">
<div class="title">Show3</div>
</div>
</div>
<h2>International Movies</h2>
<div class="video">
<div class="thumbnail">
<img src="video11.jpg" alt="Video 11">
<div class="title">Movie1</div>
</div>
<div class="thumbnail">
<img src="video12.jpg" alt="Video 12">
<div class="title">Movie2</div>
</div>
<div class="thumbnail">
<img src="video13.jpg" alt="Video 13">
<div class="title">Movie3</div>
</div>
</div>
</main>
<footer>
<p>© 2023 My OTT Platform. All rights reserved.</p>
</footer>
</body>
</html>ログイン後にコピー Output: Example #4 Newsletter Subscription PageIn this example, let’s create a simple subscription page where users can subscribe to a newsletter. <form action="newsletter.php" method="post" style="background-color: #f2f2f2; padding: 20px; border-radius: 10px;"> <h2 style="color: #333;">Join our Newsletter!</h2> <div class="form-group"> <label for="name" style="color: #333;">Name:</label> <input type="text" id="name" name="name" placeholder="Enter your name" required style="padding: 5px; border: 1px solid #ccc; border-radius: 5px;"> </div> <div class="form-group"> <label for="email" style="color: #333;">Email:</label> <input type="email" id="email" name="email" placeholder="Enter your email" required style="padding: 5px; border: 1px solid #ccc; border-radius: 5px;"> </div> <div class="form-group"> <label for="interests" style="color: #333;">Interests:</label> <select id="interests" name="interests" multiple style="padding: 5px; border: 1px solid #ccc; border-radius: 5px;"> <option value="technology">Technology</option> <option value="fashion">Fashion</option> <option value="food">Food</option> <option value="travel">Travel</option> <option value="sports">Sports</option> </select> </div> <button type="submit" style="background-color: #04aa6d; color: #fff; padding: 10px 20px; border: none; border-radius: 5px; cursor: pointer;">Subscribe Now!</button> </form> ログイン後にコピー Output: Example #5: Guess the Number GameIn this instance, we will design a simple game where users have to guess the number generated by the system. <!DOCTYPE html>
<html>
<head>
<title>Guessing Game</title>
<style>
body {
text-align: center;
padding-top: 100px;
font-family: Arial, sans-serif;
background-color: #f2f2f2;
}
h1 {
color: #333333;
}
p {
color: #666666;
}
input {
padding: 10px;
font-size: 16px;
border-radius: 4px;
border: 1px solid #cccccc;
}
button {
padding: 10px 20px;
font-size: 16px;
background-color: #4CAF50;
color: white;
border-radius: 4px;
border: none;
cursor: pointer;
}
button:hover {
background-color: #45a049;
}
#result {
margin-top: 20px;
font-weight: bold;
}
</style>
</head>
<body>
<h1>Guessing Game</h1>
<p>Guess a number between 1 and 10:</p>
<input type="number" id="guess" min="1" max="10">
<button onclick="checkGuess()">Submit</button>
<p id="result"></p>
<script>
function checkGuess() {
var guess = parseInt(document.getElementById("guess").value);
var randomNumber = Math.floor(Math.random() * 10) + 1;
if (guess === randomNumber) {
document.getElementById("result").innerHTML = "Congratulations! You guessed the correct number.";
} else {
document.getElementById("result").innerHTML = "Wrong guess. The correct number was " + randomNumber + ".";
}
}
</script>
</body>
</html>ログイン後にコピー Output: ConclusionFrom all the above discussion, we can say that Web pages are created by using HTML code in a very simplified manner. Just simply put your HTML code in any one editor, save it with the .html extension, and open it within any browser. 以上がHTML で Web ページをデザインするの詳細内容です。詳細については、PHP 中国語 Web サイトの他の関連記事を参照してください。 このウェブサイトの声明
この記事の内容はネチズンが自主的に寄稿したものであり、著作権は原著者に帰属します。このサイトは、それに相当する法的責任を負いません。盗作または侵害の疑いのあるコンテンツを見つけた場合は、admin@php.cn までご連絡ください。

ホットAIツール
Undresser.AI Undressリアルなヌード写真を作成する AI 搭載アプリ 
AI Clothes Remover写真から衣服を削除するオンライン AI ツール。 
Undress AI Tool脱衣画像を無料で 
Clothoff.ioAI衣類リムーバー 
Video Face Swap完全無料の AI 顔交換ツールを使用して、あらゆるビデオの顔を簡単に交換できます。 
人気の記事
Windows11 KB5054979の新しいものと更新の問題を修正する方法
4週間前
By DDD
KB5055523を修正する方法Windows 11にインストールできませんか?
3週間前
By DDD
KB5055518を修正する方法Windows 10にインストールできませんか?
3週間前
By DDD
R.E.P.O.のすべての敵とモンスターの強度レベル
3週間前
By 尊渡假赌尊渡假赌尊渡假赌
ブループリンス:地下室への行き方
3週間前
By DDD
ホットツール
メモ帳++7.3.1使いやすく無料のコードエディター 
SublimeText3 中国語版中国語版、とても使いやすい 
ゼンドスタジオ 13.0.1強力な PHP 統合開発環境 
ドリームウィーバー CS6ビジュアル Web 開発ツール 
SublimeText3 Mac版神レベルのコード編集ソフト(SublimeText3)
ホットトピック
Gmailメールのログイン入り口はどこですか?
 7922
7922
 15
15
Java チュートリアル
1652
14
CakePHP チュートリアル
1411
52
Laravel チュートリアル
1303
25
PHP チュートリアル
1249
29
 HTMLの表の境界線
Sep 04, 2024 pm 04:49 PM
HTMLの表の境界線
Sep 04, 2024 pm 04:49 PM
HTML の表の境界線に関するガイド。ここでは、HTML でのテーブルの境界線の例を示しながら、テーブル境界線を定義する複数の方法について説明します。  HTML のネストされたテーブル
Sep 04, 2024 pm 04:49 PM
HTML のネストされたテーブル
Sep 04, 2024 pm 04:49 PM
これは、HTML でのネストされたテーブルのガイドです。ここでは、テーブル内にテーブルを作成する方法をそれぞれの例とともに説明します。  HTML 左マージン
Sep 04, 2024 pm 04:48 PM
HTML 左マージン
Sep 04, 2024 pm 04:48 PM
HTML マージン左のガイド。ここでは、HTML margin-left の概要とその例、およびそのコード実装について説明します。  HTML テーブルのレイアウト
Sep 04, 2024 pm 04:54 PM
HTML テーブルのレイアウト
Sep 04, 2024 pm 04:54 PM
HTML テーブル レイアウトのガイド。ここでは、HTML テーブル レイアウトの値と例および出力について詳しく説明します。  HTML入力プレースホルダー
Sep 04, 2024 pm 04:54 PM
HTML入力プレースホルダー
Sep 04, 2024 pm 04:54 PM
HTML 入力プレースホルダーのガイド。ここでは、コードと出力とともに HTML 入力プレースホルダーの例について説明します。  HTML の onclick ボタン
Sep 04, 2024 pm 04:49 PM
HTML の onclick ボタン
Sep 04, 2024 pm 04:49 PM
HTML オンクリック ボタンのガイド。ここでは、それらの紹介、動作、例、およびさまざまなイベントでの onclick イベントについてそれぞれ説明します。  HTML 内のテキストの移動
Sep 04, 2024 pm 04:45 PM
HTML 内のテキストの移動
Sep 04, 2024 pm 04:45 PM
HTML でのテキストの移動に関するガイド。ここでは、概要、マーキー タグが構文でどのように機能するか、および実装例について説明します。 
|


