この記事では、AWS S3 にファイルをアップロードするために必要な手順を、Documenso と AWS S3 画像アップロードの例で比較します。
Vercel が提供する簡単な例から始めます。

Vercel は、AWS S3 にファイルをアップロードする良い例を提供します。
この例の README では、既存の S3 バケットを使用するか、新しいバケットを作成するかの 2 つのオプションが提供されています。これを理解すると役立ちます
アップロード機能が正しく設定されています。
そろそろソースコードを見てみましょう。 type=file の入力要素を探しています。 app/page.tsx には、次のコードがあります:
return (
    <main>
      <h1>Upload a File to S3</h1>
      <form onSubmit={handleSubmit}>
        <input
         >


<h2>


  <strong>onChange</strong>
</h2>

<p>onChange updates state using setFile, but it does not do the uploading. upload happens when you submit this form.<br>
</p>

<pre class="brush:php;toolbar:false">onChange={(e) => {
  const files = e.target.files
  if (files) {
    setFile(files[0])
  }
}}
handleSubmit 関数では多くのことが行われています。この handleSubmit 関数の操作のリストを分析する必要があります。手順を説明するために、このコード スニペット内にコメントを書きました。
const handleSubmit = async (e: React.FormEvent<HTMLFormElement>) => {
    e.preventDefault()

    if (!file) {
      alert('Please select a file to upload.')
      return
    }

    setUploading(true)

    const response = await fetch(
      process.env.NEXT_PUBLIC_BASE_URL + '/api/upload',
      {
        method: 'POST',
        headers: {
          'Content-Type': 'application/json',
        },
        body: JSON.stringify({ filename: file.name, contentType: file.type }),
      }
    )

    if (response.ok) {
      const { url, fields } = await response.json()

      const formData = new FormData()
      Object.entries(fields).forEach(([key, value]) => {
        formData.append(key, value as string)
      })
      formData.append('file', file)

      const uploadResponse = await fetch(url, {
        method: 'POST',
        body: formData,
      })

      if (uploadResponse.ok) {
        alert('Upload successful!')
      } else {
        console.error('S3 Upload Error:', uploadResponse)
        alert('Upload failed.')
      }
    } else {
      alert('Failed to get pre-signed URL.')
    }

    setUploading(false)
  }
api/upload/route.ts には以下のコードがあります:
import { createPresignedPost } from '@aws-sdk/s3-presigned-post'
import { S3Client } from '@aws-sdk/client-s3'
import { v4 as uuidv4 } from 'uuid'

export async function POST(request: Request) {
  const { filename, contentType } = await request.json()

  try {
    const client = new S3Client({ region: process.env.AWS_REGION })
    const { url, fields } = await createPresignedPost(client, {
      Bucket: process.env.AWS_BUCKET_NAME,
      Key: uuidv4(),
      Conditions: [
        ['content-length-range', 0, 10485760], // up to 10 MB
        ['starts-with', '$Content-Type', contentType],
      ],
      Fields: {
        acl: 'public-read',
        'Content-Type': contentType,
      },
      Expires: 600, // Seconds before the presigned post expires. 3600 by default.
    })

    return Response.json({ url, fields })
  } catch (error) {
    return Response.json({ error: error.message })
  }
}
handleSubmit の最初のリクエストは /api/upload に対するもので、コンテンツ タイプとファイル名をペイロードとして送信します。以下のように解析されます:
const { filename, contentType } = await request.json()
次のステップは、S3 クライアントを作成し、URL とフィールドを返す署名付き投稿を作成することです。この URL を使用してファイルをアップロードします。
この知識を基に、Documenso でアップロードがどのように機能するかを分析し、比較してみましょう。
type=file の input 要素から始めましょう。 Documenso ではコードの編成が異なります。 input 要素は、 document-dropzone.tsx.
という名前のファイル内にあります。
<input {...getInputProps()} />

<p className="text-foreground mt-8 font-medium">{_(heading[type])}</p>
ここでは getInputProps が useDropzone として返されます。 Documenso は、react-dropzone を使用します。
import { useDropzone } from 'react-dropzone';
onDrop は props.onDrop を呼び出します。upload-document.tsx に onFileDrop という名前の属性値が見つかります。
<DocumentDropzone
  className="h-[min(400px,50vh)]"
  disabled={remaining.documents === 0 || !session?.user.emailVerified}
  disabledMessage={disabledMessage}
  onDrop={onFileDrop}
  onDropRejected={onFileDropRejected}
/>
onFileDrop 関数で何が起こるかを見てみましょう。
const onFileDrop = async (file: File) => {
    try {
      setIsLoading(true);

      const { type, data } = await putPdfFile(file);

      const { id: documentDataId } = await createDocumentData({
        type,
        data,
      });

      const { id } = await createDocument({
        title: file.name,
        documentDataId,
        teamId: team?.id,
      });

      void refreshLimits();

      toast({
        title: _(msg`Document uploaded`),
        description: _(msg`Your document has been uploaded successfully.`),
        duration: 5000,
      });

      analytics.capture('App: Document Uploaded', {
        userId: session?.user.id,
        documentId: id,
        timestamp: new Date().toISOString(),
      });

      router.push(`${formatDocumentsPath(team?.url)}/${id}/edit`);
    } catch (err) {
      const error = AppError.parseError(err);

      console.error(err);

      if (error.code === 'INVALID_DOCUMENT_FILE') {
        toast({
          title: _(msg`Invalid file`),
          description: _(msg`You cannot upload encrypted PDFs`),
          variant: 'destructive',
        });
      } else if (err instanceof TRPCClientError) {
        toast({
          title: _(msg`Error`),
          description: err.message,
          variant: 'destructive',
        });
      } else {
        toast({
          title: _(msg`Error`),
          description: _(msg`An error occurred while uploading your document.`),
          variant: 'destructive',
        });
      }
    } finally {
      setIsLoading(false);
    }
  };
多くのことが起こりますが、分析のために、putFile という名前の関数だけを考えてみましょう。
putPdfFile は、upload/put-file.ts で定義されています
/**
 * Uploads a document file to the appropriate storage location and creates
 * a document data record.
 */
export const putPdfFile = async (file: File) => {
  const isEncryptedDocumentsAllowed = await getFlag('app_allow_encrypted_documents').catch(
    () => false,
  );

  const pdf = await PDFDocument.load(await file.arrayBuffer()).catch((e) => {
    console.error(`PDF upload parse error: ${e.message}`);

    throw new AppError('INVALID_DOCUMENT_FILE');
  });

  if (!isEncryptedDocumentsAllowed && pdf.isEncrypted) {
    throw new AppError('INVALID_DOCUMENT_FILE');
  }

  if (!file.name.endsWith('.pdf')) {
    file.name = `${file.name}.pdf`;
  }

  removeOptionalContentGroups(pdf);

  const bytes = await pdf.save();

  const { type, data } = await putFile(new File([bytes], file.name, { type: 'application/pdf' }));

  return await createDocumentData({ type, data });
};
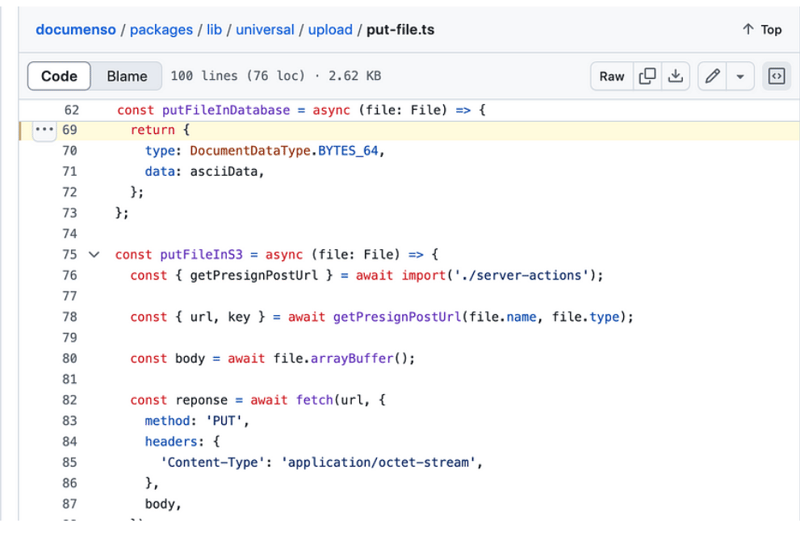
これは putFile 関数を呼び出します。
/**
 * Uploads a file to the appropriate storage location.
 */
export const putFile = async (file: File) => {
  const NEXT_PUBLIC_UPLOAD_TRANSPORT = env('NEXT_PUBLIC_UPLOAD_TRANSPORT');

  return await match(NEXT_PUBLIC_UPLOAD_TRANSPORT)
    .with('s3', async () => putFileInS3(file))
    .otherwise(async () => putFileInDatabase(file));
};
const putFileInS3 = async (file: File) => {
  const { getPresignPostUrl } = await import('./server-actions');

  const { url, key } = await getPresignPostUrl(file.name, file.type);

  const body = await file.arrayBuffer();

  const reponse = await fetch(url, {
    method: 'PUT',
    headers: {
      'Content-Type': 'application/octet-stream',
    },
    body,
  });

  if (!reponse.ok) {
    throw new Error(
      `Failed to upload file "${file.name}", failed with status code ${reponse.status}`,
    );
  }

  return {
    type: DocumentDataType.S3_PATH,
    data: key,
  };
};
export const getPresignPostUrl = async (fileName: string, contentType: string) => {
  const client = getS3Client();

  const { getSignedUrl } = await import('@aws-sdk/s3-request-presigner');

  let token: JWT | null = null;

  try {
    const baseUrl = APP_BASE_URL() ?? 'http://localhost:3000';

    token = await getToken({
      req: new NextRequest(baseUrl, {
        headers: headers(),
      }),
    });
  } catch (err) {
    // Non server-component environment
  }

  // Get the basename and extension for the file
  const { name, ext } = path.parse(fileName);

  let key = `${alphaid(12)}/${slugify(name)}${ext}`;

  if (token) {
    key = `${token.id}/${key}`;
  }

  const putObjectCommand = new PutObjectCommand({
    Bucket: process.env.NEXT_PRIVATE_UPLOAD_BUCKET,
    Key: key,
    ContentType: contentType,
  });

  const url = await getSignedUrl(client, putObjectCommand, {
    expiresIn: ONE_HOUR / ONE_SECOND,
  });

  return { key, url };
};
Documenso には POST リクエストが表示されません。 getSignedUrl という名前の関数を使用して URL を取得しますが、
vercel の例は、api/upload Route に POST リクエストを作成します。
これは単なる例であるため、Vercel の例では入力要素を簡単に見つけることができますが、Documenso が見つかります
反応ドロップゾーンを使用しており、入力要素はビジネスコンテキストに従って配置されています。
Thinkthroo では、大規模なオープンソース プロジェクトを研究し、アーキテクチャ ガイドを提供しています。私たちは、tailwind で構築された、プロジェクトで使用できる再利用可能なコンポーネントを開発しました。
Next.js、React、Node 開発サービスを提供します。
プロジェクトについて話し合うためのミーティングを予約してください。

https://github.com/documenso/documenso/blob/main/packages/lib/universal/upload/put-file.ts#L69
https://github.com/vercel/examples/blob/main/solutions/aws-s3-image-upload/README.md
https://github.com/vercel/examples/tree/main/solutions/aws-s3-image-upload
https://github.com/vercel/examples/blob/main/solutions/aws-s3-image-upload/app/page.tsx#L58C5-L76C12
https://github.com/vercel/examples/blob/main/solutions/aws-s3-image-upload/app/api/upload/route.ts
https://github.com/documenso/documenso/blob/main/packages/ui/primitives/document-dropzone.tsx#L157
https://react-dropzone.js.org/
https://github.com/documenso/documenso/blob/main/apps/web/src/app/(ダッシュボード)/documents/upload-document.tsx#L61
https://github.com/documenso/documenso/blob/main/packages/lib/universal/upload/put-file.ts#L22
以上がDocumenso と aws-smage-upload の例の Spload 機能の比較の詳細内容です。詳細については、PHP 中国語 Web サイトの他の関連記事を参照してください。