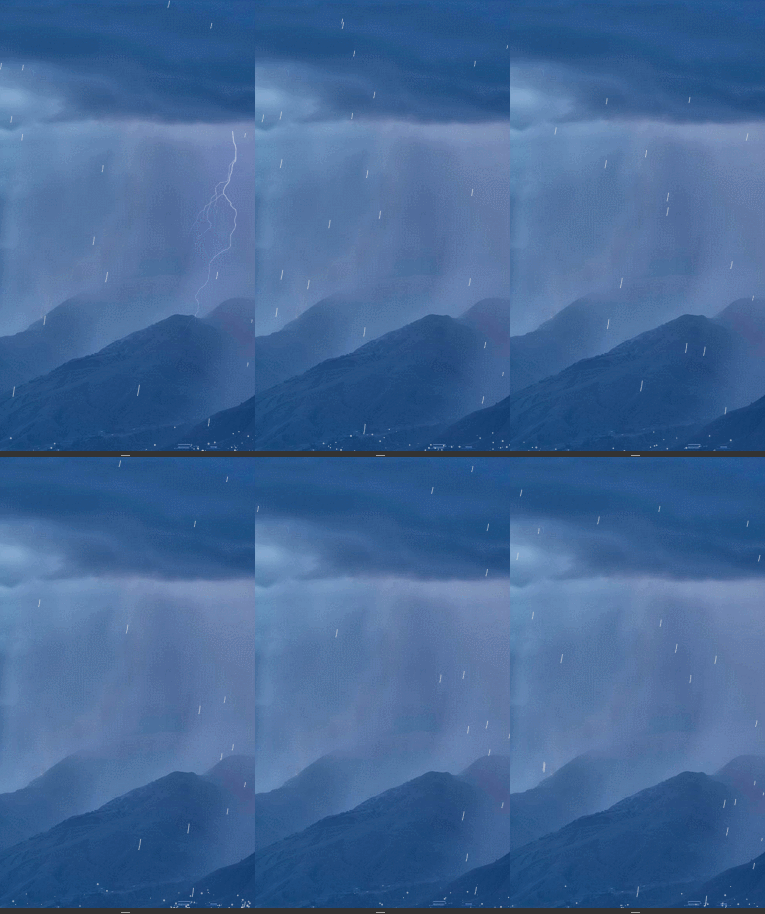
私は最近、雨と小雪のアニメーション効果を実現する必要があるプロジェクトに取り組みました。そのため、キャンバス上に一般的な落下オブジェクトの効果を表示するために、ここにドロップ コンポーネントを作成しました。本文を紹介する前に、レンダリングをお見せします:
レンダリングを表示:
雨と雪

複数のオブジェクトを作成するために dom 要素を使用するのと比較すると、見栄えがよくなります ディスプレイスメント アニメーションの場合、キャンバスがより簡単かつ高速になり、パフォーマンスが向上します
コードの呼び出し
<!DOCTYPE html>
<html>
<head>
<meta charset="UTF-8">
<title>Document</title>
<style>
#canvas{
width:100%;
height: 100%;
}
</style>
</head>
<body>
<canvas id="canvas"></canvas>
<script src="canvasDrop.js"></script>
<script>
canvasDrop.init({
type: "rain", // drop类型,有rain or snow
speed : [0.4,2.5], //速度范围
size_range: [0.5,1.5],//大小半径范围
hasBounce: true, //是否有反弹效果or false,
wind_direction: -105 //角度
hasGravity: true //是否有重力考虑
});
</script>
</body>
</html>それでは、簡単な実装原理を説明しましょう。まず、風向きの角度、オブジェクトのデータなど、使用するいくつかのグローバル変数を定義します。など。
グローバル変数を定義する
//定义两个对象数据
//分别是drops下落物体对象
//和反弹物体bounces对象
var drops = [], bounces = [];
//这里设定重力加速度为0.2/一帧
var gravity = 0.2;
var speed_x_x, //横向加速度
speed_x_y, //纵向加速度
wind_anger; //风向
//画布的像素宽高
var canvasWidth,
canvasHeight;
//创建drop的几率
var drop_chance;
//配置对象
var OPTS;
//判断是否有requestAnimationFrame方法,如果有则使用,没有则大约一秒30帧
window.requestAnimFrame =
window.requestAnimationFrame ||
window.webkitRequestAnimationFrame ||
window.mozRequestAnimationFrame ||
window.oRequestAnimationFrame ||
window.msRequestAnimationFrame ||
function(callback) {
window.setTimeout(callback, 1000 / 30);
};コア オブジェクトを定義する
次に、組織は比較的少数のオブジェクトを定義する必要があります。ドロップ コンポーネント全体で定義されるオブジェクトは合計 3 つだけです。
水平 x および垂直 y の速度サイズ単位を持つベクトル速度オブジェクト: V = ピクセル/フレームの変位
ベクトル オブジェクトの理解も非常に単純かつ大雑把です。つまり、速度を記録します。落下オブジェクトのドロップ/V
var Vector = function(x, y) {
//私有属性 横向速度x ,纵向速度y
this.x = x || 0;
this.y = y || 0;
};
//公有方法- add : 速度改变函数,根据参数对速度进行增加
//由于业务需求,考虑的都是下落加速的情况,故没有减速的,后期可拓展
/*
* @param v object || string
*/
Vector.prototype.add = function(v) {
if (v.x != null && v.y != null) {
this.x += v.x;
this.y += v.y;
} else {
this.x += v;
this.y += v;
}
return this;
};
//公有方法- copy : 复制一个vector,来用作保存之前速度节点的记录
Vector.prototype.copy = function() {
//返回一个同等速度属性的Vector实例
return new Vector(this.x, this.y);
};
Drop 下落物体对象, 即上面效果中的雨滴和雪, 在后面你也可自己拓展为陨石或者炮弹
对于Drop对象其基本定义如下
//构造函数
var Drop = function() {
/* .... */
};
//公有方法-update
Drop.prototype.update = function() {
/* .... */
};
//公有方法-draw
Drop.prototype.draw = function() {
/* .... */
};上記の 3 つのメソッドを読んで、その機能を推測できましたか? 次に、これら 3 つのメソッドが何を行うかを理解しましょう
Constructor
コンストラクターは主にドロップ オブジェクトの初期情報を定義します。速度、初期座標、サイズ、加速度など。
//构造函数 Drop
var Drop = function() {
//随机设置drop的初始坐标
//首先随机选择下落对象是从从哪一边
var randomEdge = Math.random()*2;
if(randomEdge > 1){
this.pos = new Vector(50 + Math.random() * canvas.width, -80);
}else{
this.pos = new Vector(canvas.width, Math.random() * canvas.height);
}
//设置下落元素的大小
//通过调用的OPTS函数的半径范围进行随机取值
this.radius = (OPTS.size_range[0] + Math.random() * OPTS.size_range[1]) *DPR;
//获得drop初始速度
//通过调用的OPTS函数的速度范围进行随机取值
this.speed = (OPTS.speed[0] + Math.random() * OPTS.speed[1]) *DPR;
this.prev = this.pos;
//将角度乘以 0.017453293 (2PI/360)即可转换为弧度。
var eachAnger = 0.017453293;
//获得风向的角度
wind_anger = OPTS.wind_direction * eachAnger;
//获得横向加速度
speed_x = this.speed * Math.cos(wind_anger);
//获得纵向加速度
speed_y = - this.speed * Math.sin(wind_anger);
//绑定一个速度实例
this.vel = new Vector(wind_x, wind_y);
};Drop オブジェクトの update メソッド
update メソッドは、ディスプレイスメントの変更など、各フレーム内のドロップ インスタンスの属性の変更を担当します
Drop.prototype.update = function() {
this.prev = this.pos.copy();
//如果是有重力的情况,则纵向速度进行增加
if (OPTS.hasGravity) {
this.vel.y += gravity;
}
//
this.pos.add(this.vel);
};Drop オブジェクトのdrawメソッド
drawメソッドは、各フレームのドロップインスタンスの描画を担当します
Drop.prototype.draw = function() {
ctx.beginPath();
ctx.moveTo(this.pos.x, this.pos.y);
//目前只分为两种情况,一种是rain 即贝塞尔曲线
if(OPTS.type =="rain"){
ctx.moveTo(this.prev.x, this.prev.y);
var ax = Math.abs(this.radius * Math.cos(wind_anger));
var ay = Math.abs(this.radius * Math.sin(wind_anger));
ctx.bezierCurveTo(this.pos.x + ax, this.pos.y + ay, this.prev.x + ax , this.prev.y + ay, this.pos.x, this.pos.y);
ctx.stroke();
//另一种是snow--即圆形
}else{
ctx.moveTo(this.pos.x, this.pos.y);
ctx.arc(this.pos.x, this.pos.y, this.radius, 0, Math.PI*2);
ctx.fill();
}
};
bounce 落下するオブジェクトは地面で跳ね返ります。つまり、水滴は地面で跳ね返されます。上の雨は、後で跳ね返る砂利のフレークや煙に拡張することもできます
定義は非常に簡単なので、ここでは詳しく説明しません
外部インターフェース
update
です。キャンバス全体アニメーションの開始関数に相当
var Bounce = function(x, y) {
var dist = Math.random() * 7;
var angle = Math.PI + Math.random() * Math.PI;
this.pos = new Vector(x, y);
this.radius = 0.2+ Math.random()*0.8;
this.vel = new Vector(
Math.cos(angle) * dist,
Math.sin(angle) * dist
);
};
Bounce.prototype.update = function() {
this.vel.y += gravity;
this.vel.x *= 0.95;
this.vel.y *= 0.95;
this.pos.add(this.vel);
};
Bounce.prototype.draw = function() {
ctx.beginPath();
ctx.arc(this.pos.x, this.pos.y, this.radius*DPR, 0, Math.PI * 2);
ctx.fill();
};
init
initインターフェース、初期化 画面のピクセル比率の取得、キャンバスのピクセルサイズの設定など、キャンバス全体のすべての基本プロパティ、そしてスタイルの設定
function update() {
var d = new Date;
//清理画图
ctx.clearRect(0, 0, canvas.width, canvas.height);
var i = drops.length;
while (i--) {
var drop = drops[i];
drop.update();
//如果drop实例下降到底部,则需要在drops数组中清楚该实例对象
if (drop.pos.y >= canvas.height) {
//如果需要回弹,则在bouncess数组中加入bounce实例
if(OPTS.hasBounce){
var n = Math.round(4 + Math.random() * 4);
while (n--)
bounces.push(new Bounce(drop.pos.x, canvas.height));
}
//如果drop实例下降到底部,则需要在drops数组中清楚该实例对象
drops.splice(i, 1);
}
drop.draw();
}
//如果需要回弹
if(OPTS.hasBounce){
var i = bounces.length;
while (i--) {
var bounce = bounces[i];
bounce.update();
bounce.draw();
if (bounce.pos.y > canvas.height) bounces.splice(i, 1);
}
}
//每次产生的数量
if(drops.length < OPTS.maxNum){
if (Math.random() < drop_chance) {
var i = 0,
len = OPTS.numLevel;
for(; i<len; i++){
drops.push(new Drop());
}
}
}
//不断循环update
requestAnimFrame(update);
}
結論
さて、シンプルなドロップコンポーネントが完成しました、もちろん存在します このドロップコンポーネントを書いてみると、まだまだ完璧ではない箇所がたくさんあると思います。これは、キャンバスのアニメーション実装の H5 シーンで調べることができます。
最後に、欠点とその後の作業について話しましょう:
0. このコンポーネントには現在十分な外部インターフェースがなく、調整可能な範囲があまり広くなく、抽象化があまり徹底されていません
1。基本的なスタイル
2. ドロップおよびバウンスオブジェクトの更新および描画メソッドのカスタマイズにより、ユーザーは落下速度やサイズ変更のより多くのフォームとスタイル効果を設定できるようになります
3. 一時停止、加速、減速などの操作アニメーションを追加する必要があります。 インターフェイス
上記は、雨と雪の効果を実現するためにエディターが紹介する関連知識です。ご質問があれば、お気軽にお問い合わせください。メッセージをお送りいただければ、編集者が時間内に返信いたします。また、PHP 中国語 Web サイトをサポートしていただきありがとうございます。
雨と雪の効果を実現するための JS+Canvas に関連するその他の記事については、PHP 中国語 Web サイトに注目してください。