

C# でステップ バー コントロールを開発するためのコードの詳細な説明 (写真)

この記事では、参考値の高いC#を使ってステップコントロールを実装する手順を中心に紹介します。以下のエディターで見てみましょう
現在、非常に優れた javascript コントロールがたくさんあります。下の図に示すように、step もその 1 つです:

それでは、C# の使用方法を説明します。ステップ コントロールを実装するには?
まず、ステップ バー ノードの情報を保存する StepEntity クラスを定義します。
public class StepEntity
 {
  public string Id { get; set; }
  public string StepName { get; set; }
  public int StepOrder { get; set; }
  public eumStepState StepState { get; set; }
  public string StepDesc { get; set; }
  public object StepTag { get; set; }
  //public Image StepCompletedImage { get; set; }
  //public Image StepDoingImage { get; set; }
  public StepEntity(string id,string stepname,int steporder,string stepdesc, eumStepState stepstate,object tag)
  {
   this.Id = id;
   this.StepName = stepname;
   this.StepOrder = steporder;
   this.StepDesc = stepdesc;
   this.StepTag = tag;
   this.StepState = stepstate;
  }
}StepViewer という名前のユーザー コントロールを定義します。
public partial class StepViewer : UserControl
 {
  public StepViewer()
  {
   InitializeComponent();
   this.Height = 68;
  }
}StepViewer ユーザー コントロールで ListDataSource プロパティを次のように定義します:
private List<StepEntity> _dataSourceList = null;
  [Browsable(true), Category("StepViewer")]
  public List<StepEntity> ListDataSource
  {
   get
   {
    return _dataSourceList;
   }
   set
   {
    if (_dataSourceList != value)
    {
     _dataSourceList = value;
     Invalidate();
    }
   }
}このコントロールのペイント メソッドで、ステップ バーを描画します:
private void StepViewer_Paint(object sender, PaintEventArgs e)
  {
   if(this.ListDataSource!=null)
   {
    int CenterY = this.Height / 2;
    int index = 1;
    int count = ListDataSource.Count;
    int lineWidth = 120;
    int StepNodeWH = 28;
    //this.Width = 32 * count + lineWidth * (count - 1) + 6+300;
    //defalut pen & brush
    e.Graphics.SmoothingMode = System.Drawing.Drawing2D.SmoothingMode.HighQuality;
    Brush brush = new SolidBrush(_Gray);
    Pen p = new Pen(brush, 1f);
    Brush brushNode = new SolidBrush(_DarkGray);
    Pen penNode = new Pen(brushNode, 1f);
    Brush brushNodeCompleted = new SolidBrush(_Blue);
    Pen penNodeCompleted = new Pen(brushNodeCompleted, 1f);
    int initX = 6;
    //string
    Font nFont = new Font("微软雅黑", 12);
    Font stepFont = new Font("微软雅黑", 11,FontStyle.Bold);
    int NodeNameWidth = 0;
    foreach (var item in ListDataSource)
    {
     //round
     Rectangle rec = new Rectangle(initX, CenterY - StepNodeWH / 2, StepNodeWH, StepNodeWH);
     if (CurrentStep == item.StepOrder)
     {
      if (item.StepState == eumStepState.OutTime)
      {
       e.Graphics.DrawEllipse(new Pen(_Red,1f), rec);
       e.Graphics.FillEllipse(new SolidBrush(_Red), rec);
      }
      else
      {
       e.Graphics.DrawEllipse(penNodeCompleted, rec);
       e.Graphics.FillEllipse(brushNodeCompleted, rec);
      }
      //白色字体
      SizeF fTitle = e.Graphics.MeasureString(index.ToString(), stepFont);
      Point pTitle = new Point(initX + StepNodeWH / 2 - (int)Math.Round(fTitle.Width) / 2, CenterY - (int)Math.Round(fTitle.Height / 2));
      e.Graphics.DrawString(index.ToString(), stepFont, Brushes.White, pTitle);
      //nodeName
      SizeF sNode = e.Graphics.MeasureString(item.StepName, nFont);
      Point pNode = new Point(initX + StepNodeWH, CenterY - (int)Math.Round(sNode.Height / 2) + 2);
      e.Graphics.DrawString(item.StepName,new Font( nFont,FontStyle.Bold), brushNode, pNode);
      NodeNameWidth = (int)Math.Round(sNode.Width);
      if (index < count)
      {
       e.Graphics.DrawLine(p, initX + StepNodeWH + NodeNameWidth, CenterY, initX + StepNodeWH + NodeNameWidth + lineWidth, CenterY);
      }
     }
     else if (item.StepOrder < CurrentStep)
     {
      //completed
      e.Graphics.DrawEllipse(penNodeCompleted, rec);
      //image
      RectangleF recRF = new RectangleF(rec.X + 6, rec.Y + 6, rec.Width - 12, rec.Height - 12);
      e.Graphics.DrawImage(ControlsResource.check_lightblue, recRF);
      //nodeName
      SizeF sNode = e.Graphics.MeasureString(item.StepName, nFont);
      Point pNode = new Point(initX + StepNodeWH, CenterY - (int)Math.Round(sNode.Height / 2) + 2);
      e.Graphics.DrawString(item.StepName, nFont, brushNode, pNode);
      NodeNameWidth = (int)Math.Round(sNode.Width);
      if (index < count)
      {
       e.Graphics.DrawLine(penNodeCompleted, initX + StepNodeWH + NodeNameWidth,
       CenterY, initX + StepNodeWH + NodeNameWidth + lineWidth, CenterY);
      }
     }
     else
     {
      e.Graphics.DrawEllipse(p, rec);
      //
      SizeF fTitle = e.Graphics.MeasureString(index.ToString(), stepFont);
      Point pTitle = new Point(initX + StepNodeWH / 2 - (int)Math.Round(fTitle.Width) / 2, CenterY - (int)Math.Round(fTitle.Height / 2));
      e.Graphics.DrawString(index.ToString(), stepFont, brush, pTitle);
      //nodeName
      SizeF sNode = e.Graphics.MeasureString(item.StepName, nFont);
      Point pNode = new Point(initX + StepNodeWH, CenterY - (int)Math.Round(sNode.Height / 2) + 2);
      e.Graphics.DrawString(item.StepName, nFont, brushNode, pNode);
      NodeNameWidth = (int)Math.Round(sNode.Width);
      if (index < count)
      {
       //line
       e.Graphics.DrawLine(p, initX + StepNodeWH + NodeNameWidth, CenterY, initX + StepNodeWH + NodeNameWidth + lineWidth, CenterY);
      }
     }
     //描述信息
     if (item.StepDesc != "")
     {
      Point pNode = new Point(initX + StepNodeWH, CenterY+10);
      e.Graphics.DrawString(item.StepDesc,new Font(nFont.FontFamily,10),brush, pNode);
     }
     index++;
     //8 is space width
     initX = initX + lineWidth + StepNodeWH+ NodeNameWidth+8;
    }
   }
}コントロールの使用方法:
List<StepEntity> list = new List<StepEntity>();
 list.Add(new StepEntity("1", "新开单", 1, "这里是该步骤的描述信息", eumStepState.Completed, null));
 list.Add(new StepEntity("2", "主管审批", 2, "这里是该步骤的描述信息", eumStepState.Waiting, null));
 list.Add(new StepEntity("3", "总经理审批", 3, "这里是该步骤的描述信息", eumStepState.OutTime, null));
 list.Add(new StepEntity("2", "完成", 4, "这里是该步骤的描述信息", eumStepState.Waiting, null));
 this.stepViewer1.CurrentStep = 3;
this.stepViewer1.ListDataSource = list; 
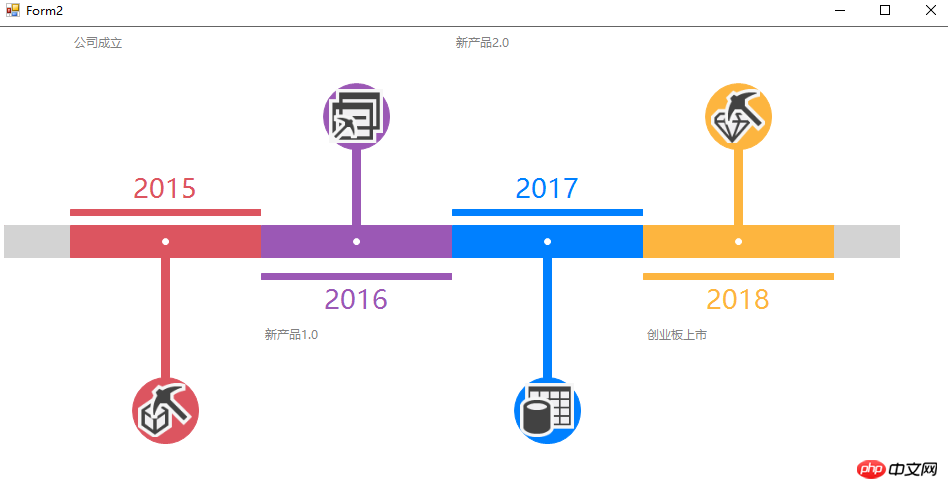
同様に、次のタイムライン コントロールを実装できます。
以上がC# でステップ バー コントロールを開発するためのコードの詳細な説明 (写真)の詳細内容です。詳細については、PHP 中国語 Web サイトの他の関連記事を参照してください。

ホットAIツール

Undresser.AI Undress
リアルなヌード写真を作成する AI 搭載アプリ

AI Clothes Remover
写真から衣服を削除するオンライン AI ツール。

Undress AI Tool
脱衣画像を無料で

Clothoff.io
AI衣類リムーバー

Video Face Swap
完全無料の AI 顔交換ツールを使用して、あらゆるビデオの顔を簡単に交換できます。

人気の記事
ホットツール

メモ帳++7.3.1
使いやすく無料のコードエディター

SublimeText3 中国語版
中国語版、とても使いやすい

ゼンドスタジオ 13.0.1
強力な PHP 統合開発環境

ドリームウィーバー CS6
ビジュアル Web 開発ツール

SublimeText3 Mac版
神レベルのコード編集ソフト(SublimeText3)
ホットトピック
 1665
1665
 14
1423
52
1321
25
1269
29
1249
24
14
1423
52
1321
25
1269
29
1249
24

 C# を使用した Active Directory
Sep 03, 2024 pm 03:33 PM
C# を使用した Active Directory
Sep 03, 2024 pm 03:33 PM
C# を使用した Active Directory のガイド。ここでは、Active Directory の概要と、C# での動作方法について、構文と例とともに説明します。

 C# データ グリッド ビュー
Sep 03, 2024 pm 03:32 PM
C# データ グリッド ビュー
Sep 03, 2024 pm 03:32 PM
C# データ グリッド ビューのガイド。ここでは、SQL データベースまたは Excel ファイルからデータ グリッド ビューをロードおよびエクスポートする方法の例について説明します。

 マルチスレッドと非同期C#の違い
Apr 03, 2025 pm 02:57 PM
マルチスレッドと非同期C#の違い
Apr 03, 2025 pm 02:57 PM
マルチスレッドと非同期の違いは、マルチスレッドが複数のスレッドを同時に実行し、現在のスレッドをブロックせずに非同期に操作を実行することです。マルチスレッドは計算集約型タスクに使用されますが、非同期はユーザーインタラクションに使用されます。マルチスレッドの利点は、コンピューティングのパフォーマンスを改善することですが、非同期の利点はUIスレッドをブロックしないことです。マルチスレッドまたは非同期を選択することは、タスクの性質に依存します。計算集約型タスクマルチスレッド、外部リソースと相互作用し、UIの応答性を非同期に使用する必要があるタスクを使用します。


 XMLの形式を変更する方法
Apr 03, 2025 am 08:42 AM
XMLの形式を変更する方法
Apr 03, 2025 am 08:42 AM
XML形式を変更する方法はいくつかあります。Atepadなどのテキストエディターを使用して手動で編集する。 XmlBeautifierなどのオンラインまたはデスクトップXMLフォーマットツールを使用して自動的にフォーマットします。 XSLTなどのXML変換ツールを使用して変換ルールを定義します。または、Pythonなどのプログラミング言語を使用して解析および操作します。元のファイルを変更してバックアップするときは注意してください。
