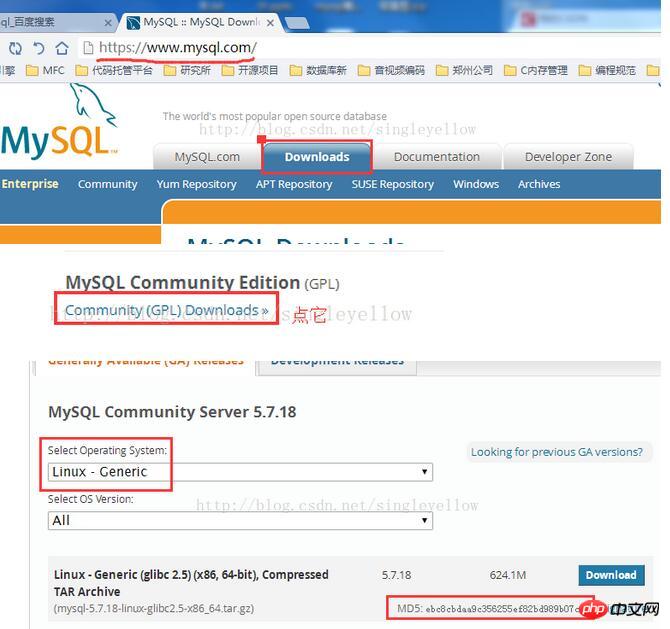
この記事では、主に CentOS 7 での mysql 5.7.18 のインストールと設定方法について詳しく説明します。興味のある方は参考にしてください。
Linux で MySQL 5.7 をインストールする方法を紹介します。
の値を確認します。

[cpp] view plain copy 在CODE上查看代码片派生到我的代码片
[root@CentOS MySQL]# tar -xzvf mysql-5.7.17-linux-glibc2.5-x86_64.tar.gz -C /usr/local
[root@CentOS MySQL]# cd /usr/local
[root@CentOS local]# mv mysql-5.7.17-linux-glibc2.5-x86_64 mysql
[root@CentOS local]# cd mysql
[root@CentOS mysql]# mkdir data
[root@CentOS mysql]# groupadd mysql
[root@CentOS mysql]# useradd -r -g mysql -s/bin/false mysql
[root@CentOS mysql]# chown -R mysql:mysql ./
[root@CentOS mysql]# bin/mysqld --initialize --user=mysql --basedir=/usr/local/mysql --datadir=/usr/local/mysql/data
2017-02-23T07:43:03.404885Z 0 [Warning] TIMESTAMP with implicit DEFAULT value is deprecated. Please use --explicit_defaults_for_timestamp server option (see documentation for more details).
2017-02-

23T07:43:04.442174Z 0 [Warning] InnoDB: New log files created, LSN=45790
2017-02-23T07:43:04.588507Z 0 [Warning] InnoDB: Creating foreign key constraint system tables.
2017-02-23T07:43:04.646721Z 0 [Warning] No

existing UUID has been found, so we assume that this is the first time that this server has been started. Generating a new UUID: b5c8e226-f99b-11e6-beb5-b7c1a1e39029.
2017-02-23T07:43:04.671492Z 0 [Warning]

Gtid table is not ready to be used. Table 'mysql.gtid_executed' cannot be opened.
2017-02-23T07:43:04.672338Z 1 [Note] A temporary password is generated for root@localhost: I%e=s+lfx9ko
[root@CentOS mysql]#

bin/mysql_ssl_rsa_setup --datadir=/usr/local/mysql/data
Generating a 2048 bit RSA private key
.....................................+++
..............................+++
writing new private key to 'ca-key.pem'
-----
Generating a 2048 bit RSA private key
.........................................+++
.........................+++
writing new private key to 'server-key.pem'
-----
Generating a 2048 bit RSA private key
..................................................+++
...................................................................................................................................................................................................+++
writing

new private key to 'client-key.pem'
-----
[root@CentOS mysql]# cd support-files
[root@CentOS support-files]# cp my-default.cnf /etc/my.cnf
[root@CentOS support-files]# gedit /etc/my.cnf
[root@CentOS support-files]# cp mysql.server /etc/init.d/mysqld
[root@CentOS support-files]# service mysqld start
Starting MySQL.Logging to '/usr/local/mysql/data/CentOS.cn.err'.
. SUCCESS!
[root@CentOS support-files]# ps aux |grep mysql
root  18279 0.0 0.0 11764 1576 pts/0 S 17:34 0:00 /bin/sh

/usr/local/mysql/bin/mysqld_safe --datadir=/usr/local/mysql/data --pid-file=/usr/local/mysql/data/CentOS.cn.pid
mysql  18449 1.9 9.5 1182688 177940 pts/0 Sl 17:34 0:00 /usr/local/mysql/bin/mysqld --

basedir=/usr/local/mysql --datadir=/usr/local/mysql/data --plugin-dir=/usr/local/mysql/lib/plugin --user=mysql --log-error=/usr/local/mysql/data/CentOS.cn.err --pid-file=/usr/local/mysql/data/CentOS.cn.pid

--socket=/tmp/mysql.sock --port=3306

[root@CentOS support-files]#
ステップ 1、bin/mysqld 後で指定するパラメータに注意してください。そのうちの 1 つは一時的なパスワードを生成し、保存し、後でデータベースにログインするために使用します。
ステップ 2 、bin/mysql_ssl_rsa_setup はデータベースのセキュリティ処理のように見えます。後で指定されるパラメーターに注意してください。
/etc/init.d/mysqld にコピーします。これは主に MySQL の起動を担当します。
/mysql/bin/mysqld_safe、/mysql/bin/mysqld
3. その後の設定:
set password for 'root'@localhost=password('xxxxxx');
chkconfig --add mysqld #增加mysqld服务
chkconfig --list    #列出所有的系统服务
chkconfig --level 35 mysqld on
#设定mysqld在等级3和5为开机运行服务
以上がCentOS 7 での mysql 5.7.18 のインストールと設定方法に関するグラフィカルなチュートリアルの詳細内容です。詳細については、PHP 中国語 Web サイトの他の関連記事を参照してください。