WeChat開発に関する実践的なチュートリアル
この記事は主にWeChatミニプログラムの実践的なミニプログラムの例の関連情報を紹介します。必要な友人はそれを参照してください
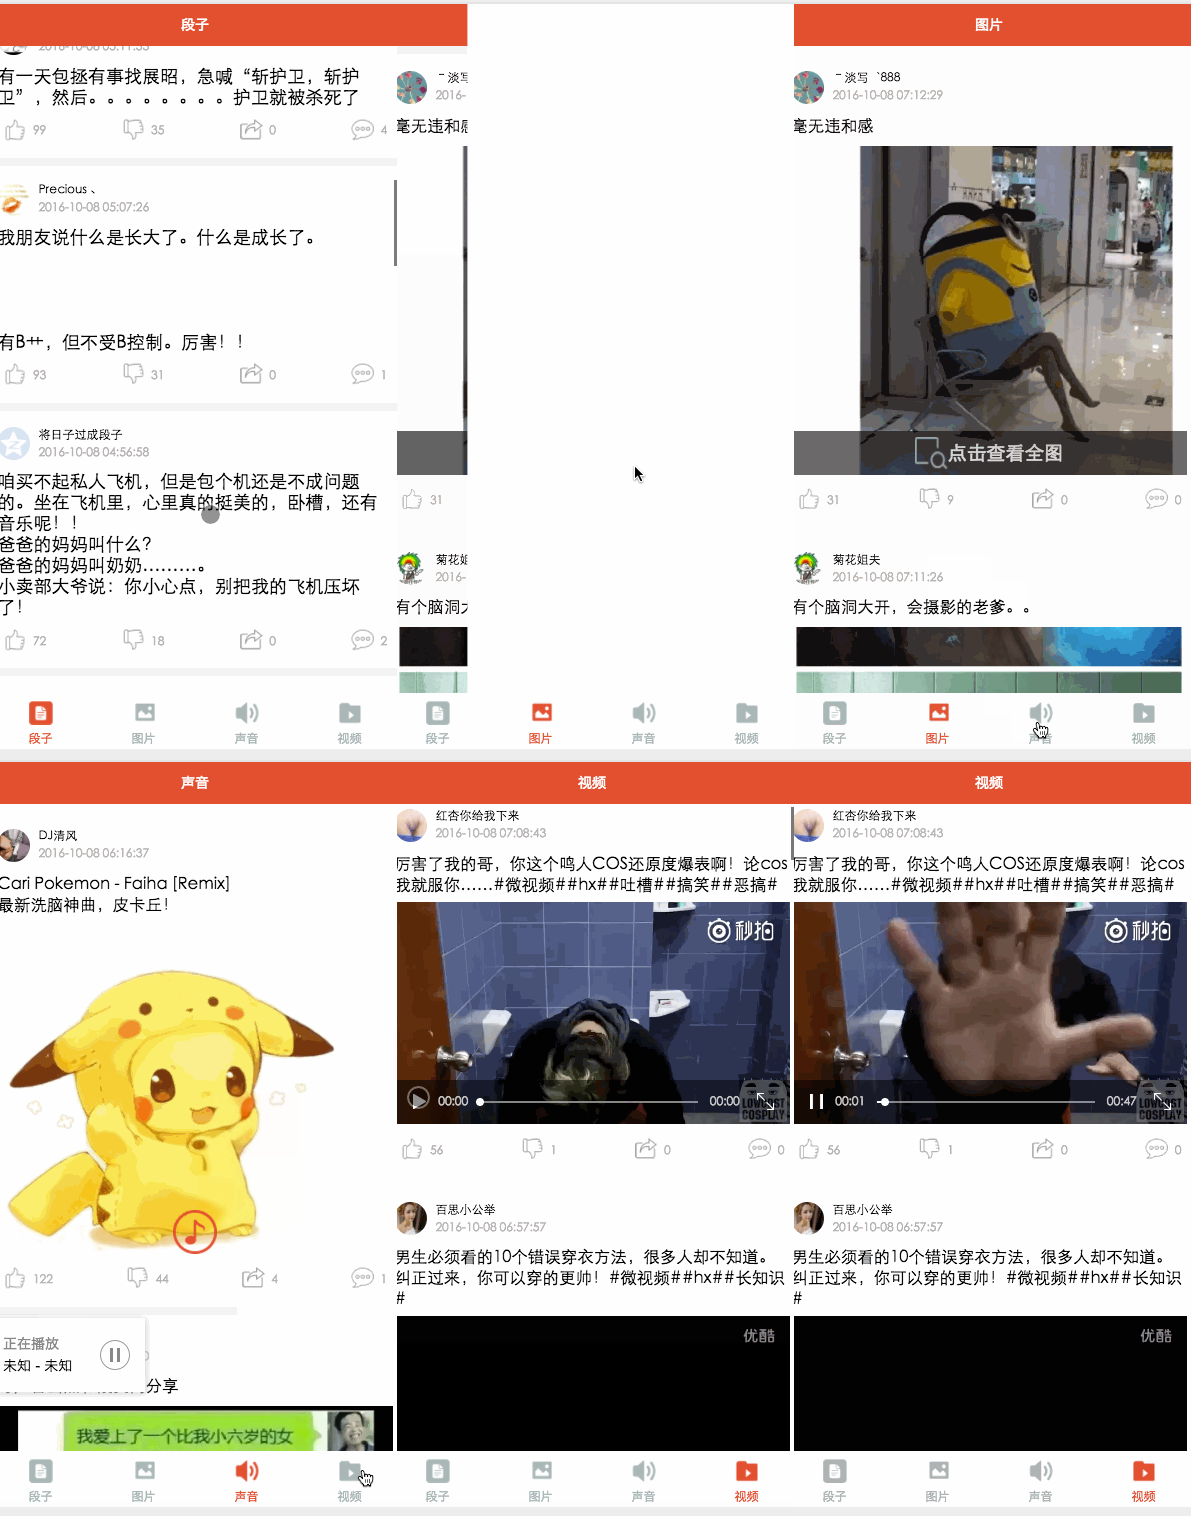
WeChatミニプログラムの基本コンポーネントとAPIが完成しました。半日で、ジョーク、写真、オーディオ、ビデオの 4 つのモジュールを含む合理化されたバージョンの Baisibujie を作成しました。この記事では、この小さな APP について簡単に説明します。ソース コードは GitHub に置かれているので、気軽に始めていただけます。
このプロジェクトから何を学ぶことができますか?
タブバーの使用法
ネットワークは実際のインターフェースを呼び出します
読み込みは
スクロールビューを使用してプルダウン更新とプルアップ読み込みを実装します
画像の画像コンポーネント処理、
音楽とビデオコンポーネントの使用
Jump値を渡すUse
など。 。 。 。
{
 "pages":[
  "pages/word/word",
  "pages/image/image",
  "pages/voice/voice",
  "pages/video/video",
  "pages/detail/detail"
 ],
 "tabBar": {
  "color": "#a9b7b7",
  "selectedColor": "#eb4f38",
  "borderStyle": "white",
  "backgroundColor": "#ffffff",
  "list": [
   {
    "pagePath": "pages/word/word",
    "text": "段子",
    "iconPath": "image/wordN.png",
    "selectedIconPath": "image/wordS.png"
   },
   {
    "pagePath": "pages/image/image",
    "text": "图片",
    "iconPath": "image/imageN.png",
    "selectedIconPath": "image/imageS.png"
   },
   {
    "pagePath": "pages/voice/voice",
    "text": "声音",
    "iconPath": "image/voiceN.png",
    "selectedIconPath": "image/voiceS.png"
   },
   {
    "pagePath": "pages/video/video",
    "text": "视频",
    "iconPath": "image/videoN.png",
    "selectedIconPath": "image/videoS.png"
   }

  ]
 },
 "window":{
  "backgroundTextStyle":"light",
  "navigationBarBackgroundColor": "#eb4f38",
  "navigationBarTextStyle":"white"
 }
}
ここでは、プログラムのグローバル属性を設定する必要がある場合があります。タブバーの表示はこれが原因である可能性があります。タブバーの下部にあるナビゲーション項目は、リスト内の4つの項目に分かれています。ここでの主な構成は、選択された色と選択されていない色、ページの紹介と画像です。下部の各オプションページの紹介。 window 属性は主にフォーム全体の色、文字色、背景色を設定します。ここでの window 属性は各ページの window 属性によってオーバーライドされます。
app.wxss
/*整体view样式*/
.containsView{
 padding: 15rpx 15rpx 15rpx 15rpx;
 margin-top: 15rpx;
 margin-bottom: 15rpx;
 background-color: white;
}
/*头部整体样式*/
.topContainsView{
 display: flex;
 flex-direction: row;
 align-items: center;
 margin-bottom: 18rpx;
}

/**
 * 头像样式
*/
.profileImage{
 width: 60rpx;
 height: 60rpx;
 border-radius: 30rpx;
}

/*头部显示名字和时间整体样式*/
.topRightView{
 margin-left: 15rpx;
 display: flex;
 flex-direction: column;
}
/*用户名称样式*/
.topRightName{
 font-size: 18rpx;
}
/*时间样式*/
.topRightTime{
 font-size: 14rpx;
 color: #b8b2b2;
 margin-top: 10rpx;
}

/*因为中间部分不一样不放在整体样式中*/

/*底部view整体样式*/
.bottomView{
 display: flex;
 flex-direction: row;
 justify-content: space-between;
 align-items: center;
}
/*每个Item样式*/
.bottomItemView{
 display: flex;
 flex-direction: row;
 align-items: center;
 justify-content: center;
 margin-top: 18rpx;
 padding-left: 10rpx;
 padding-right: 10rpx;
}
/*Item样式中的图标样式 顶 踩 分享 评论*/
.bottomItemImage{
 width: 45rpx;
 height: 45rpx;
}
/*Item中的文字样式 顶 踩 分享 评论*/
.bottomItemText{
 font-size: 15rpx;
 color: #b8b2b2;
 margin-left: 10rpx;
 margin-top: 8rpx;
}

/*分割线样式*/
.pLine{
 background: #f3f3f3;
 width: 100%;
 height: 15rpx;
}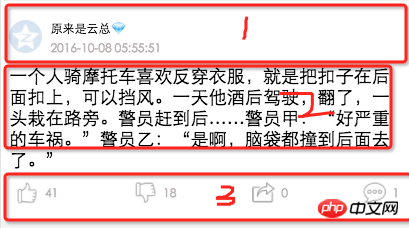
app.wxss 各ページのヘッダーと下部のスタイルは同じであるため、4 つのモジュールをヘッダー、コンテンツ領域、下部の 3 つの部分に分割しました。真ん中の部分が違うので、1と3をグローバルに抽出しました、コメントがより明確です
段落モジュール
word.wxml
<loading hidden="{{loadingHidden}}">正在加载...</loading>
<scroll-view scroll-y="true" bindscrolltoupper="bindscrolltoupper" bindscrolltolower="bindscrolltolower" style="height: 100%">
 <block wx:for-items="{{list}}">
  <!-- 分割线 -->
  <view class="pLine"></view>
  <!-- 整体item样式 -->
  <view class="containsView">
   <view class="topContainsView">
    <image class="profileImage" src="{{item.profile_image}}" />
    <view class="topRightView">
     <text class="topRightName">{{item.name}}</text>
     <text class="topRightTime">{{item.passtime}}</text>
    </view>
   </view>
   <!-- 中间内容 -->
   <text class="centerContent">{{item.text}}</text>
   <!-- 底部view样式 -->
   <view class="bottomView">
    <view class="bottomItemView">
     <image class="bottomItemImage" src="../../image/ding.png" />
     <text class="bottomItemText">{{item.ding}}</text>
    </view>
    <view class="bottomItemView">
     <image class="bottomItemImage" src="../../image/cai.png" />
     <text class="bottomItemText">{{item.cai}}</text>
    </view>
    <view class="bottomItemView">
     <image class="bottomItemImage" src="../../image/share.png" />
     <text class="bottomItemText">{{item.repost}}</text>
    </view>
    <view class="bottomItemView">
     <image class="bottomItemImage" src="../../image/comment.png" />
     <text class="bottomItemText">{{item.comment}}</text>
    </view>
   </view>
  </view>
 </block>
</scroll-view>スクロールビューを使用して外側の層をラップしてロードしますさらに上に引き上げて更新します。bindscrolltoupper=”bindscrolltoupper” この属性は、上にスライドするときにこのメソッドを呼び出します。bindscrollto lower=”bindscrollto lower” このメソッドは、下にスライドするときに呼び出されます。最初に、ヘッダーと末尾を抽出することもできます。レイアウトを作成し、導入メソッドを通じて使用します。4 ページすべてを記述する必要はありません。自分で取得できます
word.js
Page({
 data: {
  list: [],
  maxtime: '',
  loadingHidden: false
 },
 onLoad: function (options) {
  // 页面初始化 options为页面跳转所带来的参数
  //加载最新
  this.requestData('newlist');
 },

 /**
  * 上拉刷新
  */
 bindscrolltoupper: function () {
  //加载最新
  // this.requestData('newlist');
 },

 /**
  * 加载更多
  */
 bindscrolltolower: function () {
  console.log('到底部')
  //加载更多
  this.requestData('list');
 },

 /**
  * 请求数据
  */
 requestData: function (a) {
  var that = this;
  console.log(that.data.maxtime)
  wx.request({
   url: 'http://api.budejie.com/api/api_open.php',
   data: {
    a: a,
    c: 'data',
    maxtime: that.data.maxtime,
    type: '29',
   },
   method: 'GET',
   success: function (res) {
    console.log(res)
    console.log('上一页', that.data.list)
    that.setData({
     // 拼接数组
     list: that.data.list.concat(res.data.list),
     loadingHidden: true,
     maxtime: res.data.info.maxtime
    })

   }
  })
 },
 onReady: function () {
  // 页面渲染完成
 },
 onShow: function () {
  // 页面显示
 },
 onHide: function () {
  // 页面隐藏
 },
 onUnload: function () {
  // 页面关闭
 }
})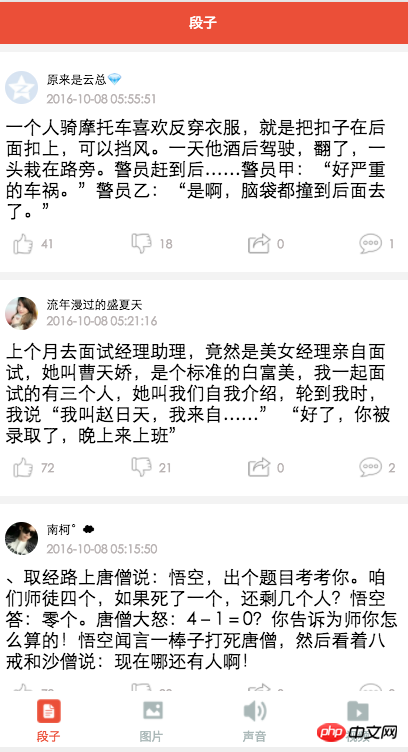
loading を変更します。 word.wxml と word.json の 1 つはコンテンツのフォント サイズを設定し、もう 1 つはナビゲーション バーのテキストを設定するため、ここには投稿しません。
Picture module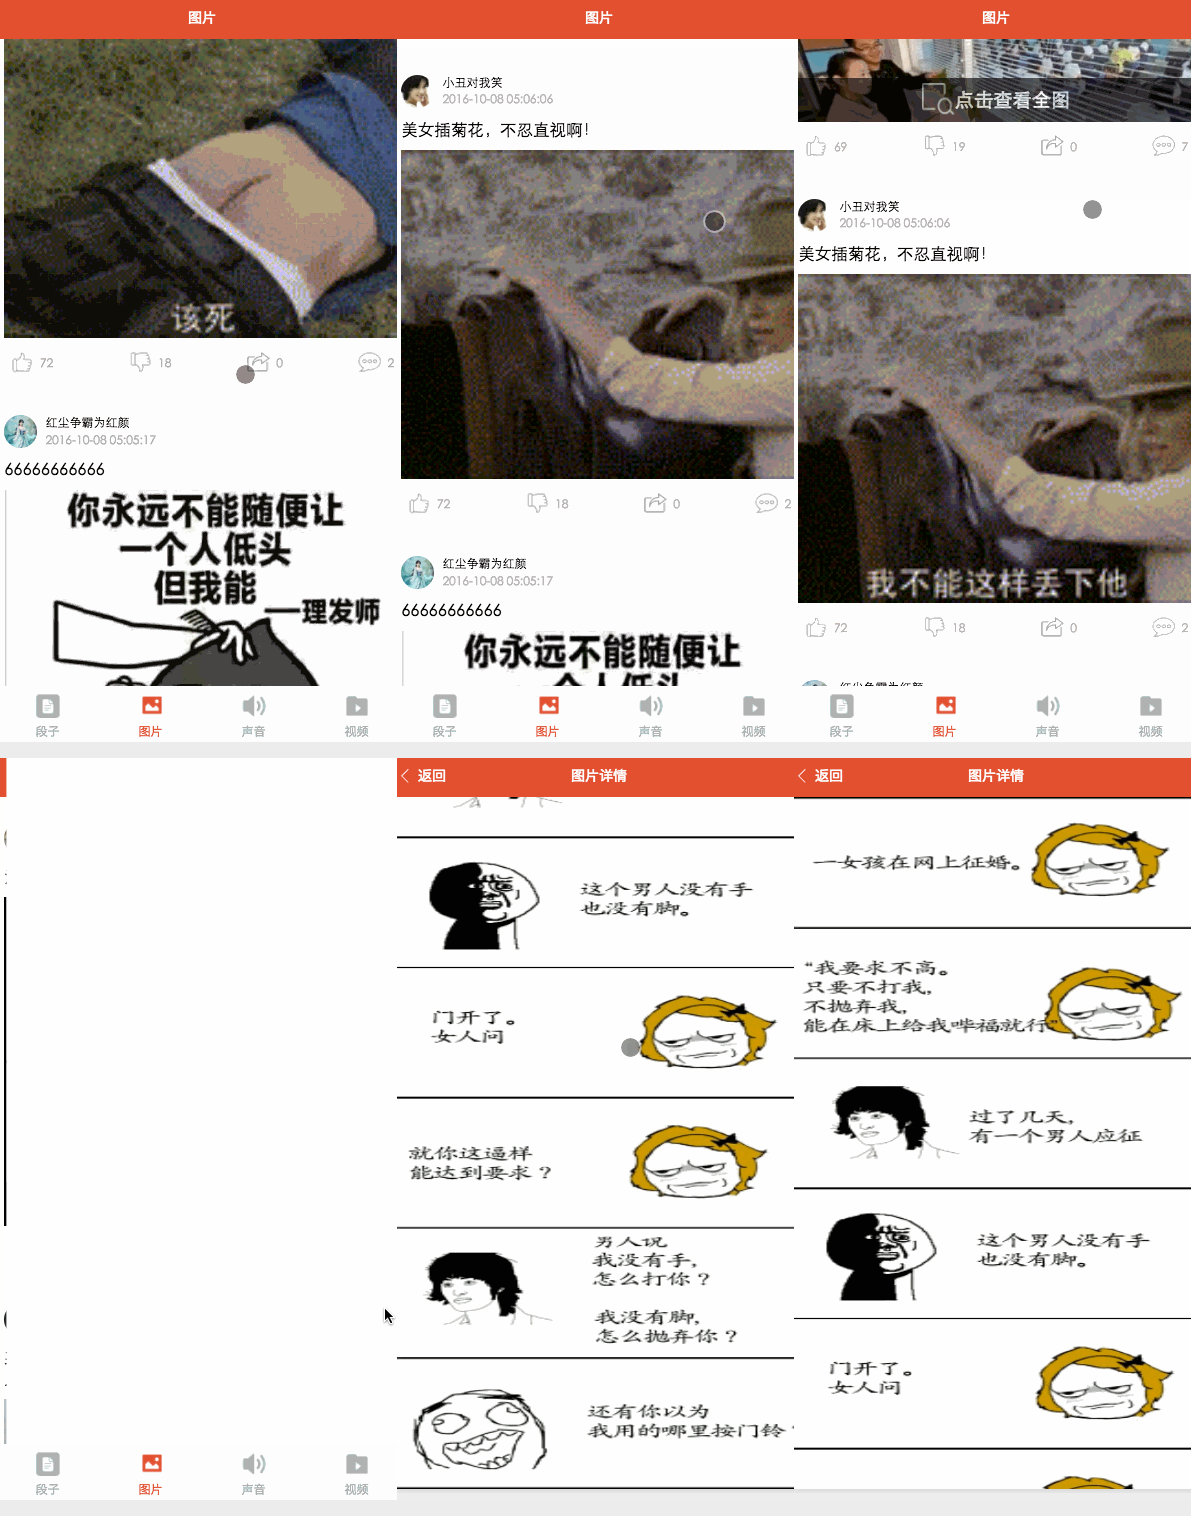
<loading hidden="{{loadingHidden}}">正在加载...</loading>
<scroll-view scroll-y="true" bindscrolltolower="bindscrolltolower" style="height: 100%">
 <block wx:for-items="{{list}}">
  <!-- 分割线 -->
  <view class="pLine"></view>
  <!-- 整体item样式 -->
  <view class="containsView">
   <view class="topContainsView">
    <image class="profileImage" src="{{item.profile_image}}" />
    <view class="topRightView">
     <text class="topRightName">{{item.name}}</text>
     <text class="topRightTime">{{item.passtime}}</text>
    </view>
   </view>
   <text style="font-size: 30rpx">{{item.text}}</text>
   <!-- 当时gif图 -->
   <view wx:if="{{item.is_gif != 0}}" style="position: relative;">
    <image class="centerContent" src="{{item.cdn_img}}" mode="aspectFill" />
   </view>
   <!-- 普通大图 可点击查看全部图片 -->
   <view data-url="{{item.cdn_img}}" data-height="{{item.height}}" data-width="{{item.width}}"
      bindtap="lookBigPicture" wx:elif="{{item.is_gif == 0}}" style="position: relative;">
    <!-- 图片资源 -->
    <image class="centerContent" src="{{item.cdn_img}}" mode="aspectFill" />
    <!-- 图片上浮动的点击查看详情图片view -->
    <view class="flexView">
     <image src="../../image/seeBigPicture.png" style="width: 60rpx; height: 60rpx;" />
     <text class="flexText">点击查看全图</text>
    </view>
   </view>
   <!-- 底部view样式 -->
   <view class="bottomView">
    <view class="bottomItemView">
     <image class="bottomItemImage" src="../../image/ding.png" />
     <text class="bottomItemText">{{item.ding}}</text>
    </view>
    <view class="bottomItemView">
     <image class="bottomItemImage" src="../../image/cai.png" />
     <text class="bottomItemText">{{item.cai}}</text>
    </view>
    <view class="bottomItemView">
     <image class="bottomItemImage" src="../../image/share.png" />
     <text class="bottomItemText">{{item.repost}}</text>
    </view>
    <view class="bottomItemView">
     <image class="bottomItemImage" src="../../image/comment.png" />
     <text class="bottomItemText">{{item.comment}}</text>
    </view>
   </view>
  </view>
 </block>
</scroll-view>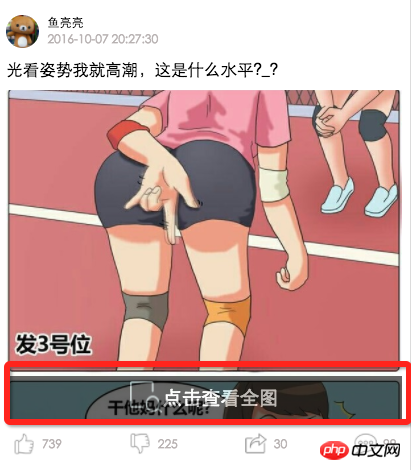
ここでは主に、画像が処理されているかどうかによって区別されます。 gifです、GIFではありません。クリックすると大きな画像が表示されます。これはビューフローティング効果であり、インターフェイスとimage.wxssを組み合わせて
/*中间文字样式*/
.centerContent{
 margin-top: 20rpx;
 width: 100%;
 height: 600rpx;

}
/*中间浮动文字样式*/
.flexView{
display: flex;
justify-content: center;
align-items: center;
width: 100%;
height: 80rpx;
position: absolute;
z-index: 2;
top: 540rpx;
background: #000000;
opacity: 0.6

}
/*浮动文字*/
.flexText{
 color: white;
 font-size: 35rpx;
}image.js
を表示します
var detail = '../detail/detail'
Page({
 data: {
  list: [],
  maxtime: '',
  loadingHidden: false
 },
 onLoad: function (options) {
  // 页面初始化 options为页面跳转所带来的参数
  this.requestData('newlist');

 },
 /**
  * 滚动到底部时加载下一页
  */
 bindscrolltolower: function () {
  console.log('到底部')
  this.requestData('list');

 },

 /**
  * 加载数据
  */
 requestData: function (a) {
  var that = this;
  wx.request({
   url: 'http://api.budejie.com/api/api_open.php',
   data: {
    a: a,
    c: 'data',
    // 上一页的maxtime作为加载下一页的条件,
    maxtime: this.data.maxtime,
    type: '10',
   },
   method: 'GET',
   success: function (res) {
    console.log(res)
    console.log('上一页', that.datalist)
    that.setData({
     // 拼接数组
     list: that.data.list.concat(res.data.list),
     loadingHidden: true,
     maxtime: res.data.info.maxtime
    })

   }
  })
 },
 /**
  * 查看大图
  */
 lookBigPicture: function (e) {
  console.log(e);
  console.log(e.currentTarget.id)
  //图片url 对应wxml中data-url="{{item.url}}"
  var url = e.currentTarget.dataset.url;
  //获取图片高度 对应wxml中data-height="{{item.height}}"
  var height = e.currentTarget.dataset.height;
  //获取图片高度 对应wxml中data-width="{{item.width}}"
  var width = e.currentTarget.dataset.width;
  // 传参方式向GET请求
  wx.navigateTo({
   url: detail + '?' + 'url=' + url + "&height=" + height + "&width=" + width,
   success: function (res) {
    console.log(res)
   },
   fail: function (err) {
    console.log(err)
   },
  })
 },
 onReady: function () {
  // 页面渲染完成
 },
 onShow: function () {
  // 页面显示
 },
 onHide: function () {
  // 页面隐藏
 },
 onUnload: function () {
  // 页面关闭
 }
})ここでは主にlookBigPictureメソッドを見ていきます。構文は var url = e .currentTarget.dataset.url; 値で転送するには、GET にリクエストを送信するのと同じ形式に従います
【関連する推奨事項】
1. WeChat パブリック アカウント プラットフォームのソース コードのダウンロード
以上がWeChat開発に関する実践的なチュートリアルの詳細内容です。詳細については、PHP 中国語 Web サイトの他の関連記事を参照してください。

ホットAIツール

Undresser.AI Undress
リアルなヌード写真を作成する AI 搭載アプリ

AI Clothes Remover
写真から衣服を削除するオンライン AI ツール。

Undress AI Tool
脱衣画像を無料で

Clothoff.io
AI衣類リムーバー

AI Hentai Generator
AIヘンタイを無料で生成します。

人気の記事

ホットツール

メモ帳++7.3.1
使いやすく無料のコードエディター

SublimeText3 中国語版
中国語版、とても使いやすい

ゼンドスタジオ 13.0.1
強力な PHP 統合開発環境

ドリームウィーバー CS6
ビジュアル Web 開発ツール

SublimeText3 Mac版
神レベルのコード編集ソフト(SublimeText3)

ホットトピック
 7479
7479
 15
15
 1377
1377
 52
52
 77
77
 11
11
 19
19
 33
33
 Xianyu WeChat ミニプログラムが正式に開始
Feb 10, 2024 pm 10:39 PM
Xianyu の公式 WeChat ミニ プログラムが静かに開始されました。ミニ プログラムでは、プライベート メッセージを投稿して購入者/販売者とコミュニケーションしたり、個人情報や注文を表示したり、商品を検索したりすることができます。プログラム、見てみましょう。 Xianyu WeChat アプレットの名前は何ですか? 回答: Xianyu、アイドル取引、中古品販売、評価、リサイクル。 1. ミニ プログラムでは、アイドル メッセージの投稿、プライベート メッセージを介した購入者/販売者とのコミュニケーション、個人情報と注文の表示、指定された商品の検索などができます。 2. ミニ プログラム ページには、ホームページ、近くに、アイドル投稿、メッセージ投稿、私の投稿 5つの機能; 3. 使用したい場合は、購入する前に WeChat 支払いを有効にする必要があります。
 WeChatアプレットは画像アップロード機能を実装
Nov 21, 2023 am 09:08 AM
WeChat アプレットが画像アップロード機能を実装 モバイル インターネットの発展に伴い、WeChat アプレットは人々の生活に欠かせないものになりました。 WeChat ミニ プログラムは、豊富なアプリケーション シナリオを提供するだけでなく、画像アップロード機能などの開発者定義の機能もサポートします。この記事では、WeChat アプレットに画像アップロード機能を実装する方法と具体的なコード例を紹介します。 1. 準備作業 コードを書き始める前に、WeChat 開発者ツールをダウンロードしてインストールし、WeChat 開発者として登録する必要があります。同時に、WeChat についても理解する必要があります。
 PHP 実践: フィボナッチ数列をすばやく実装するコード例
Mar 20, 2024 pm 02:24 PM
PHP の実践: フィボナッチ数列をすばやく実装するためのコード例 フィボナッチ数列は、数学では非常に興味深い一般的な数列です。次のように定義されています: 最初と 2 番目の数値は 0 と 1、3 番目からは数値で始まり、それぞれの数値前の 2 つの数値の合計です。フィボナッチ数列の最初のいくつかの数値は、0、1、1.2、3、5、8、13、21 などです。 PHP では、再帰と反復を通じてフィボナッチ数列を生成できます。以下ではこの2つを紹介していきます
 WeChat アプレットにドロップダウン メニュー効果を実装する
Nov 21, 2023 pm 03:03 PM
WeChat ミニ プログラムでドロップダウン メニュー効果を実装するには、特定のコード サンプルが必要です。モバイル インターネットの普及に伴い、WeChat ミニ プログラムはインターネット開発の重要な部分となり、ますます多くの人が注目し始めています。 WeChat ミニ プログラムを使用します。 WeChat ミニ プログラムの開発は、従来の APP 開発よりも簡単かつ迅速ですが、特定の開発スキルを習得する必要もあります。 WeChat ミニ プログラムの開発では、ドロップダウン メニューが一般的な UI コンポーネントであり、より良いユーザー エクスペリエンスを実現します。この記事では、WeChat アプレットにドロップダウン メニュー効果を実装し、実用的な機能を提供する方法を詳しく紹介します。
 WeChat ミニ プログラムに画像フィルター効果を実装する
Nov 21, 2023 pm 06:22 PM
WeChat ミニ プログラムでの画像フィルター効果の実装 ソーシャル メディア アプリケーションの人気に伴い、人々は写真にフィルター効果を適用して、写真の芸術的効果や魅力を高めることがますます好まれています。画像フィルター効果は WeChat ミニ プログラムにも実装でき、より興味深く創造的な写真編集機能をユーザーに提供します。この記事では、WeChat ミニ プログラムに画像フィルター効果を実装する方法を紹介し、具体的なコード例を示します。まず、WeChat アプレットのキャンバス コンポーネントを使用して画像を読み込み、編集する必要があります。 Canvasコンポーネントはページ上で使用できます
 WeChat アプレットを使用してカルーセル切り替え効果を実現する
Nov 21, 2023 pm 05:59 PM
WeChat アプレットを使用してカルーセル スイッチング効果を実現する WeChat アプレットは、シンプルで効率的な開発と使用特性を備えた軽量のアプリケーションです。 WeChat ミニ プログラムでは、カルーセル スイッチング効果を実現することが一般的な要件です。この記事では、WeChat アプレットを使用してカルーセル切り替え効果を実現する方法と、具体的なコード例を紹介します。まず、カルーセル コンポーネントを WeChat アプレットのページ ファイルに追加します。たとえば、<swiper> タグを使用すると、カルーセルの切り替え効果を実現できます。このコンポーネントでは、 b を渡すことができます。
 Xianyu WeChat アプレットの名前は何ですか?
Feb 27, 2024 pm 01:11 PM
Xianyu の公式 WeChat ミニ プログラムが静かに開始され、アイドルアイテムを簡単に公開および交換できる便利なプラットフォームをユーザーに提供します。ミニ プログラムでは、プライベート メッセージを介して購入者または販売者とコミュニケーションしたり、個人情報や注文を表示したり、欲しい商品を検索したりできます。では、WeChat ミニ プログラムでは Xianyu とはいったい何と呼ばれているのでしょうか? このチュートリアル ガイドで詳しくご紹介しますので、知りたいユーザーは、この記事に従って読み続けてください。 Xianyu WeChat アプレットの名前は何ですか? 回答: Xianyu、アイドル取引、中古品販売、評価、リサイクル。 1. ミニ プログラムでは、アイドル メッセージの投稿、プライベート メッセージを介した購入者/販売者とのコミュニケーション、個人情報と注文の表示、指定された商品の検索などができます。 2. ミニ プログラム ページには、ホームページ、近くに、アイドル投稿、メッセージ投稿、マイ投稿の5つの機能、3.
 WeChat アプレットに画像回転効果を実装する
Nov 21, 2023 am 08:26 AM
WeChat ミニ プログラムで画像回転効果を実装するには、特定のコード サンプルが必要です。WeChat ミニ プログラムは、ユーザーに豊富な機能と優れたユーザー エクスペリエンスを提供する軽量のアプリケーションです。ミニ プログラムでは、開発者はさまざまなコンポーネントと API を使用して、さまざまな効果を実現できます。その中で、画像回転効果は、ミニプログラムに興味と視覚効果を加えることができる一般的なアニメーション効果です。 WeChat ミニ プログラムで画像の回転効果を実現するには、ミニ プログラムが提供するアニメーション API を使用する必要があります。以下は、その方法を示す具体的なコード例です。


