ヘッド ナビゲーションへの Vue のマウント ルーティングについてどれだけご存知かわかりませんが、この記事では主に編集者がヘッド ナビゲーションへの Vue のマウント ルーティングの方法を紹介します。参考にしてください。編集者をフォローして見てみましょう。皆さんのお役に立てれば幸いです。
ルートが書かれていますが、ルートを切り替える正しい方法は、アドレスバーに住所を入力することではなく、次のように、頭のナビゲーションメニューをクリックして切り替えることです

。
クリックすると上記の発見・注意・メッセージがルートナビゲーションに切り替わります
まずヘッダーナビゲーションを書きます
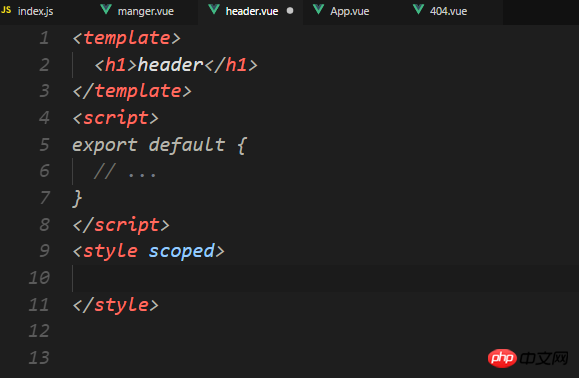
header.vueを開きます
まずvueコンポーネントの基本形式を書きます

それからレイアウトを書き始めます Header
ここでごめんなさい、head に header.vue が導入されているとずっと思っていましたが、実際はそうではありませんでした...
アプリを開いて、vue で書き換えます
app.vue コード:
<template>
<p id="app">
<!-- element-ui 容器布局 -->
<el-container>
<!-- 头部 -->
<el-header>
<!-- 头部组件渲染 -->
<header-ly></header-ly>
</el-header>
<!-- 中间主要区域容器 -->
<el-container>
<!-- 添加一个element-ui内置的过渡动画 -->
<transition name="el-zoom-in-center">
<!-- 通过路由渲染不同内容的页面 -->
<router-view/>
</transition>
</el-container>
<!-- 底部 -->
<el-footer>
<!-- 底部组件渲染 -->
<footer-ly></footer-ly>
</el-footer>
</el-container>
</p>
</template>
<script>
// 导入组件
import HeaderLy from '@/components/header'
import FooterLy from '@/components/footer'
export default {
name: 'app',
components: {
HeaderLy,
FooterLy
}
}
</script>
<style>
#app {
font-family: 'Avenir', Helvetica, Arial, sans-serif;
-webkit-font-smoothing: antialiased;
-moz-osx-font-smoothing: grayscale;
text-align: center;
color: #2c3e50;
}
</style>ここのコードは基本的に element-ui 公式 Web サイトから直接コピーできます: http://element-cn.eleme.io/#/zh -CN /
<template>
 <el-row>
  <!-- 左边logo -->
  <el-col :span="4" class="logo">
   <img src="../assets/logo.png" alt="">
  </el-col>
  <!-- 中间导航区域 -->
  <el-col :span="16">
   <el-menu
    :default-active="activeIndex2"
    class="menu"
    router
    mode="horizontal"
    @select="handleSelect"
    background-color="#545c64"
    text-color="#fff"
    active-text-color="#ffd04b">
    <el-menu-item index="1">处理中心</el-menu-item>
    <el-submenu index="2">
     <template slot="title">我的工作台</template>
     <el-menu-item index="2-1">选项1</el-menu-item>
     <el-menu-item index="2-2">选项2</el-menu-item>
     <el-menu-item index="2-3">选项3</el-menu-item>
    </el-submenu>
    <el-menu-item index="3"><a href="https://www.ele.me" rel="external nofollow" target="_blank">订单管理</a></el-menu-item>
   </el-menu>
  </el-col>
  <!-- 右边用户信息以及登陆注册 -->
  <el-button-group>
   <el-button type="danger" size="small" round >login</el-button>
   <el-button type="success" size="small" round >regin</el-button>
  </el-button-group>
 </el-row>
</template>
<script>
export default {
 // ...
}
</script>
<style scoped>

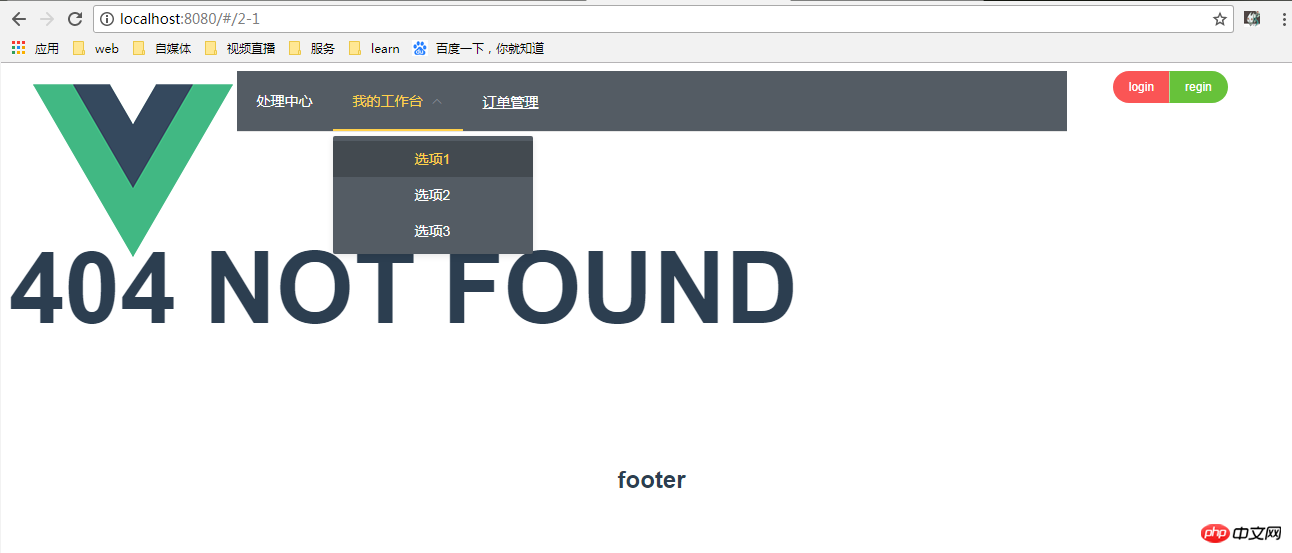
</style>現時点でのブラウザの表示は次のとおりです

見た目は醜いですが、ナビゲーションをクリックすると、中のインデックスに直接ジャンプします<el-menu-item index="2-1">xxxxxx<el-menu-item>,。 、結局のところ、愚かな方法は単にインデックスの値を変更することですが、これは十分な柔軟性がありません...
ナビゲーションを記述する一般的な方法は次のようになります
<template>
<el-row>
<!-- 左边logo -->
<el-col :span="4" class="logo">
<img src="../assets/logo.png" alt="">
</el-col>
<!-- 中间导航区域 -->
<el-col :span="16">
<el-menu
:default-active="$route.path"
class="menu"
router
mode="horizontal"
@select="handleSelect"
background-color="#545c64"
text-color="#fff"
active-text-color="#ffd04b">
<!-- 循环写的路由,其中路由中有 hidden:true 的就不加入循环 -->
<template
v-for="route in $router.options.routes"
v-if="!route.hidden">
<!-- 循环没有children的路由 -->
<el-menu-item
v-if="!route.hasChild"
:key="route.path"
:index="route.path" >
{{ route.name }}
</el-menu-item>
<!-- 循环有children的路由 -->
<el-submenu v-else :index="route.path">
<template slot="title">{{ route.name }}</template>
<el-menu-item
v-for="child in route.children"
:index="child.path"
:key="child.path">
{{ child.name }}
</el-menu-item>
</el-submenu>
</template>
</el-menu>
</el-col>
<!-- 右边用户信息以及登陆注册 -->
<el-button-group>
<el-button type="danger" size="small" round >login</el-button>
<el-button type="success" size="small" round >regin</el-button>
</el-button-group>
</el-row>
</template>
<script>
export default {
// ...
methods: {
handleSelect () {
console.log('菜单选择之后的回调操作')
}
}
}
</script>
<style scoped>
</style>ブラウザでの効果


この方法で記述することの利点は、アイコンを追加したい場合に直接追加することもできることです。 router/index.js の設定ルーティング セクションのフィールド class:classname をループ中に出力します。もちろん、ホームページのナビゲーション メニューは通常、ここでは表示されません。これを実現するには、次のようにして、ルーティング設定に hidden: true を追加するだけです。完成するには簡単な修正が必要です
このようにして、ナビゲーションにルートをぶら下げることが完了します。 次に、スタイルを記述し、関数 header.vue を改良して、ほぼ完成です
関連する推奨事項:
 実装する jQuery についてポジショニング ナビゲーション効果

以上がvue がヘッドナビゲーションにルーティングを実装する詳細な例の詳細内容です。詳細については、PHP 中国語 Web サイトの他の関連記事を参照してください。