この記事では主に、サーバーに写真をアップロードする WeChat アプレットのサンプル コードを紹介します。また、1 つまたは複数の写真をアップロードする WeChat アプレットも紹介します。 この記事ではその方法を詳しく紹介しており、必要な友人が参考になれば幸いです。
画像をサーバーにアップロードします:
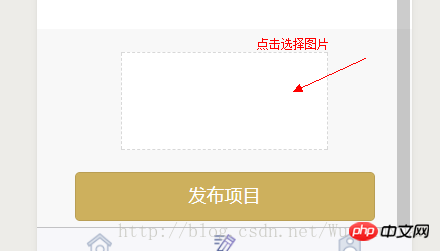
1. まず、フロントエンドに画像を選択するための領域を記述して、wx.chooseImage インターフェイスをトリガーし、wx.setStorage インターフェイスを使用して画像のパスを保存します。

-wxml
 <view>
  <image></image>
 </view>
 <button>发布项目</button>
 /**选择图片 */
 choose: function () {
  var that = this
  wx.chooseImage({
   count: 1,
   sizeType: ['original', 'compressed'], // 可以指定是原图还是压缩图,默认二者都有
   sourceType: ['album', 'camera'], // 可以指定来源是相册还是相机,默认二者都有
   success: function (res) {
    var tempFilePaths = res.tempFilePaths
    that.setData({
     tempFilePaths: res.tempFilePaths
    })
    console.log(res.tempFilePaths)
    wx.setStorage({ key: "card", data: tempFilePaths[0] })
   }
  })
},2. wx.uploadFile を使用して、サーバーにアップロードした写真をアップロードします
 formSubmit2: function (e) {
    var that = this
    var card = wx.getStorageSync('card')
    wx.uploadFile({
     url: app.globalData.create_funds,
     filePath: card,
     name: 'card',
     formData: {
      'user_id': app.globalData.user_id,
      'person': e.detail.value.person,
      'company': e.detail.value.company,
     },
     success: function (res) {
      console.log(res)
     }
    })
   }
  }
},PS: WeChat アプレットは 1 つ以上の写真をアップロードします
1. . 写真を選択します
wx.chooseImage({
   sizeType: [], // original 原图,compressed 压缩图,默认二者都有
   sourceType: [], // album 从相册选图,camera 使用相机,默认二者都有
   success: function (res) {
    console.log(res);
    var array = res.tempFilePaths, //图片的本地文件路径列表
   }
})2. 写真をアップロードします
wx.uploadFile({
   url: '', //开发者服务器的 url
   filePath: '', // 要上传文件资源的路径 String类型!!!
   name: 'uploadFile', // 文件对应的 key ,(后台接口规定的关于图片的请求参数)
   header: {
    'content-type': 'multipart/form-data'
   }, // 设置请求的 header
   formData: { }, // HTTP 请求中其他额外的参数
   success: function (res) {
   },
   fail: function (res) {
   }
})2. コード例
// 点击上传图片
upShopLogo: function () {
  var that = this;
  wx.showActionSheet({
   itemList: ['从相册中选择', '拍照'],
   itemColor: "#f7982a",
   success: function (res) {
    if (!res.cancel) {
     if (res.tapIndex == 0) {
      that.chooseWxImageShop('album')
     } else if (res.tapIndex == 1) {
      that.chooseWxImageShop('camera')
     }
    }
   }
  })
 },
 chooseWxImageShop: function (type) {
  var that = this;
  wx.chooseImage({
   sizeType: ['original', 'compressed'],
   sourceType: [type],
   success: function (res) {
/*上传单张
    that.data.orderDetail.shopImage = res.tempFilePaths[0],
    that.upload_file(API_URL + 'shop/shopIcon', res.tempFilePaths[0])
*/
 /*上传多张(遍历数组,一次传一张)
    for (var index in res.tempFilePaths) {
       that.upload_file(API_URL + 'shop/shopImage', res.tempFilePaths[index])
    }
*/
   }
  })
 },
upload_file: function (url, filePath) {
  var that = this;
  wx.uploadFile({
   url: url,
   filePath: filePath,
   name: 'uploadFile',
   header: {
    'content-type': 'multipart/form-data'
   }, // 设置请求的 header
   formData: { 'shopId': wx.getStorageSync('shopId') }, // HTTP 请求中其他额外的 form data
   success: function (res) {
    wx.showToast({
       title: "图片修改成功",
       icon: 'success',
       duration: 700
      })
   },
   fail: function (res) {
   }
  })
},関連する推奨事項:
以上が画像をサーバーにアップロードする WeChat アプレットの詳細な例の詳細内容です。詳細については、PHP 中国語 Web サイトの他の関連記事を参照してください。