この記事では主に WeChat アプレットのタブ機能の開発について説明します。お役に立てば幸いです。
ページ ファイルに swipertab フォルダーを作成します
1。 swipertab.wxml
<!--swipertab.wxml-->
<view class="swiper-tab">
<view class="swiper-tab-list {{currentTab==0 ? 'on' : ''}}" data-current="0" bindtap="swichNav">tab一</view>
<view class="swiper-tab-list {{currentTab==1 ? 'on' : ''}}" data-current="1" bindtap="swichNav">tab二</view>
<view class="swiper-tab-list {{currentTab==2 ? 'on' : ''}}" data-current="2" bindtap="swichNav">tab三</view>
</view>
<swiper current="{{currentTab}}" class="swiper-box" duration="300" style="height:{{winHeight - 31}}px" bindchange="bindChange">
<!-- tab一 -->
<swiper-item>
<view>tab一</view>
</swiper-item>
<!-- tab二 -->
<swiper-item>
<view>tab二</view>
</swiper-item>
<!-- tab三 -->
<swiper-item>
<view>tab三</view>
</swiper-item>
</swiper>2.データを設定: swipertab.js
//获取应用实例
var app = getApp()
Page({
	data: {
		/**
		 * 页面配置
		 */
		winWidth: 0,
		winHeight: 0,
		// tab切换
		currentTab: 0,
	},
	onLoad: function() {
		var that = this;

		/**
		 * 获取系统信息
		 */
		wx.getSystemInfo({

			success: function(res) {
				that.setData({
					winWidth: res.windowWidth,
					winHeight: res.windowHeight
				});
			}

		});
	},
	/**
	 * 滑动切换tab
	 */
	bindChange: function(e) {

		var that = this;
		that.setData({
			currentTab: e.detail.current
		});

	},
	/**
	 * 点击tab切换
	 */
	swichNav: function(e) {

		var that = this;

		if (this.data.currentTab === e.target.dataset.current) {
			return false;
		} else {
			that.setData({
				currentTab: e.target.dataset.current
			})
		}
	}
})3. スタイルを設定: swipertab.wxss
りー
4. ヘッダー タイトルの変更: swipertab.json
.swiper-tab{
    width: 100%;
    border-bottom: 2rpx solid #777777;
    text-align: center;
    line-height: 80rpx;}
.swiper-tab-list{  font-size: 30rpx;
    display: inline-block;
    width: 33.33%;
    color: #777777;
}
.on{ color: #da7c0c;
    border-bottom: 5rpx solid #da7c0c;}

.swiper-box{ display: block; height: 100%; width: 100%; overflow: hidden; }
.swiper-box view{
    text-align: center;
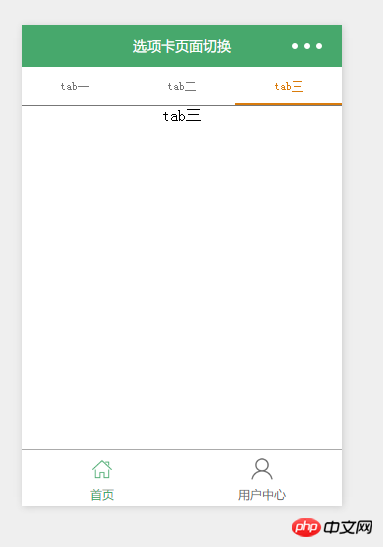
}5. レンダリング

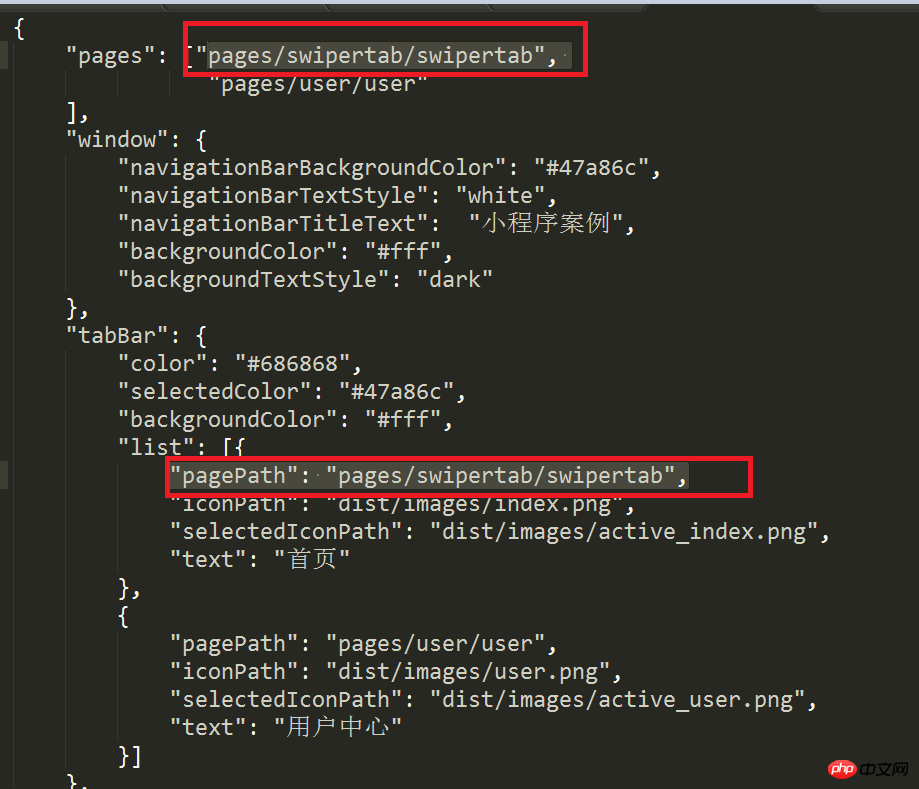
注: ファイル名ははインデックスではありません。忘れずに app.json ファイルを変更してください (以下の注)。変更しないと、ページが表示されず、下部も表示されません

関連する推奨事項:
以上がWeChatミニプログラムタブ機能の開発の詳細内容です。詳細については、PHP 中国語 Web サイトの他の関連記事を参照してください。