

Vue は画像カルーセルを作成します
今回は、Vue で画像カルーセルを作成する方法について説明します。Vue で画像カルーセルを作成する際の 注意事項 は何ですか? ここで実際のケースを見てみましょう。
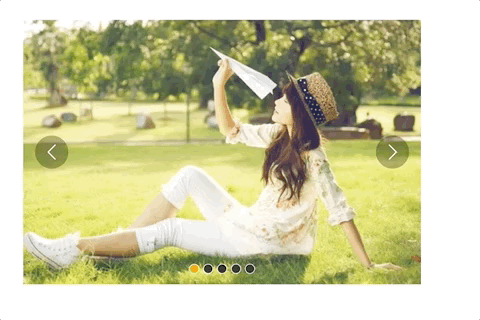
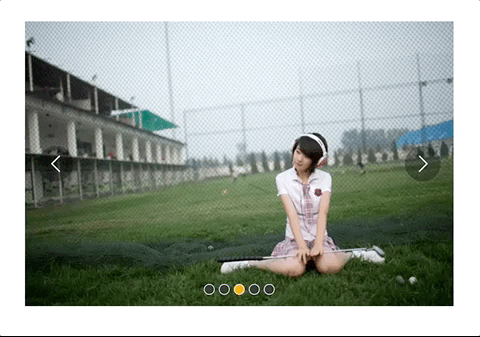
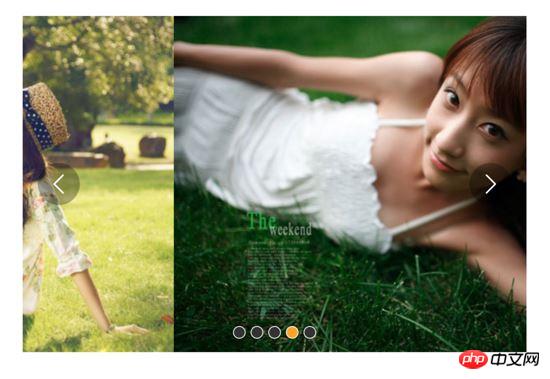
私はこれまで真剣にコンポーネントを書いたことがありません。これまで業務コードを書くときはいつも他人がパッケージ化したコンポーネントを使っていましたが、今回はよく知られているカルーセルコンポーネントには及ばないものの、基本的には機能が充実しているので、画像カルーセルコンポーネントを書いてみました。このコンポーネントを作成する過程で、私は多くのことを学びました。漏れがあれば、修正してください。 このコンポーネントを作成する前に、カルーセルに関する多くの記事をグーグルで検索したところ、カルーセルを実装するためのアイデアは異なっていても、実際には大きなロジックは同じであることがわかりました。この記事は主にフォーカス カルーセル画像の特殊効果に基づいています。 MOOC のオンライン レッスンについて説明しましたが、MOOC は主にネイティブ JS で書かれており、作者は Vue を使用して再構築し、いくつかの修正を加えました。完成したコンポーネントのレンダリングは次のとおりです: 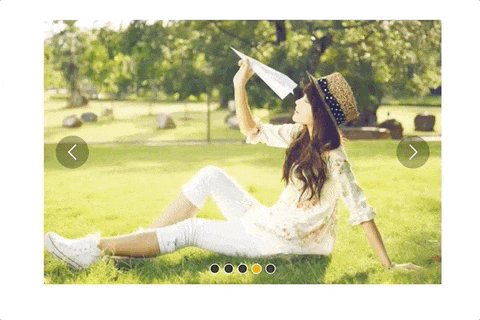
1. アイデアを明確にし、ニーズと原則を理解します
1. どのような種類のカルーセルを書きたいですか?
- 右側の矢印をクリックすると画像が左にスライドして次の画像に移動し、左側の矢印をクリックすると画像が右にスライドして次の画像に移動します
- クリック下の小さな点をクリックして、対応する点にスライドします。 画像内の対応する小さな点のスタイルも変わります
-
トランジション効果が必要で、ゆっくりとスライドします
- マウスを画像の上に置くと、カルーセルは一時停止され、マウスが離れるとカルーセルは継続します
- 自動再生機能
- 無限スクロール、つまり、最後の画像までスクロールするとき、次の画像をクリックすると、次の画像までスライドし続けます。最初の写真までずっと引っ張るのではなく、ここで最初の写真の左側に移動します。少し難しいです
2. 無限カルーセルの原理を理解します
まず概略図を見てみましょう:


2. まずは写真を切り替えましょう
1. レイアウトと準備
<template>
 <p id="slider">
  <p class="window">  // window上图中红线框
   <ul class="container" :style="containerStyle"> //注意这里的:style //这是图片列表,排成一排
    <li> //列表最前面的辅助图,它和图5一样,用于无限滚动
     <img :src="sliders[sliders.length - 1].img" alt="">
    </li>
    <li v-for="(item, index) in sliders" :key="index"> //通过v-for渲染的需要展示的5张图
     <img :src="item.img" alt="">
    </li>
    <li> //列表最后面的辅助图,它和图1一样,用于无限滚动
     <img :src="sliders[0].img" alt="">
    </li>
   </ul>
   <ul class="direction"> //两侧的箭头
    <li class="left">
     <svg class="icon" width="30px" height="30.00px" viewBox="0 0 1024 1024" version="1.1" xmlns="http://www.w3.org/2000/svg"><path fill="#ffffff" d="M481.233 904c8.189 0 16.379-3.124 22.628-9.372 12.496-12.497 12.496-32.759 0-45.256L166.488 512l337.373-337.373c12.496-12.497 12.496-32.758 0-45.255-12.498-12.497-32.758-12.497-45.256 0l-360 360c-12.496 12.497-12.496 32.758 0 45.255l360 360c6.249 6.249 14.439 9.373 22.628 9.373z" /></svg>
    </li>
    <li class="right">
     <svg class="icon" width="30px" height="30.00px" viewBox="0 0 1024 1024" version="1.1" xmlns="http://www.w3.org/2000/svg"><path fill="#ffffff" d="M557.179 904c-8.189 0-16.379-3.124-22.628-9.372-12.496-12.497-12.496-32.759 0-45.256L871.924 512 534.551 174.627c-12.496-12.497-12.496-32.758 0-45.255 12.498-12.497 32.758-12.497 45.256 0l360 360c12.496 12.497 12.496 32.758 0 45.255l-360 360c-6.249 6.249-14.439 9.373-22.628 9.373z" /></svg>
    </li>
   </ul>
   <ul class="dots"> //下面的小圆点
    <li v-for="(dot, i) in sliders" :key="i"
    :class="{dotted: i === (currentIndex-1)}"
    >
    </li>
   </ul>
  </p>
 </p>
</template>
<script>
export default {
 name: 'slider',
 data () {
  return {
   sliders:[
    {
     img:'../../static/images/1.jpg'
    },
    {
     img:'../../static/images/2.jpg'
    },
    {
     img:'../../static/images/3.jpg'
    },
    {
     img:'../../static/images/4.jpg'
    },
    {
     img:'../../static/images/5.jpg'
    }
   ],
   currentIndex:1,
   distance:-600
  }
 },
 computed:{
  containerStyle() { //这里用了计算属性,用transform来移动整个图片列表
   return {
    transform:`translate3d(${this.distance}px, 0, 0)`
   }
  }
 }
}
</script>
- ウィンドウは幅 600 ピクセルの赤い線の枠であり、移動するのは画像を囲むコンテナです。 is: style="containerStyle"、これは計算されたプロパティです。左右の動きを制御するには、translate3d(${this. distance, 0, 0}) を使用します
- distance と currentIndex のデータがキー、距離です移動距離を制御します。デフォルトは -600 で、7 枚の写真のうち 2 番目の写真 (写真 1) が表示されます。 currentIndex はウィンドウに表示されるピクチャのインデックスです。ここでのデフォルトは 1 で、これは 7 つのピクチャのうちの 2 番目のピクチャでもあります。
- 表示する必要がある画像は 5 枚だけですが、画像 5 を画像 1 の前に配置し、画像 1 を画像 5 の後に配置することで、無限スクロールを実現します
。
当点击右侧的箭头,container向左移动, distance 会越来越小;当点击左侧的箭头,container向右移动, distance 会越来越大,方向不要弄错
2. 图片切换
我们在左侧和右侧的箭头上添加点击事件:
<ul class="direction">
    <li class="left" @click="move(600, 1)">
     <svg class="icon" width="30px" height="30.00px" viewBox="0 0 1024 1024" version="1.1" xmlns="http://www.w3.org/2000/svg"><path fill="#ffffff" d="M481.233 904c8.189 0 16.379-3.124 22.628-9.372 12.496-12.497 12.496-32.759 0-45.256L166.488 512l337.373-337.373c12.496-12.497 12.496-32.758 0-45.255-12.498-12.497-32.758-12.497-45.256 0l-360 360c-12.496 12.497-12.496 32.758 0 45.255l360 360c6.249 6.249 14.439 9.373 22.628 9.373z" /></svg>
    </li>
    <li class="right" @click="move(600, -1)">
     <svg class="icon" width="30px" height="30.00px" viewBox="0 0 1024 1024" version="1.1" xmlns="http://www.w3.org/2000/svg"><path fill="#ffffff" d="M557.179 904c-8.189 0-16.379-3.124-22.628-9.372-12.496-12.497-12.496-32.759 0-45.256L871.924 512 534.551 174.627c-12.496-12.497-12.496-32.758 0-45.255 12.498-12.497 32.758-12.497 45.256 0l360 360c12.496 12.497 12.496 32.758 0 45.255l-360 360c-6.249 6.249-14.439 9.373-22.628 9.373z" /></svg>
    </li>
   </ul>
   ......
   methods:{
      move(offset, direction) {
        this.distance += this.distance * direction
        if (this.distance < -3000) this.distance = -600
        if (this.distance > -600) this.distance = -3000
      }
}解释下上面的代码:点击左侧或者右侧的箭头,调用move函数,move接收偏移量offset和方向direction两个参数。direction只传两个值,1表示container向右移动,-1表示container向左移动;偏移量是600,也就是一张图片的宽度。如果移动到7张图片的最后一张,就把container拉到7张图片里的第二张;如果移动到7张图片里第一张,就把container拉到7张图片里的第5张。
效果:
可以看到,图片切换效果已经出来了,但是下面的小圆点没有跟着变换。接下来我们把这个效果加上。从上面的html代码可以看到, :class="{dotted: i === (currentIndex - 1)}" ,小圆点的切换效果和data里的currentIndex值相关,我们只要随着图片切换变动currentIndex值就可以了。
修改move方法里的代码:
......
move(offset, direction) {
  direction === -1 ? this.currentIndex++ : this.currentIndex--
  if (this.currentIndex > 5) this.currentIndex = 1
  if (this.currentIndex < 1) this.currentIndex = 5
  this.distance = this.distance + offset * direction
  if (this.distance < -3000) this.distance = -600
  if (this.distance > -600) this.distance = -3000
}上面的添加的三行代码很好理解,如果是点击右侧箭头,container就是向左移动, this.currentIndex 就是减1,反之就是加1。
效果:
可以看到,小圆点的切换效果已经出来了。
三、过渡动画
上面的代码已经实现了切换,但是没有动画效果,显的非常生硬,接下来就是给每个图片的切换过程添加过渡效果。
这个轮播组件笔者并没有使用Vue自带的class钩子,也没有直接使用css的transition属性,而是用慕课网原作者讲的setTimeout方法加递归来实现。
其实我也试过使用Vue的钩子,但是总有一些小问题解决不掉;比如下面找到的这个例子:例子
这个例子在过渡的边界上有一些问题,我也遇到了,而且还是时有时无。而如果使用css的transition过渡方法,在处理边界的无限滚动上总会在chrome浏览器上有一下闪动,即使添加了 -webkit-transform-style:preserve-3d; 和 -webkit-backface-visibility:hidden 也还是没用,而且要配合transition的 transitionend 事件对于IE浏览器的支持也不怎么好。
如果大家有看到更好的办法,请在评论中留言哦~
下面我们来写这个过渡效果,主要是改写:
methods:{
  move(offset, direction) {
    direction === -1 ? this.currentIndex++ : this.currentIndex--
    if (this.currentIndex > 5) this.currentIndex = 1
    if (this.currentIndex < 1) this.currentIndex = 5
    const destination = this.distance + offset * direction
    this.animate(destination, direction)
  },
  animate(des, direc) {
    if ((direc === -1 && des < this.distance) || (direc === 1 && des > this.distance)) {
      this.distance += 30 * direc
      window.setTimeout(() => {
        this.animate(des, direc)
      }, 20)
    } else {
      this.distance = des
      if (des < -3000) this.distance = -600
      if (des > -600) this.distance = -3000
   }
  }
}上面的代码是这个轮播我觉得最麻烦、也是最难理解的地方。
来理解一下:首先,我们对于move方法进行了改写,因为要一点点的移动,所以要先算出要移动到的目标距离。然后,我们写一个animate函数来实现这个过渡。这个animate函数接收两个参数,一个是要移动到的距离,另一个是方向。 如果我们点击了右侧的箭头,container要向左侧移动,要是没有移动到目标距离,就在 this.distance 减去一定的距离,如果减去后还是没有到达,在20毫米以后再调用这个 this.animate ,如此不断移动,就形成了过渡效果。而如果移动到了目标距离,那就将目标距离赋值给 this.distance ,然后再进行边界和无限滚动的判断。
当然,使用 window.setInterval() 也可以实现这个效果,而且会稍微好理解一点,因为没有用到递归:
methods:{
  move(offset, direction) {
    direction === -1 ? this.currentIndex++ : this.currentIndex--
    if (this.currentIndex > 5) this.currentIndex = 1
    if (this.currentIndex < 1) this.currentIndex = 5
    const destination = this.distance + offset * direction
    this.animate(destination, direction)
  },
  animate(des, direc) {
    const temp = window.setInterval(() => {
      if ((direc === -1 && des < this.distance) || (direc === 1 && des > this.distance)) {
        this.distance += 30 * direc
      } else {
        window.clearInterval(temp)
        this.distance = des
        if (des < -3000) this.distance = -600
        if (des > -600) this.distance = -3000
      }
    }, 20)
  }
}实现出来的效果如下:

四、简单节流一下
写到这里,效果是出来了,但是会有一点问题,如果多次快速点击,就会有可能出现下面这种情况:
出现这种情况的原因很简单,因为是使用定时器过渡,所以连续快速点击就会出现错乱,简单节流一下就好了: 在过渡完成之前点击箭头无效,其实就是设了一个闸,第一次点击把闸打开,在闸再次打开之前,让一部分代码无法执行,然后再在恰当的时机把闸打开。
我们把这个闸设在move函数里:
move(offset, direction) {
  if (!this.transitionEnd) return //这里是闸
  this.transitionEnd = false    //开闸以后再把闸关上
  direction === -1 ? this.currentIndex++ : this.currentIndex--
  if (this.currentIndex > 5) this.currentIndex = 1
  if (this.currentIndex < 1) this.currentIndex = 5
  const destination = this.distance + offset * direction
  this.animate(destination, direction)
}this.transitionEnd 是这个闸的钥匙,我们把它放到data里:
this.transitionEnd: true
这个闸一开始默认的状态是开着的,第一次点击以后,这个闸就关上了, this.tranisitonEnd = false ,在再次打开之前,后面的代码都执行不了。接下来就是在恰当的时机把这个闸打开,而这个恰当的时机就是过渡完成时,也就是在 animate函数 里:
animate(des, direc) {
  if (this.temp) {
    window.clearInterval(this.temp)
    this.temp = null
  }
  this.temp = window.setInterval(() => {
    if ((direc === -1 && des < this.distance) || (direc === 1 && des > this.distance)) {
     this.distance += 30 * direc
    } else {
     this.transitionEnd = true   //闸再次打开
     window.clearInterval(this.temp)
     this.distance = des
     if (des < -3000) this.distance = -600
     if (des > -600) this.distance = -3000
    }
  }, 20)
}这下快速点击就没有之前的那个问题了:

五、点击小圆点实现图片过渡切换
到目前为止的代码:
<template>
 <p id="slider">
  <p class="window">
   <ul class="container" :style="containerStyle">
    <li>
     <img :src="sliders[sliders.length - 1].img" alt="">
    </li>
    <li v-for="(item, index) in sliders" :key="index">
     <img :src="item.img" alt="">
    </li>
    <li>
     <img :src="sliders[0].img" alt="">
    </li>
   </ul>
   <ul class="direction">
    <li class="left" @click="move(600, 1)">
     <svg class="icon" width="30px" height="30.00px" viewBox="0 0 1024 1024" version="1.1" xmlns="http://www.w3.org/2000/svg"><path fill="#ffffff" d="M481.233 904c8.189 0 16.379-3.124 22.628-9.372 12.496-12.497 12.496-32.759 0-45.256L166.488 512l337.373-337.373c12.496-12.497 12.496-32.758 0-45.255-12.498-12.497-32.758-12.497-45.256 0l-360 360c-12.496 12.497-12.496 32.758 0 45.255l360 360c6.249 6.249 14.439 9.373 22.628 9.373z" /></svg>
    </li>
    <li class="right" @click="move(600, -1)">
     <svg class="icon" width="30px" height="30.00px" viewBox="0 0 1024 1024" version="1.1" xmlns="http://www.w3.org/2000/svg"><path fill="#ffffff" d="M557.179 904c-8.189 0-16.379-3.124-22.628-9.372-12.496-12.497-12.496-32.759 0-45.256L871.924 512 534.551 174.627c-12.496-12.497-12.496-32.758 0-45.255 12.498-12.497 32.758-12.497 45.256 0l360 360c12.496 12.497 12.496 32.758 0 45.255l-360 360c-6.249 6.249-14.439 9.373-22.628 9.373z" /></svg>
    </li>
   </ul>
   <ul class="dots">
    <li v-for="(dot, i) in sliders" :key="i"
    :class="{dotted: i === (currentIndex-1)}"
    >
    </li>
   </ul>
  </p>
 </p>
</template>
<script>
export default {
 name: 'slider',
 data () {
  return {
   sliders:[
    {
     img:'../../static/images/1.jpg'
    },
    {
     img:'../../static/images/2.jpg'
    },
    {
     img:'../../static/images/3.jpg'
    },
    {
     img:'../../static/images/4.jpg'
    },
    {
     img:'../../static/images/5.jpg'
    }
   ],
   currentIndex:1,
   distance:-600,
   transitionEnd: true
  }
 },
 computed:{
  containerStyle() {
   return {
    transform:`translate3d(${this.distance}px, 0, 0)`
   }
  }
 },
 methods:{
  move(offset, direction) {
   if (!this.transitionEnd) return
   this.transitionEnd = false
   direction === -1 ? this.currentIndex++ : this.currentIndex--
   if (this.currentIndex > 5) this.currentIndex = 1
   if (this.currentIndex < 1) this.currentIndex = 5
   const destination = this.distance + offset * direction
   this.animate(destination, direction)
  },
  animate(des, direc) {
   if (this.temp) {
    window.clearInterval(this.temp)
    this.temp = null
   }
   this.temp = window.setInterval(() => {
    if ((direc === -1 && des < this.distance) || (direc === 1 && des > this.distance)) {
     this.distance += 30 * direc
    } else {
     this.transitionEnd = true
     window.clearInterval(this.temp)
     this.distance = des
     if (des < -3000) this.distance = -600
     if (des > -600) this.distance = -3000
    }
   }, 20)
  }
 }
}
</script>接下来我们要实现点击下面的小圆点来实现过渡和图片切换。
<ul class="dots">
  <li v-for="(dot, i) in sliders" :key="i"
  :class="{dotted: i === (currentIndex-1)}"
  @click = jump(i+1)>
  </li>
</ul>在点击小圆点的时候我们调用 jump 函数,并将索引 i+1 传给它。 这里需要特别注意,小圆点的索引和图片对应的索引不一致,图片共7张,而5个小圆点对应的是图片中中间的5张,所以我们才传 i+1 。
jump(index) {
  const direction = index - this.currentIndex >= 0 ? -1 : 1 //获取滑动方向
  const offset = Math.abs(index - this.currentIndex) * 600  //获取滑动距离
  this.move(offset, direction)
}上面的代码有一个问题,在jump函数里调用move方法,move里对于currentIndex的都是 +1 ,而点击小圆点可能是将 currentIndex 加或者减好多个,所以要对move里的代码修改下:
direction === -1 ? this.currentIndex += offset/600 : this.currentIndex -= offset/600
改一行,根据offset算出currentIndex就行了。
但是又有一个问题,长距离切换速度太慢,如下:

所以我们需要控制一下速度,让滑动一张图片耗费的时间和滑动多张图片耗费的时间一样,给move和animate函数添加一个speed参数,还要再算一下:
jump(index) {
  const direction = index - this.currentIndex >= 0 ? -1 : 1
  const offset = Math.abs(index - this.currentIndex) * 600
  const jumpSpeed = Math.abs(index - this.currentIndex) === 0 ? this.speed : Math.abs(index - this.currentIndex) * this.speed
  this.move(offset, direction, jumpSpeed)
}六、自动播放与暂停
前面的写的差不多了,到这里就非常简单了,写一个函数play:
play() {
  if (this.timer) {
    window.clearInterval(this.timer)
    this.timer = null
  }
  this.timer = window.setInterval(() => {
    this.move(600, -1, this.speed)
  }, 4000)
}除了初始化以后自动播放,还要通过mouseover和mouseleave来控制暂停与播放:
stop() {
  window.clearInterval(this.timer)
  this.timer = null
}七、 两处小坑
1. window.onblur 和 window.onfocus
写到这里,基本功能都差不多了。但是如果把页面切换到别的页面,导致轮播图所在页面失焦,过一段时间再切回来会发现轮播狂转。原因是页面失焦以后,setInterval停止运行,但是如果切回来就会一次性把该走的一次性走完。解决的方法也很简单,当页面失焦时停止轮播,页面聚焦时开始轮播。
window.onblur = function() { this.stop() }.bind(this)
window.onfocus = function() { this.play() }.bind(this)2. window.setInterval() 小坑
当定时器 window.setInterval() 在多个异步回调中使用时,就有可能在某种机率下开启多个执行队列, 所以为了保险起见,不仅应该在该清除时清除定时器,还要在每次使用之前也清除一遍 。
八、用props简单写两个对外接口
props: {
  initialSpeed: {
   type: Number,
   default: 30
  },
  initialInterval: {
   type: Number,
   default: 4
  }
},
data() {
  ......
  speed: this.initialSpeed
},
computed:{
  interval() {
    return this.initialInterval * 1000
  }
}然后再在相应的地方修改下就可以了。
完整的代码如下:
<template>
 <p id="slider">
  <p class="window" @mouseover="stop" @mouseleave="play">
   <ul class="container" :style="containerStyle">
    <li>
     <img :src="sliders[sliders.length - 1].img" alt="">
    </li>
    <li v-for="(item, index) in sliders" :key="index">
     <img :src="item.img" alt="">
    </li>
    <li>
     <img :src="sliders[0].img" alt="">
    </li>
   </ul>
   <ul class="direction">
    <li class="left" @click="move(600, 1, speed)">
     <svg class="icon" width="30px" height="30.00px" viewBox="0 0 1024 1024" version="1.1" xmlns="http://www.w3.org/2000/svg"><path fill="#ffffff" d="M481.233 904c8.189 0 16.379-3.124 22.628-9.372 12.496-12.497 12.496-32.759 0-45.256L166.488 512l337.373-337.373c12.496-12.497 12.496-32.758 0-45.255-12.498-12.497-32.758-12.497-45.256 0l-360 360c-12.496 12.497-12.496 32.758 0 45.255l360 360c6.249 6.249 14.439 9.373 22.628 9.373z" /></svg>
    </li>
    <li class="right" @click="move(600, -1, speed)">
     <svg class="icon" width="30px" height="30.00px" viewBox="0 0 1024 1024" version="1.1" xmlns="http://www.w3.org/2000/svg"><path fill="#ffffff" d="M557.179 904c-8.189 0-16.379-3.124-22.628-9.372-12.496-12.497-12.496-32.759 0-45.256L871.924 512 534.551 174.627c-12.496-12.497-12.496-32.758 0-45.255 12.498-12.497 32.758-12.497 45.256 0l360 360c12.496 12.497 12.496 32.758 0 45.255l-360 360c-6.249 6.249-14.439 9.373-22.628 9.373z" /></svg>
    </li>
   </ul>
   <ul class="dots">
    <li v-for="(dot, i) in sliders" :key="i"
    :class="{dotted: i === (currentIndex-1)}"
    @click = jump(i+1)
    >
    </li>
   </ul>
  </p>
 </p>
</template>
<script>
export default {
 name: 'slider',
 props: {
  initialSpeed: {
   type: Number,
   default: 30
  },
  initialInterval: {
   type: Number,
   default: 4
  }
 },
 data () {
  return {
   sliders:[
    {
     img:'../../static/images/1.jpg'
    },
    {
     img:'../../static/images/2.jpg'
    },
    {
     img:'../../static/images/3.jpg'
    },
    {
     img:'../../static/images/4.jpg'
    },
    {
     img:'../../static/images/5.jpg'
    }
   ],
   currentIndex:1,
   distance:-600,
   transitionEnd: true,
   speed: this.initialSpeed
  }
 },
 computed:{
  containerStyle() {
   return {
    transform:`translate3d(${this.distance}px, 0, 0)`
   }
  },
  interval() {
   return this.initialInterval * 1000
  }
 },
 mounted() {
  this.init()
 },
 methods:{
  init() {
   this.play()
   window.onblur = function() { this.stop() }.bind(this)
   window.onfocus = function() { this.play() }.bind(this)
  },
  move(offset, direction, speed) {
   if (!this.transitionEnd) return
   this.transitionEnd = false
   direction === -1 ? this.currentIndex += offset/600 : this.currentIndex -= offset/600
   if (this.currentIndex > 5) this.currentIndex = 1
   if (this.currentIndex < 1) this.currentIndex = 5
   const destination = this.distance + offset * direction
   this.animate(destination, direction, speed)
  },
  animate(des, direc, speed) {
   if (this.temp) {
    window.clearInterval(this.temp)
    this.temp = null
   }
   this.temp = window.setInterval(() => {
    if ((direc === -1 && des < this.distance) || (direc === 1 && des > this.distance)) {
     this.distance += speed * direc
    } else {
     this.transitionEnd = true
     window.clearInterval(this.temp)
     this.distance = des
     if (des < -3000) this.distance = -600
     if (des > -600) this.distance = -3000
    }
   }, 20)
  },
  jump(index) {
   const direction = index - this.currentIndex >= 0 ? -1 : 1
   const offset = Math.abs(index - this.currentIndex) * 600
   const jumpSpeed = Math.abs(index - this.currentIndex) === 0 ? this.speed : Math.abs(index - this.currentIndex) * this.speed
   this.move(offset, direction, jumpSpeed)
  },
  play() {
   if (this.timer) {
    window.clearInterval(this.timer)
    this.timer = null
   }
   this.timer = window.setInterval(() => {
    this.move(600, -1, this.speed)
   }, this.interval)
  },
  stop() {
   window.clearInterval(this.timer)
   this.timer = null
  }
 }
}
</script>github地址
九、结语
このコンポーネントを書き終えた後、This. distance と this.currentIndex は高度に結合されており、計算されたプロパティを通じて接続できることがわかりました。移行メソッドもありますが、タイマー メソッドはまだ少し硬く、Vue を活用していません。しかし、最初のコンポーネントはほぼ完成しており、かなりの労力がかかりました。
この記事の事例を読んだ後は、この方法を習得したと思います。さらに興味深い情報については、php 中国語 Web サイトの他の関連記事に注目してください。
推奨読書:
ToutiaoモバイルホームページインターフェースのJS模倣
以上がVue は画像カルーセルを作成しますの詳細内容です。詳細については、PHP 中国語 Web サイトの他の関連記事を参照してください。

ホットAIツール

Undresser.AI Undress
リアルなヌード写真を作成する AI 搭載アプリ

AI Clothes Remover
写真から衣服を削除するオンライン AI ツール。

Undress AI Tool
脱衣画像を無料で

Clothoff.io
AI衣類リムーバー

Video Face Swap
完全無料の AI 顔交換ツールを使用して、あらゆるビデオの顔を簡単に交換できます。

人気の記事
ホットツール

メモ帳++7.3.1
使いやすく無料のコードエディター

SublimeText3 中国語版
中国語版、とても使いやすい

ゼンドスタジオ 13.0.1
強力な PHP 統合開発環境

ドリームウィーバー CS6
ビジュアル Web 開発ツール

SublimeText3 Mac版
神レベルのコード編集ソフト(SublimeText3)
ホットトピック
 7655
7655
 15
1393
52
91
11
37
110
15
1393
52
91
11
37
110

 小紅書で公開するときに写真が自動的に保存される問題を解決するにはどうすればよいですか?投稿時に自動保存された画像はどこにありますか?
Mar 22, 2024 am 08:06 AM
小紅書で公開するときに写真が自動的に保存される問題を解決するにはどうすればよいですか?投稿時に自動保存された画像はどこにありますか?
Mar 22, 2024 am 08:06 AM
ソーシャルメディアの継続的な発展に伴い、Xiaohongshu はますます多くの若者が自分たちの生活を共有し、美しいものを発見するためのプラットフォームとなっています。多くのユーザーは、画像を投稿する際の自動保存の問題に悩まされています。では、この問題をどうやって解決すればよいでしょうか? 1.小紅書で公開するときに写真が自動的に保存される問題を解決するにはどうすればよいですか? 1. キャッシュをクリアする まず、Xiaohongshu のキャッシュ データをクリアしてみます。手順は次のとおりです: (1) 小紅書を開いて右下隅の「マイ」ボタンをクリックします。 (2) 個人センター ページで「設定」を見つけてクリックします。 (3) 下にスクロールして「」を見つけます。 「キャッシュをクリア」オプションを選択し、「OK」をクリックします。キャッシュをクリアした後、Xiaohongshu を再起動し、写真を投稿して、自動保存の問題が解決されるかどうかを確認します。 2. 小紅書バージョンを更新して、小紅書が正しく動作することを確認します。
 TikTokのコメントに写真を投稿するにはどうすればよいですか?コメント欄の写真への入り口はどこですか?
Mar 21, 2024 pm 09:12 PM
TikTokのコメントに写真を投稿するにはどうすればよいですか?コメント欄の写真への入り口はどこですか?
Mar 21, 2024 pm 09:12 PM
Douyin のショートビデオの人気により、コメント エリアでのユーザーのやり取りがより多彩になりました。ユーザーの中には、自分の意見や感情をよりよく表現するために、コメントで画像を共有したいと考えている人もいます。では、TikTokのコメントに写真を投稿するにはどうすればよいでしょうか?この記事では、この質問に詳しく答え、関連するヒントと注意事項をいくつか紹介します。 1.Douyinのコメントに写真を投稿するにはどうすればよいですか? 1. Douyinを開く: まず、Douyin APPを開いてアカウントにログインする必要があります。 2. コメントエリアを見つける:短いビデオを閲覧または投稿するときに、コメントしたい場所を見つけて「コメント」ボタンをクリックします。 3. コメントの内容を入力します: コメント領域にコメントの内容を入力します。 4. 写真の送信を選択します。コメント内容を入力するインターフェースに「写真」ボタンまたは「+」ボタンが表示されます。
 iPhone で写真をより鮮明にする 6 つの方法
Mar 04, 2024 pm 06:25 PM
iPhone で写真をより鮮明にする 6 つの方法
Mar 04, 2024 pm 06:25 PM
Apple の最近の iPhone は、鮮明なディテール、彩度、明るさで思い出を捉えます。ただし、場合によっては、画像が鮮明に見えなくなる問題が発生することがあります。 iPhone カメラのオートフォーカスは大きく進歩し、写真をすばやく撮影できるようになりましたが、状況によってはカメラが誤って間違った被写体に焦点を合わせ、不要な領域で写真がぼやけてしまうことがあります。 iPhone 上の写真の焦点が合っていない場合、または全体的に鮮明さが欠けている場合は、次の投稿を参照して写真を鮮明にすることができます。 iPhone で写真を鮮明にする方法 [6 つの方法] ネイティブの写真アプリを使用して写真をクリーンアップしてみることができます。さらに多くの機能やオプションが必要な場合
 PPT画像を1枚ずつ表示させる方法
Mar 25, 2024 pm 04:00 PM
PPT画像を1枚ずつ表示させる方法
Mar 25, 2024 pm 04:00 PM
PowerPoint では、画像を 1 枚ずつ表示するのが一般的な手法ですが、これはアニメーション効果を設定することで実現できます。このガイドでは、基本的なセットアップ、画像の挿入、アニメーションの追加、アニメーションの順序とタイミングの調整など、この手法を実装する手順について詳しく説明します。さらに、トリガーの使用、アニメーションの速度と順序の調整、アニメーション効果のプレビューなど、高度な設定と調整が提供されます。これらの手順とヒントに従うことで、ユーザーは PowerPoint で次々に表示される画像を簡単に設定できるため、プレゼンテーションの視覚的な効果が高まり、聴衆の注意を引くことができます。
 Web ページ上の画像を読み込めない場合はどうすればよいですか? 6つのソリューション
Mar 15, 2024 am 10:30 AM
Web ページ上の画像を読み込めない場合はどうすればよいですか? 6つのソリューション
Mar 15, 2024 am 10:30 AM
一部のネチズンは、ブラウザの Web ページを開いたときに、Web ページ上の画像が長時間読み込めないことに気づきました。何が起こったのでしょうか?ネットワークは正常であることを確認しましたが、どこに問題があるのでしょうか?以下のエディタでは、Web ページの画像が読み込めない問題に対する 6 つの解決策を紹介します。 Web ページの画像を読み込めない: 1. インターネット速度の問題 Web ページに画像が表示されません。これは、コンピュータのインターネット速度が比較的遅く、コンピュータ上で開いているソフトウェアが多いためと考えられます。また、アクセスする画像が比較的大きいため、読み込みタイムアウトが原因である可能性があります。その結果、画像が表示されません。ネットワーク速度をより多く消費するソフトウェアをオフにすることができます。タスク マネージャーに移動して確認できます。 2. 訪問者が多すぎる Web ページに写真が表示されない場合は、訪問した Web ページが同時に訪問されたことが原因である可能性があります。
 Foxit PDF Reader で PDF ドキュメントを jpg 画像に変換する方法 - Foxit PDF Reader で PDF ドキュメントを jpg 画像に変換する方法
Mar 04, 2024 pm 05:49 PM
Foxit PDF Reader で PDF ドキュメントを jpg 画像に変換する方法 - Foxit PDF Reader で PDF ドキュメントを jpg 画像に変換する方法
Mar 04, 2024 pm 05:49 PM
Foxit PDF Reader ソフトウェアも使用していますか? Foxit PDF Reader が PDF ドキュメントを jpg 画像に変換する方法をご存知ですか? 次の記事では、Foxit PDF Reader が PDF ドキュメントを jpg 画像に変換する方法について説明します。 jpg画像は以下からご覧ください。まずFoxit PDF Readerを起動し、上部のツールバーで「機能」を見つけ、「PDF to Others」機能を選択します。次に、「Foxit PDF Online Conversion」というWebページを開きます。ページ右上の「ログイン」ボタンをクリックしてログインし、「PDF to Image」機能をオンにしてください。次にアップロードボタンをクリックし、画像に変換したいPDFファイルを追加し、追加後「変換開始」をクリックします。
 WPSドキュメントで2つの写真を並べて配置する方法
Mar 20, 2024 pm 04:00 PM
WPSドキュメントで2つの写真を並べて配置する方法
Mar 20, 2024 pm 04:00 PM
WPS オフィス ソフトウェアを使用すると、使用するフォームは 1 つだけではなく、テキストに表や写真を追加したり、表に写真を追加したりすることもできます。これらをすべて組み合わせて文書全体のコンテンツを作成することができます。文書に 2 つの画像を挿入し、それらを並べて配置する必要がある場合。次のコースでは、この問題を解決します。WPS ドキュメントに 2 つの写真を並べて配置する方法です。 1. まず、WPS ソフトウェアを開き、調整する画像を見つける必要があります。画像を左クリックするとメニューバーが表示されるので「ページレイアウト」を選択します。 2. 文字の折り返しで「タイト折り返し」を選択します。 3. 必要なすべての画像が「テキスト折り返し」に設定されていることを確認したら、画像を適切な位置にドラッグし、最初の画像をクリックします。
 Win11起動時に画像を自動表示させる方法
Dec 31, 2023 pm 10:54 PM
Win11起動時に画像を自動表示させる方法
Dec 31, 2023 pm 10:54 PM
パソコンの電源を入れたときに、デスクトップの壁紙を変更せずに自動的に画像を開きたいというユーザーもいると思いますが、この機能を使えば、写真を楽しんだり、メモをすぐに楽しむことができます。実は設定方法はとても簡単です。以下で見てみましょう。 Windows 11 の起動時に画像を自動的に開く方法: 1. まず、デスクトップ上の「このコンピュータ」をダブルクリックして開きます 2. このコンピュータに入った後、ダブルクリックしてシステムの「C ドライブ」に入ります 3.次に、「C:\Users\Administrator」\AppData\Roaming\Microsoft\Windows\StartMenu\Programs\Start の場所を見つけます。
