
この記事では主に hls 再生を実装するための vue2.0+vue-dplayer の例を紹介し、参考として提供します。
原因
以前「vue2.0+vue-video-player で hls 再生が実装される」という記事を書きましたが、その中で、vue-video-player を使用する前に、vue-dplayer を使用して hls 再生を実装しようとしたと述べました。しかし、当時は時間が限られていたため、完成する前に計画が変更されました。今すぐ完了してください。
開始
依存関係のインストール
npm install vue-dplayer -S
コンポーネントHelloWorld.vueの作成
<template>
<p class="hello">
<d-player ref="player" @play="play" :video="video" :contextmenu="contextmenu"></d-player>
</p>
</template>
<script>
import VueDPlayer from './VueDPlayerHls';
export default {
name: 'HelloWorld',
data () {
return {
msg: 'Welcome to Your Vue.js App',
video: {
url: 'https://logos-channel.scaleengine.net/logos-channel/live/biblescreen-ad-free/chunklist_w630020335.m3u8',
pic: 'http://static.smartisanos.cn/pr/img/video/video_03_cc87ce5bdb.jpg',
type: 'hls'
},
autoplay: false,
player: null,
contextmenu: [
{
text: 'GitHub',
link: 'https://github.com/MoePlayer/vue-dplayer'
}
]
}
},
components: {
'd-player': VueDPlayer
},
methods: {
play() {
console.log('play callback')
}
},
mounted() {
this.player = this.$refs.player.dp;
// console.log(this.player);
var hls = new Hls();
hls.loadSource('https://logos-channel.scaleengine.net/logos-channel/live/biblescreen-ad-free/chunklist_w630020335.m3u8');
hls.attachMedia(this.player);
}
}
</script>
<!-- Add "scoped" attribute to limit CSS to this component only -->
<style scoped>
</style>hls.jsの紹介
もともとimport を使用して導入しましたが、実行時にエラーが報告されました。そのため、まずindex.htmlのscriptタグを使用して導入します。
<!DOCTYPE html>
<html>
 <head>
  <meta charset="utf-8">
  <meta name="viewport" content="width=device-width,initial-scale=1.0">
  <title>vue-dplayer-hls</title>
 </head>
 <body>
  <p id="app"></p>
  <!-- built files will be auto injected -->
  <script src="https://cdn.jsdelivr.net/npm/hls.js@latest"></script>
 </body>
</html>
注:
DPlayer のデモ ページのコードによると、hls をサポートしたい場合は、video.type を "hls" に設定する必要がありますが、それを変更した後、再生できなかったということ。そこでソース コードを調べたところ、ソース コード内に次の場所が見つかりました。
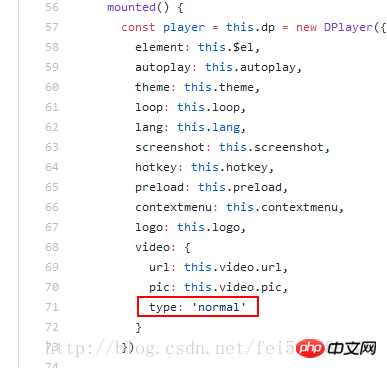
つまり、コンポーネントに何を入力しても、実際には新しい Dplayer インスタンスを作成するために「normal」を使用します。
ソース コードを変更する
コンポーネント VueDPlayerHls.vue をカスタマイズし、ソース コードをコピーして、問題を次のように変更します。 type: this.video.type
<template>
<p class="dplayer"></p>
</template>
<script>
require('../../node_modules/dplayer/dist/DPlayer.min.css');
import DPlayer from 'DPlayer'
export default {
props: {
autoplay: {
type: Boolean,
default: false
},
theme: {
type: String,
default: '#FADFA3'
},
loop: {
type: Boolean,
default: true
},
lang: {
type: String,
default: 'zh'
},
screenshot: {
type: Boolean,
default: false
},
hotkey: {
type: Boolean,
default: true
},
preload: {
type: String,
default: 'auto'
},
contextmenu: {
type: Array
},
logo: {
type: String
},
video: {
type: Object,
required: true,
validator(value) {
return typeof value.url === 'string'
}
}
},
data() {
return {
dp: null
}
},
mounted() {
const player = this.dp = new DPlayer({
element: this.$el,
autoplay: this.autoplay,
theme: this.theme,
loop: this.loop,
lang: this.lang,
screenshot: this.screenshot,
hotkey: this.hotkey,
preload: this.preload,
contextmenu: this.contextmenu,
logo: this.logo,
video: {
url: this.video.url,
pic: this.video.pic,
type: this.video.type
}
})
player.on('play', () => {
this.$emit('play')
})
player.on('pause', () => {
this.$emit('pause')
})
player.on('canplay', () => {
this.$emit('canplay')
})
player.on('playing', () => {
this.$emit('playing')
})
player.on('ended', () => {
this.$emit('ended')
})
player.on('error', () => {
this.$emit('error')
})
}
}
</script>新しいコンポーネントを元のコンポーネントにインポートします(HelloWorld.vue)
import VueDPlayer from './VueDPlayerHls';
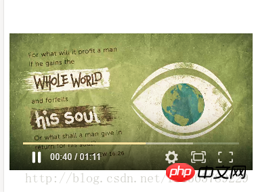
再生を実現
以上、皆さんの参考になれば幸いです。
関連記事:
vueでv-forを使用すると赤色と警告が表示される問題を解決する方法(詳細チュートリアル)
Vuejsで検索マッチング関数メソッドを実装する方法(詳細チュートリアル)
選択ドロップダウン ボックスを使用して、vue.js でバインドと値のメソッドを実装します
以上がvue2.0+vue-dplayer テクノロジーを使用して hls 再生を実装する方法の例の詳細内容です。詳細については、PHP 中国語 Web サイトの他の関連記事を参照してください。


![[Web フロントエンド] Node.js クイック スタート](https://img.php.cn/upload/course/000/000/067/662b5d34ba7c0227.png)


