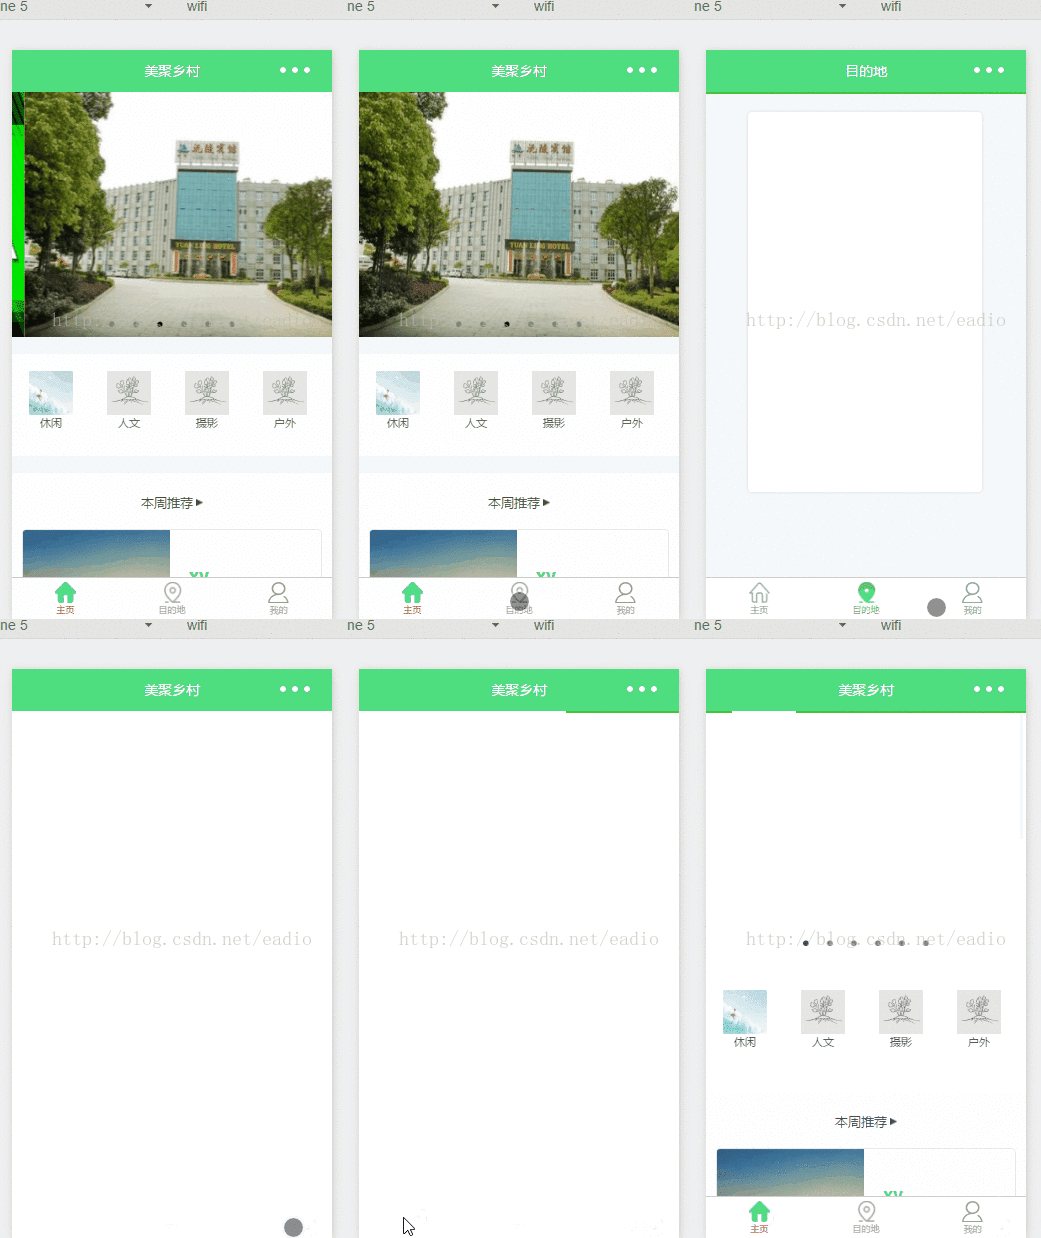
この記事では、主に WeChat アプレット tabBar テンプレートの使用法を紹介し、具体的な例の形で tabBar テンプレートの定義、構成、参照、およびその他の関連操作スキルを分析します。必要な友人はそれを参照できます
の例。この記事では、WeChat アプレット tabBar テンプレートの使用法について説明します。参考までに皆さんと共有してください。詳細は次のとおりです:
ご存知のとおり、WeChat ミニ プログラムの tabBar は新しいページを開きますが、WeChat ドキュメントでは最大 5 ページしか開けないことが示されています。これにより問題が発生しやすくなります。tabBar が 5 つある場合はどうなりますか?以下は WeChat の元の言葉です:
アプリケーションは同時に 5 ページしか開くことができません、 5 ページが開かれた後は、 wx.navigateTo不能正常打开新页面。请避免多层级的交互方式,或者使用wx.redirectTo
そこで、ここ数日間、私はテンプレートに基づいてカスタマイズすることを考えてきました。ページ呼び出し用の WeChat tabBar 配列。ただし、各 tabBar の現在のページのスタイルを容易にするために、リスト内の各オブジェクトに selectedColor と active 属性を追加しました。渡されない場合は、設定された selectedColor が直接使用されます。したがって、このデータ文字列は各ページの下にのみ設定でき、パブリックの app.js 設定ファイルの下には設定できません。コードが少し冗長です。次回は、アプリに直接設定する方法を検討します。 js.
新しい tarBar.wxml テンプレート ページを作成し、そのテンプレートを参照するページからデータを渡すだけです。コードは次のとおりです。
<template name="tabBar">
<view class="flex-h flex-hsb tab-bar" style="color: {{tabBar.color}}; background: {{tarBar.backgroundColor}}; {{tabBar.position=='top'? 'top: 0' : 'bottom: 0'}}; {{tabBar.borderStyle? (tabBar.position=='top'? 'border-bottom: solid 1px '+tabBar.borderStyle + ';' : 'border-top: solid 1px '+tabBar.borderStyle + ';') : ''}}">
<block wx:for="{{tabBar.list}}" wx:key="pagePath">
<navigator url="{{item.pagePath}}" open-type="redirect" class="menu-item" style="{{item.active? 'color: '+(item.selectedColor? item.selectedColor : tabBar.selectedColor) : ''}}">
<image src="{{item.selectedIconPath}}" wx:if="{{item.active}}"></image>
<image src="{{item.iconPath}}" wx:if="{{!item.active}}"></image>
<text>{{item.text}}</text>
</navigator>
</block>
</view>
</template>次のステップでは、まず、index.js の構成オブジェクトをテストします。 :
//配置tabBar
  tabBar: {
   "color": "#9E9E9E",
   "selectedColor": "#f00",
   "backgroundColor": "#fff",
   "borderStyle": "#ccc",
   "list": [
    {
     "pagePath": "/pages/index/index",
     "text": "主页",
     "iconPath": "../../img/tabBar_home.png",
     "selectedIconPath": "../../img/tabBar_home_cur.png",
     //"selectedColor": "#4EDF80",
     active: true
    },
    {
     "pagePath": "/pages/village/city/city",
     "text": "目的地",
     "iconPath": "../../img/tabBar_village.png",
     "selectedIconPath": "../../img/tabBar_village_cur.png",
     "selectedColor": "#4EDF80",
     active: false
    },
    {
     "pagePath": "/pages/mine/mine",
     "text": "我的",
     "iconPath": "../../img/tabBar_mine.png",
     "selectedIconPath": "../../img/tabBar_mine_cur.png",
     "selectedColor": "#4EDF80",
     active: false
    }
   ],
   "position": "bottom"
}index.wxml でテンプレートを導入します:
<import src="../../template/tabBar.wxml" />
<template is="tabBar" data="{{tabBar: tabBar}}" />次に、構成オブジェクトを導入する Mine.js ファイルです:
//配置tabBar
  tabBar: {
   "color": "#9E9E9E",
   "selectedColor": "#f00",
   "backgroundColor": "#fff",
   "borderStyle": "#ccc",
   "list": [
    {
     "pagePath": "/pages/index/index",
     "text": "主页",
     "iconPath": "../../img/tabBar_home.png",
     "selectedIconPath": "../../img/tabBar_home_cur.png",
     //"selectedColor": "#4EDF80",
     active: false
    },
    {
     "pagePath": "/pages/village/city/city",
     "text": "目的地",
     "iconPath": "../../../img/tabBar_village.png",
     "selectedIconPath": "../../../img/tabBar_village_cur.png",
     "selectedColor": "#4EDF80",
     active: false
    },
    {
     "pagePath": "/pages/mine/mine",
     "text": "我的",
     "iconPath": "../../img/tabBar_mine.png",
     "selectedIconPath": "../../img/tabBar_mine_cur.png",
     "selectedColor": "#4EDF80",
     active: true
    }
   ],
   "position": "bottom"
}mine.wxml でテンプレートを導入します:
<import src="../../template/tabBar.wxml" />
<template is="tabBar" data="{{tabBar: tabBar}}" />最後のデモは次のとおりです:

オプション 2、app.js ファイルに設定データを配置し、クリックしてページにジャンプして現在のページ インスタンスにデータを追加します。具体的な方法は次のとおりです:
1. app.js ファイルの設定:
//app.js
var net = require('common/net');
var a_l, a_d = {}, a_cbSucc, a_cbSuccFail, a_cbFail, a_cbCom, a_h, a_m;
App({
onLaunch: function () {
var that = this;
},
//修改tabBar的active值
editTabBar: function () {
var _curPageArr = getCurrentPages();
var _curPage = _curPageArr[_curPageArr.length - 1];<span style="font-family: Arial, Helvetica, sans-serif;">//相当于Page({})里面的this对象</span>
var _pagePath=_curPage.__route__;
if(_pagePath.indexOf('/') != 0){
_pagePath='/'+_pagePath;
}
var tabBar=this.globalData.tabBar;
for(var i=0; i<tabBar.list.length; i++){
tabBar.list[i].active=false;
if(tabBar.list[i].pagePath==_pagePath){
tabBar.list[i].active=true;//根据页面地址设置当前页面状态
}
}
_curPage.setData({
tabBar: tabBar
});
},
globalData: {
userInfo: null,
//配置tabBar
tabBar: {
"color": "#9E9E9E",
"selectedColor": "#f00",
"backgroundColor": "#fff",
"borderStyle": "#ccc",
"list": [
{
"pagePath": "/pages/index/index",
"text": "主页",
"iconPath": "/pages/templateImg/tabBar_home.png",
"selectedIconPath": "/pages/templateImg/tabBar_home_cur.png",
"selectedColor": "#4EDF80",
active: false
},
{
"pagePath": "/pages/village/city/city",
"text": "目的地",
"iconPath": "/pages/templateImg/tabBar_village.png",
"selectedIconPath": "/pages/templateImg/tabBar_village_cur.png",
"selectedColor": "#4EDF80",
active: false
},
{
"pagePath": "/pages/mine/mine",
"text": "我的",
"iconPath": "/pages/templateImg/tabBar_mine.png",
"selectedIconPath": "/pages/templateImg/tabBar_mine_cur.png",
"selectedColor": "#4EDF80",
active: false
}
],
"position": "bottom"
}
}
})2.index.js+mine.js+city.js ページの使用法:
var App=getApp();
Page({
 data:{
  detail: {},
 },
 onLoad:function(options){
  App.editTabBar();//添加tabBar数据
  var that=this;
 }
})以上が皆さんの参考になれば幸いです。
関連記事:
以上がWeChat ミニ プログラムでの tabBar テンプレートの使用について (詳細なチュートリアル)の詳細内容です。詳細については、PHP 中国語 Web サイトの他の関連記事を参照してください。