

この記事では主にreact-nativeのART描画方法の詳細な説明を紹介していますが、とても良い内容なので参考にさせていただきます。
背景
モバイル アプリケーションの開発プロセスでは、基本的な 2D グラフィックスまたはアニメーションを描画することが不可欠です。ただし、Android と iOS の両方に独自の API ソリューションがあることを考慮すると、より一般的に受け入れられている技術ソリューションを採用する方が、コードのデュアル プラットフォーム互換性を確保しやすくなります。
art は、マルチブラウザーと互換性があるように設計された Node スタイルの CommonJS モジュールです。これに基づいて Facebook は、フロントエンド SVG ライブラリを実装する React.js で使用できるようにアートをカプセル化する React-art を開発しました。ただし、react.js の JSX 構文を考慮すると、svg タグなどを dom に直接挿入することはすでにサポートされています (もちろん、この時点では、react-art ライブラリは使用されません)。また、HTML の存在もあります。キャンバスなので、フロントエンドでは、react-art は代替不可能ではありません。
しかし、モバイル側では、クロスプラットフォームの要件とウェブ側のテクノロジーの蓄積を考慮すると、react-art はグラフィックを描画するための既製のソリューションになりました。反応ネイティブは、それぞれ 0.10.0 と 0.18.0 で iOS と Android プラットフォームでの反応アートのサポートを追加しました。
サンプルコード
React.js と React-Native の違いは、以下に説明する ART 取得のみです。この例は、Web 端末とモバイル端末の両方に適用できます。 React-art に付属する公式サンプル: Vector-Widget
Vector-Widget は、マウス クリック イベントに対する回転と回転加速応答をさらに実装します。クリックの高速化は Web 側では確認できますが、モバイル側では無効です。これは、React Native がグループ内の onMouseDown 属性と onMouseUp 属性を処理しないためです。この記事では、静的 SVG の実装に焦点を当てており、アニメーション効果の一部を一時的に無視しています。
ART
ART は React Native の非常に重要なライブラリであり、非常にクールな描画やアニメーションを可能にします。 React Native で ART を導入する際、Android にはデフォルトで ART ライブラリが含まれており、IOS では依存ライブラリを別途追加する必要があることに注意してください。
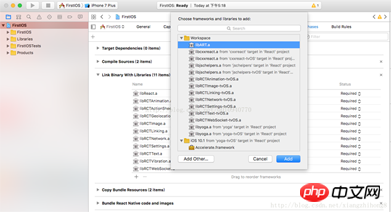
ios 依存ライブラリを追加します
1. xcode を使用して React-native で iOS プロジェクトを開き、[ライブラリ] ディレクトリを選択します ——> 右クリックして [プロジェクト名にファイルを追加] を選択します ——> 'node_modules/react -native/Libraries/ART/ART.xcodeproj' を追加します。

2. [Build Phases] をクリックします ——> ——> 左下の「+」をクリックします ——> 追加する「libART.a」を選択します。
基本コンポーネント
この記事では、ART によって公開される 4 つの一般的なコンポーネント (Surface、Group、Shape、Text) を紹介します。
サーフェス - 他の要素のコンテナーである長方形のレンダリング可能な領域
グループ - 複数の図形、テキスト、その他のグループを保持できます
シェイプ - 図形の定義、塗りつぶし可能
テキスト - テキストの図形定義
属性
表面
幅: レンダリング領域の幅
高さ: レンダリング領域の高さを定義
形状
d : 描画パスを定義します
ストローク: ストロークの色
ストローク幅: ストロークの幅
ストロークDash: 破線を定義
fill: 塗りつぶしの色
Text
funt:フォントスタイル、フォントを定義、サイズ、太字にするかどうか、例:太字 35px Heiti SC
Path
moveTo(x,y): 座標 (x,y) に移動
lineTo(x,y): connect (x, y) への直線
arc() : 円弧を描く
close() : 空間を閉じる
コード例
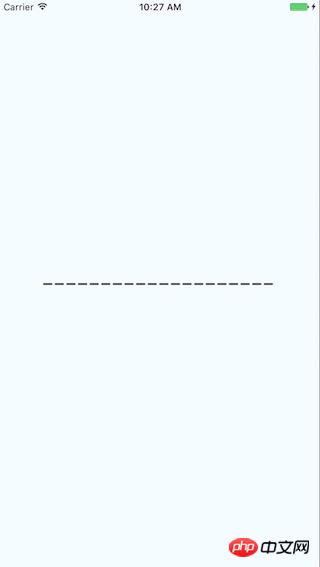
直線を描く
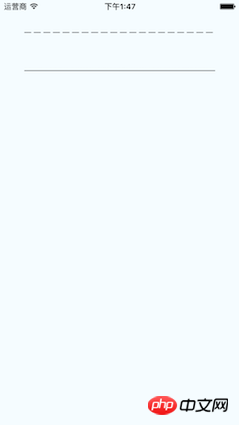
点線を描画します
ストロークダッシュのパラメータを理解してください。
[10,5]: 10 ピクセルの実線を描画し、5 ピクセルの空白を描画することを意味します
[10,5, 20,5]: 10 ピクセルを描画することを意味します 5 ピクセルのスペースで実線を描画し、5 ピクセルのスペースで 20 ピクセルの実線を描画します
import React from 'react'
import {
  View,
  ART
} from 'react-native'

export default class Line extends React.Component{

  render(){

    const path = ART.Path();
    path.moveTo(1,1); //将起始点移动到(1,1) 默认(0,0)
    path.lineTo(300,1); //连线到目标点(300,1)

    return(
      <View style={this.props.style}>
        <ART.Surface width={300} height={2}>
          <ART.Shape d={path} stroke="#000000" strokeWidth={1} />
        </ART.Surface>
      </View>
    )
  }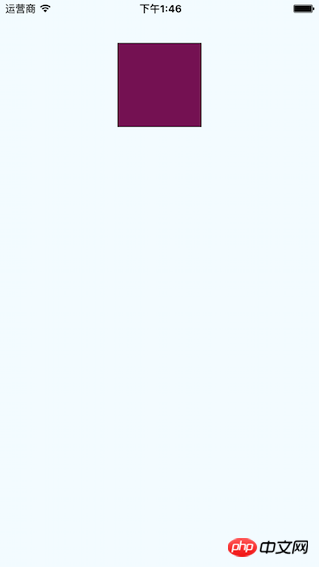
}長方形を描画します
最初の描画lineTo を使用して 3 つの側面をリンクし、close を使用して 4 番目の側面をリンクします。 fill は色を塗りつぶします
import React from 'react'
import {
  View,
  ART
} from 'react-native'

const {Surface, Shape, Path} = ART;

export default class Rect extends React.Component{

  render(){

    const path = new Path()
      .moveTo(1,1)
      .lineTo(1,99)
      .lineTo(99,99)
      .lineTo(99,1)
      .close();

    return(
      <View style={this.props.style}>
        <Surface width={100} height={100}>
          <Shape d={path} stroke="#000000" fill="#892265" strokeWidth={1} />
        </Surface>
      </View>
    )
  }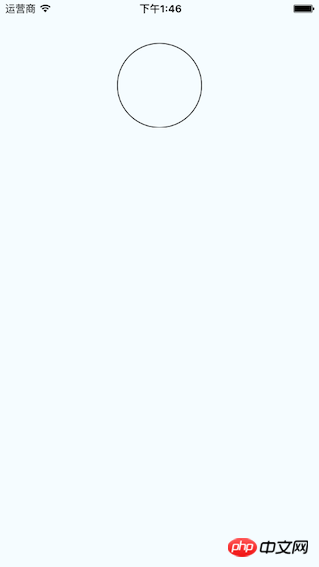
}绘圆
了解arc(x,y,radius)的使用, 终点坐标距离起点坐标的相对距离。
import React from 'react'
import {
  View,
  ART
} from 'react-native'

const {Surface, Shape, Path} = ART;

export default class Circle extends React.Component{

  render(){

    const path = new Path()
      .moveTo(50,1)
      .arc(0,99,25)
      .arc(0,-99,25)
      .close();


    return(
      <View style={this.props.style}>
        <Surface width={100} height={100}>
          <Shape d={path} stroke="#000000" strokeWidth={1}/>
        </Surface>
      </View>
    )
  }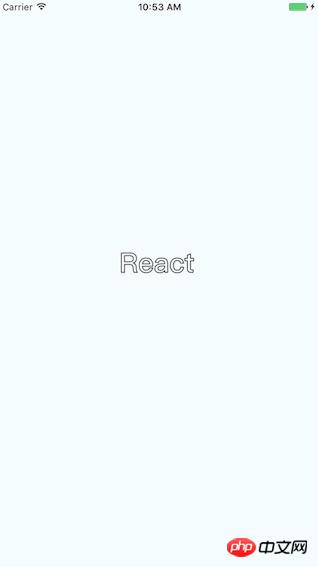
}绘制文字
了解funt属性的使用,规则是“粗细 字号 字体”
注意: 字体应该是支持path属性的,应该是实现bug并没有不生效。 Android通过修改源码是可以解决的,IOS没看源码。
import React, {Component} from 'react';
import {
AppRegistry,
StyleSheet,
ART,
View
} from 'react-native';
const {Surface, Text, Path} = ART;
export default class ArtTextView extends Component {
render() {
return (
<View style={styles.container}>
<Surface width={100} height={100}>
<Text strokeWidth={1} stroke="#000" font="bold 35px Heiti SC" path={new Path().moveTo(40,40).lineTo(99,10)} >React</Text>
</Surface>
</View>
);
}
}
const styles = StyleSheet.create({
container: {
flex: 1,
justifyContent: 'center',
alignItems: 'center',
backgroundColor: '#F5FCFF',
},
});绘制扇形
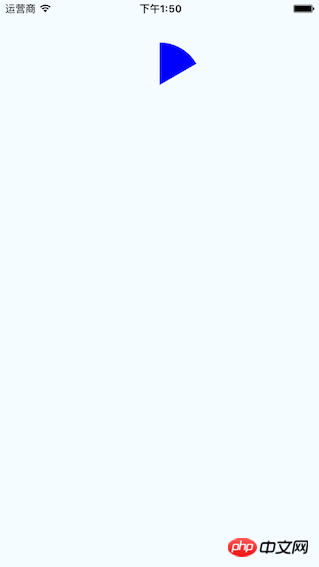
在这里需要使用arc做路径绘制。
Wedge.js
import React, { Component, PropTypes } from 'react';
import { ART } from 'react-native';
const { Shape, Path } = ART;
/**
* Wedge is a React component for drawing circles, wedges and arcs. Like other
* ReactART components, it must be used in a <Surface>.
*/
export default class Wedge extends Component<void, any, any> {
static propTypes = {
outerRadius: PropTypes.number.isRequired,
startAngle: PropTypes.number.isRequired,
endAngle: PropTypes.number.isRequired,
originX: PropTypes.number.isRequired,
originY: PropTypes.number.isRequired,
innerRadius: PropTypes.number,
};
constructor(props : any) {
super(props);
(this:any).circleRadians = Math.PI * 2;
(this:any).radiansPerDegree = Math.PI / 180;
(this:any)._degreesToRadians = this._degreesToRadians.bind(this);
}
/**
* _degreesToRadians(degrees)
*
* Helper function to convert degrees to radians
*
* @param {number} degrees
* @return {number}
*/
_degreesToRadians(degrees : number) : number {
if (degrees !== 0 && degrees % 360 === 0) { // 360, 720, etc.
return (this:any).circleRadians;
}
return degrees * (this:any).radiansPerDegree % (this:any).circleRadians;
}
/**
* _createCirclePath(or, ir)
*
* Creates the ReactART Path for a complete circle.
*
* @param {number} or The outer radius of the circle
* @param {number} ir The inner radius, greater than zero for a ring
* @return {object}
*/
_createCirclePath(or : number, ir : number) : Path {
const path = new Path();
path.move(0, or)
.arc(or * 2, 0, or)
.arc(-or * 2, 0, or);
if (ir) {
path.move(or - ir, 0)
.counterArc(ir * 2, 0, ir)
.counterArc(-ir * 2, 0, ir);
}
path.close();
return path;
}
/**
* _createArcPath(sa, ea, ca, or, ir)
*
* Creates the ReactART Path for an arc or wedge.
*
* @param {number} startAngle The starting degrees relative to 12 o'clock
* @param {number} endAngle The ending degrees relative to 12 o'clock
* @param {number} or The outer radius in pixels
* @param {number} ir The inner radius in pixels, greater than zero for an arc
* @return {object}
*/
_createArcPath(originX : number, originY : number, startAngle : number, endAngle : number, or : number, ir : number) : Path {
const path = new Path();
// angles in radians
const sa = this._degreesToRadians(startAngle);
const ea = this._degreesToRadians(endAngle);
// central arc angle in radians
const ca = sa > ea ? (this:any).circleRadians - sa + ea : ea - sa;
// cached sine and cosine values
const ss = Math.sin(sa);
const es = Math.sin(ea);
const sc = Math.cos(sa);
const ec = Math.cos(ea);
// cached differences
const ds = es - ss;
const dc = ec - sc;
const dr = ir - or;
// if the angle is over pi radians (180 degrees)
// we will need to let the drawing method know.
const large = ca > Math.PI;
// TODO (sema) Please improve theses comments to make the math
// more understandable.
//
// Formula for a point on a circle at a specific angle with a center
// at (0, 0):
// x = radius * Math.sin(radians)
// y = radius * Math.cos(radians)
//
// For our starting point, we offset the formula using the outer
// radius because our origin is at (top, left).
// In typical web layout fashion, we are drawing in quadrant IV
// (a.k.a. Southeast) where x is positive and y is negative.
//
// The arguments for path.arc and path.counterArc used below are:
// (endX, endY, radiusX, radiusY, largeAngle)
path.move(or + or * ss, or - or * sc) // move to starting point
.arc(or * ds, or * -dc, or, or, large) // outer arc
.line(dr * es, dr * -ec); // width of arc or wedge
if (ir) {
path.counterArc(ir * -ds, ir * dc, ir, ir, large); // inner arc
}
return path;
}
render() : any {
// angles are provided in degrees
const startAngle = this.props.startAngle;
const endAngle = this.props.endAngle;
// if (startAngle - endAngle === 0) {
// return null;
// }
// radii are provided in pixels
const innerRadius = this.props.innerRadius || 0;
const outerRadius = this.props.outerRadius;
const { originX, originY } = this.props;
// sorted radii
const ir = Math.min(innerRadius, outerRadius);
const or = Math.max(innerRadius, outerRadius);
let path;
if (endAngle >= startAngle + 360) {
path = this._createCirclePath(or, ir);
} else {
path = this._createArcPath(originX, originY, startAngle, endAngle, or, ir);
}
return <Shape {...this.props} d={path} />;
}
}示例代码:
import React from 'react'
import {
  View,
  ART
} from 'react-native'

const {Surface} = ART;
import Wedge from './Wedge'

export default class Fan extends React.Component{

  render(){

    return(
      <View style={this.props.style}>
        <Surface width={100} height={100}>
          <Wedge
           outerRadius={50}
           startAngle={0}
           endAngle={60}
           originX={50}
           originY={50}
           fill="blue"/>

        </Surface>
      </View>
    )
  }
}综合示例
相关代码:
/**
* Sample React Native App
* https://github.com/facebook/react-native
* @flow
*/
import React, {
Component
}from 'react';
import {
ART as Art,
StyleSheet,
View,
Dimensions,
TouchableWithoutFeedback,
Animated
} from 'react-native';
var HEART_SVG = "M130.4-0.8c25.4 0 46 20.6 46 46.1 0 13.1-5.5 24.9-14.2 33.3L88 153.6 12.5 77.3c-7.9-8.3-12.8-19.6-12.8-31.9 0-25.5 20.6-46.1 46-46.2 19.1 0 35.5 11.7 42.4 28.4C94.9 11 111.3-0.8 130.4-0.8"
var HEART_COLOR = 'rgb(226,38,77,1)';
var GRAY_HEART_COLOR = "rgb(204,204,204,1)";
var FILL_COLORS = [
'rgba(221,70,136,1)',
'rgba(212,106,191,1)',
'rgba(204,142,245,1)',
'rgba(204,142,245,1)',
'rgba(204,142,245,1)',
'rgba(0,0,0,0)'
];
var PARTICLE_COLORS = [
'rgb(158, 202, 250)',
'rgb(161, 235, 206)',
'rgb(208, 148, 246)',
'rgb(244, 141, 166)',
'rgb(234, 171, 104)',
'rgb(170, 163, 186)'
]
getXYParticle = (total, i, radius) => {
var angle = ( (2 * Math.PI) / total ) * i;
var x = Math.round((radius * 2) * Math.cos(angle - (Math.PI / 2)));
var y = Math.round((radius * 2) * Math.sin(angle - (Math.PI / 2)));
return {
x: x,
y: y,
}
}
getRandomInt = (min, max) => {
return Math.floor(Math.random() * (max - min)) + min;
}
shuffleArray = (array) => {
for (var i = array.length - 1; i > 0; i--) {
var j = Math.floor(Math.random() * (i + 1));
var temp = array[i];
array[i] = array[j];
array[j] = temp;
}
return array;
}
var {
Surface,
Group,
Shape,
Path
} = Art;
//使用Animated.createAnimatedComponent对其他组件创建对话
//创建一个灰色的新型图片
var AnimatedShape = Animated.createAnimatedComponent(Shape);
var {
width: deviceWidth,
height: deviceHeight
} = Dimensions.get('window');
export default class ArtAnimView extends Component {
constructor(props) {
super(props);
this.state = {
animation: new Animated.Value(0)
};
}
explode = () => {
Animated.timing(this.state.animation, {
duration: 1500,
toValue: 28
}).start(() => {
this.state.animation.setValue(0);
this.forceUpdate();
});
}
getSmallExplosions = (radius, offset) => {
return [0, 1, 2, 3, 4, 5, 6].map((v, i, t) => {
var scaleOut = this.state.animation.interpolate({
inputRange: [0, 5.99, 6, 13.99, 14, 21],
outputRange: [0, 0, 1, 1, 1, 0],
extrapolate: 'clamp'
});
var moveUp = this.state.animation.interpolate({
inputRange: [0, 5.99, 14],
outputRange: [0, 0, -15],
extrapolate: 'clamp'
});
var moveDown = this.state.animation.interpolate({
inputRange: [0, 5.99, 14],
outputRange: [0, 0, 15],
extrapolate: 'clamp'
});
var color_top_particle = this.state.animation.interpolate({
inputRange: [6, 8, 10, 12, 17, 21],
outputRange: shuffleArray(PARTICLE_COLORS)
})
var color_bottom_particle = this.state.animation.interpolate({
inputRange: [6, 8, 10, 12, 17, 21],
outputRange: shuffleArray(PARTICLE_COLORS)
})
var position = getXYParticle(7, i, radius)
return (
<Group
x={position.x + offset.x }
y={position.y + offset.y}
rotation={getRandomInt(0, 40) * i}
>
<AnimatedCircle
x={moveUp}
y={moveUp}
radius={15}
scale={scaleOut}
fill={color_top_particle}
/>
<AnimatedCircle
x={moveDown}
y={moveDown}
radius={8}
scale={scaleOut}
fill={color_bottom_particle}
/>
</Group>
)
}, this)
}
render() {
var heart_scale = this.state.animation.interpolate({
inputRange: [0, .01, 6, 10, 12, 18, 28],
outputRange: [1, 0, .1, 1, 1.2, 1, 1],
extrapolate: 'clamp'
});
var heart_fill = this.state.animation.interpolate({
inputRange: [0, 2],
outputRange: [GRAY_HEART_COLOR, HEART_COLOR],
extrapolate: 'clamp'
})
var heart_x = heart_scale.interpolate({
inputRange: [0, 1],
outputRange: [90, 0],
})
var heart_y = heart_scale.interpolate({
inputRange: [0, 1],
outputRange: [75, 0],
})
var circle_scale = this.state.animation.interpolate({
inputRange: [0, 1, 4],
outputRange: [0, .3, 1],
extrapolate: 'clamp'
});
var circle_stroke_width = this.state.animation.interpolate({
inputRange: [0, 5.99, 6, 7, 10],
outputRange: [0, 0, 15, 8, 0],
extrapolate: 'clamp'
});
var circle_fill_colors = this.state.animation.interpolate({
inputRange: [1, 2, 3, 4, 4.99, 5],
outputRange: FILL_COLORS,
extrapolate: 'clamp'
})
var circle_opacity = this.state.animation.interpolate({
inputRange: [1, 9.99, 10],
outputRange: [1, 1, 0],
extrapolate: 'clamp'
})
return (
<View style={styles.container}>
<TouchableWithoutFeedback onPress={this.explode} style={styles.container}>
<View style={{transform: [{scale: .8}]}}>
<Surface width={deviceWidth} height={deviceHeight}>
<Group x={75} y={200}>
<AnimatedShape
d={HEART_SVG}
x={heart_x}
y={heart_y}
scale={heart_scale}
fill={heart_fill}
/>
<AnimatedCircle
x={89}
y={75}
radius={150}
scale={circle_scale}
strokeWidth={circle_stroke_width}
stroke={FILL_COLORS[2]}
fill={circle_fill_colors}
opacity={circle_opacity}
/>
{this.getSmallExplosions(75, {x: 89, y: 75})}
</Group>
</Surface>
</View>
</TouchableWithoutFeedback>
</View>
);
}
};
class AnimatedCircle extends Component {
render() {
var radius = this.props.radius;
var path = Path().moveTo(0, -radius)
.arc(0, radius * 2, radius)
.arc(0, radius * -2, radius)
.close();
return React.createElement(AnimatedShape);
}
}
var styles = StyleSheet.create({
container: {
flex: 1,
}
});以上就是本文的全部内容,希望对大家的学习有所帮助,更多相关内容请关注PHP中文网!
相关推荐:
以上がReact-NativeのART描画方法についての詳細内容です。詳細については、PHP 中国語 Web サイトの他の関連記事を参照してください。


![[Web フロントエンド] Node.js クイック スタート](https://img.php.cn/upload/course/000/000/067/662b5d34ba7c0227.png)


