この記事では主に、ES6 クラスを使用して Vue を模倣して双方向バインディングのサンプルコードを記述する方法を紹介します。内容が非常に優れているので、参考として共有します。
この記事では、ES6 クラスを使用して Vue を模倣し、双方向バインディングのサンプル コードを作成し、全員と共有する方法を紹介します。詳細は次のとおりです。
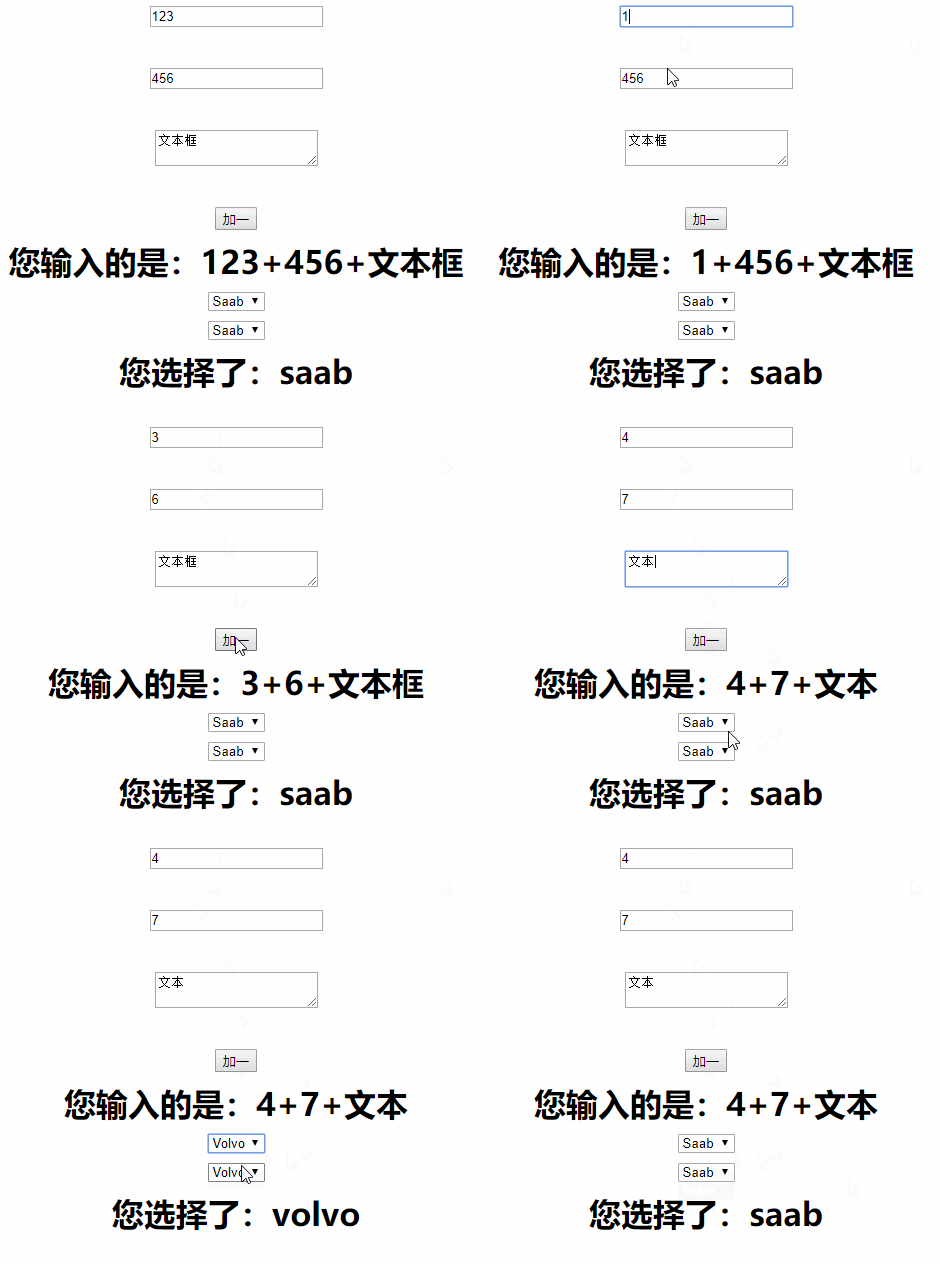
最終的な効果は次のとおりです。 Constructor (コンストラクター)

class TinyVue{
 constructor({el, data, methods}){
  this.$data = data
  this.$el = document.querySelector(el)
  this.$methods = methods
  // 初始化
  this._compile()
  this._updater()
  this._watcher()
 }
}まずイベントをロードする関数を作成します:
// el为元素tagName,attr为元素属性(v-model,@click)
_initEvents(el, attr, callBack) {
 this.$el.querySelectorAll(el).forEach(i => {
  if(i.hasAttribute(attr)) {
   let key = i.getAttribute(attr)
   callBack(i, key)
  }
 })
}this._initEvents('input, textarea', 'v-model', (i, key) => {
i.addEventListener('input', () => {
Object.assign(this.$data, {[key]: i.value})
})
})this._initEvents('select', 'v-model', (i, key) => {
i.addEventListener('change', () => Object.assign(this.$data, {[key]: i.options[i.options.selectedIndex].value}))
})クリックイベントをロード
クリックイベントはメソッドのイベントに対応しますthis._initEvents('*', '@click', (i, key) => {
i.addEventListener('click', () => this.$methods[key].bind(this.$data)())
})View updater ( updater)
_initView(el, attr, callBack) {
this.$el.querySelectorAll(el, attr, callBack).forEach(i => {
if(i.hasAttribute(attr)) {
let key = i.getAttribute(attr),
data = this.$data[key]
callBack(i, key, data)
}
})
}this._initView('input, textarea', 'v-model', (i, key, data) => {
i.value = data
})this._initView('select', 'v-model', (i, key, data) => {
i.querySelectorAll('option').forEach(v => {
if(v.value == data) v.setAttribute('selected', true)
else v.removeAttribute('selected')
})
})innerHTMLを更新
ここでの実装方法は少し低めで、定期的な置き換えしか考えていません{{text}}let regExpInner = /\{{ *([\w_\-]+) *\}}/g
this.$el.querySelectorAll("*").forEach(i => {
let replaceList = i.innerHTML.match(regExpInner) || (i.hasAttribute('vueID') && i.getAttribute('vueID').match(regExpInner))
if(replaceList) {
if(!i.hasAttribute('vueID')) {
i.setAttribute('vueID', i.innerHTML)
}
i.innerHTML = i.getAttribute('vueID')
replaceList.forEach(v => {
let key = v.slice(2, v.length - 2)
i.innerHTML = i.innerHTML.replace(v, this.$data[key])
})
}
})リスナー(ウォッチャー)
<p id="app">
<input type="text" v-model="text1"><br>
<input type="text" v-model="text2"><br>
<textarea type="text" v-model="text3"></textarea><br>
<button @click="add">加一</button>
<h1>您输入的是:{{text1}}+{{text2}}+{{text3}}</h1>
<select v-model="select">
<option value="volvo">Volvo</option>
<option value="saab">Saab</option>
</select>
<select v-model="select">
<option value="volvo">Volvo</option>
<option value="saab">Saab</option>
</select>
<h1>您选择了:{{select}}</h1>
</p>
<script src="./TinyVue.js"></script>
<script>
let app = new TinyVue({
el: '#app',
data: {
text1: 123,
text2: 456,
text3: '文本框',
select: 'saab'
},
methods: {
add() {
this.text1 ++
this.text2 ++
}
}
})
</script>class TinyVue{
constructor({el, data, methods}){
this.$data = data
this.$el = document.querySelector(el)
this.$methods = methods
this._compile()
this._updater()
this._watcher()
}
_watcher(data = this.$data) {
let that = this
Object.keys(data).forEach(i => {
let value = data[i]
Object.defineProperty(data, i, {
enumerable: true,
configurable: true,
get: function () {
return value;
},
set: function (newVal) {
if (value !== newVal) {
value = newVal;
that._updater()
}
}
})
})
}
_initEvents(el, attr, callBack) {
this.$el.querySelectorAll(el).forEach(i => {
if(i.hasAttribute(attr)) {
let key = i.getAttribute(attr)
callBack(i, key)
}
})
}
_initView(el, attr, callBack) {
this.$el.querySelectorAll(el, attr, callBack).forEach(i => {
if(i.hasAttribute(attr)) {
let key = i.getAttribute(attr),
data = this.$data[key]
callBack(i, key, data)
}
})
}
_updater() {
this._initView('input, textarea', 'v-model', (i, key, data) => {
i.value = data
})
this._initView('select', 'v-model', (i, key, data) => {
i.querySelectorAll('option').forEach(v => {
if(v.value == data) v.setAttribute('selected', true)
else v.removeAttribute('selected')
})
})
let regExpInner = /\{{ *([\w_\-]+) *\}}/g
this.$el.querySelectorAll("*").forEach(i => {
let replaceList = i.innerHTML.match(regExpInner) || (i.hasAttribute('vueID') && i.getAttribute('vueID').match(regExpInner))
if(replaceList) {
if(!i.hasAttribute('vueID')) {
i.setAttribute('vueID', i.innerHTML)
}
i.innerHTML = i.getAttribute('vueID')
replaceList.forEach(v => {
let key = v.slice(2, v.length - 2)
i.innerHTML = i.innerHTML.replace(v, this.$data[key])
})
}
})
}
_compile() {
this._initEvents('*', '@click', (i, key) => {
i.addEventListener('click', () => this.$methods[key].bind(this.$data)())
})
this._initEvents('input, textarea', 'v-model', (i, key) => {
 i.addEventListener('input', () => {
  Object.assign(this.$data, {[key]: i.value})
 })
})
this._initEvents('select', 'v-model', (i, key) => {
 i.addEventListener('change', () => Object.assign(this.$data, {[key]: i.options[i.options.selectedIndex].value}))
})
}
}関連する推奨事項:
Vue2.0 マルチタブ切り替えコンポーネントのパッケージ化の紹介Vue フォームデモ v-model 双方向バインディングの問題について
以上がES6 クラスを使用して Vue を模倣し、双方向バインディングの例を作成するの詳細内容です。詳細については、PHP 中国語 Web サイトの他の関連記事を参照してください。