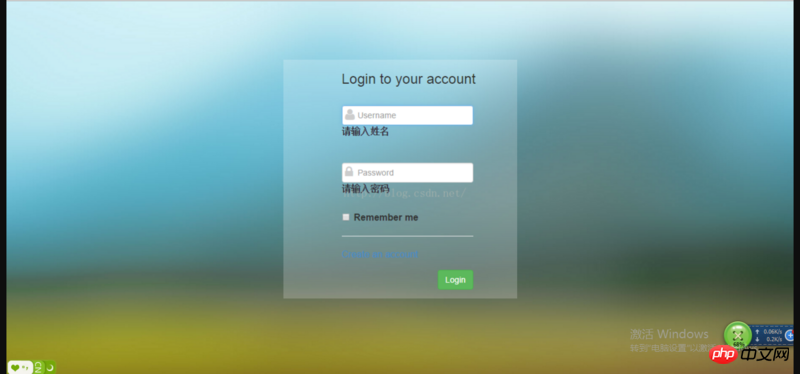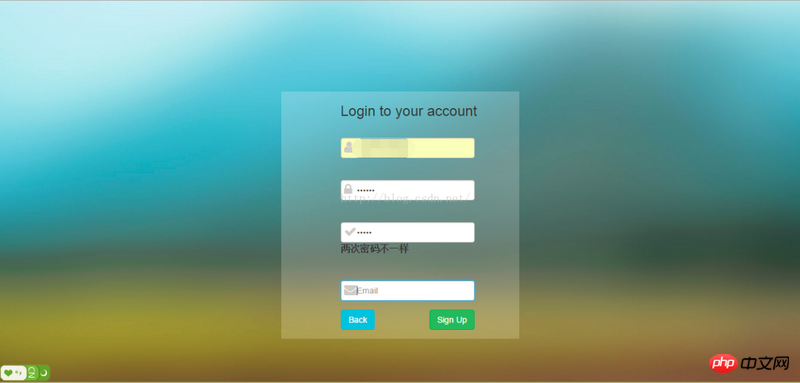
この記事では、ログイン登録ページを作成するためのブートストラップについて詳しく説明します。必要な方は参考にしてください。
この章の内容は、ブートストラップを使用してログイン登録ページを作成し、jquery-validate を使用してフォーム検証を行うことです。
テクノロジー: bootstrap、font-awesome、jquery-validate; 機能: レスポンシブ レイアウト、フォーム検証、背景画像適応画面サイズ。
目的: 実戦から知識を学ぶ。

 ##html コード: サードパーティ リソースのインポートは cdn を使用して行われます。もちろん、自分でダウンロードしてローカルにインポートすることもできます。
nbsp;html>


        <meta>
        <title>bootstrap案例</title>
        <!--用百度的静态资源库的cdn安装bootstrap环境-->
        <!-- Bootstrap 核心 CSS 文件 -->
        <link>
        <!--font-awesome 核心我CSS 文件-->
        <link>
        <!-- 在bootstrap.min.js 之前引入 -->
        <script></script>
        <!-- Bootstrap 核心 JavaScript 文件 -->
        <script></script>
        <!--jquery.validate-->
        <script></script>
        <script></script>
        <style>
            body{background: url(img/4.jpg) no-repeat;background-size:cover;font-size: 16px;}
            .form{background: rgba(255,255,255,0.2);width:400px;margin:100px auto;}
            #login_form{display: block;}
            #register_form{display: none;}
            .fa{display: inline-block;top: 27px;left: 6px;position: relative;color: #ccc;}
            input[type="text"],input[type="password"]{padding-left:26px;}
            .checkbox{padding-left:21px;}
        </style>


        <!--
            基础知识:
            网格系统:通过行和列布局
            行必须放在container内
            手机用col-xs-*
            平板用col-sm-*
            笔记本或普通台式电脑用col-md-*
            大型设备台式电脑用col-lg-*
            为了兼容多个设备,可以用多个col-*-*来控制;
        -->
    <div>
        <div>
            <form>
                <h3>Login to your account</h3>
                <div>
                    <div>
                        <i></i>
                        <input>
                    </div>
                    <div>
                            <i></i>
                            <input>
                    </div>
                    <div>
                        <label>
                            <input> Remember me
                        </label>
                        <hr>
                        <a>Create an account</a>
                    </div>
                    <div>
                        <input>
                    </div>
                </div>
            </form>
        </div>

        <div>
            <form>
                <h3>Login to your account</h3>
                <div>
                    <div>
                        <i></i>
                        <input>
                    </div>
                    <div>
                            <i></i>
                            <input>
                    </div>
                    <div>
                            <i></i>
                            <input>
                    </div>
                    <div>
                            <i></i>
                            <input>
                    </div>
                    <div>
                        <input>
                        <input>
                    </div>
                </div>
            </form>
        </div>
        </div>
    <script></script>
js コード:
$().ready(function() {
    $("#login_form").validate({
        rules: {
            username: "required",
            password: {
                required: true,
                minlength: 5
            },
        },
        messages: {
            username: "请输入姓名",
            password: {
                required: "请输入密码",
                minlength: jQuery.format("密码不能小于{0}个字 符")
            },
        }
    });
    $("#register_form").validate({
        rules: {
            username: "required",
            password: {
                required: true,
                minlength: 5
            },
            rpassword: {
                equalTo: "#register_password"
            },
            email: {
                required: true,
                email: true
            }
        },
        messages: {
            username: "请输入姓名",
            password: {
                required: "请输入密码",
                minlength: jQuery.format("密码不能小于{0}个字 符")
            },
            rpassword: {
                equalTo: "两次密码不一样"
            },
            email: {
                required: "请输入邮箱",
                email: "请输入有效邮箱"
            }
        }
    });
});
$(function() {
    $("#register_btn").click(function() {
        $("#register_form").css("display", "block");
        $("#login_form").css("display", "none");
    });
    $("#back_btn").click(function() {
        $("#register_form").css("display", "none");
        $("#login_form").css("display", "block");
    });
});①ブートストラップ レイアウト:
ブートストラップは、col-x-x を使用したグリッド レイアウトを使用します 使用条件: .container と .row の下で使用できます。 構造は次のとおりです。
<div>
   <div>
      <div></div>
      <div></div>
   </div>
   <div>...</div>
</div>
col-md-*: 998px 以上、一般的なコンピュータ、ノートブックなど
col-lg-*: 1200px 以上、一般的な大型デスクトップ コンピュータ
で使用可能同時に複数のデバイスの効果を実現します。
Offset:col-
-offset-
②Form:ここのフォームは通常のフォームとあまり変わらないので、私が勝ちました。それ以上は言わないでください。
③font-awesome の使用方法:
バージョン 4.3.0 を使用し、使用方法は
<i></i>
fa-lg は大きな画像を表します
その他のアイコンのリファレンス: http :// fontawesome.dashgame.com/
④jquery-validate フォームの検証:
これが私が話したい重要なポイントです。
ステップ 2: フォーム form を作成し、validate を初期化します
$("#login_form").validate({
        rules: {
            username: "required",
            password: {
                required: true,
                minlength: 5
            },
        },
        messages: {
            username: "请输入姓名",
            password: {
                required: "请输入密码",
                minlength: jQuery.format("密码不能小于{0}个字 符")
            },
        }
});equalTo: XX と同じ意味で、その後に最初の値 "#id" または ".class" が続きます。
message: 対応するコンテンツその後にプロンプトのテキスト情報が続きます。
⑤背景適応画面サイズ:
いつの間にかドキュメントをあちこち探していましたが、知ってみると非常にシンプルで、背景画像はこうです。ブラウザと同じサイズにすることができます。とても簡単です!
上記はこの記事の全内容です。ブートストラップに関連する無料のビデオ チュートリアルについては、php 中国語 Web サイトの
bootstrap チュートリアル
以上がbootstrapのログイン登録ページ作成の詳細説明の詳細内容です。詳細については、PHP 中国語 Web サイトの他の関連記事を参照してください。