

PSで写真のテキストを変更する方法


#画像 PS 内のテキストを変更する方法?
画像 PS 内の単語を変更する方法:
1. ps ソフトウェアを開き、テキストを変更する必要がある画像を見つけて開きます。


PHP 中国語 Web サイトの ps チュートリアル 列をご覧ください。
以上がPSで写真のテキストを変更する方法の詳細内容です。詳細については、PHP 中国語 Web サイトの他の関連記事を参照してください。

ホットAIツール

Undresser.AI Undress
リアルなヌード写真を作成する AI 搭載アプリ

AI Clothes Remover
写真から衣服を削除するオンライン AI ツール。

Undress AI Tool
脱衣画像を無料で

Clothoff.io
AI衣類リムーバー

Video Face Swap
完全無料の AI 顔交換ツールを使用して、あらゆるビデオの顔を簡単に交換できます。

人気の記事
ホットツール

メモ帳++7.3.1
使いやすく無料のコードエディター

SublimeText3 中国語版
中国語版、とても使いやすい

ゼンドスタジオ 13.0.1
強力な PHP 統合開発環境

ドリームウィーバー CS6
ビジュアル Web 開発ツール

SublimeText3 Mac版
神レベルのコード編集ソフト(SublimeText3)
ホットトピック
 1667
1667
 14
1426
52
1328
25
1273
29
1255
24
14
1426
52
1328
25
1273
29
1255
24

 ps シリアル番号 cs5 永久無料 2020
Jul 13, 2023 am 10:06 AM
ps シリアル番号 cs5 永久無料 2020
Jul 13, 2023 am 10:06 AM
PS シリアル番号 cs5 永久無料 2020 には次が含まれます: 1. 1330-1384-7388-4265-2355-8589 (中国語); 2. 1330-1409-7892-5799-0412-7680 (中国語); 3. 1330-1616-1993 -8375-9492-6951 (中国語); 4. 1330-1971-2669-5043-0398-7801 (中国語) など
 ps インストールでレジストリ値を書き込めないエラー 160 が発生した場合の対処方法
Mar 22, 2023 pm 02:33 PM
ps インストールでレジストリ値を書き込めないエラー 160 が発生した場合の対処方法
Mar 22, 2023 pm 02:33 PM
ps インストールでレジストリ値を書き込めない場合のエラー 160 の解決策: 1. コンピュータに 2345 ソフトウェアがあるかどうかを確認し、ある場合はソフトウェアをアンインストールします; 2. 「Win+R」を押して「Regedit」と入力して、システム レジストリを開きますをクリックし、「Photoshop.exe」を見つけて Photoshop アイテムを削除します。
 PS インターフェースのフォントが小さすぎる場合はどうすればよいですか?
Dec 01, 2022 am 11:31 AM
PS インターフェースのフォントが小さすぎる場合はどうすればよいですか?
Dec 01, 2022 am 11:31 AM
PS インターフェイスのフォントが小さすぎるのを修正する方法: 1. PS を開き、PS の上部メニュー バーにある「編集」ボタンをクリックして編集メニューを展開します; 2. 展開された編集メニューで「環境設定」ボタンをクリックし、 3. インターフェイス設定で、ユーザー インターフェイスのフォント サイズを「大」に設定し、UI スケーリングを「200%」に設定して設定を保存し、PS を再起動して有効にします。
 psで選択範囲を削除する方法
Aug 07, 2023 pm 01:46 PM
psで選択範囲を削除する方法
Aug 07, 2023 pm 01:46 PM
PS で選択した領域を削除する手順: 1. 編集したい画像を開きます; 2. 適切なツールを使用して選択範囲を作成します; 3. 選択範囲内のコンテンツを削除するには、さまざまな方法を使用できます。 「削除」キー、「修復ブラシ ツール」の使用、「コンテンツに応じた塗りつぶし」の使用、「スタンプ ツール」の使用など; 4. ツールを使用して明らかな痕跡や欠陥を修復し、画像をより自然に見せます; 5 . 編集完了後、メニューバーの「ファイル」→「保存」をクリックして編集結果を保存します。
 PSで線画を抽出する手順の紹介
Apr 01, 2024 pm 12:51 PM
PSで線画を抽出する手順の紹介
Apr 01, 2024 pm 12:51 PM
1. ソフトウェアを開き、下の図に示すようにマテリアルをインポートします。 2. 次に、Ctrl+Shift+U を押して色を削除します。 3. 次に Ctrl+J を押してレイヤーをコピーします。 4. 次に、Ctrl+I を反転して、レイヤーブレンドモードをカラー覆い焼きに設定します。 5. 「フィルタ」-「その他」-「最小」をクリックします。 6. ポップアップ ダイアログ ボックスで、半径を 2 に設定し、[OK] をクリックします。 7. 最後に、抽出された線画が表示されます。
 PSコピーレイヤーのショートカットキー
Feb 23, 2024 pm 02:34 PM
PSコピーレイヤーのショートカットキー
Feb 23, 2024 pm 02:34 PM
PS コピー レイヤーのショートカット キーでは、PS を使用しているときにレイヤーをコピーしたい場合、ショートカット キー [Ctrl+J] を使用すると簡単にコピーできることがわかります。レイヤーをコピーするショートカットキーの具体的な操作方法を紹介しますが、以下に詳しい内容を記載していますので、ぜひご覧ください。 PS レイヤーのコピー ショートカット キーの答え: [Ctrl+J] 具体的な方法: 1. PS で画像を開き、コピーする必要があるレイヤーを選択します。 2. キーボードの[Ctrl+J]を同時に押して、レイヤーのコピーを完了します。その他のコピー方法: 1. 画像を開いた後、レイヤーを長押しして[新規レイヤー]アイコンを下に移動します。 2. アイコンに移動したら指を放します。 3. レイヤーのコピーが完了します。
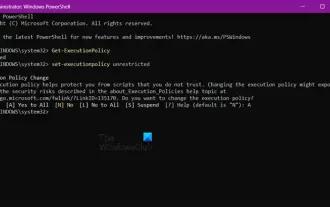 PowerShell を使用してタスクを自動化する方法
Feb 20, 2024 pm 01:51 PM
PowerShell を使用してタスクを自動化する方法
Feb 20, 2024 pm 01:51 PM
IT 管理者またはテクノロジーの専門家であれば、自動化の重要性を認識している必要があります。特に Windows ユーザーにとって、Microsoft PowerShell は最高の自動化ツールの 1 つです。 Microsoft は、サードパーティのアプリケーションをインストールする必要なく、自動化のニーズに対応するさまざまなツールを提供しています。このガイドでは、PowerShell を活用してタスクを自動化する方法について詳しく説明します。 PowerShell スクリプトとは何ですか? PowerShell の使用経験がある場合は、コマンドを使用してオペレーティング システムを構成したことがあるかもしれません。スクリプトは、.ps1 ファイル内のこれらのコマンドの集合です。 .ps1 ファイルには、基本的な Get-Help など、PowerShell によって実行されるスクリプトが含まれています。
 ps ショートカット キーの完全なリスト
Mar 11, 2024 pm 04:31 PM
ps ショートカット キーの完全なリスト
Mar 11, 2024 pm 04:31 PM
1. Ctrl + N: 新しいドキュメントを作成します。 2. Ctrl + O: ファイルを開きます。 3. Ctrl + S: 現在のファイルを保存します。 4. Ctrl + Shift + S: 名前を付けて保存します。 5. Ctrl + W: 現在のドキュメントを閉じます。 6. Ctrl + Q: Photoshop を終了します。 7. Ctrl + Z: 元に戻します。 8. Ctrl + Y: やり直し。 9. Ctrl + X: 選択したコンテンツを切り取ります。 10. Ctrl + C: 選択したコンテンツをコピーします。
