

psでテキストを変更する方法


ps のテキストを変更するにはどうすればよいですか?
#方法
1. PS を使用して、処理する画像を開きます。


以上がpsでテキストを変更する方法の詳細内容です。詳細については、PHP 中国語 Web サイトの他の関連記事を参照してください。

ホットAIツール

Undresser.AI Undress
リアルなヌード写真を作成する AI 搭載アプリ

AI Clothes Remover
写真から衣服を削除するオンライン AI ツール。

Undress AI Tool
脱衣画像を無料で

Clothoff.io
AI衣類リムーバー

AI Hentai Generator
AIヘンタイを無料で生成します。

人気の記事
ホットツール

メモ帳++7.3.1
使いやすく無料のコードエディター

SublimeText3 中国語版
中国語版、とても使いやすい

ゼンドスタジオ 13.0.1
強力な PHP 統合開発環境

ドリームウィーバー CS6
ビジュアル Web 開発ツール

SublimeText3 Mac版
神レベルのコード編集ソフト(SublimeText3)
ホットトピック
 7316
7316
 9
1625
14
1349
46
1261
25
1208
29
9
1625
14
1349
46
1261
25
1208
29

 ps シリアル番号 cs5 永久無料 2020
Jul 13, 2023 am 10:06 AM
ps シリアル番号 cs5 永久無料 2020
Jul 13, 2023 am 10:06 AM
PS シリアル番号 cs5 永久無料 2020 には次が含まれます: 1. 1330-1384-7388-4265-2355-8589 (中国語); 2. 1330-1409-7892-5799-0412-7680 (中国語); 3. 1330-1616-1993 -8375-9492-6951 (中国語); 4. 1330-1971-2669-5043-0398-7801 (中国語) など
 psで選択範囲を削除する方法
Aug 07, 2023 pm 01:46 PM
psで選択範囲を削除する方法
Aug 07, 2023 pm 01:46 PM
PS で選択した領域を削除する手順: 1. 編集したい画像を開きます; 2. 適切なツールを使用して選択範囲を作成します; 3. 選択範囲内のコンテンツを削除するには、さまざまな方法を使用できます。 「削除」キー、「修復ブラシ ツール」の使用、「コンテンツに応じた塗りつぶし」の使用、「スタンプ ツール」の使用など; 4. ツールを使用して明らかな痕跡や欠陥を修復し、画像をより自然に見せます; 5 . 編集完了後、メニューバーの「ファイル」→「保存」をクリックして編集結果を保存します。
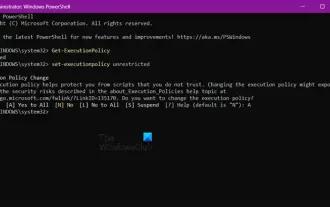 PowerShell を使用してタスクを自動化する方法
Feb 20, 2024 pm 01:51 PM
PowerShell を使用してタスクを自動化する方法
Feb 20, 2024 pm 01:51 PM
IT 管理者またはテクノロジーの専門家であれば、自動化の重要性を認識している必要があります。特に Windows ユーザーにとって、Microsoft PowerShell は最高の自動化ツールの 1 つです。 Microsoft は、サードパーティのアプリケーションをインストールする必要なく、自動化のニーズに対応するさまざまなツールを提供しています。このガイドでは、PowerShell を活用してタスクを自動化する方法について詳しく説明します。 PowerShell スクリプトとは何ですか? PowerShell の使用経験がある場合は、コマンドを使用してオペレーティング システムを構成したことがあるかもしれません。スクリプトは、.ps1 ファイル内のこれらのコマンドの集合です。 .ps1 ファイルには、基本的な Get-Help など、PowerShell によって実行されるスクリプトが含まれています。
 ps インストールでレジストリ値を書き込めないエラー 160 が発生した場合の対処方法
Mar 22, 2023 pm 02:33 PM
ps インストールでレジストリ値を書き込めないエラー 160 が発生した場合の対処方法
Mar 22, 2023 pm 02:33 PM
ps インストールでレジストリ値を書き込めない場合のエラー 160 の解決策: 1. コンピュータに 2345 ソフトウェアがあるかどうかを確認し、ある場合はソフトウェアをアンインストールします; 2. 「Win+R」を押して「Regedit」と入力して、システム レジストリを開きますをクリックし、「Photoshop.exe」を見つけて Photoshop アイテムを削除します。
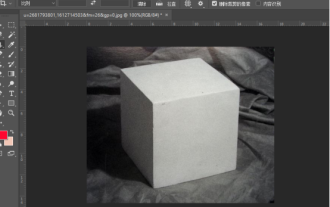
 PSで線画を抽出する手順の紹介
Apr 01, 2024 pm 12:51 PM
PSで線画を抽出する手順の紹介
Apr 01, 2024 pm 12:51 PM
1. ソフトウェアを開き、下の図に示すようにマテリアルをインポートします。 2. 次に、Ctrl+Shift+U を押して色を削除します。 3. 次に Ctrl+J を押してレイヤーをコピーします。 4. 次に、Ctrl+I を反転して、レイヤーブレンドモードをカラー覆い焼きに設定します。 5. 「フィルタ」-「その他」-「最小」をクリックします。 6. ポップアップ ダイアログ ボックスで、半径を 2 に設定し、[OK] をクリックします。 7. 最後に、抽出された線画が表示されます。
 PS インターフェースのフォントが小さすぎる場合はどうすればよいですか?
Dec 01, 2022 am 11:31 AM
PS インターフェースのフォントが小さすぎる場合はどうすればよいですか?
Dec 01, 2022 am 11:31 AM
PS インターフェイスのフォントが小さすぎるのを修正する方法: 1. PS を開き、PS の上部メニュー バーにある「編集」ボタンをクリックして編集メニューを展開します; 2. 展開された編集メニューで「環境設定」ボタンをクリックし、 3. インターフェイス設定で、ユーザー インターフェイスのフォント サイズを「大」に設定し、UI スケーリングを「200%」に設定して設定を保存し、PS を再起動して有効にします。
 ps ショートカット キーの完全なリスト
Mar 11, 2024 pm 04:31 PM
ps ショートカット キーの完全なリスト
Mar 11, 2024 pm 04:31 PM
1. Ctrl + N: 新しいドキュメントを作成します。 2. Ctrl + O: ファイルを開きます。 3. Ctrl + S: 現在のファイルを保存します。 4. Ctrl + Shift + S: 名前を付けて保存します。 5. Ctrl + W: 現在のドキュメントを閉じます。 6. Ctrl + Q: Photoshop を終了します。 7. Ctrl + Z: 元に戻します。 8. Ctrl + Y: やり直し。 9. Ctrl + X: 選択したコンテンツを切り取ります。 10. Ctrl + C: 選択したコンテンツをコピーします。
 ps消失点の使い方 - ps消失点の使い方
Mar 05, 2024 am 09:00 AM
ps消失点の使い方 - ps消失点の使い方
Mar 05, 2024 am 09:00 AM
最近、多くの友人が PS 消失点の使い方を編集者に尋ねてきました。次に、PS 消失点の使い方を学びましょう。皆さんのお役に立てれば幸いです。ステップ 1: まず、PS ソフトウェアを開き、3 次元遠近効果のある画像をインポートします (図を参照)。ステップ 2: 次に、マテリアル画像をインポートします。(図に示すように) 任意の画像を使用できます。ステップ 3: 素材画像を選択し、Ctrl+C を押して素材画像をコピーし、目の前の目を隠し、立体遠近効果画像を選択して、フィルター オプションの消失点オプションをクリックします (図を参照)。 。ステップ 4: 消失点フィルターの編集ウィンドウに入り、左側の [平面の作成] ツールを選択します (図を参照)。ステップ 5: 3 次元透視レンダリングでオブジェクトの 4 隅をクリックして、閉じた円を形成します。
