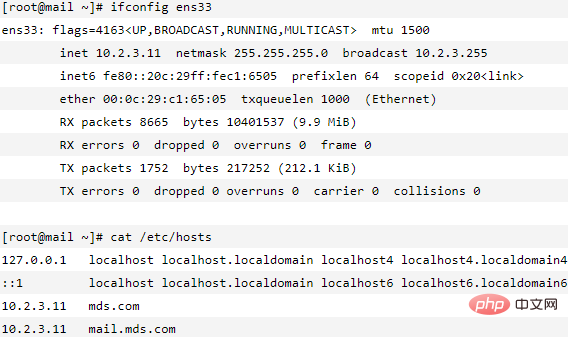
1. ホスト マッピングの構成

2. Postfix および Mailx ツールのインストール
[root@mail ~]# yum -y install postfix mailx
[root@mail ~]# systemctl start postfix
[root@mail ~]# systemctl enable postfix
[root@mail ~]# netstat -anput | grep 25
tcp        0      0 0.0.0.0:25              0.0.0.0:*               LISTEN      1820/master
3. Postfix の定義設定ファイル
[root@mail ~]# vim /etc/postfix/main.cf
myhostname = mail.mds.com
mydomain = mds.com
myorigin = $mydomain
inet_interfaces = all
mydestination = $myhostname,$mydomain
4. 163電子メール証明書を申請
[root@mail ~]# mkdir /root/.certs
[root@mail ~]# echo -n | openssl s_client -connect smtp.163.com:465 | sed -ne '/-BEGIN CERTIFICATE-/,/-END CERTIFICATE-/p' > ~/.certs/163.crt
[root@mail ~]# certutil -A -n "GeoTrust Global CA" -t "C,," -d ~/.certs -i ~/.certs/163.crt
[root@mail ~]# certutil -A -n "GeoTrust SSL CA" -t "C,," -d ~/.certs -i ~/.certs/163.crt
[root@mail ~]# certutil -L -d /root/.certs
[root@mail ~]# certutil -A -n "GeoTrust SSL CA - G3" -t "Pu,Pu,Pu" -d ~/.certs/ -i ~/.certs/163.crt
5. 163メールボックスを使用して電子メールを送信
[root@mail ~]# vim /etc/mail.rc
set ssl-verify="ignore"
set smtp-auth="login"
set from="mds302587@163.com"
set smtp="smtps://smtp.163.com:465"
set smtp-auth-user="mds302587@163.com"
set smtp-auth-password="123456"
set nss-config-dir="/root/.certs"
6. サービスを再起動してテスト電子メールを送信
[root@mail ~]# systemctl restart postfix
[root@mail ~]# echo "This is a test mail" | mail -s '邮件测试' 452666750@qq.com
7. メールの受信を確認します
推奨される関連チュートリアル: centos チュートリアル
以上がCentOS7でPostfixを使用してメールを送信する方法の詳細内容です。詳細については、PHP 中国語 Web サイトの他の関連記事を参照してください。