CSS3 線形グラデーションで 4 つの接続されたリングを実現 (コード例)
この記事の目的:
1. CSS3 での線形グラデーションの実装方法をマスターする
#質問:
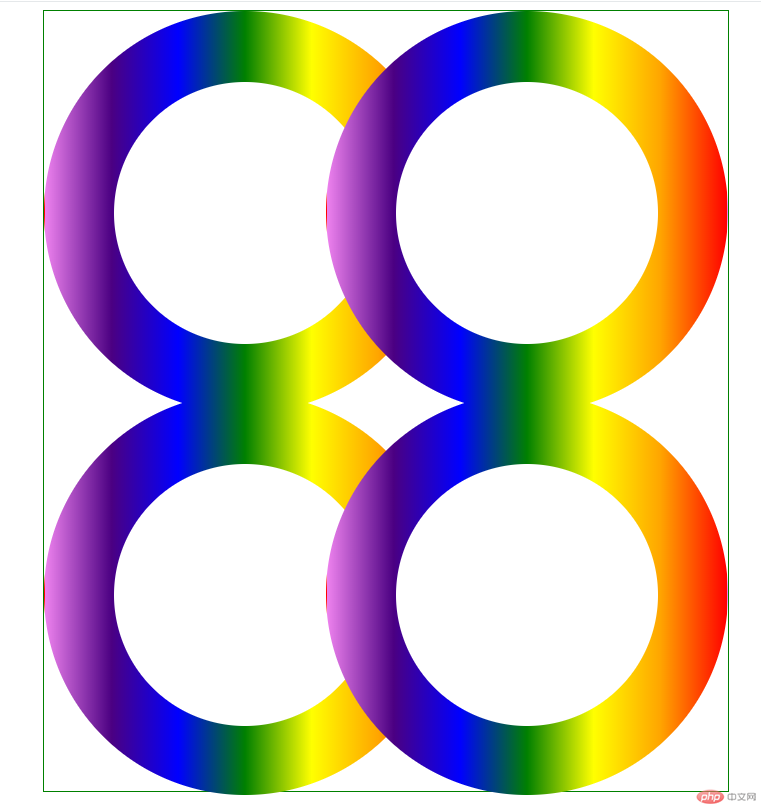
次の効果を実現するには、純粋な DIV を使用する必要があります。 CSS では、ナレッジ ポイントの線形グラデーションを使用し、それを中央に表示する必要があります

補足:
1. 色付きリングのサイズは 400px *400px、内側の空のリングのサイズは 260px*260px
2、右のリングと左のリングの間の左の移動距離は 120px
3、下のリングと上のリングです 移動距離は 20px
アイデア分析:
1. 一番外側のレイヤーは緑色の枠線で囲まれた div です。 4 つのリング
2. div は上部と下部に分かれていますが、実際には両方の部分は同じです。上部が実装されていれば、下部は実際にコピーできますが、マージントップが必要です
3. 各リングは実際には同じですが、位置が異なるため、1 つのグラデーション リングが実装されている限り、他のすべてのリングは最初のリングをコピーできます
次に、特定の操作を実行しましょう
1 。index.html を作成し、アーキテクチャを記述します
アーキテクチャのアイデア:
1. 外側のコンテナは次のように呼ばれます。 .container コンテナは、.top と .bottom の 2 つの部分に分かれています。各部分には 2 つのリング div が含まれています。
2 つの平行な div リングは水平に配置する必要があるため、float でなければなりません。 float, .clear をコンテナの最後に追加する必要があります。 div, コンテナが 2 つの float リング div
2 をラップできるように、float をクリアします。各リングは実際には 2 つの部分で構成されます外側の色付きのリングと内側の小さな白いリング
分析によると、次のアーキテクチャ コードが得られます
<!DOCTYPE html>
<html lang="en">
<head>
    <meta charset="UTF-8">
    <meta name="viewport" content="width=device-width, initial-scale=1.0">
    <title>渐变圆环</title>

</head>
<body>
    <div class="container">
        <div class="top">
             <!-- 第一个圆环 -->
            <div class="colorcircle circle1">
                <div class="smallcircle">
                </div>
            </div>
            <!-- 第二个圆环 -->
            <div class="colorcircle circle2">
                <div class="smallcircle">
                </div>
            </div>
            <div class="clear"> </div>
        </div>
        <div class="bottom">
            <!-- 第一个圆环 -->
           <div class="colorcircle circle1">
               <div class="smallcircle">
               </div>
           </div>
           <!-- 第二个圆环 -->
           <div class="colorcircle circle2">
               <div class="smallcircle">
               </div>
           </div>
           <div class="clear"> </div>
       </div>
    </div>
</body>
</html>2。次に、スタイルを記述します
1. すべての css ファイルの管理を容易にするために、css ファイル フォルダーを作成します。index.css を作成します。その中にスタイルを記述する方法は次のとおりです。アイデアは次のとおりです。コンテナ *
アイデア分析
1 コンテナ内のすべての要素の共通スタイルを設定するには、これらの共通コードを .container * style
に記述します。そこで、次のコードをindex.cssに追加します:
.container *{
    padding:0;
    margin: 0;
}2. 外側のレイヤーの色circle.colorcircle
アイデア分析
1. 要件に従って、幅: 400px、高さ: 400px、円形であるため、境界フィレットを 400px、つまり border-radius: 400px;、
2 に設定する必要があります。背景は 7 色であるため、線のグラデーションが必要です。そして、色のグラデーションは左から右に赤、オレンジ、黄、緑、青、青、紫なので、コードに変換されます。つまり、background-image:linear-gradient(to left, red, orange, yellow, green,blue,indigo,violet);
3. 次に、丸い角を使用する場合は、境界線を設定する必要があります。そうしないと有効になりません。ただし、その境界線は透明なので、コードは border:1px になります。実線透明;
4. リングが平行に配置されるようにするには、float:left
にする必要があります。分析によると、引き続き次のコードをindex.cssに追加します。 :
.colorcircle{
    width:400px;
    height:400px;
    border-radius: 400px;
    background-image:linear-gradient(to left, red, orange,yellow,green,blue,indigo,violet);
    border:1px solid transparent;
    float: left;
}3. リング内の小さな白い円.smallcircle
アイデア分析:
1. 要件に従って取得、幅: 260px、高さ: 260px、は円形なので、境界線の丸い角を 260px、つまり、border-radius: 260px;、background-color:white;
中央に配置する必要があるため、左の間隔と上部を設定する必要があります。間隔は 70px=(400-260)/2
2 です。次に、丸い角が使用され、境界線を設定する必要があります。そうしないと有効になりませんが、その境界線は透明なので、変換はコードはボーダーです: 1px 実線透明;
次のように、index.css にコードを追加し続けます:
.smallcircle{
    width: 260px;
    height: 260px;
    border-radius: 260px;
    background-color: white;
    margin:70px auto;
    border:1px solid transparent;
}4..clear style
アイデア分析:
1. フロートをクリアする必要があるため、float:none、clear:both
2. この div にはコンテンツがありません。レイアウトに影響を与えないようにするには、幅と高さが必要です0に設定します
引き続き、次のコードをindex.cssに追加します:
.clear{
    clear: both;
    float: none;
    width: 0;
    height: 0;
}5. 右円.circle2
アイデア分析:
1. 要件に従って、左に移動します。量は 120px なので、margin-left:-120px
index.css に次のようにコードを追加します:
.circle2{
    margin-left:-120px;
}6。 part.bottom
アイデア分析:
1. 要件によれば、上方向への移動は 20px なので、margin-top:-20px
引き続き次のコードを追加します。 Index.css へ:
.bottom{
    margin-top:-20px;
}7. 一番外側の Layer.container
アイデア分析
1. 全体を中央に配置する必要があるため、コードに変換されます。 margin:0 auto; 緑のボーダーなので border:1px ソリッドグリーン;
2. div のデフォルトの幅は 100% です。中央揃えにするには、幅を設定する必要があります width= 684px (400 400 4 [リング 4 の境界線] -120)、高さ = 784 (400 400 4 [リング 4] 境界線] -20)
引き続き、次のコードを Index.css に追加します。
.container{
    border:1px solid green;
    width:684px;
    margin:0 auto;
    height: 784px;
}.container *{
padding:0;
margin: 0;
}
.colorcircle{
width:400px;
height:400px;
border-radius: 400px;
background-image:linear-gradient(to left, red, orange,yellow,green,blue,indigo,violet);
border:1px solid transparent;
float: left;
}
.smallcircle{
width: 260px;
height: 260px;
border-radius: 260px;
background-color: white;
margin:70px auto;
border:1px solid transparent;
}
.clear{
clear: both;
float: none;
width: 0;
height: 0;
}
.circle2{
margin-left:-120px;
}
.bottom{
margin-top:-20px;
}
.container{
border:1px solid green;
width:684px;
margin:0 auto;
height: 784px;
}<!DOCTYPE html>
<html lang="en">
<head>
<meta charset="UTF-8">
<meta name="viewport" content="width=device-width, initial-scale=1.0">
<title>渐变圆环</title>
<link rel="stylesheet" href="css/index.css" />
</head>
<body>
<div class="container">
<div class="top">
<!-- 第一个圆环 -->
<div class="colorcircle circle1">
<div class="smallcircle">
</div>
</div>
<!-- 第二个圆环 -->
<div class="colorcircle circle2">
<div class="smallcircle">
</div>
</div>
<div class="clear"> </div>
</div>
<div class="bottom">
<!-- 第一个圆环 -->
<div class="colorcircle circle1">
<div class="smallcircle">
</div>
</div>
<!-- 第二个圆环 -->
<div class="colorcircle circle2">
<div class="smallcircle">
</div>
</div>
<div class="clear"> </div>
</div>
</div>
</body>
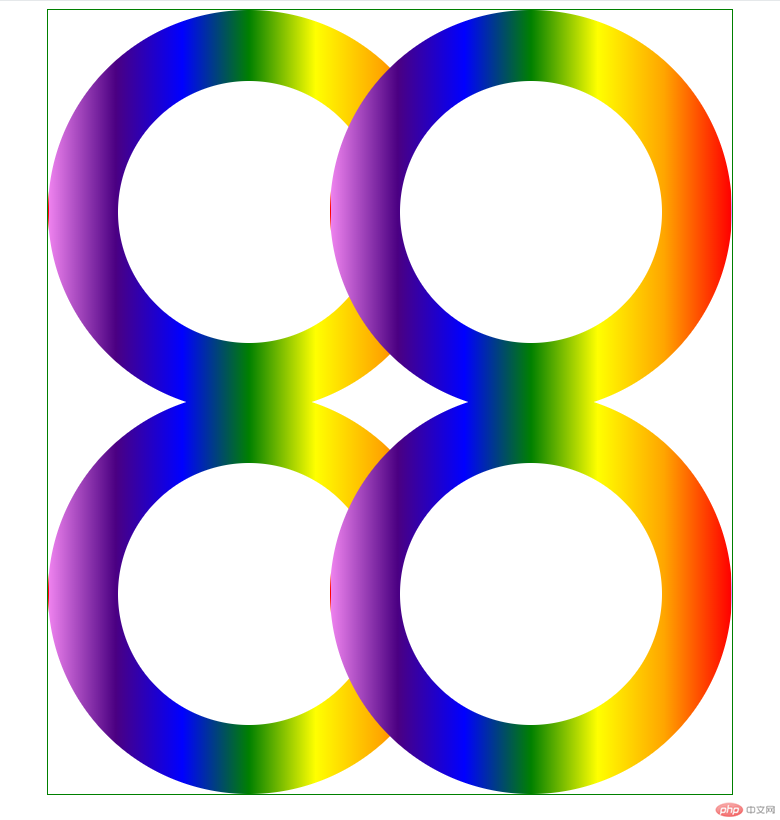
</html>发现下面部分.bottom的margin-top好像失效了,其实如果我们将.bottom的border设置成红色,可以看出,其实也是上移了20px,但是因为里面圆环是float的,且默认的postion为relative,所以圆环是无法再上移的,怎么办呢?这里提供两种解决方案:
1、我们将.bottom的postion设置为absoute
index.css中.bottom代码修改如下:
.bottom{
    margin-top:-20px;
    position: absolute;
}我们再来运行效果:

我们发现效果实现了
还有一种方法就是
2、通过让.top,.bottom上下两个div都float:left,也可以解决,只不过这样在.container的最后需要添加.clear 块
index.html代码修改如下:
<!DOCTYPE html>
<html lang="en">
<head>
    <meta charset="UTF-8">
    <meta name="viewport" content="width=device-width, initial-scale=1.0">
    <title>渐变圆环</title>
    <link rel="stylesheet" href="css/index.css" />
</head>
<body>
    <div class="container">
        <div class="top">
             <!-- 第一个圆环 -->
            <div class="colorcircle circle1">
                <div class="smallcircle">
                </div>
            </div>
            <!-- 第二个圆环 -->
            <div class="colorcircle circle2">
                <div class="smallcircle">
                </div>
            </div>
            <div class="clear"> </div>
        </div>
        <div class="bottom">
            <!-- 第一个圆环 -->
           <div class="colorcircle circle1">
               <div class="smallcircle">
               </div>
           </div>
           <!-- 第二个圆环 -->
           <div class="colorcircle circle2">
               <div class="smallcircle">
               </div>
           </div>
           <div class="clear"> </div>
       </div>
       <!--如果.top,.bottom都float了,需要加上此行-->
       <div class="clear"> </div>
    </div>
</body>
</html>index.css代码如下:
.container *{
    padding:0;
    margin: 0;
}

.colorcircle{
    width:400px;
    height:400px;
    border-radius: 400px;
    background-image:linear-gradient(to left, red, orange,yellow,green,blue,indigo,violet);

    border:1px solid transparent;
    float: left;
}
.smallcircle{
    width: 260px;
    height: 260px;

    border-radius: 260px;
    background-color: white;
    margin:70px auto;
    border:1px solid transparent;
}
.clear{
    clear: both;
    float: none;
    width: 0;
    height: 0;
}
.circle2{
    margin-left:-120px;
}

/* 解决上移问题 */
.bottom{
    margin-top:-20px;
    float: left;
}
.top{
    float: left;
}
/* end */
.container{
    border:1px solid green;
    width:684px;
    margin:0 auto;
    height: 784px;
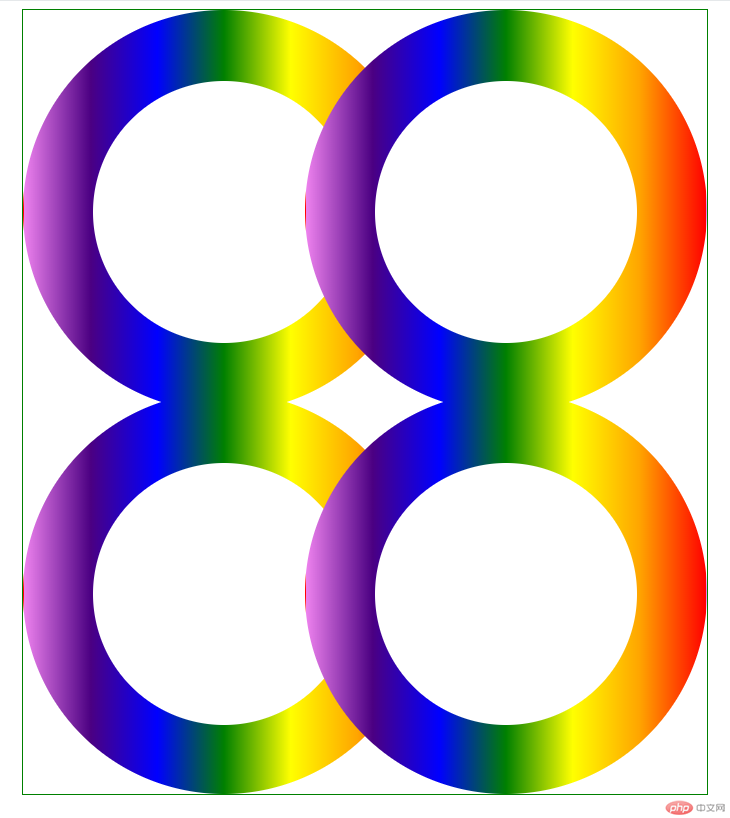
}运行结果为:

效果还是一样的
到此为止,我们就实现了全部的需求
总结:
1、学习了CSS3中线线渐变的语法如
linear-gradient(to left, red, orange,yellow,green,blue,indigo,violet);
其中方向left也可以是right,后面的颜色,可以2个或者3个都可以自定义
希望本文能给大家带来一定的帮助,谢谢!!!
以上がCSS3 線形グラデーションで 4 つの接続されたリングを実現 (コード例)の詳細内容です。詳細については、PHP 中国語 Web サイトの他の関連記事を参照してください。

ホットAIツール

Undresser.AI Undress
リアルなヌード写真を作成する AI 搭載アプリ

AI Clothes Remover
写真から衣服を削除するオンライン AI ツール。

Undress AI Tool
脱衣画像を無料で

Clothoff.io
AI衣類リムーバー

AI Hentai Generator
AIヘンタイを無料で生成します。

人気の記事

ホットツール

メモ帳++7.3.1
使いやすく無料のコードエディター

SublimeText3 中国語版
中国語版、とても使いやすい

ゼンドスタジオ 13.0.1
強力な PHP 統合開発環境

ドリームウィーバー CS6
ビジュアル Web 開発ツール

SublimeText3 Mac版
神レベルのコード編集ソフト(SublimeText3)

ホットトピック
 7321
7321
 9
9
 1625
1625
 14
14
 1349
1349
 46
46
 1261
1261
 25
25
 1209
1209
 29
29
 純粋な CSS3 で波の効果を実現するにはどうすればよいですか? (コード例)
Jun 28, 2022 pm 01:39 PM
純粋な CSS3 で波の効果を実現するにはどうすればよいですか?この記事ではSVGとCSSアニメーションを使って波のエフェクトを作成する方法をご紹介しますので、お役に立てれば幸いです。
 CSSを上手に使って色々な変わった形のボタンを実現(コード付き)
Jul 19, 2022 am 11:28 AM
この記事では、頻繁に登場する様々な奇妙な形のボタンをCSSを使って簡単に実現する方法を紹介しますので、ぜひ参考にしてください。
 スペースを取らずにCSS内の要素を非表示にする方法
Jun 01, 2022 pm 07:15 PM
2 つの方法: 1. display 属性を使用して、要素に「display:none;」スタイルを追加するだけです。 2. Position 属性と top 属性を使用して、要素の絶対位置を設定し、要素を非表示にします。要素に「position:absolute;top:-9999px;」スタイルを追加するだけです。
 CSS3でレースボーダーを実装する方法
Sep 16, 2022 pm 07:11 PM
CSS では、border-image 属性を使用してレースの境界線を実現できます。 border-image 属性では、画像を使用して境界線を作成できます。つまり、境界線に背景画像を追加できます。背景画像をレース スタイルとして指定するだけで済みます。構文「border-image: url (画像パス) は、内側への画像境界線の幅。開始を繰り返すかどうか;"。
 テキストカルーセルと画像カルーセルも純粋な CSS を使用して実現できることがわかりました。
Jun 10, 2022 pm 01:00 PM
テキストカルーセルと画像カルーセルを作成するにはどうすればよいですか?皆さんが最初に考えるのはjsを使うかどうかですが、実はテキストカルーセルや画像カルーセルも純粋なCSSでも実現できますので実装方法を見ていきましょう。
 css3アダプティブレイアウトとは何ですか
Jun 02, 2022 pm 12:05 PM
「レスポンシブ レイアウト」とも呼ばれるアダプティブ レイアウトとは、画面の幅を自動的に認識し、それに応じて調整できる Web ページ レイアウトを指します。このような Web ページは、端末ごとに特定のバージョンを作成するのではなく、複数の異なる端末と互換性を持たせることができます。 。アダプティブ レイアウトは、モバイル Web ブラウジングの問題を解決するために生まれ、さまざまな端末を使用するユーザーに優れたユーザー エクスペリエンスを提供できます。
 CSS3でマウスクリックで画像を拡大する方法
Apr 25, 2022 pm 04:52 PM
実装方法: 1. ":active" セレクターを使用して、画像上のマウス クリックの状態を選択します; 2. 変換属性とscale() 関数を使用して、画像の拡大効果を実現します。構文 "img:active {transform : スケール(x 軸倍率、y 軸倍率);}"。
 css3のアニメーション効果に変形はありますか?
Apr 28, 2022 pm 02:20 PM
css3 のアニメーション効果には変形があり、「animation: アニメーション属性 @keyframes ..{..{transform: 変換属性}}」を使用して変形アニメーション効果を実現できます。アニメーション属性はアニメーション スタイルを設定するために使用され、変形スタイルを設定するには、transform 属性を使用します。


