CentOS7でGitlabサーバーをセットアップする方法
#centosシステム紹介の次のチュートリアルコラムでは、CentOS7でGitlabサーバーを構築する方法を紹介しますので、困っている方の参考になれば幸いです。

CentOS7 を使用して Gitlab サーバーを構築します
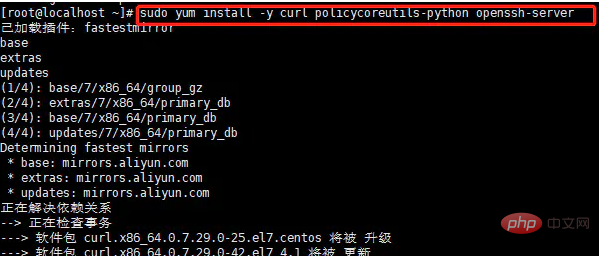
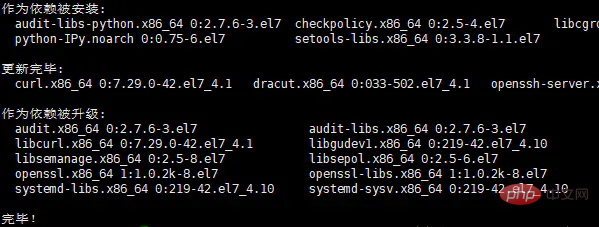
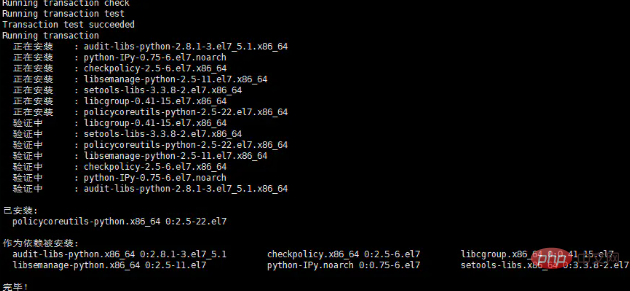
CentOSCentOS7 をインストールします。必要な依存関係
ステップ 1: ssh をインストールする1 |
|
1 2 |
|
1 2 |
|
1 |
|

1 |
|
1 2 |
|
1 2 |
|
1 |
|

1 |
|

1 |
|
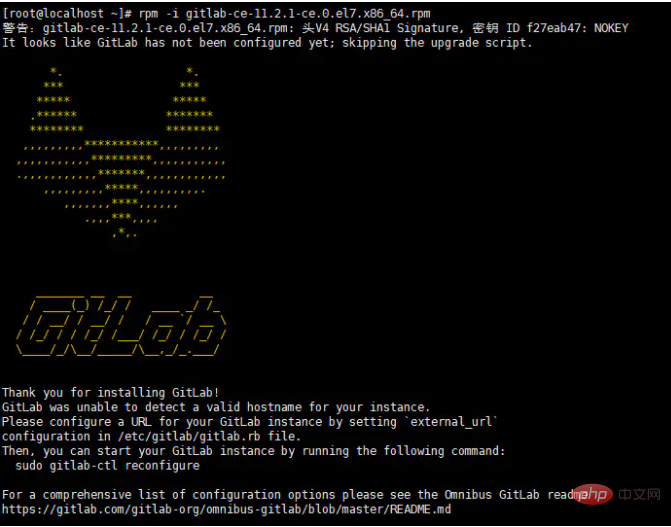 ##ステップ 3: gitlab 構成ファイルを変更し、サーバー IP とカスタム ポートを指定します;
1 |
|
URL を変更します: external_url 'http://192.168.2.121:8081'
 ポートの変更: nginx['listen_port'] = 8081
 ユニコーンの構成を変更するには
 ステップ 4: GitLab をリセットして開始する;
設定をリセットする: gitlab-ctl reconfigure
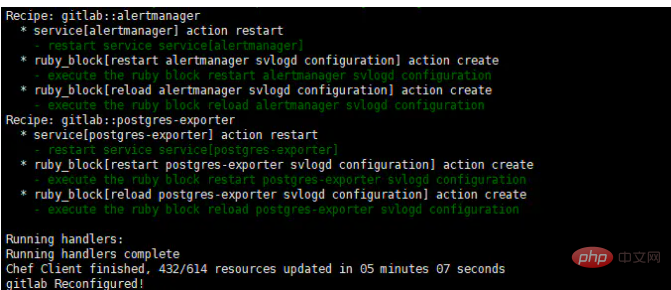 gitlab サービスを再起動する: gitlab-ctl restart
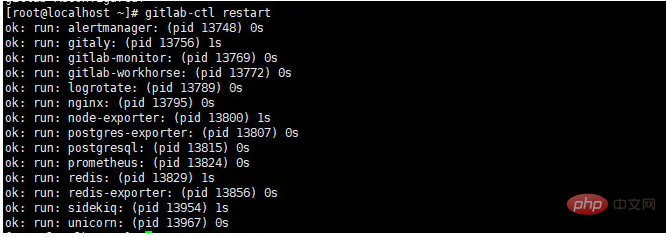 ステップ 5: Gitlab にアクセスし、初めてログインし、パスワードを変更します。
初期ユーザー: root
Initialパスワード: 5iveL !fe
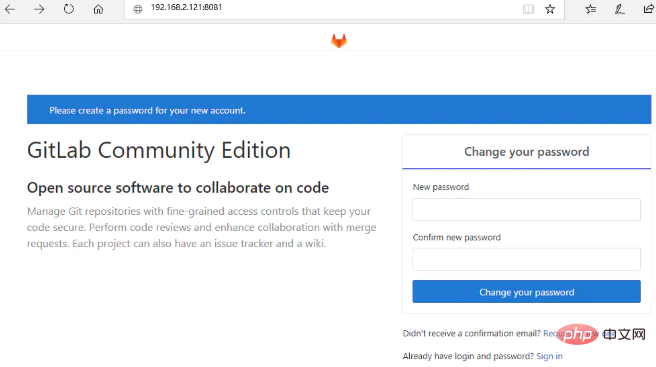 アクセスできない場合は、ポートが無効になっているかどうかを確認できます;
ポートのステータスを確認します: netstat -lntp; netstat コマンドが存在しない場合は、yum install net-tools -y をインストールします。CentOS7 には net-tools が含まれていないため、ifconfig コマンドは利用できません。net-tools をインストールした後は、netstat および ifconfig コマンドを使用できます。
ファイアウォールのオープン ポート:
1 |
|
ファイアウォール リストのリロード:
1 |
|
以上がCentOS7でGitlabサーバーをセットアップする方法の詳細内容です。詳細については、PHP 中国語 Web サイトの他の関連記事を参照してください。

ホットAIツール

Undresser.AI Undress
リアルなヌード写真を作成する AI 搭載アプリ

AI Clothes Remover
写真から衣服を削除するオンライン AI ツール。

Undress AI Tool
脱衣画像を無料で

Clothoff.io
AI衣類リムーバー

Video Face Swap
完全無料の AI 顔交換ツールを使用して、あらゆるビデオの顔を簡単に交換できます。

人気の記事

ホットツール

メモ帳++7.3.1
使いやすく無料のコードエディター

SublimeText3 中国語版
中国語版、とても使いやすい

ゼンドスタジオ 13.0.1
強力な PHP 統合開発環境

ドリームウィーバー CS6
ビジュアル Web 開発ツール

SublimeText3 Mac版
神レベルのコード編集ソフト(SublimeText3)

ホットトピック
 1664
1664
 14
14
 1423
1423
 52
52
 1318
1318
 25
25
 1269
1269
 29
29
 1248
1248
 24
24
 CentOS7 各種バージョンイメージのダウンロードアドレスとバージョン説明(Everythingバージョン含む)
Feb 29, 2024 am 09:20 AM
CentOS-7.0-1406 をロードする場合、オプションのバージョンが多数あり、一般ユーザーにとってはどれを選択すればよいか分かりませんが、簡単に紹介すると、 (1) CentOS-xxxx-LiveCD.ios と CentOS-xxxx- -DVD.iso はどう違いますか?前者は700Mしかなく、後者は3.8Gです。違いはサイズだけではありませんが、より本質的な違いは、CentOS-xxxx-LiveCD.ios はメモリにロードして実行することしかできず、インストールできないことです。ハードディスクには CentOS-xxx-bin-DVD1.iso のみインストールできます。 (2) CentOS-xxx-bin-DVD1.iso、Ce
 CentOS 7 緊急修復モードに入る手順
Jan 13, 2024 am 09:36 AM
centos7 ページを開くと、「緊急モードへようこそ!」が表示されます。ログイン後、「journalctl -xb」と入力してシステムログを表示し、「systemctlreboot」と入力して再起動し、「systemctldefault」と入力してデフォルトモードで再起動します。 giverootpasswordformaintenance(??Control-D???): 解決策: r を実行します。
 CentOS 7 の /tmp ディレクトリにあるジャンク ファイルにアクセスしてクリーンアップする方法は?
Dec 27, 2023 pm 09:10 PM
centos7システムのtmpディレクトリにゴミが大量にあるのですが、ゴミを削除したい場合はどうすればよいでしょうか?以下の詳細なチュートリアルを見てみましょう。 tmp ファイル ディレクトリ内のファイルのリストを表示するには、コマンド cdtmp/ を実行して tmp の現在のファイル ディレクトリに切り替え、ll コマンドを実行して現在のディレクトリ内のファイルのリストを表示します。以下に示すように。ファイルを削除するには、rm コマンドを使用します。rm コマンドはファイルをシステムから永久に削除することに注意してください。したがって、rm コマンドを使用するときは、ファイルを削除する前にプロンプトを表示することをお勧めします。コマンド rm-i file name を使用し、ユーザーが削除を確認する (y) か削除をスキップする (n) まで待つと、システムは対応する操作を実行します。以下に示すように。
 centos7 でパスワード ルールを設定する方法 centos7 でパスワード ルールを設定する方法
Jan 07, 2024 pm 01:17 PM
セキュリティ上の理由からパスワード ルールを設定する パスワードの有効期限が切れるまでの日数を設定します。ユーザーは数日以内にパスワードを変更する必要があります。この設定は、作成されたユーザーにのみ影響し、既存のユーザーには影響しません。既存のユーザーに設定する場合は、「chage -M (日) (ユーザー)」コマンドを実行します。 PASS_MAX_DAYS60#パスワードの有効期限 PASS_MIN_DAYS3#初期パスワード変更時間 PASS_MIN_LEN8#パスワードの最小長 PASS_WARN_AGE7#パスワード有効期限のプロンプト時間 パスワードの繰り返し制限の使用 [root@linuxprobe~]#vi/etc/pam.d/system-auth#nearline15:
 centos7でのファイル解凍コマンド(zip)の詳細説明
Jan 07, 2024 pm 06:30 PM
1. 圧縮フォルダーは zip ファイルです [root@cgls]#zip-rmydata.zipmydata2。mydata.zip を mydatabak ディレクトリに解凍します [root@cgls]#unzipmydata.zip-dmydatabak3.mydata01 フォルダーと mydata02.txt が圧縮されます。 mydata.zip[root@cgls]#zipmydata.zipmydata01mydata02.txt4. mydata.zip ファイルを直接解凍します [root@cgls]#unzipmydata.zip5. myd を表示します。
 CENTOS7でmbstring拡張機能をインストールするにはどうすればよいですか?
Jan 06, 2024 pm 09:59 PM
1.UncaughtError:Calltoundependentfunctionmb_strlen(); 上記のエラーが発生した場合、mbstring 拡張機能がインストールされていないことを意味します; 2. PHP インストール ディレクトリ cd/temp001/php-7.1.0/ext/mbstring に入ります 3. phpize( /usr/local/bin /phpize または /usr/local/php7-abel001/bin/phpize) コマンドを使用して、php 拡張機能 4../configure--with-php-config=/usr/local/php7-abel をインストールします。
 CentOS7にMysqlをインストールして起動時に自動起動するように設定する方法
Jun 02, 2023 pm 08:36 PM
Centos7 には mysql データベースがありません。デフォルトのデータベースは mariadb (mysql のブランチ) です。以下の手順に従って、mysql データベースを手動でインストールできます。 1. rpm インストール ファイル wgethttp://repo.mysql.com/mysql-community-release-el7.rpm をダウンロードします 2. rpm を実行して rpm-ivhmysql-community-release-el7.rpm をインストールします依存関係の解決が完了したらを選択すると、次のオプションが表示されます: dependencyresolved =================================
 CentOS7にNginxをインストールして自動起動を設定する方法
May 14, 2023 pm 03:01 PM
1. 公式 Web サイトからインストール パッケージをダウンロードし、Linux に適したバージョンを選択します。ここで最新バージョンを選択し、ローカルにダウンロードしてサーバーにアップロードするか、centos で wget コマンドを使用して直接ダウンロードします。 /usr/local ディレクトリに切り替えて、ソフトウェア パッケージ #cd/usr/local#wgethttp://nginx.org/download/nginx-1.11.5.tar.gz2 をダウンロードします。nginx をインストールするには、まず次のコマンドを実行して、 nginx の依存ライブラリをインストールします。依存ライブラリが不足している場合、インストールに失敗する可能性があります。詳細については、記事の最後にあるエラー メッセージを参照してください。 #yuminstallgcc-c++#yuminstallpcre#yumins


