vue.js を使用して非同期リクエストを行う方法: まずプロジェクトに axiox をインストールし、次にグローバルで使用するために main.js に axiox を導入し、次に axios get リクエストを作成し、最後に axios post リクエストを実装します。

vue チュートリアル"
vue.js を使用して非同期リクエストを行う
1. Axios は非同期リクエストを実装します。 1. axiox をプロジェクトにインストールしますnpm install --save axios
import axios from 'axios'
//可以给axios的ajax请求设置统一的主机和端口号
axios.defaults.baseURL = "http://157.122.54.189:8080/";
//将axios这个对象添加到Vue的原型对象中,在使用的时候就只需要使用this.对象名就可以了
Vue.prototype.$http = axios
<template>
<div>
</div>
</template>
<script>
export default {
methods:{
getData(){
//axios-get请求
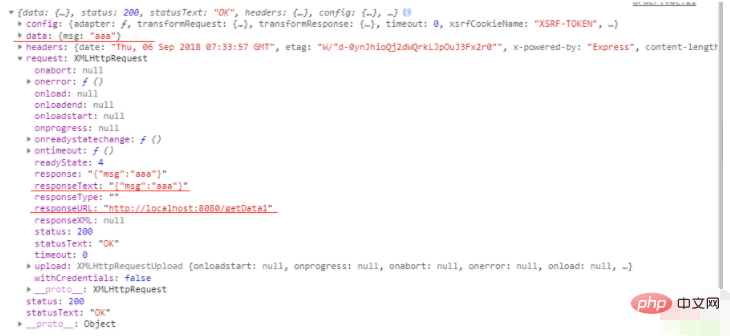
this.$http.get('/getData1')
.then(r => console.log(r))//接口调用成功返回的数据
.catch(err => console.log(err)),//接口调用失败返回的数据
}
}
mounted(){//模板或el对应的html渲染完成后再调用里面的方法
this.getData()
}
}
</script>
<style scoped>
</style>
node后端:
server.get('/getData1',function(req,res){
res.send({
'msg':'aaa'
})
})
// 1.可以直接传入字符串 name=张三&age=19
// 2.可以以对象的形式传入{name:“三”,age:19}
<template>
<div>
</div>
</template>
<script>
export default {
methods:{
getData(){
//axios-post请求传值
this.$http({
method:"post",
url:"/getData2",
headers:{
'Content-type': 'application/x-www-form-urlencoded'
},
data:{
name:'xxx'
},
transformRequest: [function (data) {//更改传值格式
let ret = ''
for (let it in data) {
ret += encodeURIComponent(it) + '=' +
encodeURIComponent(data[it]) + '&'
}
return ret.slice(0,ret.length-1)
}],
})
.then(r => console.log(r))
.catch(err => console.log(err))
}
}
mounted(){//模板或el对应的html渲染完成后再调用里面的方法
this.getData()
}
}
</script>
<style scoped>
</style>server.post('/getData2',function(req,res){
req.on("data",function(data){
console.log(querystring.parse(decodeURIComponent(data)));
});
res.send({
'msg':'bbb'
})
})npm install --save vue-resource
import vueResource from 'vue-resource'
Vue.use(vueResource)//这儿有所不同
this.$http.get('/getData1')
    .then(r => console.log(r))//接口调用成功返回的数据
.catch(err => console.log(err)),//接口调用失败返回的数据りー
以上がvue.js を使用して非同期リクエストを行う方法の詳細内容です。詳細については、PHP 中国語 Web サイトの他の関連記事を参照してください。