

Bootstrap で Typeahead コンポーネントを使用する方法


Bootstrap 中的 Typeahead 组件就是通常所说的自动完成 AutoComplete,功能很强大,但是,使用上并不太方便。这里我们将介绍一下这个组件的使用。
相关推荐:《bootstrap基础教程》
第一,简单使用
首先,最简单的使用方式,就是直接在标记中声明,通过 data-provide="typeahead" 来声明这是一个 typeahead 组件,通过 data-source= 来提供数据。当然了,你还必须提供 bootstrap-typeahead.js 脚本。
<html>
<head>
<link href="bootstrap.min.css" rel="stylesheet" type="text/css" />
</head>
<body>
<div style="margin: 50px 50px">
<label for="product_search">Product Search: </label>
<input id="product_search" type="text" data-provide="typeahead"
data-source='["Deluxe Bicycle", "Super Deluxe Trampoline", "Super Duper Scooter"]'>
</div>
<script src="js/jquery-1.8.3.min.js"></script>
<script src="js/bootstrap-typeahead.js"></script>
</body>
</html>第二,使用脚本填充数据
通常,我们使用脚本来填充数据,那么,页面可以变成如下的形式。
<html>
<head>
<link href="bootstrap.min.css" rel="stylesheet" type="text/css" />
</head>
<body>

<div style="margin: 50px 50px">
<label for="product_search">Product Search: </label>
<input id="product_search" type="text" data-provide="typeahead">
</div>

<script src="js/jquery-1.8.3.min.js"></script>
<script src="js/bootstrap-typeahead.js"></script>

<script>
$(document).ready(function($) {
   // Workaround for bug in mouse item selection
   $.fn.typeahead.Constructor.prototype.blur = function() {
      var that = this;
      setTimeout(function () { that.hide() }, 250);
   };

   $('#product_search').typeahead({
      source: function(query, process) {
         return ["Deluxe Bicycle", "Super Deluxe Trampoline", "Super Duper Scooter"];
      }
   });
})
</script>

</body>
</html>注意,我们提供了一个 source 函数来提供数据,这个函数接收两个参数,第一个参数 query 表示用户的输入,第二个参数是 process 函数,这个 process 函数是 typeahead 提供的,用来处理我们的数据。
如果你希望通过 Ajax 调用从服务器端获取匹配的数据,那么,在异步完成的处理函数中,你需要获取一个匹配的字符串数组,然后,将这个数组作为参数,调用 process 函数。
第三,支持 Ajax 获取数据
说了半天,数据都是从本地获取的,到底如何从服务器端获取数据呢?
其实很简单,在 source 函数中,自己调用 Ajax 方法来获取数据,主要注意的是,在获取数据之后,调用 typeahead 的 process 函数处理即可。
$('#product_search').typeahead({
    source: function (query, process) {
        var parameter = {query: query};
        $.post('@Url.Action("AjaxService")', parameter, function (data) {
            process(data);
        });
    }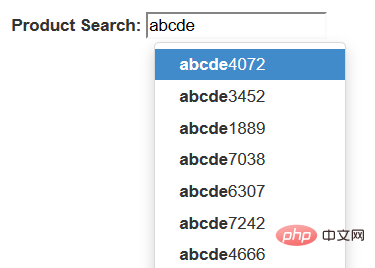
});当然了,在服务器上,你需要创建一个服务来提供数据,这里,我们演示使用随机数来生成一组随机数据的方法。
public ActionResult AjaxService(string query)
{
    System.Collections.ArrayList list
        = new System.Collections.ArrayList();
    System.Random random = new Random();

    for (int i = 0; i < 20; i++)
    {
        string item  = string.Format("{0}{1}", query, random.Next(10000));
        list.Add(item);
    }
    return this.Json(list);
}第四,使用 highlighter 和 updater
除了使用 source 函数之外,还可以使用 highlighter 函数来特别处理匹配项目的显示,使用 updater 函数,在选择了某个匹配项之后,做出一些后继的处理。

默认的 highlighter 是这样实现的,item 是匹配的项目,找到匹配的部分之后,使用 加粗了。 而 updater 的默认实现就更加简单了。 我们可以重写这两个函数,来实现自定义的处理。 实际上,你的数据可能是一组对象而不是一个字符串数组,下面的例子中,我们使用一个产品对象的数组来说明,每个产品对象有一个 id 编号,还有名称 name 和价格 price . 我们希望能够在提示中显示产品的更加详细的信息。 首先,修改我们的 source 函数,原来这个函数返回一个字符串的数组,现在我们返回一个产品 id 的数组,但是,process 函数期望得到一个字符串数组的参数,所以,我们将每个 id 都转换为字符串类型。 然后,typeahead 组件就会调用 matcher 函数来检查用户的输入是否与某个项目匹配,你可以使用产品的 id 在产品列表中获取产品对象,然后检查产品的名称与用户的输入是否匹配。 默认的 matcher 直接使用用户的输入来匹配,我们如果使用 id 的话,显然不能匹配,我们需要重写 matcher 函数。 matcher 接收一个当前项目的字符串,用户当前的输入为 this.query,匹配返回 true, 否则返回 false. 默认的 matcher 如下: 将它重写为永远匹配,直接返回 true。而在 highlighter 中将显示结果替换为希望的产品名称和价格组合。在下一步的 highlighter 中,我们使用 Underscore 组件中的 find 方法,通过产品的 id 在产品列表中获取产品对象,然后,显示产品名称和价格的组合。 默认的 updater 直接返回当前匹配的内容,我们这里是一个 id, 需要重写。 在用户选择之后,typeahead 将会调用 updater 函数,我们通过产品的 id 在产品列表中获取产品对象,然后 最后,updater 函数返回一个产品名称的字符串,为输入框提供内容。setSelectedProduct 是我们的一个自定义函数。 下面是全部的代码。 更多编程相关知识,请访问:编程入门!! 以上がBootstrap で Typeahead コンポーネントを使用する方法の詳細内容です。詳細については、PHP 中国語 Web サイトの他の関連記事を参照してください。highlighter: function (item) {
var query = this.query.replace(/[\-\[\]{}()*+?.,\\\^$|#\s]/g, '\\$&')
return item.replace(new RegExp('(' + query + ')', 'ig'), function ($1, match) {
return '<strong>' + match + '</strong>'
})
}updater: function (item) {
return item
}<html>
<head>
<link href="bootstrap.min.css" rel="stylesheet" type="text/css" />
</head>
<body>
<div style="margin: 50px 50px">
<label for="product_search">Product Search: </label>
<input id="product_search" type="text" data-provide="typeahead">
</div>
<script src="js/jquery-1.8.3.min.js"></script>
<script src="js/bootstrap-typeahead.js"></script>
<script>
$(document).ready(function($) {
// Workaround for bug in mouse item selection
$.fn.typeahead.Constructor.prototype.blur = function() {
var that = this;
setTimeout(function () { that.hide() }, 250);
};
$('#product_search').typeahead({
source: function(query, process) {
return ["Deluxe Bicycle", "Super Deluxe Trampoline", "Super Duper Scooter"];
},
highlighter: function(item) {
return "==>" + item + "<==";
},
updater: function(item) {
console.log("'" + item + "' selected.");
return item;
}
});
})
</script>
</body>
</html>第五,使用对象数据
<html>
<head>
    <link href="~/Content/dist/css/bootstrap.min.css" rel="stylesheet" />
</head>
<body>

    <div style="margin: 50px 50px">
        <label for="product_search">Product Search: </label>
        <input id="product_search" type="text" data-provide="typeahead">
    </div>
    <script src="~/Content/dist/js/jquery.js"></script>
    <script src="~/Content/dist/js/bootstrap-typeahead.js"></script>
    <script src="~/Content/dist/js/underscore-min.js"></script>


    <script>
        $(document).ready(function ($) {
            // Workaround for bug in mouse item selection
            $.fn.typeahead.Constructor.prototype.blur = function () {
                var that = this;
                setTimeout(function () { that.hide() }, 250);
            };

            var products = [
            {
                id: 0,
                name: "Deluxe Bicycle",
                price: 499.98
            },
            {
                id: 1,
                name: "Super Deluxe Trampoline",
                price: 134.99
            },
            {
                id: 2,
                name: "Super Duper Scooter",
                price: 49.95
            }
            ];

            $('#product_search').typeahead({
                source: function (query, process) {
                    var results = _.map(products, function (product) {
                        return product.name;
                    });
                    process(results);
                },

                highlighter: function (item) {
                    return "==>" + item + "<==";
                },

                updater: function (item) {
                    console.log("'" + item + "' selected.");
                    return item;
                }
            });
        })
    </script>

</body>
</html>第六,高级用法
, matcher: function (item) {    return ~item.toLowerCase().indexOf(this.query.toLowerCase())
}highlighter: function (id) { var product = _.find(products, function (p) { return p.id == id;
}); return product.name + " ($" + product.price + ")";
}updater: function (item) { return item
}updater: function (id) {
var product = _.find(products, function (p) {
return p.id == id;
});
that.setSelectedProduct(product);
return product.name;
}<html>
<head>
<link href="~/Content/dist/css/bootstrap.min.css" rel="stylesheet" />
</head>
<body>
<div style="margin: 50px 50px">
<label for="product_search">Product Search: </label>
<input id="product_search" type="text" data-provide="typeahead">
<div id="product" style="border-width: 1; padding: 5px; border-style: solid"></div>
</div>
<script src="~/Content/dist/js/jquery.js"></script>
<script src="~/Content/dist/js/bootstrap-typeahead.js"></script>
<script src="~/Content/dist/js/underscore-min.js"></script>
<script>
$(document).ready(function ($) {
// Workaround for bug in mouse item selection
$.fn.typeahead.Constructor.prototype.blur = function () {
var that = this;
setTimeout(function () { that.hide() }, 250);
};
var products = [
{
id: 0,
name: "Deluxe Bicycle",
price: 499.98
},
{
id: 1,
name: "Super Deluxe Trampoline",
price: 134.99
},
{
id: 2,
name: "Super Duper Scooter",
price: 49.95
}
];
var that = this;
$('#product_search').typeahead({
source: function (query, process) {
$('#product').hide();
var results = _.map(products, function (product) {
return product.id + "";
});
process(results);
},
matcher: function (item) {
return true;
},
highlighter: function (id) {    var product = _.find(products, function (p) {        return p.id == id;
    });    return product.name + " ($" + product.price + ")";
},
updater: function (id) {
    var product = _.find(products, function (p) {
        return p.id == id;
    });
    that.setSelectedProduct(product);
    return product.name;
}
});
$('#product').hide();
this.setSelectedProduct = function (product) {
$('#product').html("Purchase: <strong>" + product.name + " ($" + product.price + ")</strong>").show();
}
})
</script>
</body>
</html>

ホットAIツール

Undresser.AI Undress
リアルなヌード写真を作成する AI 搭載アプリ

AI Clothes Remover
写真から衣服を削除するオンライン AI ツール。

Undress AI Tool
脱衣画像を無料で

Clothoff.io
AI衣類リムーバー

AI Hentai Generator
AIヘンタイを無料で生成します。

人気の記事
ホットツール

メモ帳++7.3.1
使いやすく無料のコードエディター

SublimeText3 中国語版
中国語版、とても使いやすい

ゼンドスタジオ 13.0.1
強力な PHP 統合開発環境

ドリームウィーバー CS6
ビジュアル Web 開発ツール

SublimeText3 Mac版
神レベルのコード編集ソフト(SublimeText3)
ホットトピック
 7476
7476
 15
1377
52
77
11
19
32
15
1377
52
77
11
19
32

 ブートストラップの垂直センタリングを行う方法
Apr 07, 2025 pm 03:21 PM
ブートストラップの垂直センタリングを行う方法
Apr 07, 2025 pm 03:21 PM
ブートストラップを使用して垂直センタリングを実装します。FlexBoxメソッド:D-Flex、Justify-Content-Center、Align-Items-Centerクラスを使用して、FlexBoxコンテナに要素を配置します。 ALIGN-ITEMS-CENTERクラス方法:FlexBoxをサポートしていないブラウザの場合、親要素の高さが定義されている場合、Align-Items-Centerクラスを使用します。
 ブートストラップボタンの使用方法
Apr 07, 2025 pm 03:09 PM
ブートストラップボタンの使用方法
Apr 07, 2025 pm 03:09 PM
ブートストラップボタンの使用方法は?ブートストラップCSSを導入してボタン要素を作成し、ブートストラップボタンクラスを追加してボタンテキストを追加します
 ブートストラップ検索バーを取得する方法
Apr 07, 2025 pm 03:33 PM
ブートストラップ検索バーを取得する方法
Apr 07, 2025 pm 03:33 PM
ブートストラップを使用して検索バーの値を取得する方法:検索バーのIDまたは名前を決定します。 JavaScriptを使用してDOM要素を取得します。要素の値を取得します。必要なアクションを実行します。

 ブートストラップの日付を表示する方法
Apr 07, 2025 pm 03:03 PM
ブートストラップの日付を表示する方法
Apr 07, 2025 pm 03:03 PM
回答:ブートストラップの日付ピッカーコンポーネントを使用して、ページで日付を表示できます。手順:ブートストラップフレームワークを紹介します。 HTMLで日付セレクター入力ボックスを作成します。ブートストラップは、セレクターにスタイルを自動的に追加します。 JavaScriptを使用して、選択した日付を取得します。
 ブートストラップにスプリットラインを書く方法
Apr 07, 2025 pm 03:12 PM
ブートストラップにスプリットラインを書く方法
Apr 07, 2025 pm 03:12 PM
ブートストラップスプリットラインを作成するには2つの方法があります。タグを使用して、水平方向のスプリットラインを作成します。 CSS Borderプロパティを使用して、カスタムスタイルのスプリットラインを作成します。
 ブートストラップのフレームワークをセットアップする方法
Apr 07, 2025 pm 03:27 PM
ブートストラップのフレームワークをセットアップする方法
Apr 07, 2025 pm 03:27 PM
Bootstrapフレームワークをセットアップするには、次の手順に従う必要があります。1。CDNを介してブートストラップファイルを参照してください。 2。独自のサーバーでファイルをダウンロードしてホストします。 3。HTMLにブートストラップファイルを含めます。 4.必要に応じてSASS/LESSをコンパイルします。 5。カスタムファイルをインポートします(オプション)。セットアップが完了したら、Bootstrapのグリッドシステム、コンポーネント、スタイルを使用して、レスポンシブWebサイトとアプリケーションを作成できます。
 ブートストラップに写真を挿入する方法
Apr 07, 2025 pm 03:30 PM
ブートストラップに写真を挿入する方法
Apr 07, 2025 pm 03:30 PM
ブートストラップに画像を挿入する方法はいくつかあります。HTMLIMGタグを使用して、画像を直接挿入します。ブートストラップ画像コンポーネントを使用すると、レスポンシブ画像とより多くのスタイルを提供できます。画像サイズを設定し、IMG-Fluidクラスを使用して画像を適応可能にします。 IMGボーダークラスを使用して、境界線を設定します。丸い角を設定し、IMGラウンドクラスを使用します。影を設定し、影のクラスを使用します。 CSSスタイルを使用して、画像をサイズ変更して配置します。背景画像を使用して、背景イメージCSSプロパティを使用します。
