この記事では、Angular でのルーティングと Angular ルーティングの使用について説明します。一定の参考値があるので、困っている友達が参考になれば幸いです。

関連する推奨事項: 「angular チュートリアル 」
1. プロジェクトを作成するコマンド
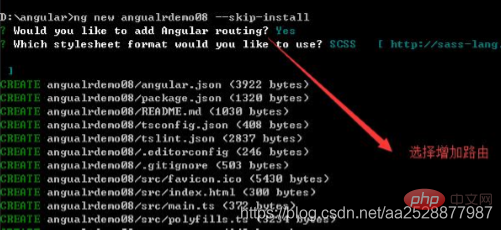
ng new ng-demo --skip-install

2. 必要なコンポーネントを作成する
ng g component components/home
ng g component components/news
ng g component components/newscontent
3. app-routing.module.ts を見つけてルーティングを構成します
コンポーネントの紹介
import { HomeComponent } from './components/home/home.component';
import { NewsComponent } from './components/news/news.component';
import { ProductComponent } from './components/product/product.component';ルーティングを構成します
const routes: Routes = [
{path: 'home', component: HomeComponent},
{path: 'news', component: NewsComponent},
{path:'product', component:ProductComponent },
{path: '*', redirectTo: '/home', pathMatch: 'full' }
];4. app.component .html ルート コンポーネント テンプレート、動的にロードされたルートを表示するようにルーター アウトレットを構成します
<h1>
    <a>首页</a>
    <a>新闻</a>
</h1>
<router-outlet></router-outlet>
<a>首页</a>
<a>新闻</a>
//匹配不到路由的时候加载的组件 或者跳转的路由
{
    path: '**', /*任意的路由*/
    // component:HomeComponent
    redirectTo:'home'
}<h1> <a> 首页 </a> <a> 新闻 </a> </h1>
<h1>
    <a>首页</a>
    <a>新闻</a>
</h1>
ジャンプ転送方法、ページジャンプまたはjsジャンプ
クエスチョンマークパラメータのURLアドレスは.../list-item?id=1
queryParams属性は固定と表示されます
//js Jump
//ルーターは ActivatedRoute のインスタンスです
import { Router } from '@angular/router';
.
constructor(private router: Router) {}
.
this.router.navigate(['/newscontent'],{
  queryParams:{
    name:'laney',
    id:id
  },
  skipLocationChange: true
  //可以不写,默认为false,设为true时路由跳转浏览器中的url会保持不变,传入的参数依然有效
});パラメータの取得方法
import { ActivatedRoute } from '@angular/router';

constructor(public route:ActivatedRoute) { }
ngOnInit() {
    this.route.queryParams.subscribe((data)=>{
      console.log(data);
 })
}Path パラメータの URL アドレスは.../list-item/1
<a [routerLink]="[’/list-item’, item.id]"> {{ item.name }}
//js跳转 //router为ActivatedRoute的实例
this.router.navigate([’/list-item’, item.id]); パス構成:
{path: ‘list-item/:id’, component: ListItemComponent}取得方法パラメータ
this.route.params.subscribe(
  param => {
      this.id= param['id'];
  }
)1. コンポーネントの作成とコンポーネントの導入
import { WelcomeComponent } from ‘./components/home/welcome/welcome.component’;
import { SettingComponent } from ‘./components/home/setting/setting.component’;2. ルーティングの構成
{
    path:'home',
    component:HomeComponent,
    children:[{
      path:'welcome',
      component:WelcomeComponent
    },{
      path:'setting',
      component:SettingComponent
    },
    {path: '**', redirectTo: 'welcome'}
  ]
},3. 親コンポーネントでルーター アウトレットを定義する
更新 プログラミング関連の知識の詳細については、プログラミング ビデオ を参照してください。 !
以上がAngular でのルーティングとその使用法の詳細な説明の詳細内容です。詳細については、PHP 中国語 Web サイトの他の関連記事を参照してください。