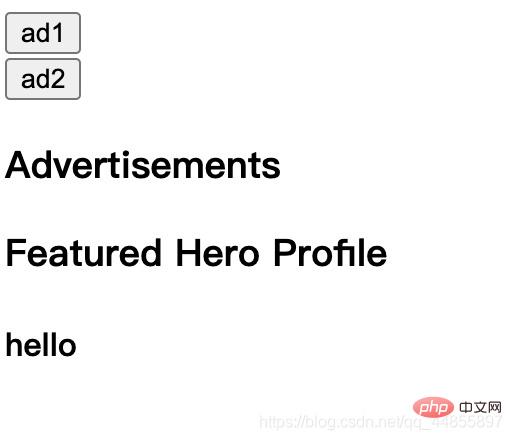
angular9におけるコンポーネントの動的ロードの実装方法についての簡単な説明
条件に応じてコンポーネントをロードすることで、コンポーネントの柔軟な切り替えを実現し、大量の ngIf の使用を削減します。これは、angular では比較的一般的な操作でもあります。この記事では、Angular コンポーネントの動的な使用方法を共有します。一定の参考値があるので、困っている友達が参考になれば幸いです。

ディレクティブの作成
コンポーネントを追加する前に、まずアンカー ポイントを定義して、コンポーネントを挿入する場所を Angular に指示する必要があります。 。 場所。
src/dynamic-banner/ad.directive.ts で
import { Directive, ViewContainerRef } from '@angular/core';

@Directive({
  selector: '[ad-host]',
})
export class AdDirective {
  constructor(public viewContainerRef: ViewContainerRef) { }
}AdDirective は ViewContainerRef を挿入して、コンテナ ビューへのアクセスを取得します。このコンテナは、動的に追加されるコンポーネントのホストです。
@Directive デコレーターでは、セレクターの名前 ad-host に注目してください。これは、要素に適用するディレクティブです。
関連する推奨事項: 「angular チュートリアル 」
動的コンポーネントのコア コード
動的コンポーネントによって読み込まれる HTML
src/dynamic-banner/ad-banner.component.html
<div>
  <h3 id="Advertisements">Advertisements</h3>
  <ng-template></ng-template>
</div>
動的コンポーネントの数
src/dynamic-banner /ad-banner.component.ts
import { Component, Input, OnInit, ViewChild, ComponentFactoryResolver, OnDestroy, SimpleChanges } from '@angular/core';

import { AdDirective } from './ad.directive';
import { AdItem }      from './ad-item';
import { AdComponent } from './ad.component';
import { componentMap } from './component/utils';
@Component({
  selector: 'app-ad-banner',
  templateUrl: './ad-banner.component.html',
  // styleUrls: ['./ad-banner.component.css']
})
export class AdBannerComponent implements OnInit {
  @Input() type: string = 'ad1' // 传入的key,确定加载那个组件
  @Input() data: any = {} // 传入组件的数据
  @ViewChild(AdDirective, {static: true}) adHost: AdDirective; // 动态组件的指令
  constructor(private componentFactoryResolver: ComponentFactoryResolver) { }

  ngOnInit() {
    this.loadComponent();
  }
  ngOnChanges(changes: SimpleChanges): void {
    if (changes['type']) this.loadComponent()
  }

  loadComponent() {
    // adItem 要加载的组件类,以及绑定到该组件上的任意数据
    const adItem = new AdItem(componentMap[this.type], this.data)
    const componentFactory = this.componentFactoryResolver.resolveComponentFactory(adItem.component);
    const viewContainerRef = this.adHost.viewContainerRef;
    viewContainerRef.clear();
    const componentRef = viewContainerRef.createComponent(componentFactory);
    (<adcomponent>componentRef.instance).data = adItem.data;
  }
}</adcomponent>ad-item.ts
src/dynamic-banner/ad-item.ts
import { Type } from '@angular/core';

export class AdItem {
  constructor(public component: Type<any>, public data: any) {}
}</any>ad.component.ts
src/dynamic-banner/ad.component.ts
import { Type } from '@angular/core';
export interface AdComponent {
  data: any;
}統合コンポーネントの登録
src/dynamic-banner/share.module.ts
import { NgModule } from '@angular/core';
import { CommonModule } from '@angular/common';
import { componets } from './component/utils';
import { AdDirective } from './ad.directive';
import { AdBannerComponent } from './ad-banner.component';

@NgModule({
  imports: [
    CommonModule
  ],
  exports:[
    [...componets],
    AdDirective,
    AdBannerComponent,
  ],
  declarations: [
    [...componets],
    AdDirective,
    AdBannerComponent,
  ],
  entryComponents: [
    [...componets]
  ]
})
export class ShareModule { }コンポーネントマッピング
src/dynamic-banner/component/utils.ts
import { HeroProfileComponent } from "./hero-profile.component";
import { HeroJobAdComponent } from './hero-job-ad.component';
const componentMap = {
    ad1: HeroProfileComponent,
    ad2: HeroJobAdComponent
}
const componets = [
    HeroProfileComponent,
    HeroJobAdComponent
]
export {componets, componentMap}##レンダリング

プログラミング ビデオをご覧ください。 !
以上がangular9におけるコンポーネントの動的ロードの実装方法についての簡単な説明の詳細内容です。詳細については、PHP 中国語 Web サイトの他の関連記事を参照してください。

ホットAIツール

Undresser.AI Undress
リアルなヌード写真を作成する AI 搭載アプリ

AI Clothes Remover
写真から衣服を削除するオンライン AI ツール。

Undress AI Tool
脱衣画像を無料で

Clothoff.io
AI衣類リムーバー

Video Face Swap
完全無料の AI 顔交換ツールを使用して、あらゆるビデオの顔を簡単に交換できます。

人気の記事

ホットツール

メモ帳++7.3.1
使いやすく無料のコードエディター

SublimeText3 中国語版
中国語版、とても使いやすい

ゼンドスタジオ 13.0.1
強力な PHP 統合開発環境

ドリームウィーバー CS6
ビジュアル Web 開発ツール

SublimeText3 Mac版
神レベルのコード編集ソフト(SublimeText3)

ホットトピック
 7715
7715
 15
15
 1641
1641
 14
14
 1395
1395
 52
52
 1289
1289
 25
25
 1232
1232
 29
29
 フロントエンドのサーマルペーパーレシートのために文字化けしたコード印刷に遭遇した場合はどうすればよいですか?
Apr 04, 2025 pm 02:42 PM
フロントエンドのサーマルペーパーチケット印刷のためのよくある質問とソリューションフロントエンド開発におけるチケット印刷は、一般的な要件です。しかし、多くの開発者が実装しています...
 javascriptの分解:それが何をするのか、なぜそれが重要なのか
Apr 09, 2025 am 12:07 AM
JavaScriptは現代のWeb開発の基礎であり、その主な機能には、イベント駆動型のプログラミング、動的コンテンツ生成、非同期プログラミングが含まれます。 1)イベント駆動型プログラミングにより、Webページはユーザー操作に応じて動的に変更できます。 2)動的コンテンツ生成により、条件に応じてページコンテンツを調整できます。 3)非同期プログラミングにより、ユーザーインターフェイスがブロックされないようにします。 JavaScriptは、Webインタラクション、シングルページアプリケーション、サーバー側の開発で広く使用されており、ユーザーエクスペリエンスとクロスプラットフォーム開発の柔軟性を大幅に改善しています。
 誰がより多くのPythonまたはJavaScriptを支払われますか?
Apr 04, 2025 am 12:09 AM
スキルや業界のニーズに応じて、PythonおよびJavaScript開発者には絶対的な給与はありません。 1. Pythonは、データサイエンスと機械学習でさらに支払われる場合があります。 2。JavaScriptは、フロントエンドとフルスタックの開発に大きな需要があり、その給与もかなりです。 3。影響要因には、経験、地理的位置、会社の規模、特定のスキルが含まれます。
 JavaScriptを使用して、同じIDを持つArray要素を1つのオブジェクトにマージする方法は?
Apr 04, 2025 pm 05:09 PM
同じIDを持つ配列要素をJavaScriptの1つのオブジェクトにマージする方法は?データを処理するとき、私たちはしばしば同じIDを持つ必要性に遭遇します...
 JavaScriptは学ぶのが難しいですか?
Apr 03, 2025 am 12:20 AM
JavaScriptを学ぶことは難しくありませんが、挑戦的です。 1)変数、データ型、関数などの基本概念を理解します。2)非同期プログラミングをマスターし、イベントループを通じて実装します。 3)DOM操作を使用し、非同期リクエストを処理することを約束します。 4)一般的な間違いを避け、デバッグテクニックを使用します。 5)パフォーマンスを最適化し、ベストプラクティスに従ってください。
 Shiseidoの公式Webサイトのように、視差スクロールと要素のアニメーション効果を実現する方法は?
または:
Shiseidoの公式Webサイトのようにスクロールするページを伴うアニメーション効果をどのように実現できますか?
Apr 04, 2025 pm 05:36 PM
この記事の視差スクロールと要素のアニメーション効果の実現に関する議論では、Shiseidoの公式ウェブサイト(https://www.shisido.co.co.jp/sb/wonderland/)と同様の達成方法について説明します。
 Console.log出力の違い結果:なぜ2つの呼び出しが異なるのですか?
Apr 04, 2025 pm 05:12 PM
Console.log出力の違いの根本原因に関する詳細な議論。この記事では、Console.log関数の出力結果の違いをコードの一部で分析し、その背後にある理由を説明します。 �...
 フロントエンド開発でVSCodeと同様に、パネルドラッグアンドドロップ調整機能を実装する方法は?
Apr 04, 2025 pm 02:06 PM
フロントエンドのVSCodeと同様に、パネルドラッグアンドドロップ調整機能の実装を調べます。フロントエンド開発では、VSCODEと同様のVSCODEを実装する方法...


