

vscode が eslint+prettier を設定して Vue コードをフォーマットする方法

この記事では、#vscode eslint による Vue コードの整形方法を紹介します。一定の参考値があるので、困っている友達が参考になれば幸いです。

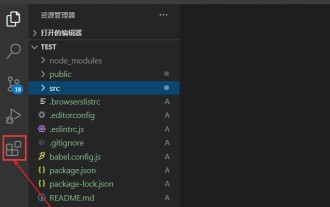
プロジェクトの背景: vue-cli
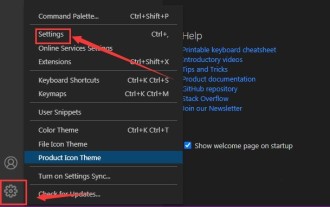
まず、これら 3 つのプラグインをインストールします。次に、設定リストに従って必要に応じて設定します。
- #ESlint
: JavaScript コード検出ツール。保存するたびに js をフォーマットするように設定できますが、少しフォーマットするだけです。フォーマットが完了する前に Ctrl S を数回連続して押す必要があります。ご自身で体験してください~~
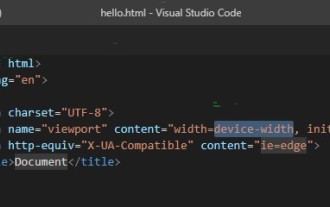
- vetur
: フォーマットできますhtml、標準 css (セミコロンと中括弧を含む種類)、標準 js (セミコロンと二重引用符を含む種類)、vue ファイル、 しかし!フォーマットされた標準 js ファイルは ESlint 仕様に準拠していないため、二重引用符やセミコロンなどが自動的に追加されます。
- Prettier - コード フォーマッタ:
Only focus書式設定に関しては、eslint で構文をチェックする機能はありませんが、JavaScript、Flow、TypeScript、CSS、SCSS、Less、JSX を含む、書式設定されたファイル (最大長、タグとスペースの混合、参照スタイルなど) のみを考慮します。 · Vue · GraphQL · JSON · Markdown
##[推奨学習: " vscode チュートリアル
vue.js チュートリアル"] vscode json 構成項目
{
  // git路径
  "git.path": "D:/tool/Git/cmd/git.exe",
  "git.confirmSync": false,
  //.vue文件template格式化支持,并使用js-beautify-html插件
  "vetur.format.defaultFormatter.html": "js-beautify-html",
  "vetur.format.defaultFormatterOptions": {
    // 对属性进行换行。
    // - auto: 仅在超出行长度时才对属性进行换行。
    // - force: 对除第一个属性外的其他每个属性进行换行。
    // - force-aligned: 对除第一个属性外的其他每个属性进行换行,并保持对齐。
    // - force-expand-multiline: 对每个属性进行换行。
    // - aligned-multiple: 当超出折行长度时,将属性进行垂直对齐。
    "js-beautify-html": {
      "wrap_line_length": 120,
      "wrap_attributes": "auto",
      "end_with_newline": false
    },
    "prettier": {
      "semi": false, //不使用分号结尾
      "singleQuote": true, //使用单引号
      "eslintIntegration": true  //开启 eslint 支持
    }
  },
  //根据文件后缀名定义vue文件类型
  "files.associations": {
    "*.vue": "vue"
  },
  //保存自动格式化
  "editor.formatOnSave": true,
  //配置 ESLint 检查的文件类型
  "eslint.validate": [
    "javascript",
    "javascriptreact",
    "vue-html",
    {
      "language": "vue",
      "autoFix": true
    },
    {
      "language": "html",
      "aotoFix": true
    }
  ],
  "eslint.run": "onSave",
  //保存时eslint自动修复错误
  "eslint.autoFixOnSave": true,
  "files.autoSave": "afterDelay"
}module.exports = {
root: true,
parserOptions: {
parser: 'babel-eslint',
sourceType: 'module'
},
env: {
browser: true,
node: true,
es6: true,
},
extends: ['plugin:vue/recommended', 'eslint:recommended'],
// add your custom rules here
//it is base on https://github.com/vuejs/eslint-config-vue
rules: {
"vue/max-attributes-per-line": [2, {
"singleline": 10,
"multiline": {
"max": 1,
"allowFirstLine": false
}
}],
"vue/singleline-html-element-content-newline": "off",
"vue/multiline-html-element-content-newline":"off",
"vue/name-property-casing": ["error", "PascalCase"],
"vue/no-v-html": "off",
'accessor-pairs': 2,
'arrow-spacing': [2, {
'before': true,
'after': true
}],
'block-spacing': [2, 'always'],
'brace-style': [2, '1tbs', {
'allowSingleLine': true
}],
'camelcase': [0, {
'properties': 'always'
}],
'comma-dangle': [2, 'never'],
'comma-spacing': [2, {
'before': false,
'after': true
}],
'comma-style': [2, 'last'],
'constructor-super': 2,
'curly': [2, 'multi-line'],
'dot-location': [2, 'property'],
'eol-last': 2,
'eqeqeq': ["error", "always", {"null": "ignore"}],
'generator-star-spacing': [2, {
'before': true,
'after': true
}],
'handle-callback-err': [2, '^(err|error)$'],
'indent': [2, 2, {
'SwitchCase': 1
}],
'jsx-quotes': [2, 'prefer-single'],
'key-spacing': [2, {
'beforeColon': false,
'afterColon': true
}],
'keyword-spacing': [2, {
'before': true,
'after': true
}],
'new-cap': [2, {
'newIsCap': true,
'capIsNew': false
}],
'new-parens': 2,
'no-array-constructor': 2,
'no-caller': 2,
'no-console': 'off',
'no-class-assign': 2,
'no-cond-assign': 2,
'no-const-assign': 2,
'no-control-regex': 0,
'no-delete-var': 2,
'no-dupe-args': 2,
'no-dupe-class-members': 2,
'no-dupe-keys': 2,
'no-duplicate-case': 2,
'no-empty-character-class': 2,
'no-empty-pattern': 2,
'no-eval': 2,
'no-ex-assign': 2,
'no-extend-native': 2,
'no-extra-bind': 2,
'no-extra-boolean-cast': 2,
'no-extra-parens': [2, 'functions'],
'no-fallthrough': 2,
'no-floating-decimal': 2,
'no-func-assign': 2,
'no-implied-eval': 2,
'no-inner-declarations': [2, 'functions'],
'no-invalid-regexp': 2,
'no-irregular-whitespace': 2,
'no-iterator': 2,
'no-label-var': 2,
'no-labels': [2, {
'allowLoop': false,
'allowSwitch': false
}],
'no-lone-blocks': 2,
'no-mixed-spaces-and-tabs': 2,
'no-multi-spaces': 2,
'no-multi-str': 2,
'no-multiple-empty-lines': [2, {
'max': 1
}],
'no-native-reassign': 2,
'no-negated-in-lhs': 2,
'no-new-object': 2,
'no-new-require': 2,
'no-new-symbol': 2,
'no-new-wrappers': 2,
'no-obj-calls': 2,
'no-octal': 2,
'no-octal-escape': 2,
'no-path-concat': 2,
'no-proto': 2,
'no-redeclare': 2,
'no-regex-spaces': 2,
'no-return-assign': [2, 'except-parens'],
'no-self-assign': 2,
'no-self-compare': 2,
'no-sequences': 2,
'no-shadow-restricted-names': 2,
'no-spaced-func': 2,
'no-sparse-arrays': 2,
'no-this-before-super': 2,
'no-throw-literal': 2,
'no-trailing-spaces': 2,
'no-undef': 2,
'no-undef-init': 2,
'no-unexpected-multiline': 2,
'no-unmodified-loop-condition': 2,
'no-unneeded-ternary': [2, {
'defaultAssignment': false
}],
'no-unreachable': 2,
'no-unsafe-finally': 2,
'no-unused-vars': [2, {
'vars': 'all',
'args': 'none'
}],
'no-useless-call': 2,
'no-useless-computed-key': 2,
'no-useless-constructor': 2,
'no-useless-escape': 0,
'no-whitespace-before-property': 2,
'no-with': 2,
'one-var': [2, {
'initialized': 'never'
}],
'operator-linebreak': [2, 'after', {
'overrides': {
'?': 'before',
':': 'before'
}
}],
'padded-blocks': [2, 'never'],
'quotes': [2, 'single', {
'avoidEscape': true,
'allowTemplateLiterals': true
}],
'semi': [2, 'never'],
'semi-spacing': [2, {
'before': false,
'after': true
}],
'space-before-blocks': [2, 'always'],
'space-before-function-paren': [2, 'never'],
'space-in-parens': [2, 'never'],
'space-infix-ops': 2,
'space-unary-ops': [2, {
'words': true,
'nonwords': false
}],
'spaced-comment': [2, 'always', {
'markers': ['global', 'globals', 'eslint', 'eslint-disable', '*package', '!', ',']
}],
'template-curly-spacing': [2, 'never'],
'use-isnan': 2,
'valid-typeof': 2,
'wrap-iife': [2, 'any'],
'yield-star-spacing': [2, 'both'],
'yoda': [2, 'never'],
'prefer-const': 2,
'no-debugger': process.env.NODE_ENV === 'production' ? 2 : 0,
'object-curly-spacing': [2, 'always', {
objectsInObjects: false
}],
'array-bracket-spacing': [2, 'never']
}
}以上がvscode が eslint+prettier を設定して Vue コードをフォーマットする方法の詳細内容です。詳細については、PHP 中国語 Web サイトの他の関連記事を参照してください。

ホットAIツール

Undresser.AI Undress
リアルなヌード写真を作成する AI 搭載アプリ

AI Clothes Remover
写真から衣服を削除するオンライン AI ツール。

Undress AI Tool
脱衣画像を無料で

Clothoff.io
AI衣類リムーバー

AI Hentai Generator
AIヘンタイを無料で生成します。

人気の記事
ホットツール

メモ帳++7.3.1
使いやすく無料のコードエディター

SublimeText3 中国語版
中国語版、とても使いやすい

ゼンドスタジオ 13.0.1
強力な PHP 統合開発環境

ドリームウィーバー CS6
ビジュアル Web 開発ツール

SublimeText3 Mac版
神レベルのコード編集ソフト(SublimeText3)
ホットトピック
 7514
7514
 15
1378
52
79
11
19
64
15
1378
52
79
11
19
64

 vscode でバックグラウンド更新を有効にする方法 vscode でバックグラウンド更新を有効にする方法
May 09, 2024 am 09:52 AM
vscode でバックグラウンド更新を有効にする方法 vscode でバックグラウンド更新を有効にする方法
May 09, 2024 am 09:52 AM
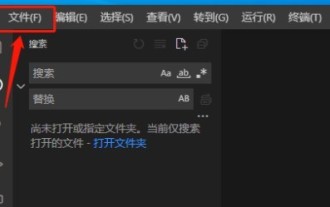
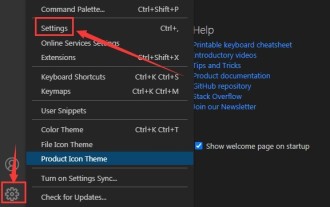
1. まず、インターフェースを開いた後、左上隅のファイルメニューをクリックします。 2. 次に、設定列の設定ボタンをクリックします。 3. ジャンプした設定ページで、アップデートセクションを見つけます。最後に、マウスをクリックしてチェックして有効にし、Windows のバックグラウンドで新しい VSCode バージョンのボタンをダウンロードしてインストールし、プログラムを再起動します。
 vscode で wsl 設定ファイルを無効にする方法 vscode で wsl 設定ファイルを無効にする方法
May 09, 2024 am 10:30 AM
vscode で wsl 設定ファイルを無効にする方法 vscode で wsl 設定ファイルを無効にする方法
May 09, 2024 am 10:30 AM
1. まず、設定メニューで設定オプションを開きます。 2. 次に、よく使用されるページでターミナル列を見つけます。 3. 最後に、列の右側にある usewslprofiles ボタンのチェックを外します。
 VScode でアニメーションのスムーズな挿入を設定する方法 アニメーションのスムーズな挿入を設定する VScode チュートリアル
May 09, 2024 am 09:49 AM
VScode でアニメーションのスムーズな挿入を設定する方法 アニメーションのスムーズな挿入を設定する VScode チュートリアル
May 09, 2024 am 09:49 AM
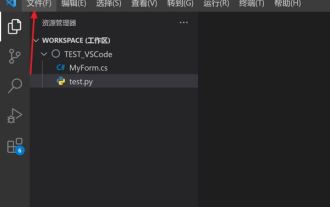
1. まず、インターフェースを開いた後、ワークスペースインターフェースをクリックします。 2. 次に、開いている編集パネルで、「ファイル」メニューをクリックします。 3. 次に、「環境設定」列の下にある「設定」ボタンをクリックします。 4. 最後に、マウスをクリックして CursorSmoothCaretAnimation を確認します。ボタンを押して保存するだけです
 Vscode でワークスペースの信頼権限を開く方法 Vscode でワークスペースの信頼権限を開く方法
May 09, 2024 am 10:34 AM
Vscode でワークスペースの信頼権限を開く方法 Vscode でワークスペースの信頼権限を開く方法
May 09, 2024 am 10:34 AM
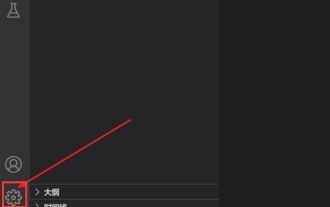
1. まず、編集ウィンドウを開いた後、左下隅にある設定アイコンをクリックします。 2. 次に、表示されるサブメニューで [ワークスペース信頼の管理] ボタンをクリックします。 3. 次に、編集ウィンドウでページを見つけます。最後に、あなたのオフィスによると、必要に応じて関連する指示を確認してください
 Vscode でアニメーションを開く方法 Vscode でアニメーションを開く方法の紹介
May 09, 2024 am 10:28 AM
Vscode でアニメーションを開く方法 Vscode でアニメーションを開く方法の紹介
May 09, 2024 am 10:28 AM
1. まず、[詳細] メニューの設定オプションをクリックして開きます。 2. 次に、[機能] セクションで [ターミナル] 列を見つけます。 3. 最後に、列の右側にある [アニメーションを有効化] ボタンをクリックして保存します。設定。
 vscode でファイル アイコンのテーマを設定する方法_vscode でファイル アイコンのテーマを設定する方法
May 09, 2024 am 10:00 AM
vscode でファイル アイコンのテーマを設定する方法_vscode でファイル アイコンのテーマを設定する方法
May 09, 2024 am 10:00 AM
1. インターフェイスを開いた後、左下隅にある拡張機能ボタンをクリックします。 2. 拡張機能ストアで vscode-icons プラグインを検索し、インストールします。 3. 次に、左上隅にあるファイル メニューの設定ボタンをクリックします。ファイルアイコンテーマを見つけるオプション4. インストールしたばかりのプラグインを見つけます。プラグインを設定するだけです。
 vscode でスマート コミットを有効にする方法 vscode でスマート コミットを有効にする手順
May 09, 2024 am 10:40 AM
vscode でスマート コミットを有効にする方法 vscode でスマート コミットを有効にする手順
May 09, 2024 am 10:40 AM
ステップ 1: vscode ソフトウェア インターフェイスを開いた後、下の設定メニューで [設定] ボタンをクリックします。 ステップ 2: [拡張機能] 列で [Git] オプションを見つけます。 ステップ 3: [enablesmartcommit] ボタンをクリックしてチェックします。
 vscode で html を実行する方法 vscode で html を実行する方法
May 09, 2024 pm 12:25 PM
vscode で html を実行する方法 vscode で html を実行する方法
May 09, 2024 pm 12:25 PM
1. まず、vscode ソフトウェアを使用して html プログラムを作成します。 2. 次に、検索ボタンをクリックして「openinbrowser」と入力します。 3. インストールが完了したら、ソフトウェアを再起動し、HTML ドキュメントを右クリックして、ドロップダウン メニューから [openindefaultbrowser] を選択する必要があります。 4. 最後に、ソフトウェアがデフォルトのブラウザで開きます。
