初級記事:CSS3を使ってラブローディングを作成する方法(詳細コード解説)
前回の記事「CSSを使用してリアルな水の波紋エフェクトを作成する方法をステップごとに教えます(コード付き)」では、CSSを使用してリアルな水の波紋エフェクトを作成する方法を紹介しました。水の波紋効果。 CSS3を使用してラブローディングを作成する方法を次の記事で紹介しますので、一緒に見ていきましょう。

Web ページにはこのような CSS3 愛のロードがよくあります。それを共有しましょう。レンダリングを確認した後、それを実現する方法を検討しましょう。 HTML CSS画像テキストレイアウトの基本的な処理を説明します。
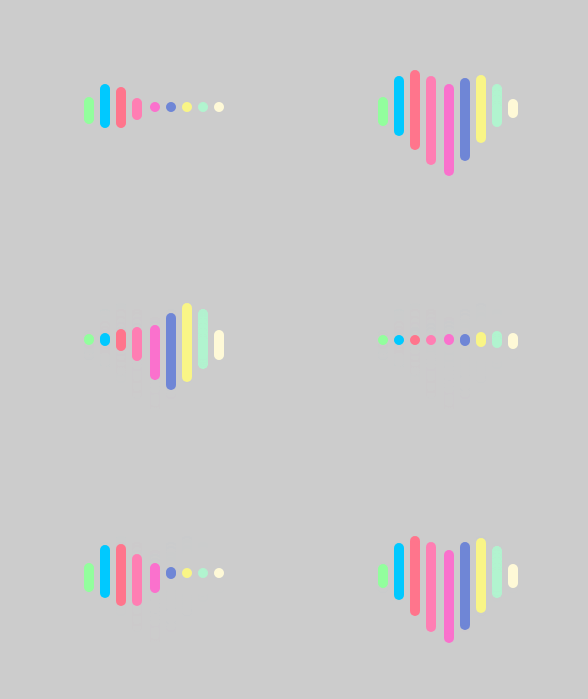
効果は次のようになります

1. まず、新しい HTML ファイルを作成し、9 個の div タグを定義します。
<div class="header-0"></div>
            <div class="header-1"></div>
            <div class="header-2"></div>
            <div class="header-3"></div>
            <div class="header-4"></div>
            <div class="header-5"></div>
            <div class="header-6"></div>
            <div class="header-7"></div>
<div class="header-8"></div>2. 変更する CSS スタイルの定義を開始し、background-color 属性を追加して背景色を設定し、幅を 100% に設定し、高さを 100% に設定します。 margin プロパティは、すべてのマージン プロパティを設定します。
body {
        width: 100%;
        height: 100%;
        margin: 0;
        background-color: #ccc;
}3. コンテナ タイトルのテキスト スタイル。align-items 属性を使用して中央揃えにします。
  .container {
        display: flex;
        width: 100%;
        height: 100%;
        justify-content: center;
align-items: center;4. ヘッダー タイトルのテキスト スタイル。position 属性を使用して要素の位置を指定します。
.header {
        position: relative;
        width: 138px;
/* display: flex; */5.class*='header-'title テキスト スタイル。要素の位置を指定するには position 属性を使用します。構文は「position:Absolute;top:-5px」です。 ;border-radius: 5px" は、絶対位置の要素を生成します。
 [class*='header-']{
        position: absolute;
        width: 10px;
        height: 10px;
        top: -5px;
        border-radius: 5px;
}6. Header0-8 のタイトル テキスト スタイル、animation (アニメーション) 属性を使用して 8 要素ごとにバインドし、要素をスイングさせます。
 .header-0,
    .header-8 {
        animation: header-0 3.2s infinite;
    }
    .header-1,
    .header-7 {
        animation: header-1 3.2s infinite;
    }
    .header-2,
    .header-6 {
        animation: header-2 3.2s infinite;
    }
    .header-3,
    .header-5 {
        animation: header-3 3.2s infinite;
    }
    .header-4 {
        animation: header-4 3.2s infinite;
}7. 4 つの @keyframes ルールを使用して、作成した 4 つのアニメーションをオープニング アニメーションとして 0% から 100% まで徐々に変更します。
@keyframes header-0 {
    0%,
    10%,
    90%,
    100% {
        height: 10px;
        top: -5px;
    }
    45%,
    55% {
        height: 30px;
        top: -10px;
    }
}
@keyframes header-1 {
    0%,
    10%,
    90%,
    100% {
        height: 10px;
        top: -5px;
    }
    45%,
    55% {
        height: 60px;
        top: -31px;
    }
}
@keyframes header-2 {
    0%,
    10%,
    90%,
    100% {
        height: 10px;
        top: -5px;
    }
    45%,
    55% {
        height: 80px;
        top: -37px;
    }
}
@keyframes header-3 {
    0%,
    10%,
    90%,
    100% {
        height: 10px;
        top: -5px;
    }
    45%,
    55% {
        height: 90px;
        top: -31px;
    }
}
@keyframes header-4 {
    0%,
    10%,
    90%,
    100% {
        height: 10px;
        top: -5px;
    }
    45%,
    55% {
        height: 94px;
        top: -23px;
}8. animation-delay 属性を header0-8 のタイトル テキスト スタイルに追加し、アニメーションを開始する前に 1 秒待ちます。background 属性は色を設定します。 8 つの要素をバインドします。
.header-0 {
    left: 0;
    animation-delay: 0s;
    background: #92fe9d;

}
.header-1 {
    left: 16px;
    animation-delay: 0.15s;
    background: #00c9ff;
}
.header-2 {
    left: 32px;
    animation-delay: 0.3s;
    background: #ff758c;
}
.header-3 {
    left: 48px;
    animation-delay: 0.45s;
    background: #ff7eb3;
}
.header-4 {
    left: 66px;
    animation-delay: 0.6s;
    background: #fa71cd;
}
.header-5 {
    left: 82px;
    animation-delay: 0.75s;
    background: #6f86d6;
}
.header-6 {
    left: 98px;
    animation-delay: 0.9s;
    background: #f9f586;
}

.header-7 {
    left: 114px;
    animation-delay: 1.05s;
    background: #b1f4cf;
}
.header-8 {
    left: 130px;
    animation-delay: 1.2s;
    background: #fef9d7;
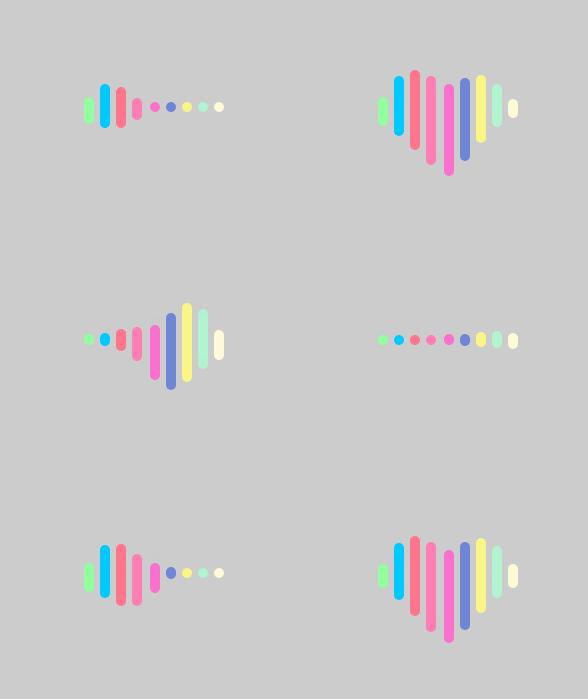
}コードの効果は出ています

完全なコードは以下です
爱心加载
<div class="header-0"></div>
<div class="header-1"></div>
<div class="header-2"></div>
<div class="header-3"></div>
<div class="header-4"></div>
<div class="header-5"></div>
<div class="header-6"></div>
<div class="header-7"></div>
<div class="header-8"></div>
推奨される学習: CSS ビデオ チュートリアル
以上が初級記事:CSS3を使ってラブローディングを作成する方法(詳細コード解説)の詳細内容です。詳細については、PHP 中国語 Web サイトの他の関連記事を参照してください。

ホットAIツール

Undresser.AI Undress
リアルなヌード写真を作成する AI 搭載アプリ

AI Clothes Remover
写真から衣服を削除するオンライン AI ツール。

Undress AI Tool
脱衣画像を無料で

Clothoff.io
AI衣類リムーバー

AI Hentai Generator
AIヘンタイを無料で生成します。

人気の記事

ホットツール

メモ帳++7.3.1
使いやすく無料のコードエディター

SublimeText3 中国語版
中国語版、とても使いやすい

ゼンドスタジオ 13.0.1
強力な PHP 統合開発環境

ドリームウィーバー CS6
ビジュアル Web 開発ツール

SublimeText3 Mac版
神レベルのコード編集ソフト(SublimeText3)

ホットトピック
 7467
7467
 15
15
 1376
1376
 52
52
 77
77
 11
11
 18
18
 19
19
 ブートストラップボタンの使用方法
Apr 07, 2025 pm 03:09 PM
ブートストラップボタンの使用方法は?ブートストラップCSSを導入してボタン要素を作成し、ブートストラップボタンクラスを追加してボタンテキストを追加します
 ブートストラップのフレームワークをセットアップする方法
Apr 07, 2025 pm 03:27 PM
Bootstrapフレームワークをセットアップするには、次の手順に従う必要があります。1。CDNを介してブートストラップファイルを参照してください。 2。独自のサーバーでファイルをダウンロードしてホストします。 3。HTMLにブートストラップファイルを含めます。 4.必要に応じてSASS/LESSをコンパイルします。 5。カスタムファイルをインポートします(オプション)。セットアップが完了したら、Bootstrapのグリッドシステム、コンポーネント、スタイルを使用して、レスポンシブWebサイトとアプリケーションを作成できます。
 ブートストラップに写真を挿入する方法
Apr 07, 2025 pm 03:30 PM
ブートストラップに画像を挿入する方法はいくつかあります。HTMLIMGタグを使用して、画像を直接挿入します。ブートストラップ画像コンポーネントを使用すると、レスポンシブ画像とより多くのスタイルを提供できます。画像サイズを設定し、IMG-Fluidクラスを使用して画像を適応可能にします。 IMGボーダークラスを使用して、境界線を設定します。丸い角を設定し、IMGラウンドクラスを使用します。影を設定し、影のクラスを使用します。 CSSスタイルを使用して、画像をサイズ変更して配置します。背景画像を使用して、背景イメージCSSプロパティを使用します。
 ブートストラップの日付を確認する方法
Apr 07, 2025 pm 03:06 PM
ブートストラップの日付を確認するには、次の手順に従ってください。必要なスクリプトとスタイルを紹介します。日付セレクターコンポーネントを初期化します。 Data-BV-Date属性を設定して、検証を有効にします。検証ルール(日付形式、エラーメッセージなどなど)を構成します。ブートストラップ検証フレームワークを統合し、フォームが送信されたときに日付入力を自動的に検証します。
 ブートストラップの日付を表示する方法
Apr 07, 2025 pm 03:03 PM
回答:ブートストラップの日付ピッカーコンポーネントを使用して、ページで日付を表示できます。手順:ブートストラップフレームワークを紹介します。 HTMLで日付セレクター入力ボックスを作成します。ブートストラップは、セレクターにスタイルを自動的に追加します。 JavaScriptを使用して、選択した日付を取得します。
 ブートストラップにスプリットラインを書く方法
Apr 07, 2025 pm 03:12 PM
ブートストラップスプリットラインを作成するには2つの方法があります。タグを使用して、水平方向のスプリットラインを作成します。 CSS Borderプロパティを使用して、カスタムスタイルのスプリットラインを作成します。
 ブートストラップナビゲーションバーの設定方法
Apr 07, 2025 pm 01:51 PM
ブートストラップは、ナビゲーションバーをセットアップするための簡単なガイドを提供します。ブートストラップライブラリを導入してナビゲーションバーコンテナを作成するブランドアイデンティティの作成ナビゲーションリンクの作成他の要素の追加(オプション)調整スタイル(オプション)


