
console.table(tabularData, [properties])

Node.js でコンソールを使用する方法についての簡単な説明

Node.js でコンソールを使用するにはどうすればよいですか?この記事では、Node.js でコンソールを使用する方法を紹介し、コンソール クラスのほとんどのメソッドについて学習します。

console クラスのほとんどのメソッドをより効率的に使用する方法を学びます。 [推奨学習: "nodejs チュートリアル"]
前提条件
このチュートリアルは Chrome ブラウザ バージョン 70.0.3538.77 および Node.js 8.11 で実行されますバージョン.3では。#console.log、console.info、および console.debug
メソッドは、端末またはブラウザ コンソールのいずれであっても、標準出力に出力します。 デフォルトでは文字列を出力しますが、テンプレート文字列と組み合わせて返す内容を変更できます。 <div class="code" style="position:relative; padding:0px; margin:0px;"><pre class='brush:php;toolbar:false;'>console.log(string, substitution)</pre><div class="contentsignin">ログイン後にコピー</div></div>
console.info
console.debug メソッドは、操作的には console.log と同じです。 console.debug
Firefox ブラウザ コンソールでデフォルトで使用できますが、Chrome で使用するには、ログ レベルを設定する必要があります。 「すべてのレベル」メニューの「詳細」に設定します。
テンプレート文字列のパラメータは 
に渡され、これらのパラメータは対応する変換値 Replace で処理されます。各交換トークン。 サポートされている置換トークンは次のとおりです。
<div class="code" style="position:relative; padding:0px; margin:0px;"><pre class='brush:php;toolbar:false;'>const msg = `Using the console class`;
console.log(&#39;%s&#39;, msg);
console.log(msg);</pre><div class="contentsignin">ログイン後にコピー</div></div>このコードは次を出力します。 OutputUsing the console class
Using the console class
ログイン後にコピー
OutputUsing the console class
Using the console class
%s
はデフォルトの置換モードです。,%f,%i,%o<div class="code" style="position:relative; padding:0px; margin:0px;"><pre class='brush:php;toolbar:false;'>const circle = (radius = 1) => {
const profile = {};
const pi = 22/7;
profile.diameter = 2 * pi * radius;
profile.circumference = pi * radius * 2;
profile.area = pi * radius * 2;
profile.volume = 4/3 * pi * radius^3;
console.log(&#39;This circle has a radius of: %d cm&#39;, radius);
console.log(&#39;This circle has a circumference of: %f cm&#39;, profile.diameter);
console.log(&#39;This circle has an area of: %i cm^2&#39;, profile.area);
console.log(&#39;The profile of this cirlce is: %o&#39;, profile);
console.log(&#39;Diameter %d, Area: %f, Circumference %i&#39;, profile.diameter, profile.area, profile.circumference)
}
circle();</pre><div class="contentsignin">ログイン後にコピー</div></div>このコードは次の内容を出力します。 OutputThis circle has a radius of: 1 cm
This circle has a circumference of: 6.285714285714286 cm
This circle has an area of: 6 cm^2
The profile of this cirlce is: {diameter: 6.285714285714286, circumference: 6.285714285714286, area: 6.285714285714286, volume: 7}
Diameter 6, Area: 6.285714285714286, Circumference 6ログイン後にコピー
%dOutputThis circle has a radius of: 1 cm
This circle has a circumference of: 6.285714285714286 cm
This circle has an area of: 6 cm^2
The profile of this cirlce is: {diameter: 6.285714285714286, circumference: 6.285714285714286, area: 6.285714285714286, volume: 7}
Diameter 6, Area: 6.285714285714286, Circumference 6- は数値 (整数または浮動小数点) に置き換えられます。
%f は float 値に置き換えられます。 %i は整数に置き換えられます。 %o はオブジェクトに置き換えられます。
JSON.stringify を使用する必要がないため、特に便利です。デフォルトでは、オブジェクトのすべてのプロパティ。 トークン置換は好きなだけ使用できることに注意してください。これらは、引数を渡した順序で単純に置き換えられます。
console.log('LOG LEVEL: %c OK', 'color: green; font-weight: normal');
console.log('LOG LEVEL: %c PRIORITY', 'color: blue; font-weight: medium');

console.log('LOG LEVEL: %c WARN', 'color: red; font-weight: bold');
console.log('ERROR HERE');
ログイン後にコピー
このコードは次を出力します。 console.log('LOG LEVEL: %c OK', 'color: green; font-weight: normal'); console.log('LOG LEVEL: %c PRIORITY', 'color: blue; font-weight: medium'); console.log('LOG LEVEL: %c WARN', 'color: red; font-weight: bold'); console.log('ERROR HERE');
%c
console.log に渡すテキストはスタイルの影響を受けますが、前へ テキストはスタイルなしでそのまま残ります。 使用
console.table(tabularData, [properties])
ログイン後にコピー
このメソッドは、渡された入力をテーブルにフォーマットし、テーブル表現の後に入力オブジェクトをログに記録します。 console.table(tabularData, [properties])
配列
配列がデータとして渡される場合、配列内の各要素はテーブル内の行になります。 const books = ['The Silmarillion', 'The Hobbit', 'Unfinished Tales'];
console.table(books);
ログイン後にコピー
const books = ['The Silmarillion', 'The Hobbit', 'Unfinished Tales'];
console.table(books);
深さ 1 の単純な配列の場合、テーブルの最初の列にはヘッダー インデックスが含まれます。最初の列のインデックス見出しの下には配列のインデックスがあり、配列内の項目は 2 列目の値見出しの下にリストされます。
const authorsAndBooks = [['Tolkien', 'Lord of The Rings'],['Rutger', 'Utopia For Realists'], ['Sinek', 'Leaders Eat Last'], ['Eyal', 'Habit']];
console.table(authorsAndBooks);
对象
对于深度为1的对象,对象的键会列在索引标题下,而对象中的值则列在第二列标题下。
const inventory = { apples: 200, mangoes: 50, avocados: 300, kiwis: 50 };
console.table(inventory);
对于嵌套的对象。
const forexConverter = { asia: { rupee: 1.39, renminbi: 14.59 , ringgit: 24.26 }, africa: { rand: 6.49, nakfa: 6.7 , kwanza:0.33 }, europe: { swissfranc: 101.60, gbp: 130, euro: 115.73 } };
console.table(forexConverter);
还有一些嵌套的对象。
const workoutLog = { Monday: { push: 'Incline Bench Press', pull: 'Deadlift'}, Wednesday: { push: 'Weighted Dips', pull: 'Barbell Rows'}};
console.table(workoutLog);
这里,我们指定只想看到列推下的数据。
console.table(workoutLog, 'push');
要对某一列下的数据_进行排序_,只需点击该列标题。
很方便,是吗?
试着把一个带有一些数值的对象作为数组传给console.table!
使用console.dir
传给这个函数的第一个参数是要记录的对象,而第二个参数是一个包含选项的对象,这些选项将定义结果输出的格式,或者对象中的哪些属性将被显示。
返回的是一个由node的util.expect函数格式化的对象。
输入对象中的嵌套或子对象可在披露三角形下展开。
console.dir(object, options);
// where options = { showHidden: true ... }让我们看看这个动作。
const user = {
  details: {
    name: {
      firstName: 'Immanuel',
      lastName: 'Kant'
    },
    height: `1.83m"`,
    weight: '90kg',
    age: '80',
    occupation: 'Philosopher',
    nationality: 'German',
    books: [
      {
        name: 'Critique of Pure Reason',
        pub: '1781',
      },
      {
        name: 'Critique of Judgement',
        pub: '1790',
      },
      {
        name: 'Critique of Practical Reason',
        pub: '1788',
      },
      {
        name: 'Perpetual Peace',
        pub: '1795',
      },
    ],
    death: '1804'
  }
}

console.dir(user);这里是Chrome浏览器的控制台。
使用console.dirxml
这个函数将为传递给它的XML/HTML渲染一棵交互式树。如果无法渲染节点树,它默认为一个Javascript对象。
console.dirxml(object|nodeList);
与console.dir ,渲染的树可以通过点击披露三角形来扩展,在其中可以看到子节点。
它的输出类似于我们在浏览器的Elements标签下发现的输出。
这是我们从维基百科页面传入一些HTML时的情况。
const toc = document.querySelector('#toc');
console.dirxml(toc);
让我们从这个网站上的一个页面传入一些HTML。
console.dirxml(document)
这就是我们传入一个对象时的情况。
试着在一些HTML上调用console.dir ,看看会发生什么。
使用console.assert
传递给函数的第一个参数是一个要测试是否为真值的值。所有传递的其他参数被认为是信息,如果传递的值没有被评估为真值,就会被打印出来。
Node REPL将抛出一个错误,停止后续代码的执行。
console.assert(value, [...messages])
下面是一个基本的例子。
console.assert(false, 'Assertion failed');
OutputAssertion failed: Assertion failed
现在,让我们找点乐子。我们将建立一个小型测试框架,使用console.assert
const sum = (a = 0, b = 0) => Number(a) + Number(b);

function test(functionName, actualFunctionResult, expected) {
  const actual = actualFunctionResult;
  const pass = actual === expected;
  console.assert(pass, `Assertion failed for ${functionName}`);
  return `Test passed ${actual} === ${expected}`;
}

console.log(test('sum', sum(1,1), 2)); // Test passed 2 === 2
console.log(test('sum', sum(), 0));    // Test passed 0 === 0
console.log(test('sum', sum, 2));      // Assertion failed for sum
console.log(test('sum', sum(3,3), 4)); // Assertion failed for sum使用console.error 和console.warn
这两个基本上是相同的。它们都会打印传递给它们的任何字符串。
然而,console.warn 在信息传递之前会打印出一个三角形的警告符号。
console.warn(string, substitution);
而console.error ,在信息传递前打印出一个危险符号。
console.error(string, substitution);
让我们注意到,字符串替换可以用与console.log 方法相同的方式来应用。
下面是一个使用console.error 的迷你日志函数。
const sum = (a = 0, b = 0) => Number(a) + Number(b);

function otherTest(actualFunctionResult, expected) {
  if (actualFunctionResult !== expected) {
    console.error(new Error(`Test failed ${actualFunctionResult} !== ${expected}`));
  } else {
    // pass
  }
}

otherTest(sum(1,1), 3);
使用console.trace(label)
这个控制台方法将打印字符串Trace: ,后面是传递给函数的标签,然后是堆栈跟踪到函数的当前位置。
function getCapital(country) {
  const capitalMap = {
    belarus: 'minsk', australia: 'canberra', egypt: 'cairo', georgia: 'tblisi', latvia: 'riga', samoa: 'apia'
  };
  console.trace('Start trace here');
  return Object.keys(capitalMap).find(item => item === country) ? capitalMap[country] : undefined;
}

console.log(getCapital('belarus'));
console.log(getCapital('accra'));
使用console.count(label)
Count将开始并递增一个名为label 的计数器。
让我们建立一个单词计数器来看看它是如何工作的。
const getOccurences = (word = 'foolish') => {
  const phrase = `Oh me! Oh life! of the questions of these recurring, Of the endless trains of the faithless, of cities fill’d with the foolish, Of myself forever reproaching myself, for who more foolish than I, and who more faithless?`;

  let count = 0;
  const wordsFromPhraseArray = phrase.replace(/[,.!?]/igm, '').split(' ');
  wordsFromPhraseArray.forEach((element, idx) => {
    if (element === word) {
      count ++;
      console.count(word);
    }
  });
  return count;
}

getOccurences();getOccurences('foolish');
在这里,我们看到foolish 这个词被记录了两次。该词在短语中每出现一次就记录一次。
[secondary_label]
foolish: 1
foolish: 2
2
我们可以用这个方法来查看一个函数被调用了多少次,或者我们的代码中的某一行被执行了多少次。
使用console.countReset(label)
顾名思义,这将重置一个计数器,该计数器有一个由console.count 方法设置的label 。
const getOccurences = (word = 'foolish') => {
  const phrase = `Oh me! Oh life! of the questions of these recurring, Of the endless trains of the faithless, of cities fill’d with the foolish, Of myself forever reproaching myself, for who more foolish than I, and who more faithless?`;

  let count = 0;
  const wordsFromPhraseArray = phrase.replace(/[,.!?]/igm, '').split(' ');
  wordsFromPhraseArray.forEach((element, idx) => {
    if (element === word) {
      count ++;
      console.count(word);
      console.countReset(word);
    }
  });
  return count;
}

getOccurences();getOccurences('foolish');
[secondary_label]
foolish: 1
foolish: 1
2
我们可以看到,我们的getOccurences 函数返回2,因为在这句话中确实有两次出现foolish ,但由于我们的计数器在每次匹配时都被重置,所以它记录了两次foolish: 1 。
使用console.time(label) 和console.timeEnd(label)
console.time 函数启动一个定时器,并将label 作为参数提供给该函数,而console.timeEnd 函数停止一个定时器,并将label 作为参数提供给该函数。
console.time('<timer-label>'); console.timeEnd('<timer-label>');
我们可以通过向两个函数传递相同的label 名称来计算出运行一个操作所需的时间。
const users = ['Vivaldi', 'Beethoven', 'Ludovico'];

const loop = (array) => {
  array.forEach((element, idx) => {
    console.log(element);
  })
}

const timer = () => {
  console.time('timerLabel');
  loop(users);
  console.timeEnd('timerLabel');
}

timer();我们可以看到计时器停止后显示的计时器标签与时间值相对应。
OutputVivaldi
Beethoven
Ludovico
timerLabel: 0.69091796875ms
循环函数花了0.6909ms完成了对数组的循环操作。
结论
最后,我们已经来到了本教程的结尾。
请注意,本教程没有涵盖console 类的非标准使用,如console.profile ,console.profileEnd ,和console.timeLog 。
更多编程相关知识,请访问:编程入门!!
以上がNode.js でコンソールを使用する方法についての簡単な説明の詳細内容です。詳細については、PHP 中国語 Web サイトの他の関連記事を参照してください。

ホットAIツール

Undresser.AI Undress
リアルなヌード写真を作成する AI 搭載アプリ

AI Clothes Remover
写真から衣服を削除するオンライン AI ツール。

Undress AI Tool
脱衣画像を無料で

Clothoff.io
AI衣類リムーバー

Video Face Swap
完全無料の AI 顔交換ツールを使用して、あらゆるビデオの顔を簡単に交換できます。

人気の記事
ホットツール

メモ帳++7.3.1
使いやすく無料のコードエディター

SublimeText3 中国語版
中国語版、とても使いやすい

ゼンドスタジオ 13.0.1
強力な PHP 統合開発環境

ドリームウィーバー CS6
ビジュアル Web 開発ツール

SublimeText3 Mac版
神レベルのコード編集ソフト(SublimeText3)
ホットトピック
 7698
7698
 15
1640
14
1393
52
1287
25
1229
29
15
1640
14
1393
52
1287
25
1229
29

 Windows 11 にグループ ポリシー管理コンソールをインストールする方法
May 17, 2023 am 09:59 AM
Windows 11 にグループ ポリシー管理コンソールをインストールする方法
May 17, 2023 am 09:59 AM
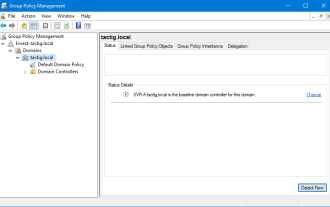
Windows 11 へのグループ ポリシー管理コンソール (GPMC とも呼ばれます) のインストールが今日の投稿のトピックになります。 Windows システムでは、ここで説明しているツールにより、IT 管理者やシステム管理者が理解しやすくなり、グループ ポリシーの管理が向上します。ローカル グループ ポリシー エディター (gpedit.msc) とグループ ポリシー管理コンソール (GPMC) を混同しないように注意してください。ローカル システム設定に関しては、Gpedit はレジストリを操作しますが、GPMC はドメインベースのネットワークのサーバー管理設定を操作します。これを行うには、Windows リモート サーバー管理ツール (RSAT とも呼ばれます) をダウンロードしてインストールする必要があります。リモートサーバー管理を使用する
 Windows 11タッチスクリーンを調整できない問題を修正する7つの方法
Apr 23, 2023 pm 10:49 PM
Windows 11タッチスクリーンを調整できない問題を修正する7つの方法
Apr 23, 2023 pm 10:49 PM
Windows 11 タッチスクリーン ノートパソコンをお持ちですか? キャリブレーションができない、または動作しません。これは、特にタッチ スクリーンを備えたデバイスを介した唯一のアクセス オプションの場合にはイライラする可能性があります。 Windows タッチ スクリーン デバイスは、特にグラフィックスを要求するアプリケーションではスムーズな機能で知られていますが、場合によっては問題が発生することがあります。タッチ スクリーンが正しく動作しない、または Windows 11 のタッチ スクリーンがまったく調整されないなどの問題が発生する場合があります。 Windows 10 でタッチ スクリーンを調整する方法についてはすでに説明しましたが、ここでは、Windows 11 タッチ スクリーンが調整できない場合に役立ついくつかの解決策について説明します。タッチスクリーンはWindでも動作しますか?
 新しいNintendo Switch Liteのリフレッシュの予約注文が開始されました
Jun 29, 2024 am 06:49 AM
新しいNintendo Switch Liteのリフレッシュの予約注文が開始されました
Jun 29, 2024 am 06:49 AM
任天堂は、最新バージョンのSwitch Lite(Amazonで現在189.99ドル)の予約注文を開始した。ただし、このデバイスはまだ世界中で注文できません。要約すると、同社はほぼ 2 週間前に Switch Lite Hyrule Edition を発表しました。
![Xbox システム エラー E200 [修正]](https://img.php.cn/upload/article/000/465/014/170832475129577.jpg?x-oss-process=image/resize,m_fill,h_207,w_330) Xbox システム エラー E200 [修正]
Feb 19, 2024 pm 02:39 PM
Xbox システム エラー E200 [修正]
Feb 19, 2024 pm 02:39 PM
この記事では、Xbox 本体のシステム エラー E200 を解決する方法について説明します。通常、このエラーは、最新の本体オペレーティング システムのアップデートをインストールしようとしているときに Xbox 本体が中断された場合に発生します。このエラーは、停電やネットワークの問題によりシステムのアップデートが中断された場合にも発生することがあります。 Xbox システム エラー E200 を修正する Xbox 本体のシステム エラー E200 を修正するには、次の修正プログラムを使用します。 Xbox 本体の電源をオフにして、再度オンにします。 システム アップデートを実行して、本体を出荷時設定にリセットします。 始めましょう。 1] Xbox 本体の電源をオフにして再度オンにする Xbox 本体の電源を入れ直します。潜在的な一時的な不具合を効果的に排除し、いくつかの問題を解決できます。 Xbox Control をオフにして再度開くには、次の手順に従ってください。
 コンソールってどういう意味ですか?
Sep 05, 2023 pm 02:43 PM
コンソールってどういう意味ですか?
Sep 05, 2023 pm 02:43 PM
コンソールとは、コンソールを意味します。コンピュータ システムと対話するデバイスまたはソフトウェアです。通常は、情報を入力および出力するためのキーボードと画面を備えたデバイスです。コンソールは、もともと大型コンピュータ システムに使用され、後に個人用にも適用されました。ユーザーがコンピュータ システムを管理および保守したり、オペレーティング システムやアプリケーションをインストールしたり、プログラムをデバッグしたりするのに役立ちます。
 Node V8 エンジンのメモリと GC の詳細な図による説明
Mar 29, 2023 pm 06:02 PM
Node V8 エンジンのメモリと GC の詳細な図による説明
Mar 29, 2023 pm 06:02 PM
この記事では、NodeJS V8 エンジンのメモリとガベージ コレクター (GC) について詳しく説明します。
 Nodeのメモリ制御に関する記事
Apr 26, 2023 pm 05:37 PM
Nodeのメモリ制御に関する記事
Apr 26, 2023 pm 05:37 PM
ノンブロッキングおよびイベント駆動に基づいて構築されたノード サービスには、メモリ消費量が少ないという利点があり、大量のネットワーク リクエストの処理に非常に適しています。大量のリクエストを前提として、「メモリ制御」に関する問題を考慮する必要があります。 1. V8 のガベージ コレクション メカニズムとメモリ制限 Js はガベージ コレクション マシンによって制御されます
 C# の Console.Clear 関数を使用してコンソール出力をクリアする
Nov 18, 2023 am 11:00 AM
C# の Console.Clear 関数を使用してコンソール出力をクリアする
Nov 18, 2023 am 11:00 AM
C# で Console.Clear 関数を使用して、コンソール出力をクリアします。C# コンソール アプリケーションでは、新しいコンテンツを表示したり、より良いユーザー エクスペリエンスを提供したりするために、コンソールの出力情報をクリアする必要があることがよくあります。 C# には、この関数を実装するための Console.Clear 関数が用意されています。これにより、コンソールの出力をクリアしてインターフェイスを再び空白にすることができます。 Console.Clear 関数の呼び出し形式は次のとおりです: Console.Clear(); この関数は入力を必要としません。
