Angular はサービスを使用してカスタム サービスを実装します (通知)
この記事では、angular の学習を継続し、Angular がサービスを使用してカスタム サービス (通知) を実装する方法を学習します。

前の記事では、
サービスは API リクエストの処理に使用できるだけでなく、他の用途にも使用できると述べました
たとえば、この記事で説明する notification の実装です。 [関連チュートリアルの推奨事項: "angular チュートリアル"]
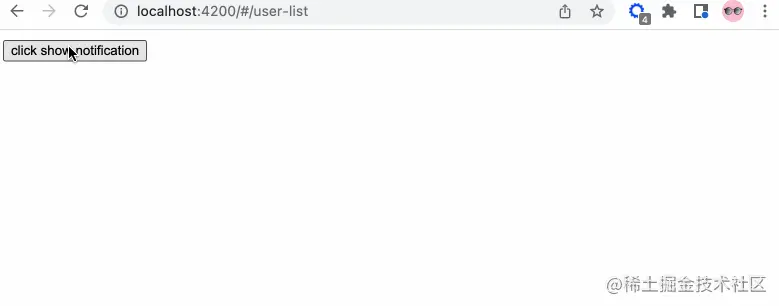
レンダリングは次のとおりです:

UI これは次のとおりです。後で調整
それでは、段階的に見ていきましょう。
サービスの追加
app/services サービスに notification.service.ts を追加します。ファイル (コマンド ラインを使用して生成してください) に関連するコンテンツを追加します:
// notification.service.ts
import { Injectable } from '@angular/core';
import { Observable, Subject } from 'rxjs';
// 通知状态的枚举
export enum NotificationStatus {
Process = "progress",
Success = "success",
Failure = "failure",
Ended = "ended"
}
@Injectable({
providedIn: 'root'
})
export class NotificationService {
private notify: Subject<NotificationStatus> = new Subject();
public messageObj: any = {
primary: '',
secondary: ''
}
// 转换成可观察体
public getNotification(): Observable<NotificationStatus> {
return this.notify.asObservable();
}
// 进行中通知
public showProcessNotification() {
this.notify.next(NotificationStatus.Process)
}
// 成功通知
public showSuccessNotification() {
this.notify.next(NotificationStatus.Success)
}
// 结束通知
public showEndedNotification() {
this.notify.next(NotificationStatus.Ended)
}
// 更改信息
public changePrimarySecondary(primary?: string, secondary?: string) {
this.messageObj.primary = primary;
this.messageObj.secondary = secondary
}
constructor() { }
}理解するのは簡単ですか...
監視可能なオブジェクトに notify を追加します。そして、さまざまなステータス情報を公開します。
コンポーネントの作成
公開コンポーネントが含まれる app/components に新しい notification## を作成します。保存されています。# 個のコンポーネント。したがって、次の構造が得られます。
notification
├── notification.component.html                     // 页面骨架
├── notification.component.scss                     // 页面独有样式
├── notification.component.spec.ts                  // 测试文件
└── notification.component.ts                       // javascript 文件
notification のスケルトンを定義します。
<!-- notification.component.html -->

<!-- 支持手动关闭通知 -->
<button (click)="closeNotification()">关闭</button>
<h1 id="提醒的内容-nbsp-nbsp-message-nbsp">提醒的内容: {{ message }}</h1>
<!-- 自定义重点通知信息 -->
<p>{{ primaryMessage }}</p>
<!-- 自定义次要通知信息 -->
<p>{{ secondaryMessage }}</p>
// notification.component.scss

:host {
  position: fixed;
  top: -100%;
  right: 20px;
  background-color: #999;
  border: 1px solid #333;
  border-radius: 10px;
  width: 400px;
  height: 180px;
  padding: 10px;
  // 注意这里的 active 的内容,在出现通知的时候才有
  &.active {
    top: 10px;
  }
  &.success {}
  &.progress {}
  &.failure {}
  &.ended {}
}success、progress、failure、ended これら 4 つのクラス名は、通知サービスによって定義された列挙に対応します。独自の設定に従って、関連するスタイルを追加できます。
javascript コードを追加します。
// notification.component.ts

import { Component, OnInit, HostBinding, OnDestroy } from '@angular/core';
// 新的知识点 rxjs
import { Subscription } from 'rxjs';
import {debounceTime} from 'rxjs/operators';
// 引入相关的服务
import { NotificationStatus, NotificationService } from 'src/app/services/notification.service';

@Component({
  selector: 'app-notification',
  templateUrl: './notification.component.html',
  styleUrls: ['./notification.component.scss']
})
export class NotificationComponent implements OnInit, OnDestroy {

  // 防抖时间,只读
  private readonly NOTIFICATION_DEBOUNCE_TIME_MS = 200;

  protected notificationSubscription!: Subscription;
  private timer: any = null;
  public message: string = ''

  // notification service 枚举信息的映射
  private reflectObj: any = {
    progress: "进行中",
    success: "成功",
    failure: "失败",
    ended: "结束"
  }

  @HostBinding('class') notificationCssClass = '';

  public primaryMessage!: string;
  public secondaryMessage!: string;

  constructor(
    private notificationService: NotificationService
  ) { }

  ngOnInit(): void {
    this.init()
  }

  public init() {
    // 添加相关的订阅信息
    this.notificationSubscription = this.notificationService.getNotification()
      .pipe(
        debounceTime(this.NOTIFICATION_DEBOUNCE_TIME_MS)
      )
      .subscribe((notificationStatus: NotificationStatus) => {
        if(notificationStatus) {
          this.resetTimeout();
          // 添加相关的样式
          this.notificationCssClass = `active ${ notificationStatus }`
          this.message = this.reflectObj[notificationStatus]
          // 获取自定义首要信息
          this.primaryMessage = this.notificationService.messageObj.primary;
          // 获取自定义次要信息
          this.secondaryMessage = this.notificationService.messageObj.secondary;
          if(notificationStatus === NotificationStatus.Process) {
            this.resetTimeout()
            this.timer = setTimeout(() => {
              this.resetView()
            }, 1000)
          } else {
            this.resetTimeout();
            this.timer = setTimeout(() => {
              this.notificationCssClass = ''
              this.resetView()
            }, 2000)
          }
        }
      })
  }

  private resetView(): void {
    this.message = ''
  }

  // 关闭定时器
  private resetTimeout(): void {
    if(this.timer) {
      clearTimeout(this.timer)
    }
  }

  // 关闭通知
  public closeNotification() {
    this.notificationCssClass = ''
    this.resetTimeout()
  }

  // 组件销毁
  ngOnDestroy(): void {
    this.resetTimeout();
    // 取消所有的订阅消息
    this.notificationSubscription.unsubscribe()
  }

}rxjs のナレッジポイントを紹介します。RxJS は、Observables を使用したリアクティブ プログラミング ライブラリであり、非同期またはコールバックの記述を可能にします。ベースのコードの方が簡単です。これは素晴らしいライブラリです。今後のいくつかの記事で詳しく説明します。
debounce アンチシェイク関数を使用します。 関数アンチシェイクは、イベントがトリガーされた後、n 秒後に 1 回だけ実行できることを意味します。 n 秒以内にイベントが再度トリガーされると、関数の実行時間が再計算されます。簡単に言うと、アクションが連続してトリガーされると、最後に実行されたものだけが実行されます。
ps:面接中、面接官はよく尋ねます...throttle
スロットル関数:関数の実行を一定期間内に 1 回のみに制限します。
電話
なぜなら、これは次のことのためです。グローバル サービスでは、このコンポーネントをapp.component.html で呼び出します:
// app.component.html

<router-outlet></router-outlet>
<app-notification></app-notification>
user-list.component.html に追加します。デモのトリガーを容易にするボタン:
// user-list.component.html

<button (click)="showNotification()">click show notification</button>
// user-list.component.ts

import { NotificationService } from 'src/app/services/notification.service';

// ...
constructor(
  private notificationService: NotificationService
) { }

// 展示通知
showNotification(): void {
  this.notificationService.changePrimarySecondary('主要信息 1');
  this.notificationService.showProcessNotification();
  setTimeout(() => {
    this.notificationService.changePrimarySecondary('主要信息 2', '次要信息 2');
    this.notificationService.showSuccessNotification();
  }, 1000)
}notification の機能を正常にシミュレートできました。実際のニーズに応じて関連するサービス コンポーネントを変更し、ビジネス ニーズに合わせてカスタマイズできます。社内で使用するシステムを開発している場合は、成熟した UI ライブラリを使用することをお勧めします。これらのライブラリは、さまざまなコンポーネントやサービスをカプセル化するのにすでに役立ち、開発時間を大幅に節約できます。
プログラミング入門をご覧ください。 !
以上がAngular はサービスを使用してカスタム サービスを実装します (通知)の詳細内容です。詳細については、PHP 中国語 Web サイトの他の関連記事を参照してください。

ホットAIツール

Undresser.AI Undress
リアルなヌード写真を作成する AI 搭載アプリ

AI Clothes Remover
写真から衣服を削除するオンライン AI ツール。

Undress AI Tool
脱衣画像を無料で

Clothoff.io
AI衣類リムーバー

AI Hentai Generator
AIヘンタイを無料で生成します。

人気の記事

ホットツール

メモ帳++7.3.1
使いやすく無料のコードエディター

SublimeText3 中国語版
中国語版、とても使いやすい

ゼンドスタジオ 13.0.1
強力な PHP 統合開発環境

ドリームウィーバー CS6
ビジュアル Web 開発ツール

SublimeText3 Mac版
神レベルのコード編集ソフト(SublimeText3)

ホットトピック
 7554
7554
 15
15
 1382
1382
 52
52
 83
83
 11
11
 22
22
 96
96
 Angular のメタデータとデコレータについて話しましょう
Feb 28, 2022 am 11:10 AM
この記事では、Angular の学習を継続し、Angular のメタデータとデコレータを理解し、それらの使用法を簡単に理解します。
 Angular Learning State Manager NgRx の詳細な説明
May 25, 2022 am 11:01 AM
この記事では、Angular のステートマネージャー NgRx について深く理解し、NgRx の使用方法を紹介します。
 Ubuntu 24.04 に Angular をインストールする方法
Mar 23, 2024 pm 12:20 PM
Angular.js は、動的アプリケーションを作成するための無料でアクセスできる JavaScript プラットフォームです。 HTML の構文をテンプレート言語として拡張することで、アプリケーションのさまざまな側面を迅速かつ明確に表現できます。 Angular.js は、コードの作成、更新、テストに役立つさまざまなツールを提供します。さらに、ルーティングやフォーム管理などの多くの機能も提供します。このガイドでは、Ubuntu24 に Angular をインストールする方法について説明します。まず、Node.js をインストールする必要があります。 Node.js は、ChromeV8 エンジンに基づく JavaScript 実行環境で、サーバー側で JavaScript コードを実行できます。ウブにいるために
 Angular のサーバーサイド レンダリング (SSR) について説明する記事
Dec 27, 2022 pm 07:24 PM
Angular Universal をご存知ですか?これは、Web サイトがより優れた SEO サポートを提供するのに役立ちます。
 フロントエンド開発に PHP と Angular を使用する方法
May 11, 2023 pm 04:04 PM
インターネットの急速な発展に伴い、フロントエンド開発テクノロジーも常に改善され、反復されています。 PHP と Angular は、フロントエンド開発で広く使用されている 2 つのテクノロジーです。 PHP は、フォームの処理、動的ページの生成、アクセス許可の管理などのタスクを処理できるサーバー側スクリプト言語です。 Angular は、単一ページ アプリケーションの開発やコンポーネント化された Web アプリケーションの構築に使用できる JavaScript フレームワークです。この記事では、PHPとAngularをフロントエンド開発に使用する方法と、それらを組み合わせる方法を紹介します。
 Angular + NG-ZORRO でバックエンド システムを迅速に開発
Apr 21, 2022 am 10:45 AM
この記事では、Angular の実践的な経験を共有し、angualr と ng-zorro を組み合わせてバックエンド システムを迅速に開発する方法を学びます。
 Angular で Monaco エディターを使用する方法の簡単な分析
Oct 17, 2022 pm 08:04 PM
Angularでモナコエディタを使用するにはどうすればよいですか?以下の記事は、最近業務で使用したangularでのmonaco-editorの使い方を記録したものですので、皆様のお役に立てれば幸いです。
 Angular の独立したコンポーネントの簡単な分析とその使用方法を説明します。
Jun 23, 2022 pm 03:49 PM
この記事では、Angular の独立コンポーネント、Angular で独立コンポーネントを作成する方法、および既存のモジュールを独立コンポーネントにインポートする方法について説明します。


