ビデオ操作をカスタマイズするにはどうすればよいですか?カスタムビデオプレーヤー?次の記事では、Angular でビデオ操作をカスタマイズする方法を紹介します。

前回の記事は Angular プロジェクトの権限制御の実装 でした。最近、他の人がインターネット上で vue を使用して video をカスタマイズしているのを見かけました。また、angular カスタマイズ video の関連要件も少し前に実装されたので、連絡と反省として記録しておきます。 [関連チュートリアルの推奨事項: "angular チュートリアル"]
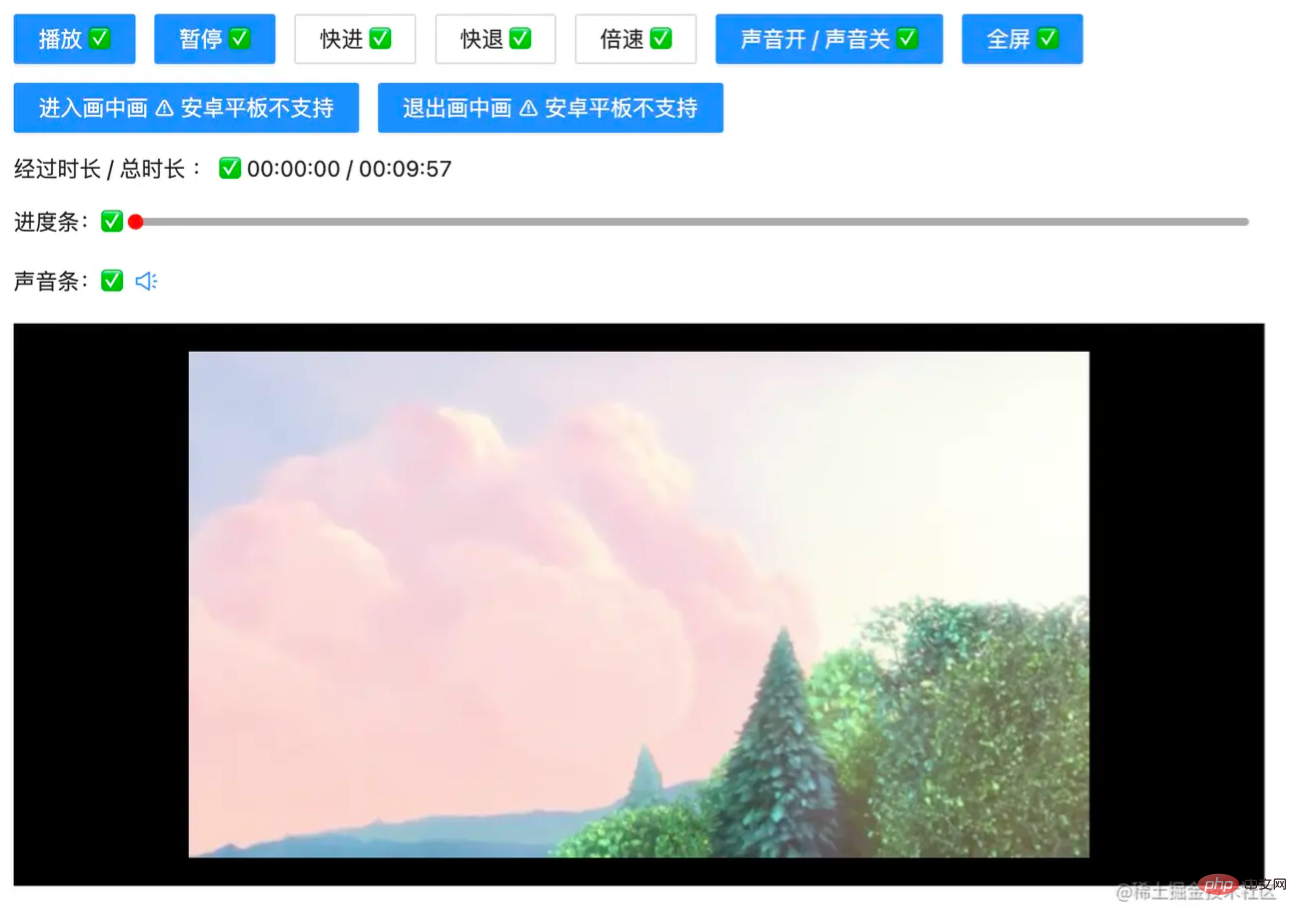
実装された機能は次のとおりです:
図に示すように:

1 つずつ実装しましょう:
ここでの焦点は次のとおりです。レイアウト上で、単純に定義しましょう:
<!-- app.component.html -->
<div class="video-page">
<div class="video-tools">
<button nz-button nzType="primary" (click)="play('btn')" style="margin-right: 12px;">播放 ✅</button>
<button nz-button nzType="primary" (click)="pause('btn')">暂停 ✅</button>
<ng-container>
<button nz-button nz-dropdown [nzDropdownMenu]="menuForward" nzPlacement="bottomCenter" style="margin: 0 12px;">快进 ✅</button>
<nz-dropdown-menu #menuForward="nzDropdownMenu">
<ul nz-menu>
<li nz-menu-item (click)="forwardSecond(10)">快进 10 s</li>
<li nz-menu-item (click)="forwardSecond(20)">快进 20 s</li>
</ul>
</nz-dropdown-menu>
</ng-container>
<ng-container>
<button nz-button nz-dropdown [nzDropdownMenu]="menuBack" nzPlacement="bottomCenter">快退 ✅</button>
<nz-dropdown-menu #menuBack="nzDropdownMenu">
<ul nz-menu>
<li nz-menu-item (click)="retreatSecond(10)">快退 10 s</li>
<li nz-menu-item (click)="retreatSecond(20)">快退 20 s</li>
</ul>
</nz-dropdown-menu>
</ng-container>
<ng-container>
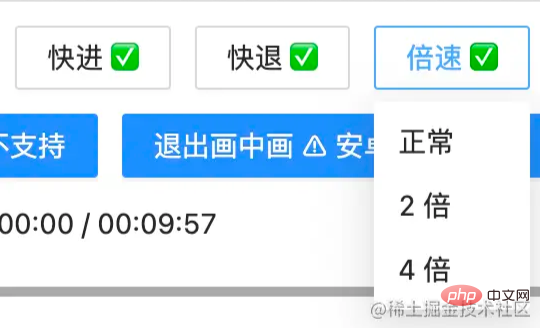
<button nz-button nz-dropdown [nzDropdownMenu]="speedUp" nzPlacement="bottomCenter" style="margin: 0 12px;">倍速 ✅</button>
<nz-dropdown-menu #speedUp="nzDropdownMenu">
<ul nz-menu>
<li nz-menu-item (click)="speedUpVideo(1)">正常</li>
<li nz-menu-item (click)="speedUpVideo(2)">2 倍</li>
<li nz-menu-item (click)="speedUpVideo(4)">4 倍</li>
</ul>
</nz-dropdown-menu>
</ng-container>
<button nz-button nzType="primary" (click)="openOrCloseVoice()">声音开 / 声音关 ✅</button>
<button nz-button nzType="primary" style="margin: 0 12px;" (click)="toFullScreen()">全屏 ✅</button>
<br />
<button nz-button nzType="primary" style="margin-top: 12px;" (click)="entryInPicture()">进入画中画 ⚠️ 安卓平板不支持</button>
<button nz-button nzType="primary" style="margin: 12px 12px 0 12px;" (click)="exitInPicture()">退出画中画 ⚠️ 安卓平板不支持</button>
<br />
<div style="display: flex; justify-content: flex-start; align-items: center; margin: 12px 0;">
经过时长 / 总时长 : ✅ {{ currentTime }} / {{ totalTime }}
</div>
<!-- 进度条 -->
<div style="display: flex; justify-content: flex-start; align-items: center; margin: 12px 0;">
进度条:✅
<div
class="custom-video_control-bg"
(mousedown)="handleProgressDown($event)"
(mousemove)="handleProgressMove($event)"
(mouseup)="handleProgressUp($event)"
>
<div
class="custom-video_control-bg-outside"
id="custom-video_control-bg-outside"
>
<span
class="custom-video_control-bg-inside"
id="custom-video_control-bg-inside"
></span>
<span
class="custom-video_control-bg-inside-point"
id="custom-video_control-bg-inside-point"
></span>
</div>
</div>
</div>
<div style="display: flex; justify-content: flex-start; align-items: center; margin: 12px 0;">
声音条:✅
<div class="custom-video_control-voice">
<span class="custom-video_control-voice-play">
<i nz-icon nzType="sound" nzTheme="outline"></i>
</span>
<div
class="custom-video_control-voice-bg"
id="custom-video_control-voice-bg"
(mousedown)="handleVolProgressDown($event)"
(mousemove)="handleVolProgressMove($event)"
(mouseup)="handleVolProgressUp($event)"
>
<div
class="custom-video_control-voice-bg-outside"
id="custom-video_control-voice-bg-outside"
>
<span
class="custom-video_control-voice-bg-inside"
id="custom-video_control-voice-bg-inside"
></span>
<span
class="custom-video_control-voice-bg-point"
id="custom-video_control-voice-bg-point"
></span>
</div>
</div>
</div>
</div>
</div>
<div class="video-content">
<video id="video" class="video" style="width: 100%" poster="assets/poster.png">
<source type="video/mp4" src="assets/demo.mp4">
Sorry, your browser doesn't support.
</video>
</div>
</div>Play/Stopここで
angular ant designがここで使用されています。以前に関連記事を書きました。詳しくない読者は、# にアクセスしてください。 ## Angular と NG-ZORRO の迅速な開発の組み合わせ
video オブジェクト メソッド play() を直接呼び出します および pause():
// app.component.ts

// 播放按钮事件
play(flag: string | undefined) {
  if(flag) this.videoState.playState = true
  this.videoState.play = true
  this.video.play()
}
// 暂停按钮事件
pause(flag: string | undefined): void {
  if(flag) this.videoState.playState = false
  this.video.pause()
  this.videoState.play = false
}play および pause メソッドは、フラグを追加します。これは、プログレス バーについては後述します。上記のコードはより簡潔にすることができ、読者は省略形で書き留めることができます。
早巻き、早送り、倍速さまざまなオプションを設定し、パラメーターに渡します:
// app.component.ts

// 快进指定的时间
forwardSecond(second: number): void {
  this.video.currentTime += second; // 定位到当前的播放时间 currentTime
}

// 后退指定的时间
retreatSecond(second: number): void {
  this.video.currentTime -= second
}

// 倍速
speedUpVideo(multiple: number): void {
  this.video.playbackRate = multiple; // 设定当前的倍速 playbackRate
}
video の muted 属性を使用します:
// app.component.ts

// 开或关声音
openOrCloseVoice(): void {
  this.video.muted = !this.video.muted;
}webkitRequestFullScreen
// app.component.ts

// 全屏操作
toFullScreen(): void {
  this.video.webkitRequestFullScreen()
}全画面表示後、ピクチャーインピクチャーに入る/ピクチャーインピクチャーを終了ピクチャーインピクチャーはポップアップと同等ですウィンドウ縮小ビデオ~esc
を押して全画面表示を終了
// app.component.ts

// 进入画中画
entryInPicture(): void {
  this.video.requestPictureInPicture()
  this.video.style.display = "none"
}

// 退出画中画
exitInPicture(): void {
  if(this.document.pictureInPictureElement) {
    this.document.exitPictureInPicture()
    this.video.style.display = "block"
  }
}video のスタイルは、邪魔にならないようにすることです...
// app.component.ts

// 初始化 video 的相关的事件
initVideoData(): void {
  // 获取视频的总时长
  this.video.addEventListener('loadedmetadata', () => {
    this.totalTime = this.formatTime(this.video.duration)
  })
  // 监听时间发生更改
  this.video.addEventListener('timeupdate', () => {
    this.currentTime = this.formatTime(this.video.currentTime) // 当前播放的时间
  })
}formatTime は書式設定関数です再生進行状況バー関数マウスを監視します
クリック、移動、リリース イベント、動画の再生時間とイベントの合計を割ってパーセンテージを計算します。
// app.component.ts

// 进度条鼠标按下
handleProgressDown(event: any): void {
  this.videoState.downState = true
  this.pause(undefined);
  this.videoState.distance = event.clientX + document.documentElement.scrollLeft - this.videoState.leftInit;
}
// 进度条 滚动条移动
handleProgressMove(event: any): void {
  if(!this.videoState.downState) return
  let distanceX = (event.clientX + document.documentElement.scrollLeft) - this.videoState.leftInit
  if(distanceX > this.processWidth) { // 容错处理
    distanceX = this.processWidth;
  }
  if(distanceX < 0) { // 容错处理
    distanceX = 0
  }
  this.videoState.distance = distanceX
  this.video.currentTime = this.videoState.distance / this.processWidth * this.video.duration
}
// 进度条 鼠标抬起
handleProgressUp(event: any): void {
  this.videoState.downState = false
  // 视频播放
  this.video.currentTime = this.videoState.distance / this.processWidth * this.video.duration
  this.currentTime = this.formatTime(this.video.currentTime)
  if(this.videoState.playState) {
    this.play(undefined)
  }
} のクリック、移動、リリース も監視します。ただし、今回は既知の音 div の高さを扱います。
// app.component.ts

// 声音条 鼠标按下
handleVolProgressDown(event: any) {
  this.voiceState.topInit = this.getOffset(this.voiceProOut, undefined).top
  this.volProcessHeight = this.voiceProOut.clientHeight
  this.voiceState.downState = true //按下鼠标标志
  this.voiceState.distance = this.volProcessHeight - (event.clientY + document.documentElement.scrollTop - this.voiceState.topInit)
}
// 声音 滚动条移动
handleVolProgressMove(event: any) {
  if(!this.voiceState.downState) return
    let disY = this.voiceState.topInit + this.volProcessHeight - (event.clientY + document.documentElement.scrollTop)
    if(disY > this.volProcessHeight - 2) { // 容错处理
      disY = this.volProcessHeight - 2
    }
    if(disY < 0) { // 容错处理
      disY = 0
    }
    this.voiceState.distance = disY
    this.video.volume = this.voiceState.distance / this.volProcessHeight
    this.videoOption.volume = Math.round(this.video.volume * 100)
}
// 声音 鼠标抬起
handleVolProgressUp(event: any) {
  this.voiceState.downState = false //按下鼠标标志
  let voiceRate =  this.voiceState.distance / this.volProcessHeight
  if(voiceRate > 1) {
    voiceRate = 1
  }
  if(voiceRate < 0) {
    voiceRate = 0
  }
  this.video.volume = voiceRate
  this.videoOption.volume = Math.round(this.video.volume * 100); // 赋值给视频声音
}gif 画像を使用して、効果を表示:
フルスクリーン、サウンドとピクチャインピクチャはキャプチャが難しく、Gif
は # に反映できません##
詳細なコードについては、 video-ng にアクセスして入手してください。
【終了】
プログラミング関連の知識については、プログラミング入門をご覧ください。 !
以上がAngular でビデオプレーヤーをカスタマイズする方法の詳細内容です。詳細については、PHP 中国語 Web サイトの他の関連記事を参照してください。