

Python GUIレイアウトツールTkinterの使い方

グラフィカル ユーザー インターフェイス (GUI)
グラフィカル ユーザー インターフェイス (GUI) は、コンピューターとの対話を支援するデスクトップ アプリケーションにすぎません
テキスト エディタなどの GUI アプリケーションは、さまざまな種類のファイルを作成、読み取り、更新、削除できます
数独、チェス、およびソリティアなどのアプリケーションは、GUI のゲーム バージョンですプログラム
インターネットの閲覧に使用される Google Chrome、Firefox、Microsoft Edge などの GUI アプリケーションもあります
これらはいくつか異なります私たちが日常的にコンピュータで使用する GUI アプリケーションの種類です。実際、Tkinter を使用して簡単な同様のアプリケーションを構築することもできます。
今日は GUI の紹介です。非常にシンプルで美しい GUI アプリケーションが作成されます
GUI を作成するための Python ライブラリ
Python には多数のサードパーティ ライブラリがあり、GUI ライブラリには主に次のようなものがあります:
Kivy
Python QT
wxPython
Tkinter
#その中でも、Tkinter は使いやすく、Python のインストールが付属しているため、多くの学習者や開発者にとって最初の選択肢となります。
Tkinter の基本
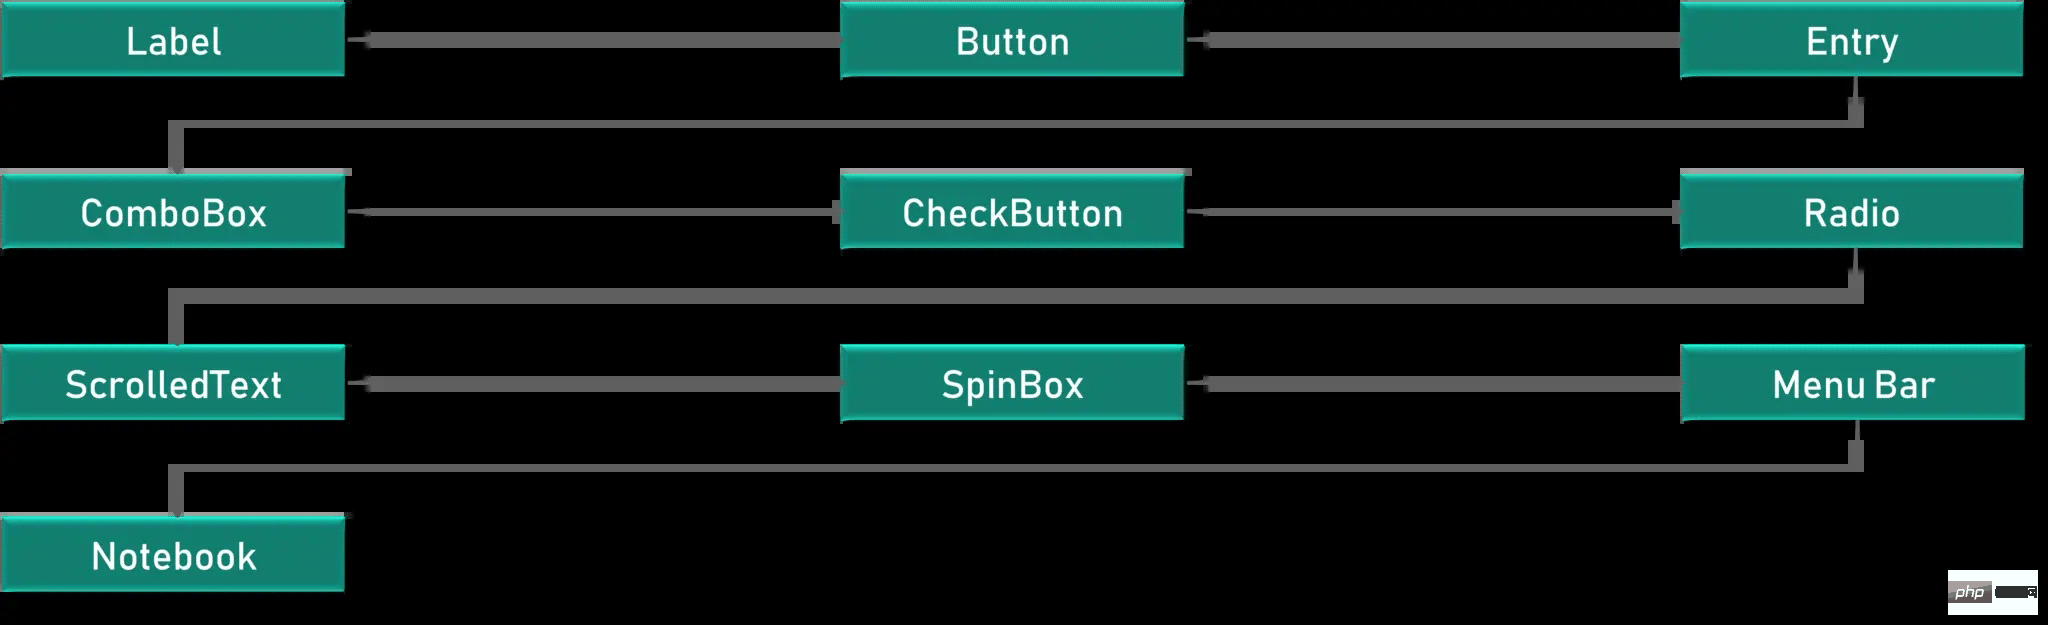
下の図は、アプリケーションが実際にどのように実行されるかを示しています。 Tkinter

最初に Tkinter モデルをインポートし、次にメイン ウィンドウを作成します。このウィンドウで、操作を実行し、すべての視覚効果を表示します。次に、ウィジェットを追加し、最後にメイン イベント ループに入ります。
ここには 2 つの重要なキーワードがあります
ウィジェット
メイン イベントループ
import tkinter
window = tkinter.Tk()
# to rename the title of the window window.title("GUI")
# pack is used to show the object in the window
label = tkinter.Label(window, text = "Hello World!").pack()
window.mainloop()

- Canvas - Canvas とともに使用します。 GUI で図形を描画するための
- Button – Tkinter にボタンを配置するために使用されるボタン
- Checkbutton – アプリケーションにボタンを配置するために使用される Checkbutton
- Entry のチェック ボタン - Entry は GUI で入力フィールドを作成するために使用されます
- Frame – Frame は Tkinter のコンテナとして使用されます
- Label - ラベルはテキスト、画像などの単一行ウィジェットを作成するために使用されます。
- Menu - メニューは作成するために使用されます。 GUI のメニュー
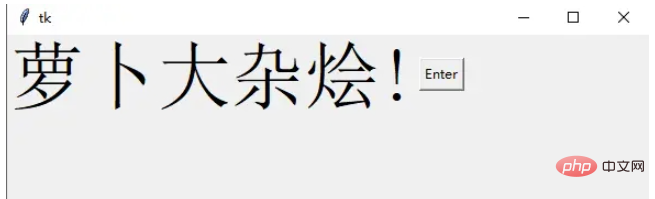
l1 = Label(window, text="萝卜大杂烩!", font=("ArialBold", 50))
l1.grid(column=0, row=0)
l1 = Label(window, text="萝卜大杂烩!", font=("ArialBold", 50))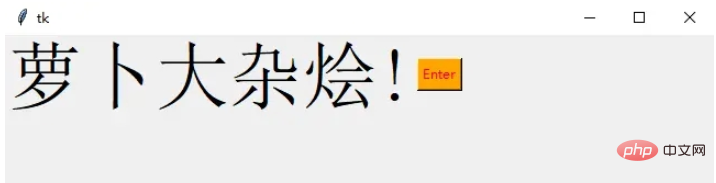
window.geometry('350x200')window.geometry('350x200') bt = Button(window, text="Enter")
bt = Button(window, text="Enter", bg="orange", fg="red")
bt.grid(column=1, row=0)
def clicked():
    l1.configure(text="按钮被点击了!!")
bt = Button(window, text="Enter", bg="orange", fg="red", command=clicked)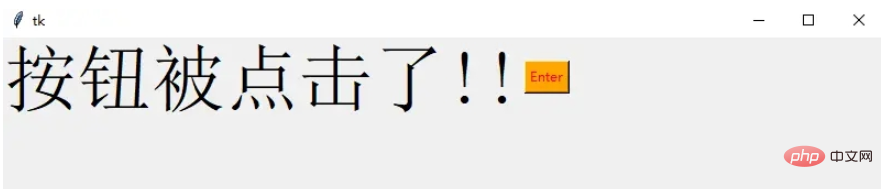
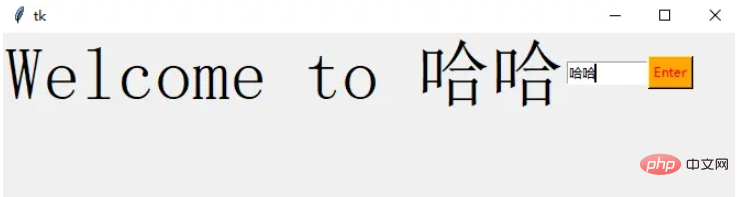
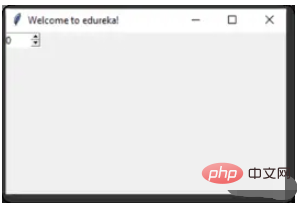
Entry
它用于在 GUI 中创建输入字段以接收文本输入
txt = Entry(window, width=10)
txt.grid(column=1, row=0)
def clicked():
    res = "Welcome to " + txt.get()
    l1.configure(text=res)
bt = Button(window, text="Enter", bg="orange", fg="red", command=clicked)在这里,我们使用 Tkinter Entry 类创建一个文本框,grid 定义我们希望窗口小部件位于何处
同时 clicked 函数接收 Entry 的文本信息
Combobox
这是一个带有某些选项的下拉菜单
from tkinter.ttk import *
combo = Combobox(window)
combo['values']= (1, 2, 3, 4, 5, "Text")
combo.current(3)
combo.grid(column=0, row=0)

这样一个下拉菜单就完成了
Checkbutton
复选按钮是非常常用的组件
chk_state = BooleanVar()
chk_state.set (True)
chk = Checkbutton(window, text="Select", var=chk_state)
chk.grid(column=4, row=0)
我们首先创建一个 booleanvar 类型的变量,这是一个 Tkinter 变量
默认情况下,我们将设置状态保持为 true,这代表按钮已经被选中 接下来,我们将 chk_state 传递给 checkbutton 类来为我们设置检查状态

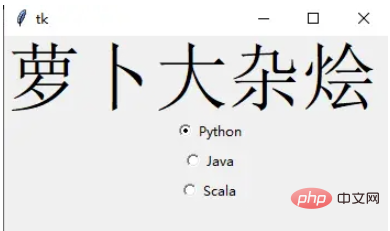
Radio Button
单选按钮也是非常常用的
rad1 = Radiobutton(window, text=Python', value=1)
rad2 = Radiobutton(window, text=Java', value=2)
rad3 = Radiobutton(window, text=Scala', value=3)
rad1.grid(column=0, row=0)
rad2.grid(column=1, row=0)
rad3.grid(column=2, row=0)
在这里,我们使用了不同的参数值,1,2和3,如果它们相同,则会导致冲突并出现错误
它们的文本数据是可以相同,在这里,我们使用了 Python、Java 和 Scala
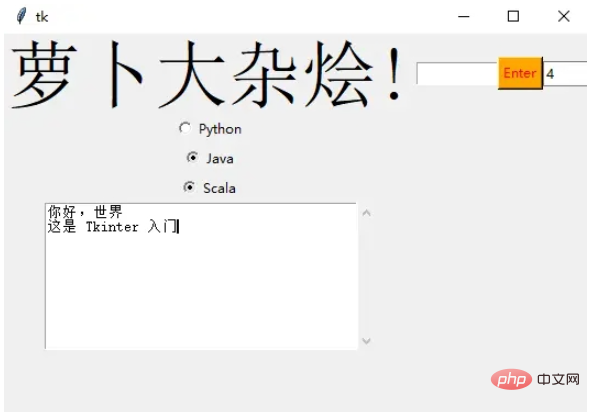
Scrolled Text
滚动文本组件
scro_txt = scrolledtext.ScrolledText(window, width=40,height=10)
scro_txt.grid(column=0, row=4)
我们指定了窗口的高和宽,否则默认会填充整个 Windiws 窗口
Message Box
消息组件可以方便的弹出提醒消息
def clicked():
    messagebox.showinfo('Message title', 'Message content')
btn = Button(window,text=‘ENTER', command=clicked)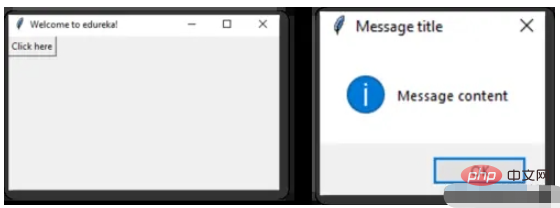
SpinBox
Spinbox 也是一个常见的组件,有两个选项卡,存在向上和向下滚动选项卡
pin = Spinbox(window, from_=0, to=100, width=5)
有 3 个参数——from、to 和 width
From – 告诉我们范围的开始和默认值
to – 给我们范围的上限阈值
width 基本上是将 widget 的大小设置为5个字符的空格
Geometry
Tkinter 中的所有 Widgets 都会有一些位置信息,这些度量使得我们可以组织 Widgets 及其父框架、窗口等
Tkinter 具有以下三个布局方式
pack():- 它在块中组织 Widgets,这意味着它占据了整个可用宽度,这是在窗口中显示 Widgets 的标准方法
grid():- 它以类似表格的结构组织 Widgets
place():- 它将 Widgets 放置在我们想要的特定位置
组织布局
为了在窗口中安排布局,我们将使用 Frame 类
Frame -- 在窗口中创建分区,我们可以根据需要使用 pack() 方法的侧面参数对齐框架
Button -- 在窗口中创建一个按钮,需要传递几个参数,如文本(按钮的值)、fg(文本的颜色)、bg(背景颜色)
在下面的代码中,我们使用 window、top_frame、bottom_frame 来布局
import tkinter
window = tkinter.Tk()
window.title("GUI")
# creating 2 frames TOP and BOTTOM
top_frame = tkinter.Frame(window).pack()
bottom_frame = tkinter.Frame(window).pack(side = "bottom")
# now, create some widgets in the top_frame and bottom_frame
btn1 = tkinter.Button(top_frame, text = "Button1", fg = "red").pack()# 'fg - foreground' is used to color the contents
btn2 = tkinter.Button(top_frame, text = "Button2", fg = "green").pack()# 'text' is used to write the text on the Button
btn3 = tkinter.Button(bottom_frame, text = "Button2", fg = "purple").pack(side = "left")# 'side' is used to align the widgets
btn4 = tkinter.Button(bottom_frame, text = "Button2", fg = "orange").pack(side = "left")
window.mainloop()
再来看一个登录的小栗子
import tkinter
window = tkinter.Tk()
window.title("GUI")
# creating 2 text labels and input labels
tkinter.Label(window, text = "Username").grid(row = 0) # this is placed in 0 0
# 'Entry' is used to display the input-field
tkinter.Entry(window).grid(row = 0, column = 1) # this is placed in 0 1
tkinter.Label(window, text = "Password").grid(row = 1) # this is placed in 1 0
tkinter.Entry(window).grid(row = 1, column = 1) # this is placed in 1 1
# 'Checkbutton' is used to create the check buttons
tkinter.Checkbutton(window, text = "Keep Me Logged In").grid(columnspan = 2) # 'columnspan' tells to take the width of 2 columns
# you can also use 'rowspan' in the similar manner
window.mainloop()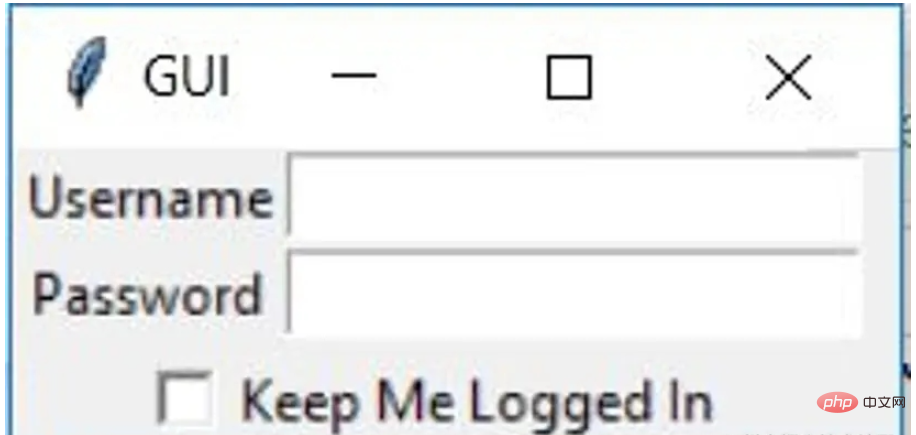
下面我们来了解 binding 函数
binding 函数
每当事件发生时调用函数就是绑定函数
在下面的示例中,当单击按钮时,它会调用一个名为 say_hi 的函数。 函数 say_hi 会创建一个带有文本 Hi 的新标签
import tkinter
window = tkinter.Tk()
window.title("GUI")
# creating a function called say_hi()
def say_hi():
    tkinter.Label(window, text = "Hi").pack()
tkinter.Button(window, text = "Click Me!", command = say_hi).pack() # 'command' is executed when you click the button
# in this above case we're calling the function 'say_hi'.
window.mainloop()
另一种绑定函数的方法是使用事件,事件类似于鼠标移动、鼠标悬停、单击和滚动等等
import tkinter
window = tkinter.Tk()
window.title("GUI")
# creating a function with an arguments 'event'
def say_hi(event): # you can rename 'event' to anything you want
    tkinter.Label(window, text = "Hi").pack()
btn = tkinter.Button(window, text = "Click Me!")
btn.bind("Button-1", say_hi) # 'bind' takes 2 parameters 1st is 'event' 2nd is 'function'
btn.pack()
window.mainloop()单击事件有 3 种不同的类型,分别是 leftClick、middleClick 和 rightClick
下面的代码将使用对于的文本创建一个新标签
import tkinter
window = tkinter.Tk()
window.title("GUI")
#creating 3 different functions for 3 events
def left_click(event):
    tkinter.Label(window, text = "Left Click!").pack()
def middle_click(event):
    tkinter.Label(window, text = "Middle Click!").pack()
def right_click(event):
    tkinter.Label(window, text = "Right Click!").pack()
window.bind("Button-1", left_click)
window.bind("Button-2", middle_click)
window.bind("Button-3", right_click)
window.mainloop()
Images 和 Icons
我们可以使用 PhotoImage 方法添加图像和图标
import tkinter
window = tkinter.Tk()
window.title("GUI")
# taking image from the directory and storing the source in a variable
icon = tkinter.PhotoImage(file = "4.PNG")
# displaying the picture using a 'Label' by passing the 'picture' variriable to 'image' parameter
label = tkinter.Label(window, image = icon)
label.pack()
window.mainloop()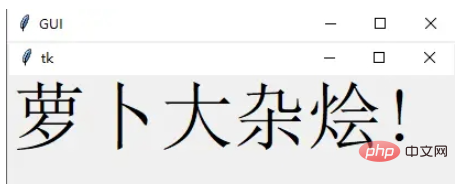
好了,进步的 Tkinter 知识我们都梳理完毕了,下面就完成一个简单的实战项目吧
计算器 APP
首先初始化页面
window = Tk()
window.geometry("350x380")
window.resizable(0, 0)  # this prevents from resizing the window
window.title("小小计算器")接下来定义输入数字框
input_text = StringVar()
input_frame = Frame(window, width=312, height=50, bd=0, highlightbackground="black", highlightcolor="black",
                    highlightthickness=1)
input_frame.pack(side=TOP)
input_field = Entry(input_frame, font=('arial', 18, 'bold'), textvariable=input_text, width=50, bg="#eee", bd=0,
                    justify=RIGHT)
input_field.grid(row=0, column=0)
input_field.pack(ipady=10)然后定义按钮方法,我们以清除按钮和除法按钮为例
clear = Button(btns_frame, text="C", fg="black", width=32, height=3, bd=0, bg="#eee", cursor="hand2",
               command=lambda: btn_clear()).grid(row=0, column=0, columnspan=3, padx=1, pady=1)
divide = Button(btns_frame, text="/", fg="black", width=10, height=3, bd=0, bg="#eee", cursor="hand2",
command=lambda: btn_click("/")).grid(row=0, column=3, padx=1, pady=1)最后就是计算equal逻辑
equals = Button(btns_frame, text="=", fg="black", width=10, height=3, bd=0, bg="#eee", cursor="hand2",
               command=lambda: btn_equal()).grid(row=4, column=3, padx=1, pady=1)
def btn_equal():
   global expression
   result = str(eval(expression))
   input_text.set(result)
expression = ""以上がPython GUIレイアウトツールTkinterの使い方の詳細内容です。詳細については、PHP 中国語 Web サイトの他の関連記事を参照してください。

ホットAIツール

Undresser.AI Undress
リアルなヌード写真を作成する AI 搭載アプリ

AI Clothes Remover
写真から衣服を削除するオンライン AI ツール。

Undress AI Tool
脱衣画像を無料で

Clothoff.io
AI衣類リムーバー

AI Hentai Generator
AIヘンタイを無料で生成します。

人気の記事
ホットツール

メモ帳++7.3.1
使いやすく無料のコードエディター

SublimeText3 中国語版
中国語版、とても使いやすい

ゼンドスタジオ 13.0.1
強力な PHP 統合開発環境

ドリームウィーバー CS6
ビジュアル Web 開発ツール

SublimeText3 Mac版
神レベルのコード編集ソフト(SublimeText3)
ホットトピック
 7326
7326
 9
1625
14
1350
46
1262
25
1209
29
9
1625
14
1350
46
1262
25
1209
29

 LinuxターミナルでPythonバージョンを表示するときに発生する権限の問題を解決する方法は?
Apr 01, 2025 pm 05:09 PM
LinuxターミナルでPythonバージョンを表示するときに発生する権限の問題を解決する方法は?
Apr 01, 2025 pm 05:09 PM
LinuxターミナルでPythonバージョンを表示する際の許可の問題の解決策PythonターミナルでPythonバージョンを表示しようとするとき、Pythonを入力してください...
 あるデータフレームの列全体を、Python内の異なる構造を持つ別のデータフレームに効率的にコピーする方法は?
Apr 01, 2025 pm 11:15 PM
あるデータフレームの列全体を、Python内の異なる構造を持つ別のデータフレームに効率的にコピーする方法は?
Apr 01, 2025 pm 11:15 PM
PythonのPandasライブラリを使用する場合、異なる構造を持つ2つのデータフレーム間で列全体をコピーする方法は一般的な問題です。 2つのデータがあるとします...
 Pythonパラメーター注釈は文字列を使用できますか?
Apr 01, 2025 pm 08:39 PM
Pythonパラメーター注釈は文字列を使用できますか?
Apr 01, 2025 pm 08:39 PM
Pythonパラメーター注釈の代替使用Pythonプログラミングでは、パラメーターアノテーションは、開発者が機能をよりよく理解して使用するのに役立つ非常に便利な機能です...
 Pythonスクリプトは、特定の場所のカーソル位置への出力をどのようにクリアしますか?
Apr 01, 2025 pm 11:30 PM
Pythonスクリプトは、特定の場所のカーソル位置への出力をどのようにクリアしますか?
Apr 01, 2025 pm 11:30 PM
Pythonスクリプトは、特定の場所のカーソル位置への出力をどのようにクリアしますか? Pythonスクリプトを書くときは、以前の出力をカーソル位置にクリアするのが一般的です...
 Pythonクロスプラットフォームデスクトップアプリケーション開発:どのGUIライブラリが最適ですか?
Apr 01, 2025 pm 05:24 PM
Pythonクロスプラットフォームデスクトップアプリケーション開発:どのGUIライブラリが最適ですか?
Apr 01, 2025 pm 05:24 PM
Pythonクロスプラットフォームデスクトップアプリケーション開発ライブラリの選択多くのPython開発者は、WindowsシステムとLinuxシステムの両方で実行できるデスクトップアプリケーションを開発したいと考えています...
 Python hourglassグラフ図面:可変未定義エラーを避ける方法は?
Apr 01, 2025 pm 06:27 PM
Python hourglassグラフ図面:可変未定義エラーを避ける方法は?
Apr 01, 2025 pm 06:27 PM
Python:Hourglassグラフィック図面と入力検証この記事では、Python NoviceがHourglass Graphic Drawingプログラムで遭遇する可変定義の問題を解決します。コード...
 なぜ私のコードはAPIによってデータを返しているのですか?この問題を解決する方法は?
Apr 01, 2025 pm 08:09 PM
なぜ私のコードはAPIによってデータを返しているのですか?この問題を解決する方法は?
Apr 01, 2025 pm 08:09 PM
なぜ私のコードはAPIによってデータを返しているのですか?プログラミングでは、APIが呼び出すときにヌル値を返すという問題に遭遇することがよくあります。
 PythonおよびOCRテクノロジーを使用して、複雑な検証コードをクラックしようとする方法は?
Apr 01, 2025 pm 10:18 PM
PythonおよびOCRテクノロジーを使用して、複雑な検証コードをクラックしようとする方法は?
Apr 01, 2025 pm 10:18 PM
毎日のネットワークインタラクションでPythonを使用したクラッキング検証コードの調査、検証コードは、自動化されたプログラムの悪意のある操作を防ぐための一般的なセキュリティメカニズムです...
