SpringBoot は SpringSecurityOauth2 をどのように統合して、認証のための動的な権限の問題を実装しますか?
準備
spring-boot: 2.1.4.RELEASE
spring-security-oauth3: 2.3.3.RELEASE (ソースコードを使用する場合は、これを変更しないでください)バージョン番号は任意、2.4以降は書き方が違うので)
mysql: 5.7
エフェクト表示
ここではテストにpostmanのみを使用しており、フロントは終了ページはまだドッキングに使用されていません。次に、バージョン ロール メニューの権限割り当てのページが表示されます。メニュー
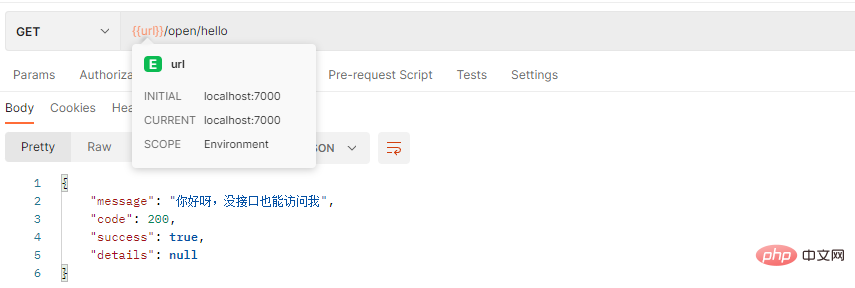
1。オープン インターフェイス http://localhost:7000/open/hello ## にアクセスします。
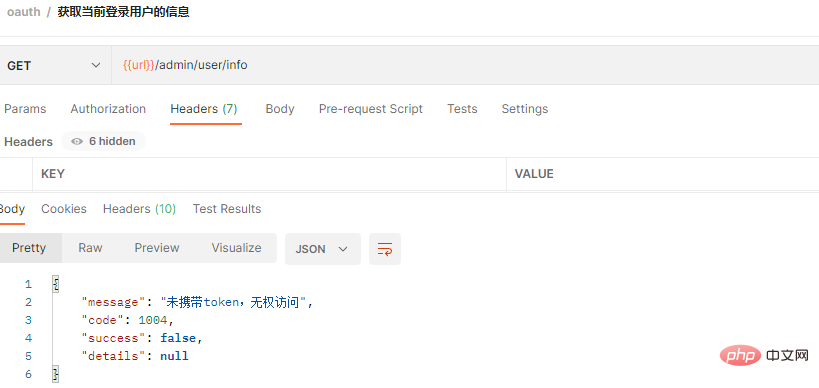
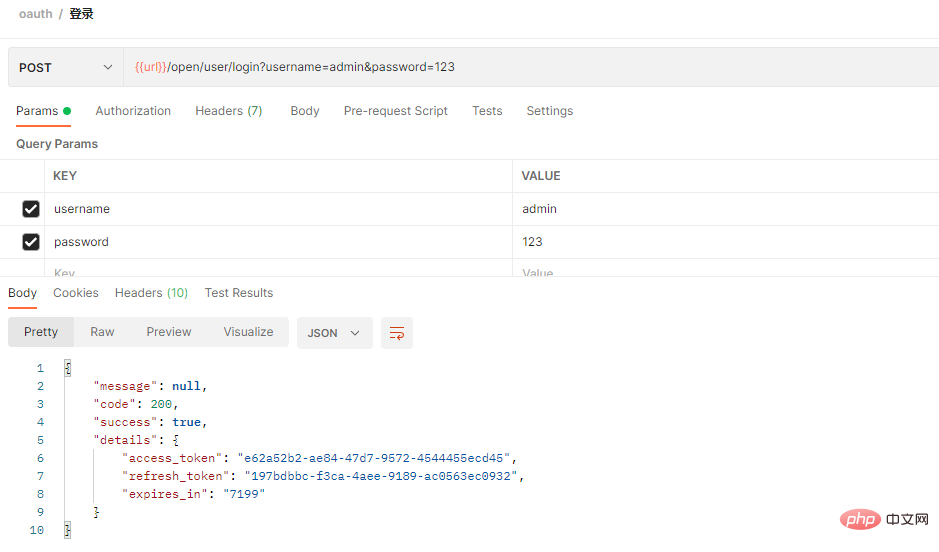
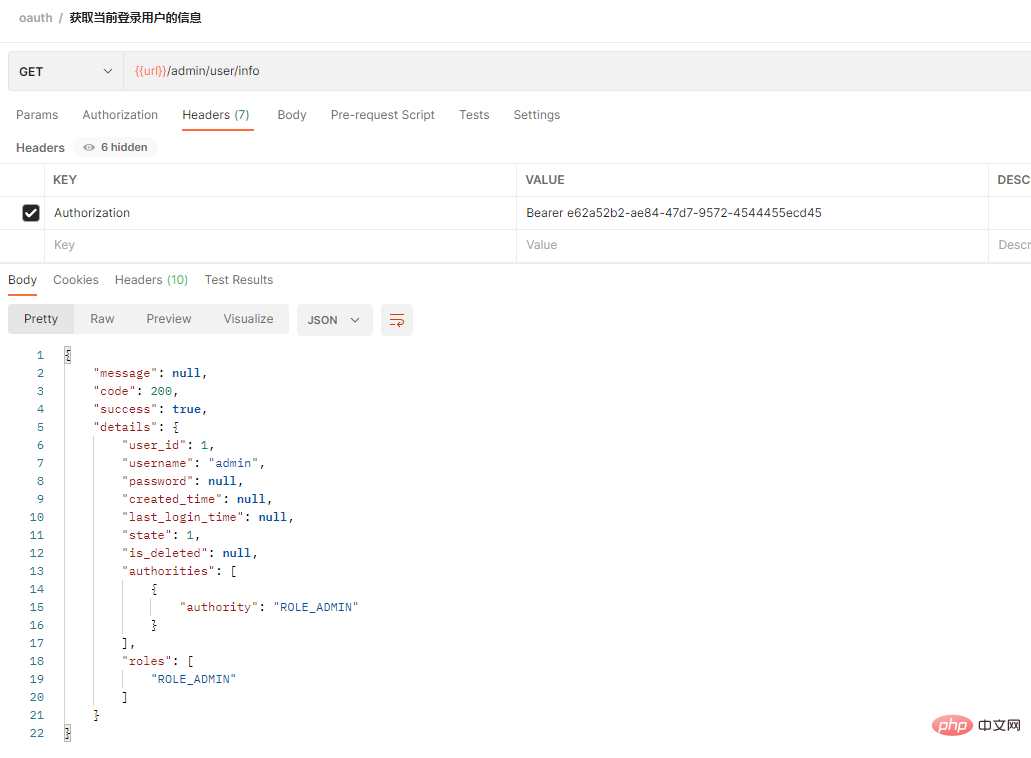
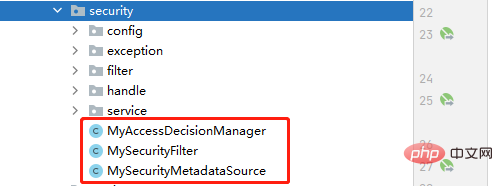
@PostConstruct
 public void init(){
        super.setAuthenticationManager(authenticationManager);
        super.setAccessDecisionManager(myAccessDecisionManager);
}@Override
public SecurityMetadataSource obtainSecurityMetadataSource() {
return this.mySecurityMetadataSource;
}
/**
     * 获得当前请求所需要的角色
     * @param object
     * @return
     * @throws IllegalArgumentException
     */
    @Override
    public Collection<ConfigAttribute> getAttributes(Object object) throws IllegalArgumentException {
        String requestUrl = ((FilterInvocation) object).getRequestUrl();

        if (IS_CHANGE_SECURITY) {
            loadResourceDefine();
        }
        if (requestUrl.indexOf("?") > -1) {
            requestUrl = requestUrl.substring(0, requestUrl.indexOf("?"));
        }
        UrlPathMatcher matcher = new UrlPathMatcher();
        List<Object> list = new ArrayList<>();  //无需权限的,直接返回
        list.add("/oauth/**");
        list.add("/open/**");
        if(matcher.pathsMatchesUrl(list,requestUrl))
            return null;

        Set<String> roleNames = new HashSet();
        for (Resc resc: resources) {
            String rescUrl = resc.getResc_url();
            if (matcher.pathMatchesUrl(rescUrl, requestUrl)) {
                if(resc.getParent_resc_id() != null && resc.getParent_resc_id().intValue() == 1){   //默认权限的则只要登录了,无需权限匹配都可访问
                    roleNames = new HashSet();
                    break;
                }
                Map map = new HashMap();
                map.put("resc_id", resc.getResc_id());
                // 获取能访问该资源的所有权限(角色)
                List<RoleRescDTO> roles = roleRescMapper.findAll(map);
                for (RoleRescDTO rr : roles)
                    roleNames.add(rr.getRole_name());
            }
        }

        Set<ConfigAttribute> configAttributes = new HashSet();
        for(String roleName:roleNames)
            configAttributes.add(new SecurityConfig(roleName));

        log.debug("【所需的权限(角色)】:" + configAttributes);

        return configAttributes;
}@Override
public void decide(Authentication authentication, Object o, Collection<ConfigAttribute> configAttributes) throws AccessDeniedException, InsufficientAuthenticationException {
if(configAttributes == null){ //属于白名单的,不需要权限
return;
}
Iterator<ConfigAttribute> iterator = configAttributes.iterator();
while (iterator.hasNext()){
ConfigAttribute configAttribute = iterator.next();
String needPermission = configAttribute.getAttribute();
for (GrantedAuthority ga: authentication.getAuthorities()) {
if(needPermission.equals(ga.getAuthority())){ //有权限,可访问
return;
}
}
}
throw new AccessDeniedException("没有权限访问");
}

@Override
    public void configure(ResourceServerSecurityConfigurer resources) throws Exception {
        resources.authenticationEntryPoint(authenticationEntryPoint)    //token失效或没携带token时
                .accessDeniedHandler(requestAccessDeniedHandler);   //权限不足时
} #3. 現在のログイン ユーザーを取得します
##今のところ説明はありません
2 番目の方法: UserDetails インターフェイスを実装する SecurityUser を作成します (これがこのプロジェクトで使用されます)
元の唯一の UserDetails インターフェイスにはユーザー名とパスワードしかありません。ここでシステムにユーザーを追加します。
protected User user;
    public SecurityUser(User user) {
        this.user = user;
    }

    public User getUser() {
        return user;
}BaseControllerでは、各Controllerがこれを継承してgetUser()メソッドを記述し、ユーザーがトークンを持ってアクセスすれば、現在ログインしているユーザーの情報を直接取得することができます。
protected User getUser() {
        try {
            SecurityUser userDetails = (SecurityUser) SecurityContextHolder.getContext().getAuthentication()
                    .getPrincipal();

            User user = userDetails.getUser();
            log.debug("【用户:】:" + user);

            return user;
        } catch (Exception e) {
        }
        return null;
}ユーザーが正常にログインした後、ユーザーのロール コレクションなどを取得する方法については、ここで UserDetailsService インターフェイスを実装する必要があります
@Service
public class TokenUserDetailsService implements UserDetailsService{

    @Autowired
    private LoginService loginService;

    @Override
    public UserDetails loadUserByUsername(String username) throws UsernameNotFoundException {
        User user = loginService.loadUserByUsername(username);  //这个我们拎出来处理
        if(Objects.isNull(user))
            throw new UsernameNotFoundException("用户名不存在");
        return new SecurityUser(user);
    }
}
@Override
    protected void configure(AuthenticationManagerBuilder auth) throws Exception {
        auth.userDetailsService(userDetailsService).passwordEncoder(passwordEncoder());
}@Override
public User loadUserByUsername(String username){
log.debug(username);
Map map = new HashMap();
map.put("username",username);
map.put("is_deleted",-1);
User user = userMapper.findByUsername(map);
if(user != null){
map = new HashMap();
map.put("user_id",user.getUser_id());
//查询用户的角色
List<UserRoleDTO> userRoles = userRoleMapper.findAll(map);
user.setRoles(listRoles(userRoles));
//权限集合
Collection<? extends GrantedAuthority> authorities = merge(userRoles);
user.setAuthorities(authorities);
return user;
}
return null;
} データベースファイルはこの中にあります

以上がSpringBoot は SpringSecurityOauth2 をどのように統合して、認証のための動的な権限の問題を実装しますか?の詳細内容です。詳細については、PHP 中国語 Web サイトの他の関連記事を参照してください。

ホットAIツール

Undresser.AI Undress
リアルなヌード写真を作成する AI 搭載アプリ

AI Clothes Remover
写真から衣服を削除するオンライン AI ツール。

Undress AI Tool
脱衣画像を無料で

Clothoff.io
AI衣類リムーバー

Video Face Swap
完全無料の AI 顔交換ツールを使用して、あらゆるビデオの顔を簡単に交換できます。

人気の記事

ホットツール

メモ帳++7.3.1
使いやすく無料のコードエディター

SublimeText3 中国語版
中国語版、とても使いやすい

ゼンドスタジオ 13.0.1
強力な PHP 統合開発環境

ドリームウィーバー CS6
ビジュアル Web 開発ツール

SublimeText3 Mac版
神レベルのコード編集ソフト(SublimeText3)

ホットトピック
 7690
7690
 15
15
 1639
1639
 14
14
 1393
1393
 52
52
 1287
1287
 25
25
 1229
1229
 29
29
 kernel_security_check_failure ブルー スクリーンを解決する 17 の方法
Feb 12, 2024 pm 08:51 PM
Kernelsecuritycheckfailure (カーネルチェック失敗) は比較的一般的な停止コードですが、理由が何であれ、ブルースクリーンエラーは多くのユーザーを悩ませます、当サイトでは 17 種類のエラーをユーザーに丁寧に紹介します。 kernel_security_check_failure ブルー スクリーンに対する 17 の解決策 方法 1: すべての外部デバイスを削除する 使用している外部デバイスが Windows のバージョンと互換性がない場合、Kernelsecuritycheckfailure ブルー スクリーン エラーが発生することがあります。これを行うには、コンピュータを再起動する前に、すべての外部デバイスを取り外しておく必要があります。
 Spring Boot と OpenAI の出会いによる新しいプログラミング パラダイム
Feb 01, 2024 pm 09:18 PM
2023年、AI技術が注目を集め、プログラミング分野を中心にさまざまな業界に大きな影響を与えています。 AI テクノロジーの重要性に対する人々の認識はますます高まっており、Spring コミュニティも例外ではありません。 GenAI (汎用人工知能) テクノロジーの継続的な進歩に伴い、AI 機能を備えたアプリケーションの作成を簡素化することが重要かつ緊急になっています。このような背景から、AI 機能アプリケーションの開発プロセスを簡素化し、シンプルかつ直観的にし、不必要な複雑さを回避することを目的とした「SpringAI」が登場しました。 「SpringAI」により、開発者はAI機能を搭載したアプリケーションをより簡単に構築でき、使いやすく、操作しやすくなります。
 Spring Boot と Spring AI を使用して生成人工知能アプリケーションを構築する
Apr 28, 2024 am 11:46 AM
Spring+AI は業界リーダーとして、強力で柔軟な API と高度な機能を通じてさまざまな業界に最先端のソリューションを提供します。このトピックでは、さまざまな分野での Spring+AI の応用例を詳しく掘り下げ、Spring+AI がどのように特定のニーズを満たし、目標を達成し、これらの教訓をより広範囲のアプリケーションに拡張するかを示します。このトピックが Spring+AI の無限の可能性をより深く理解し、活用するきっかけになれば幸いです。 Spring フレームワークはソフトウェア開発の分野で 20 年以上の歴史があり、Spring Boot 1.0 バージョンがリリースされてから 10 年が経過しました。今、その春に異論を唱える人はいない
 Springプログラマティックトランザクションの実装方法は何ですか?
Jan 08, 2024 am 10:23 AM
Spring プログラムによるトランザクションを実装する方法: 1. TransactionTemplate を使用する; 2. TransactionCallback および TransactionCallbackWithoutResult を使用する; 3. Transactional アノテーションを使用する; 4. TransactionTemplate を @Transactional と組み合わせて使用する; 5. トランザクション マネージャーをカスタマイズする。
 SpringBootとSpringMVCの比較と差異分析
Dec 29, 2023 am 11:02 AM
SpringBoot と SpringMVC はどちらも Java 開発で一般的に使用されるフレームワークですが、それらの間には明らかな違いがいくつかあります。この記事では、これら 2 つのフレームワークの機能と使用法を調べ、その違いを比較します。まず、SpringBoot について学びましょう。 SpringBoot は、Spring フレームワークに基づいたアプリケーションの作成と展開を簡素化するために、Pivotal チームによって開発されました。スタンドアロンの実行可能ファイルを構築するための高速かつ軽量な方法を提供します。
 Spring でトランザクション分離レベルを設定する方法
Jan 26, 2024 pm 05:38 PM
Spring でトランザクション分離レベルを設定する方法: 1. @Transactional アノテーションを使用します; 2. Spring 構成ファイルに設定します; 3. PlatformTransactionManager を使用します; 4. Java 構成クラスに設定します。詳細な導入方法: 1. @Transactional アノテーションを使用し、トランザクション管理が必要なクラスまたはメソッドに @Transactional アノテーションを追加し、属性に分離レベルを設定します。 2. Spring の設定ファイルなどで
 Spring アノテーションの公開: 一般的なアノテーションの分析
Dec 30, 2023 am 11:28 AM
Spring は、Java 開発を簡素化し、強化するための多くのアノテーションを提供するオープンソース フレームワークです。この記事では、一般的に使用される Spring アノテーションについて詳しく説明し、具体的なコード例を示します。 @Autowired: Autowired @Autowired アノテーションを使用して、Spring コンテナーに Bean を自動的に接続できます。依存関係が必要な場合に @Autowired アノテーションを使用すると、Spring はコンテナー内で一致する Bean を見つけて自動的に注入します。サンプルコードは次のとおりです。
 SpringBoot と SpringMVC の違いは何ですか?
Dec 29, 2023 am 10:46 AM
SpringBoot と SpringMVC の違いは何ですか? SpringBoot と SpringMVC は、Web アプリケーションを構築するための 2 つの非常に人気のある Java 開発フレームワークです。これらは別々に使用されることが多いですが、両者の違いは明らかです。まず、SpringBoot は Spring フレームワークの拡張版または強化版とみなすことができます。 Spring アプリケーションの初期化と構成プロセスを簡素化し、開発者を支援するように設計されています。


