

従来の Spring プロジェクトを実行するには、さまざまな依存関係をインポートするだけでなく、さまざまな XML 構成ファイルを構成する必要があります。これは非常に面倒ですが、Spring Boot プロジェクトの後でこれはすべて、Spring Boot のスターター メカニズムによるものです。
Spring Boot は、日々のエンタープライズ アプリケーション開発のさまざまなシナリオを抽出して、各スターターにさまざまな機能を統合します。このシナリオで使用される可能性のある依存関係。ユーザーは Maven にスターター依存関係を導入するだけで済み、SpringBoot はロードされる情報を自動的にスキャンし、対応するデフォルト構成を開始できます。スターターは大量の自動構成を提供し、ユーザーをさまざまな依存関係や構成に対処する煩わしさから解放します。これらすべてのスターターは従来のデフォルト構成に従い、ユーザーがこれらの構成を調整できるようにします。つまり、「規約は構成よりも優れています」という原則に従って、
#すべてのスターターが Spring Boot を使用しているわけではありません。は公式に提供されており、一部のスターターは druid-spring-boot-starter や mybatis-spring-boot-starter などのサードパーティ テクノロジー ベンダーによって提供されます。もちろん、個別のサードパーティ テクノロジも存在します。Spring Boot は公式にはスターターを提供しておらず、サードパーティ テクノロジ ベンダーもスターターを提供していません。たとえば、Web 開発シナリオに必要なものを提供できます。ほとんどすべての依存関係があるため、Spring Boot を使用して Web プロジェクトを開発する場合は、Starter を導入するだけでよく、Web サーバーや他の Web 依存関係を追加インポートする必要はありません。上記の pom.xml 構成では、依存関係 spring-boot-starter-web が導入されるときに、そのバージョンが指定されていませんが、依存関係ツリーでは、すべてのバージョンが指定されていることがわかります。依存関係にはバージョン情報があるため、これらのバージョン情報はどこで管理されるのでしょうか?
実はこれらのバージョン情報は、
spring-boot-starter-parent(バージョン調停センター)によって一元管理されています。
spring-boot-starter-parent
spring-boot-starter-parent は、すべての Spring Boot プロジェクトの親依存関係であり、Spring Boot のバージョンと呼ばれます仲裁センターは、プロジェクト内のいくつかの共通の依存関係を均一に管理できます。 <!--SpringBoot父项目依赖管理-->
<parent>
<groupId>org.springframework.boot</groupId>
<artifactId>spring-boot-starter-parent</artifactId>
<version>2.5.13</version>
<relativePath/>
</parent>
<dependencies>
<!--导入 spring-boot-starter-web-->
<dependency>
<groupId>org.springframework.boot</groupId>
<artifactId>spring-boot-starter-web</artifactId>
</dependency>
...
</dependencies>
</project>
デフォルトの JDK バージョン (Java) 8)
デフォルト文字セット(UTF-8)
依存関係管理機能
#リソースフィルタリング
SpringBoot基本設定
<!--SpringBoot父项目依赖管理-->
<parent>
    <groupId>org.springframework.boot</groupId>
    <artifactId>spring-boot-starter-parent</artifactId>
    <version>2.4.5</version>
</parent>server: port: 8989 #配置端口
server:
  servlet:
context-path: /springboot #配置项目的虚拟路径(根路径) 项目名使用/开头spring:
profiles:
active: dev #开发环境Web プロジェクトを開くプロセスでは、通常、毎回コードを再度開く必要があります。プロジェクトを開始し、再デプロイを実装します。しかし、プロジェクトがますます大きくなるにつれ、開始するたびに時間がかかります。したがって、ホット デプロイメントは非常に革新的なテクノロジーです。ホット デプロイメントを使用すると、開発効率を大幅に向上させることができます。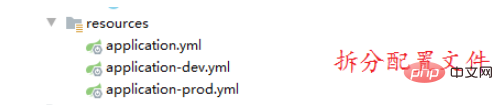
# 显示sql
logging:
  level:
cn.kgc.springboot.mapper: debug #开启日志<dependency>
<groupId>org.springframework.boot</groupId>
<artifactId>spring-boot-devtools</artifactId>
</dependency><build>
<plugins>
<plugin>
<groupId>org.springframework.boot</groupId>
<artifactId>spring-boot-maven-plugin</artifactId>
<configuration>
<fork>true</fork> <!-- 如果devtools不生效 请设置该属性 -->
</configuration>
</plugin>
</plugins>
</build>5. レジストリを設定します
ctrl shift alt /、レジストリを選択し、コンパイラーの autoMake をチェックしてアプリの実行時に許可します1.6 SpringBoot でページング クエリが有効になります
1.依存関係の導入:
devtools:
  restart:
enabled: true #开启热部署2.application.yml ファイルを設定します (設定せずにデフォルトを使用できます)3. テスト用のコントローラー、ビジネス層、永続化層を作成する<dependency> <groupId>com.github.pagehelper</groupId> <artifactId>pagehelper-spring-boot-starter</artifactId> <version>1.2.12</version> </dependency> ---------------------------------------------- <dependency> <groupId>com.github.pagehelper</groupId> <artifactId>pagehelper-spring-boot-starter</artifactId> <version>1.2.10</version> </dependency>ログイン後にコピー
# pageHelper分页配置
pagehelper:
  helper-dialect: mysql  #数据库类型
  reasonable: true   #分页合理化 page<1 查询第一页 page >pageNumber 查询最后一页
  support-methods-arguments: true  # 支持mapper接口传递参数开启分页
  params: count=countSql  #用于从对象中根据属性名取值
@Override
public PageInfo<User> getPage(int pageNum, int pageSize) {

    PageHelper.startPage(pageNum, pageSize);

    List<User> userList = userMapper.selectList();

    PageInfo<User> pageInfo = new PageInfo<>(userList);

    return pageInfo;
}
#springboot がオブジェクトを管理する方法: #1. 構成モードを使用してオブジェクトを作成する
Springboot は、構成クラスに追加される
@Configurationアノテーションを使用します。これは、Spring 構成ファイルの Bean タグ
<bean id="" class="xxx.xxx.xxx"></bean>
に相当します。 2. 元の Spring アノテーション @ を使用します。コンポーネント @Controller @Service @Repository
属性インジェクションSpring独自のインジェクションメソッド
1.setメソッド2.コンストラクター
name: tom
age: 30
price: 23.5
sex: true
birth: 2021/11/28 12:12:12
array: 12,13,15,17
list: 李四,lisi,tom
map: "{'aa':30,'bb':'lisi'}" # 注入map使用json格式 取值的个数#{${map}}对象的注入
object:
  name: lisi
  age: 20
  birth: 2021/11/24
@Controller
@RequestMapping("/inject2")
@ConfigurationProperties("object")
public class InjectController2 {

    private String name;
    private Integer age;
    private Date birth;

   	public void setName(String name) {
        this.name = name;
    }
    public void setAge(Integer age) {
        this.age = age;
    }
    public void setBirth(Date birth) {
        this.birth = birth;
    }
    @RequestMapping("/inject")
    @ResponseBody
    public String inject(){
        System.out.println(name);
        System.out.println(age);
        System.out.println(birth);
        return  "ok";
    }
}注意:添加一下依赖,可以再写yaml文件时提示,消除红色的警告提示。
<dependency>
    <groupId>org.springframework.boot</groupId>
    <artifactId>spring-boot-configuration-processor</artifactId>
    <optional>true</optional>
</dependency>引入依赖
<!--        标准标签库-->
<dependency>
    <groupId>jstl</groupId>
    <artifactId>jstl</artifactId>
    <version>1.2</version>
</dependency>
<!--        让springboot内置的tomcat具有解析jsp的能力-->
<dependency>
    <groupId>org.apache.tomcat.embed</groupId>
    <artifactId>tomcat-embed-jasper</artifactId>
</dependency>配置视图解析器
spring:
  mvc:
    view:
      prefix: /
suffix: .jsp设置不重启项目 刷新jsp页面
server:
  servlet:
    jsp:
      init-parameters:
development: true # 修改jsp页面无需重新启动项目集成后无法访问jsp页面解决方案
1.添加插件
<build>
    <resources>
        <!--注册webapp目录为资源目录-->
        <resource>
            <directory>src/main/webapp</directory>
            <targetPath>META-INF/resources</targetPath>
            <includes>
                <include>**/*.*</include>
            </includes>
        </resource>
    </resources>
    <plugins>
        <plugin>
            <groupId>org.springframework.boot</groupId>
            <artifactId>spring-boot-maven-plugin</artifactId>
        </plugin>
    </plugins>
</build>2.设置工作目录
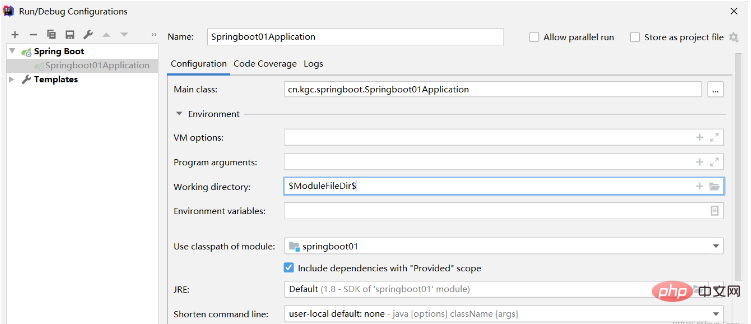
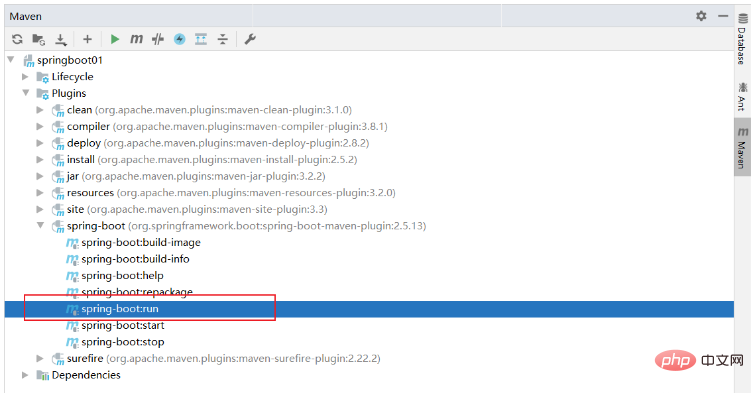
3.插件启动
引入依赖
<dependency>
    <groupId>mysql</groupId>
    <artifactId>mysql-connector-java</artifactId>
    <version>5.1.47</version>
</dependency>
<dependency>
    <groupId>org.mybatis.spring.boot</groupId>
    <artifactId>mybatis-spring-boot-starter</artifactId>
    <version>2.1.3</version>
</dependency>
<dependency>
    <groupId>com.alibaba</groupId>
    <artifactId>druid</artifactId>
    <version>1.1.12</version>
</dependency>编写配置文件
spring:
  datasource:
    type: com.alibaba.druid.pool.DruidDataSource
    driver-class-name: com.mysql.jdbc.Driver
    username: root
    password: root
url: jdbc:mysql://localhost:3306/mybatis?serverTimezone=UTC&characterEncoding=utf-8mybatis配置
mybatis:
  mapper-locations: classpath:mapper/*.xml  #设置mapper文件的位置
  type-aliases-package: cn.kgc.springboot.entity # 起别名
  configuration:
map-underscore-to-camel-case: true #开启驼峰命名设置dao接口的扫描
1.在入口类上使用注解,完成扫描
@SpringBootApplication
@MapperScan("cn.kgc.springboot.dao") //扫描dao接口所在的包 同时生成代理对象 注入spring容器
public class Springday02Application {
    public static void main(String[] args) {
        SpringApplication.run(Springday02Application.class, args);
    }
}以上がJava SpringBoot は JSP と MyBatis をどのように統合しますか?の詳細内容です。詳細については、PHP 中国語 Web サイトの他の関連記事を参照してください。


![[Web フロントエンド] Node.js クイック スタート](https://img.php.cn/upload/course/000/000/067/662b5d34ba7c0227.png)


