

Linux環境でNginxをインストールして使用する方法

1. centos のバージョンを確認します
cat /etc/redhat-release
2. リソース ライブラリを追加します
centos システムに nginx をインストールするには、以下を行う必要があります。まずリソース ライブラリを追加します:
vim /etc/yum.repos.d/nginx.repo
  [nginx]
  name=nginx repo
  baseurl=http://nginx.org/packages/centos/$releasever/$basearch/
  gpgcheck=0
  enabled=1
3. nginx
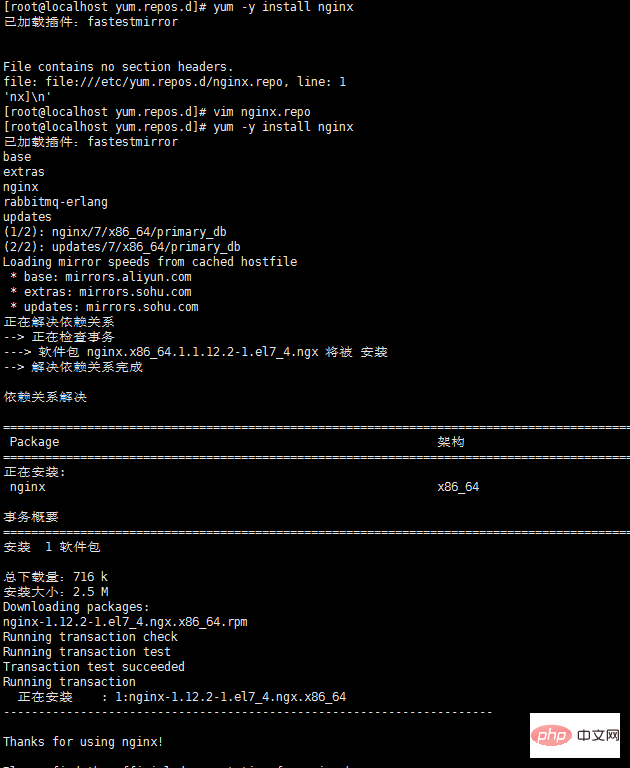
yum -y install nginx
##4 をインストールします。 nginx 設定ファイルは正しいです。
nginx -t
nginx: 設定ファイル /etc/nginx/nginx.conf の構文は ok##5. Centos7.0 nginx は停止、起動、再起動を実現しますnginx:設定ファイル /etc/nginx /nginx.conf テストは成功しました
systemctl stop nginx.service
systemctl start nginx.service
systemctl restart nginx.service
systemctl status nginx.service
systemctl enable nginx.service
Cancel auto-start at boot:
systemctl disable nginx.service
6. nginx.conf の設定例
私の構成:
user nginx;
worker_processes 4;

error_log /var/log/nginx/error.log warn;
pid    /var/run/nginx.pid;


events {
  worker_connections 1024;
}


http {
  include    /etc/nginx/mime.types;
  default_type application/octet-stream;

  log_format main '$remote_addr - $remote_user [$time_local] "$request" '
           '$status $body_bytes_sent "$http_referer" '
           '"$http_user_agent" "$http_x_forwarded_for"';

  access_log /var/log/nginx/access.log main;

  sendfile    on;
  #tcp_nopush   on;

  keepalive_timeout 65;

  #gzip on;

  include /etc/nginx/conf.d/*.conf;

  #设定负载均衡的服务器列表
  upstream pay_server {
    ip_hash;
    server 10.74.248.01:8088 max_fails=2 fail_timeout=2;
    server 10.74.248.02:8088 max_fails=2 fail_timeout=2;
  }

  upstream print_server {
    ip_hash;
    server 10.74.248.03:2001 max_fails=2 fail_timeout=2;
    server 10.74.248.04:2001 max_fails=2 fail_timeout=2;
  }

  upstream accss_door_server {
    ip_hash;
    server 10.74.248.05:2002 max_fails=2 fail_timeout=2;
    server 10.74.248.06:2002 max_fails=2 fail_timeout=2;
  }

  server {
    listen 80;
    server_name wab.kupu.ccoop.com.cn;
    location /invengo {
         proxy_pass http://pay_server;
         index index.jsp index.html index.htm;
    }
    location /invengo/epc {
         proxy_pass http://print_server;
         index index.jsp index.html index.htm;
    }
    location /invengo/print {
         proxy_pass http://print_server;
         index index.jsp index.html index.htm;
    }

    location /checkout {
         proxy_pass http://accss_door_server;
         index index.jsp index.html index.htm;
    }
    location /asset {
         proxy_pass http://accss_door_server;
         index index.jsp index.html index.htm;
    }
}一般的に使用される nginx.conf 構成:
user www www;
worker_processes 2;
error_log logs/error.log;
#error_log logs/error.log notice;
#error_log logs/error.log info;
pid    logs/nginx.pid;
events {
  use epoll;
  worker_connections 2048;
}
http {
  include    mime.types;
  default_type application/octet-stream;
  #log_format main '$remote_addr - $remote_user [$time_local] "$request" '
  #         '$status $body_bytes_sent "$http_referer" '
  #         '"$http_user_agent" "$http_x_forwarded_for"';
  #access_log logs/access.log main;
  sendfile    on;
  # tcp_nopush   on;
  keepalive_timeout 65;
 # gzip压缩功能设置
  gzip on;
  gzip_min_length 1k;
  gzip_buffers  4 16k;
  gzip_http_version 1.0;
  gzip_comp_level 6;
  gzip_types text/html text/plain text/css text/javascript application/json application/javascript application/x-javascript application/xml;
  gzip_vary on;

 # http_proxy 设置
  client_max_body_size  10m;
  client_body_buffer_size  128k;
  proxy_connect_timeout  75;
  proxy_send_timeout  75;
  proxy_read_timeout  75;
  proxy_buffer_size  4k;
  proxy_buffers  4 32k;
  proxy_busy_buffers_size  64k;
  proxy_temp_file_write_size 64k;
  proxy_temp_path  /usr/local/nginx/proxy_temp 1 2;
 # 设定负载均衡后台服务器列表
  upstream backend {
       #ip_hash;
       server  192.168.10.100:8080 max_fails=2 fail_timeout=30s ;
       server  192.168.10.101:8080 max_fails=2 fail_timeout=30s ;
  }
 # 很重要的虚拟主机配置
  server {
    listen    80;
    server_name itoatest.example.com;
    root  /apps/oaapp;
    charset utf-8;
    access_log logs/host.access.log main;
    #对 / 所有做负载均衡+反向代理
    location / {
      root  /apps/oaapp;
      index index.jsp index.html index.htm;
      proxy_pass    http://backend;
      proxy_redirect off;
      # 后端的web服务器可以通过x-forwarded-for获取用户真实ip
      proxy_set_header host $host;
      proxy_set_header x-real-ip $remote_addr;
      proxy_set_header x-forwarded-for $proxy_add_x_forwarded_for;
      proxy_next_upstream error timeout invalid_header http_500 http_502 http_503 http_504;

    }
    #静态文件,nginx自己处理,不去backend请求tomcat
    location ~* /download/ {
      root /apps/oa/fs;

    }
    location ~ .*\.(gif|jpg|jpeg|bmp|png|ico|txt|js|css)$
    {
      root /apps/oaapp;
      expires   7d;
    }
    location /nginx_status {
      stub_status on;
      access_log off;
      allow 192.168.10.0/24;
      deny all;
    }
    location ~ ^/(web-inf)/ {
      deny all;
    }
    #error_page 404       /404.html;
    # redirect server error pages to the static page /50x.html
    #
    error_page  500 502 503 504 /50x.html;
    location = /50x.html {
      root  html;
    }
  }
 ## 其它虚拟主机,server 指令开始
}以上がLinux環境でNginxをインストールして使用する方法の詳細内容です。詳細については、PHP 中国語 Web サイトの他の関連記事を参照してください。

ホットAIツール

Undresser.AI Undress
リアルなヌード写真を作成する AI 搭載アプリ

AI Clothes Remover
写真から衣服を削除するオンライン AI ツール。

Undress AI Tool
脱衣画像を無料で

Clothoff.io
AI衣類リムーバー

AI Hentai Generator
AIヘンタイを無料で生成します。

人気の記事
ホットツール

メモ帳++7.3.1
使いやすく無料のコードエディター

SublimeText3 中国語版
中国語版、とても使いやすい

ゼンドスタジオ 13.0.1
強力な PHP 統合開発環境

ドリームウィーバー CS6
ビジュアル Web 開発ツール

SublimeText3 Mac版
神レベルのコード編集ソフト(SublimeText3)
ホットトピック
 7461
7461
 15
1376
52
77
11
17
17
15
1376
52
77
11
17
17


 Giteeページ静的なWebサイトの展開に失敗しました:単一のファイル404エラーをトラブルシューティングと解決する方法
Apr 04, 2025 pm 11:54 PM
Giteeページ静的なWebサイトの展開に失敗しました:単一のファイル404エラーをトラブルシューティングと解決する方法
Apr 04, 2025 pm 11:54 PM
GiteEpages静的Webサイトの展開が失敗しました:404エラーのトラブルシューティングと解像度Giteeを使用する
 セレンでログインした後、404エラーをリダイレクトする理由は何ですか?それを解決する方法は?
Apr 01, 2025 pm 10:54 PM
セレンでログインした後、404エラーをリダイレクトする理由は何ですか?それを解決する方法は?
Apr 01, 2025 pm 10:54 PM
シミュレーションログインの場合にシミュレーションログイン後に404エラーをリダイレクトするための解決策は、シミュレーションログインにSeleniumを使用すると、いくつかの困難な問題に遭遇することがよくあります。 �...
 H5プロジェクトの実行方法
Apr 06, 2025 pm 12:21 PM
H5プロジェクトの実行方法
Apr 06, 2025 pm 12:21 PM
H5プロジェクトを実行するには、次の手順が必要です。Webサーバー、node.js、開発ツールなどの必要なツールのインストール。開発環境の構築、プロジェクトフォルダーの作成、プロジェクトの初期化、コードの書き込み。開発サーバーを起動し、コマンドラインを使用してコマンドを実行します。ブラウザでプロジェクトをプレビューし、開発サーバーURLを入力します。プロジェクトの公開、コードの最適化、プロジェクトの展開、Webサーバーの構成のセットアップ。
 マルチスレッドをC言語で実装する4つの方法
Apr 03, 2025 pm 03:00 PM
マルチスレッドをC言語で実装する4つの方法
Apr 03, 2025 pm 03:00 PM
言語のマルチスレッドは、プログラムの効率を大幅に改善できます。 C言語でマルチスレッドを実装する4つの主な方法があります。独立したプロセスを作成します。独立して実行される複数のプロセスを作成します。各プロセスには独自のメモリスペースがあります。擬似マルチスレッド:同じメモリ空間を共有して交互に実行するプロセスで複数の実行ストリームを作成します。マルチスレッドライブラリ:pthreadsなどのマルチスレッドライブラリを使用して、スレッドを作成および管理し、リッチスレッド操作機能を提供します。 Coroutine:タスクを小さなサブタスクに分割し、順番に実行する軽量のマルチスレッド実装。
 PythonインタープリターはLinuxシステムで削除できますか?
Apr 02, 2025 am 07:00 AM
PythonインタープリターはLinuxシステムで削除できますか?
Apr 02, 2025 am 07:00 AM
Linux Systemsに付属するPythonインタープリターを削除する問題に関して、多くのLinuxディストリビューションは、インストール時にPythonインタープリターをプリインストールし、パッケージマネージャーを使用しません...
 web.xmlを開く方法
Apr 03, 2025 am 06:51 AM
web.xmlを開く方法
Apr 03, 2025 am 06:51 AM
web.xmlファイルを開くには、次の方法を使用できます。テキストエディター(メモ帳やテキストエディットなど)を使用して、統合開発環境(EclipseやNetBeansなど)を使用してコマンドを編集できます(Windows:Notepad web.xml; Mac/Linux:Open -A Textedit Web.xml)
 Linuxは何に最適なものですか?
Apr 03, 2025 am 12:11 AM
Linuxは何に最適なものですか?
Apr 03, 2025 am 12:11 AM
Linuxは、サーバー管理、組み込みシステム、デスクトップ環境として最適です。 1)サーバー管理では、LinuxはWebサイト、データベース、アプリケーションをホストするために使用され、安定性と信頼性を提供します。 2)組み込みシステムでは、Linuxは柔軟性と安定性のため、スマートホームおよび自動車電子システムで広く使用されています。 3)デスクトップ環境では、Linuxは豊富なアプリケーションと効率的なパフォーマンスを提供します。
