

zabbix で nginx 監視を設定する方法

案例:zabbix 配置 nginx 监控
1. 修改配置文件
vim /usr/local/nginx/conf/nginx.conf

 location /nginx_status {
                stub_status;
        }
说明:
	nginx_status	自定义字段,访问地址(例:192.168.169.131/nginx_status)
	stub_status		固定参数


# 重启 nginx
./nginx reload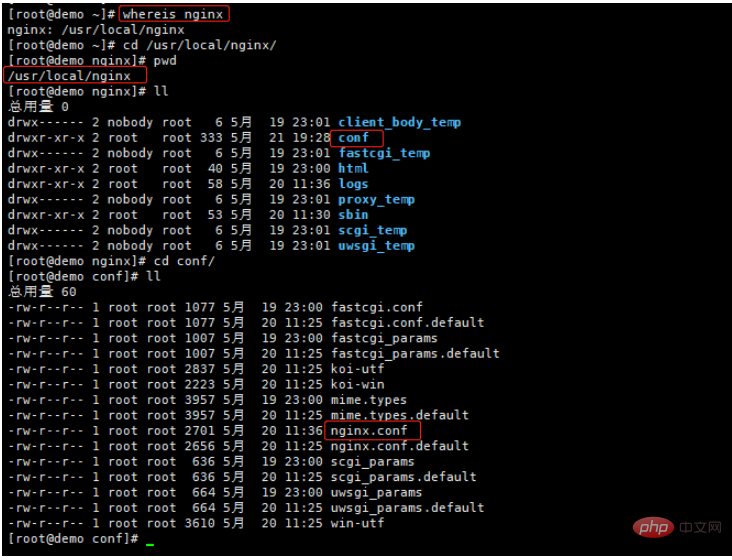

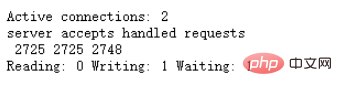
浏览器访问状态说明:
		Active connections  Nginx正处理的活动链接数个数;重要

		server              Nginx启动到现在共处理了多少个连接。

		accepts             Nginx启动到现在共成功创建几次握手。

		handled requests    Nginx总共处理了几次请求。

		Reading             Nginx读取到客户端的 Header 信息数。

		Writing             Nginx返回给客户端的 Header 信息数。

		Waiting             Nginx已经处理完正在等候下一次请求指令的驻留链接,开启。

		Keep-alive的情况下,Waiting这个值等于active-(reading + writing)。

		请求丢失数=(握手数-连接数)可以看出,本次状态显示没有丢失请求
2. 编写 nginx 监控脚本
#/bin/bash
#Description:Automated monitoring nginx performance and process nginx_status scripts

NGINX_PORT=80
NGINX_COMMAND=$1

nginx_ping(){
    /sbin/pidof nginx |wc -l
    }

nginx_active(){
    /usr/bin/curl -s "http://127.0.0.1:"$NGINX_PORT"/nginx_status/" |awk '/Active/ {print $NF}'
    }

nginx_reading(){
    /usr/bin/curl -s "http://127.0.0.1:"$NGINX_PORT"/nginx_status/" |awk '/Reading/ {print $2}'
    }

nginx_writing(){
    /usr/bin/curl -s "http://127.0.0.1:"$NGINX_PORT"/nginx_status/" |awk '/Writing/ {print $4}'
    }

nginx_waiting(){
    /usr/bin/curl -s "http://127.0.0.1:"$NGINX_PORT"/nginx_status/" |awk '/Waiting/ {print $6}'
    }

nginx_accepts(){
    /usr/bin/curl -s "http://127.0.0.1:"$NGINX_PORT"/nginx_status/" |awk 'NR==3 {print $1}'
    }

nginx_handled(){
    /usr/bin/curl -s "http://127.0.0.1:"$NGINX_PORT"/nginx_status/" |awk 'NR==3 {print $2}'
    }

nginx_requests(){
    /usr/bin/curl -s "http://127.0.0.1:"$NGINX_PORT"/nginx_status/" |awk 'NR==3 {print $3}'
    }

case $NGINX_COMMAND in
    ping)
        nginx_ping
        ;;
    active)
        nginx_active
        ;;
    reading)
        nginx_reading
        ;;
    writing)
        nginx_writing
        ;;
    waiting)
        nginx_waiting
        ;;
    accepts)
        nginx_accepts
        ;;
    handled)
        nginx_handled
        ;;
    requests)
        nginx_requests
        ;;
    *)
        echo $"USAGE:$0 {ping|active|reading|writing|waiting|accepts|handled|requests}"
esac# 修改文件权限 chmod u+x /etc/zabbix/zabbix_agentd.d/zabbix_nginx.sh
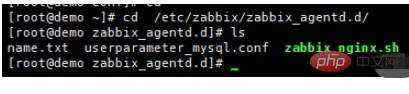
3. 修改 zabbix 配置文件
vim /etc/zabbix/zabbix_agentd.d/userparameter_mysql.conf

# 增加
UserParameter=nginx_status[*],/bin/bash /etc/zabbix/zabbix_agentd.d/zabbix_nginx.sh \$1
# 修改完成重启 zabbix-agent
systemctl restart zabbix-agent.service
4. 服务端验证
[root@zabbix ~]# zabbix_get -s 192.168.169.131 -k nginx_status[active]
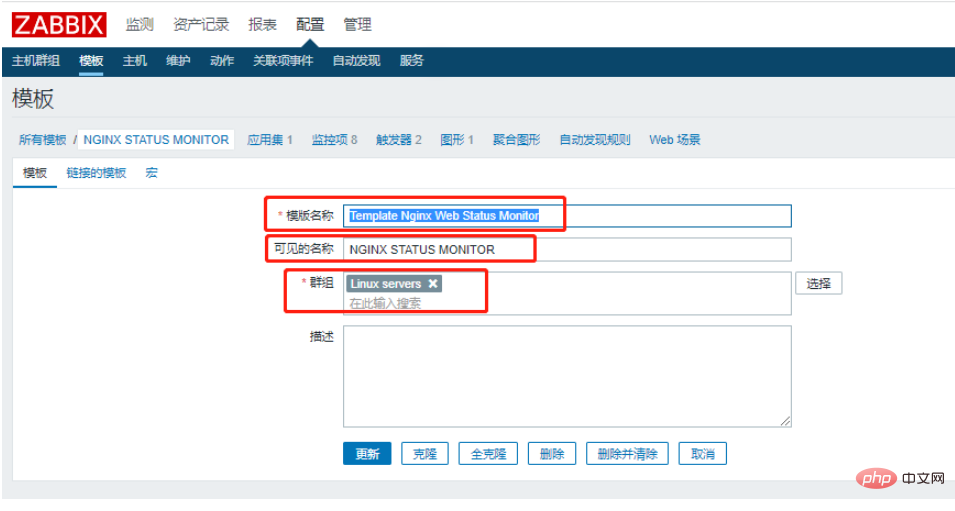
5. 添加模块
模块名称:Template Nginx Web Status Monitor(自定义)
可见名称:NGINX STATUS MONITOR(自定义)
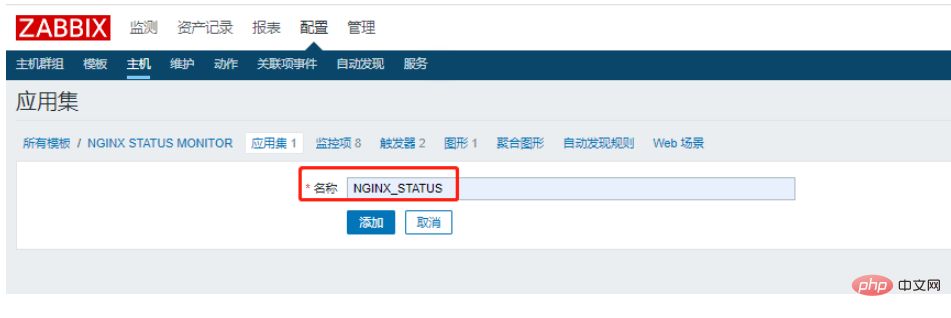
6. 创建应用集
名称:NGINX_STATUS
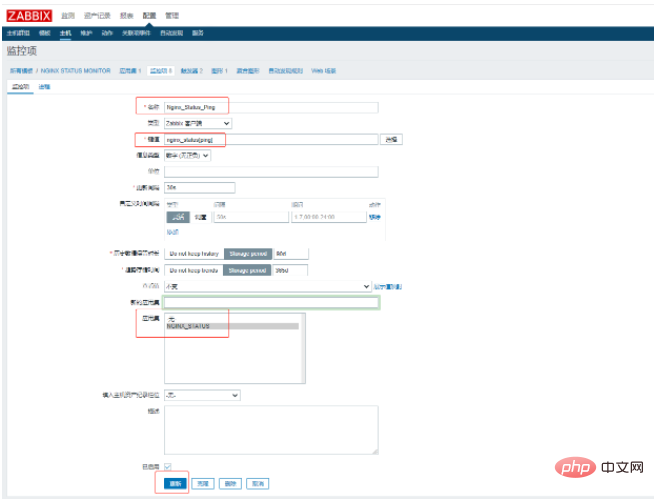
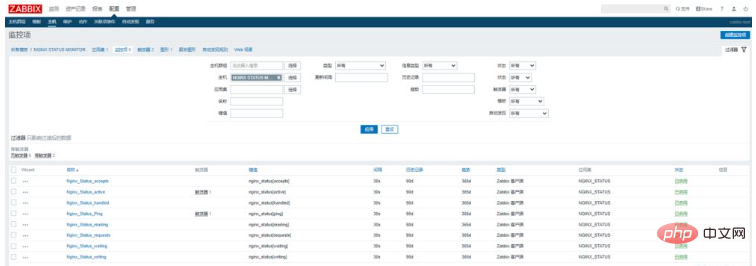
7. 创建监控项
名称:Nginx_Status_Ping
键值:nginx_status[ping]
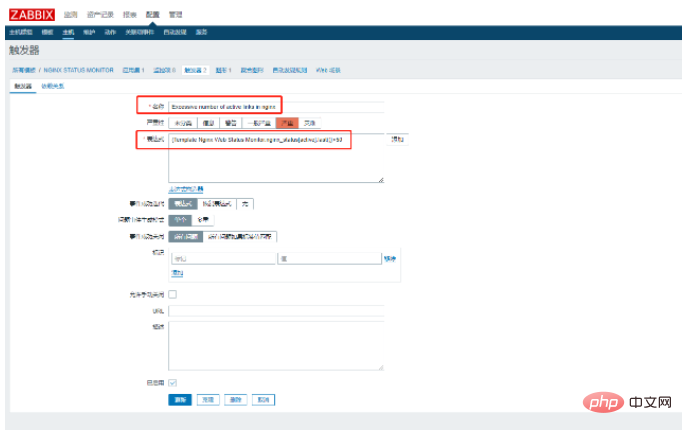
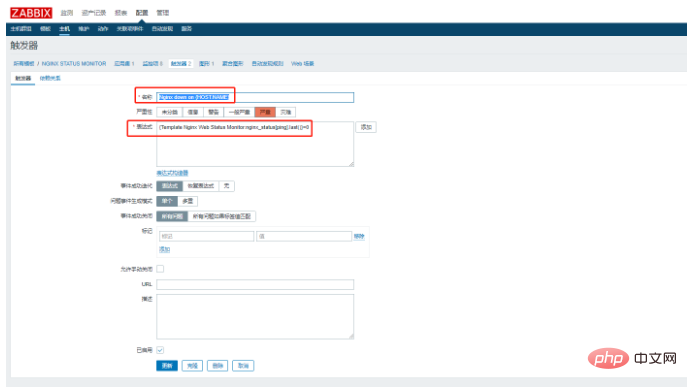
8. 定义触发器
超过50个并发连接就执行报警
nginx 服务down了执行报警
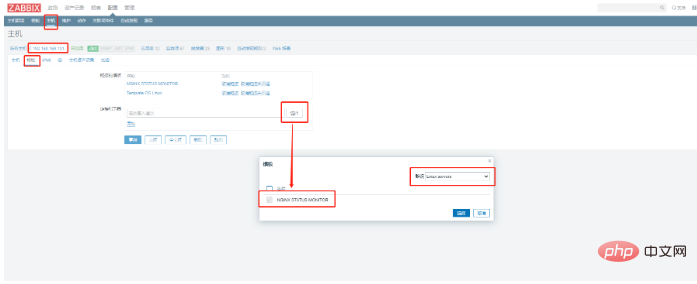
9. 关联主机
将需要监控的主机添加上此模板
10. nginx 模板文件
zbx_export_templates.xml
<?xml version="1.0" encoding="UTF-8"?>
<zabbix_export>
<version>4.0</version>
<date>2022-05-21T12:29:43Z</date>
<groups>
<group>
<name>Linux servers</name>
</group>
</groups>
<templates>
<template>
<template>Template Nginx Web Status Monitor</template>
<name>NGINX STATUS MONITOR</name>
<description/>
<groups>
<group>
<name>Linux servers</name>
</group>
</groups>
<applications>
<application>
<name>NGINX_STATUS</name>
</application>
</applications>
<items>
<item>
<name>Nginx_Status_accepts</name>
<type>0</type>
<snmp_community/>
<snmp_oid/>
<key>nginx_status[accepts]</key>
<delay>30s</delay>
<history>90d</history>
<trends>365d</trends>
<status>0</status>
<value_type>3</value_type>
<allowed_hosts/>
<units/>
<snmpv3_contextname/>
<snmpv3_securityname/>
<snmpv3_securitylevel>0</snmpv3_securitylevel>
<snmpv3_authprotocol>0</snmpv3_authprotocol>
<snmpv3_authpassphrase/>
<snmpv3_privprotocol>0</snmpv3_privprotocol>
<snmpv3_privpassphrase/>
<params/>
<ipmi_sensor/>
<authtype>0</authtype>
<username/>
<password/>
<publickey/>
<privatekey/>
<port/>
<description/>
<inventory_link>0</inventory_link>
<applications>
<application>
<name>NGINX_STATUS</name>
</application>
</applications>
<valuemap/>
<logtimefmt/>
<preprocessing/>
<jmx_endpoint/>
<timeout>3s</timeout>
<url/>
<query_fields/>
<posts/>
<status_codes>200</status_codes>
<follow_redirects>1</follow_redirects>
<post_type>0</post_type>
<http_proxy/>
<headers/>
<retrieve_mode>0</retrieve_mode>
<request_method>0</request_method>
<output_format>0</output_format>
<allow_traps>0</allow_traps>
<ssl_cert_file/>
<ssl_key_file/>
<ssl_key_password/>
<verify_peer>0</verify_peer>
<verify_host>0</verify_host>
<master_item/>
</item>
<item>
<name>Nginx_Status_active</name>
<type>0</type>
<snmp_community/>
<snmp_oid/>
<key>nginx_status[active]</key>
<delay>30s</delay>
<history>90d</history>
<trends>365d</trends>
<status>0</status>
<value_type>3</value_type>
<allowed_hosts/>
<units/>
<snmpv3_contextname/>
<snmpv3_securityname/>
<snmpv3_securitylevel>0</snmpv3_securitylevel>
<snmpv3_authprotocol>0</snmpv3_authprotocol>
<snmpv3_authpassphrase/>
<snmpv3_privprotocol>0</snmpv3_privprotocol>
<snmpv3_privpassphrase/>
<params/>
<ipmi_sensor/>
<authtype>0</authtype>
<username/>
<password/>
<publickey/>
<privatekey/>
<port/>
<description/>
<inventory_link>0</inventory_link>
<applications>
<application>
<name>NGINX_STATUS</name>
</application>
</applications>
<valuemap/>
<logtimefmt/>
<preprocessing/>
<jmx_endpoint/>
<timeout>3s</timeout>
<url/>
<query_fields/>
<posts/>
<status_codes>200</status_codes>
<follow_redirects>1</follow_redirects>
<post_type>0</post_type>
<http_proxy/>
<headers/>
<retrieve_mode>0</retrieve_mode>
<request_method>0</request_method>
<output_format>0</output_format>
<allow_traps>0</allow_traps>
<ssl_cert_file/>
<ssl_key_file/>
<ssl_key_password/>
<verify_peer>0</verify_peer>
<verify_host>0</verify_host>
<master_item/>
</item>
<item>
<name>Nginx_Status_handled</name>
<type>0</type>
<snmp_community/>
<snmp_oid/>
<key>nginx_status[handled]</key>
<delay>30s</delay>
<history>90d</history>
<trends>365d</trends>
<status>0</status>
<value_type>3</value_type>
<allowed_hosts/>
<units/>
<snmpv3_contextname/>
<snmpv3_securityname/>
<snmpv3_securitylevel>0</snmpv3_securitylevel>
<snmpv3_authprotocol>0</snmpv3_authprotocol>
<snmpv3_authpassphrase/>
<snmpv3_privprotocol>0</snmpv3_privprotocol>
<snmpv3_privpassphrase/>
<params/>
<ipmi_sensor/>
<authtype>0</authtype>
<username/>
<password/>
<publickey/>
<privatekey/>
<port/>
<description/>
<inventory_link>0</inventory_link>
<applications>
<application>
<name>NGINX_STATUS</name>
</application>
</applications>
<valuemap/>
<logtimefmt/>
<preprocessing/>
<jmx_endpoint/>
<timeout>3s</timeout>
<url/>
<query_fields/>
<posts/>
<status_codes>200</status_codes>
<follow_redirects>1</follow_redirects>
<post_type>0</post_type>
<http_proxy/>
<headers/>
<retrieve_mode>0</retrieve_mode>
<request_method>0</request_method>
<output_format>0</output_format>
<allow_traps>0</allow_traps>
<ssl_cert_file/>
<ssl_key_file/>
<ssl_key_password/>
<verify_peer>0</verify_peer>
<verify_host>0</verify_host>
<master_item/>
</item>
<item>
<name>Nginx_Status_Ping</name>
<type>0</type>
<snmp_community/>
<snmp_oid/>
<key>nginx_status[ping]</key>
<delay>30s</delay>
<history>90d</history>
<trends>365d</trends>
<status>0</status>
<value_type>3</value_type>
<allowed_hosts/>
<units/>
<snmpv3_contextname/>
<snmpv3_securityname/>
<snmpv3_securitylevel>0</snmpv3_securitylevel>
<snmpv3_authprotocol>0</snmpv3_authprotocol>
<snmpv3_authpassphrase/>
<snmpv3_privprotocol>0</snmpv3_privprotocol>
<snmpv3_privpassphrase/>
<params/>
<ipmi_sensor/>
<authtype>0</authtype>
<username/>
<password/>
<publickey/>
<privatekey/>
<port/>
<description/>
<inventory_link>0</inventory_link>
<applications>
<application>
<name>NGINX_STATUS</name>
</application>
</applications>
<valuemap/>
<logtimefmt/>
<preprocessing/>
<jmx_endpoint/>
<timeout>3s</timeout>
<url/>
<query_fields/>
<posts/>
<status_codes>200</status_codes>
<follow_redirects>1</follow_redirects>
<post_type>0</post_type>
<http_proxy/>
<headers/>
<retrieve_mode>0</retrieve_mode>
<request_method>0</request_method>
<output_format>0</output_format>
<allow_traps>0</allow_traps>
<ssl_cert_file/>
<ssl_key_file/>
<ssl_key_password/>
<verify_peer>0</verify_peer>
<verify_host>0</verify_host>
<master_item/>
</item>
<item>
<name>Nginx_Status_reading</name>
<type>0</type>
<snmp_community/>
<snmp_oid/>
<key>nginx_status[reading]</key>
<delay>30s</delay>
<history>90d</history>
<trends>365d</trends>
<status>0</status>
<value_type>3</value_type>
<allowed_hosts/>
<units/>
<snmpv3_contextname/>
<snmpv3_securityname/>
<snmpv3_securitylevel>0</snmpv3_securitylevel>
<snmpv3_authprotocol>0</snmpv3_authprotocol>
<snmpv3_authpassphrase/>
<snmpv3_privprotocol>0</snmpv3_privprotocol>
<snmpv3_privpassphrase/>
<params/>
<ipmi_sensor/>
<authtype>0</authtype>
<username/>
<password/>
<publickey/>
<privatekey/>
<port/>
<description/>
<inventory_link>0</inventory_link>
<applications>
<application>
<name>NGINX_STATUS</name>
</application>
</applications>
<valuemap/>
<logtimefmt/>
<preprocessing/>
<jmx_endpoint/>
<timeout>3s</timeout>
<url/>
<query_fields/>
<posts/>
<status_codes>200</status_codes>
<follow_redirects>1</follow_redirects>
<post_type>0</post_type>
<http_proxy/>
<headers/>
<retrieve_mode>0</retrieve_mode>
<request_method>0</request_method>
<output_format>0</output_format>
<allow_traps>0</allow_traps>
<ssl_cert_file/>
<ssl_key_file/>
<ssl_key_password/>
<verify_peer>0</verify_peer>
<verify_host>0</verify_host>
<master_item/>
</item>
<item>
<name>Nginx_Status_requests</name>
<type>0</type>
<snmp_community/>
<snmp_oid/>
<key>nginx_status[requests]</key>
<delay>30s</delay>
<history>90d</history>
<trends>365d</trends>
<status>0</status>
<value_type>3</value_type>
<allowed_hosts/>
<units/>
<snmpv3_contextname/>
<snmpv3_securityname/>
<snmpv3_securitylevel>0</snmpv3_securitylevel>
<snmpv3_authprotocol>0</snmpv3_authprotocol>
<snmpv3_authpassphrase/>
<snmpv3_privprotocol>0</snmpv3_privprotocol>
<snmpv3_privpassphrase/>
<params/>
<ipmi_sensor/>
<authtype>0</authtype>
<username/>
<password/>
<publickey/>
<privatekey/>
<port/>
<description/>
<inventory_link>0</inventory_link>
<applications>
<application>
<name>NGINX_STATUS</name>
</application>
</applications>
<valuemap/>
<logtimefmt/>
<preprocessing/>
<jmx_endpoint/>
<timeout>3s</timeout>
<url/>
<query_fields/>
<posts/>
<status_codes>200</status_codes>
<follow_redirects>1</follow_redirects>
<post_type>0</post_type>
<http_proxy/>
<headers/>
<retrieve_mode>0</retrieve_mode>
<request_method>0</request_method>
<output_format>0</output_format>
<allow_traps>0</allow_traps>
<ssl_cert_file/>
<ssl_key_file/>
<ssl_key_password/>
<verify_peer>0</verify_peer>
<verify_host>0</verify_host>
<master_item/>
</item>
<item>
<name>Nginx_Status_waiting</name>
<type>0</type>
<snmp_community/>
<snmp_oid/>
<key>nginx_status[waiting]</key>
<delay>30s</delay>
<history>90d</history>
<trends>365d</trends>
<status>0</status>
<value_type>3</value_type>
<allowed_hosts/>
<units/>
<snmpv3_contextname/>
<snmpv3_securityname/>
<snmpv3_securitylevel>0</snmpv3_securitylevel>
<snmpv3_authprotocol>0</snmpv3_authprotocol>
<snmpv3_authpassphrase/>
<snmpv3_privprotocol>0</snmpv3_privprotocol>
<snmpv3_privpassphrase/>
<params/>
<ipmi_sensor/>
<authtype>0</authtype>
<username/>
<password/>
<publickey/>
<privatekey/>
<port/>
<description/>
<inventory_link>0</inventory_link>
<applications>
<application>
<name>NGINX_STATUS</name>
</application>
</applications>
<valuemap/>
<logtimefmt/>
<preprocessing/>
<jmx_endpoint/>
<timeout>3s</timeout>
<url/>
<query_fields/>
<posts/>
<status_codes>200</status_codes>
<follow_redirects>1</follow_redirects>
<post_type>0</post_type>
<http_proxy/>
<headers/>
<retrieve_mode>0</retrieve_mode>
<request_method>0</request_method>
<output_format>0</output_format>
<allow_traps>0</allow_traps>
<ssl_cert_file/>
<ssl_key_file/>
<ssl_key_password/>
<verify_peer>0</verify_peer>
<verify_host>0</verify_host>
<master_item/>
</item>
<item>
<name>Nginx_Status_writing</name>
<type>0</type>
<snmp_community/>
<snmp_oid/>
<key>nginx_status[writing]</key>
<delay>30s</delay>
<history>90d</history>
<trends>365d</trends>
<status>0</status>
<value_type>3</value_type>
<allowed_hosts/>
<units/>
<snmpv3_contextname/>
<snmpv3_securityname/>
<snmpv3_securitylevel>0</snmpv3_securitylevel>
<snmpv3_authprotocol>0</snmpv3_authprotocol>
<snmpv3_authpassphrase/>
<snmpv3_privprotocol>0</snmpv3_privprotocol>
<snmpv3_privpassphrase/>
<params/>
<ipmi_sensor/>
<authtype>0</authtype>
<username/>
<password/>
<publickey/>
<privatekey/>
<port/>
<description/>
<inventory_link>0</inventory_link>
<applications>
<application>
<name>NGINX_STATUS</name>
</application>
</applications>
<valuemap/>
<logtimefmt/>
<preprocessing/>
<jmx_endpoint/>
<timeout>3s</timeout>
<url/>
<query_fields/>
<posts/>
<status_codes>200</status_codes>
<follow_redirects>1</follow_redirects>
<post_type>0</post_type>
<http_proxy/>
<headers/>
<retrieve_mode>0</retrieve_mode>
<request_method>0</request_method>
<output_format>0</output_format>
<allow_traps>0</allow_traps>
<ssl_cert_file/>
<ssl_key_file/>
<ssl_key_password/>
<verify_peer>0</verify_peer>
<verify_host>0</verify_host>
<master_item/>
</item>
</items>
<discovery_rules/>
<httptests/>
<macros/>
<templates/>
<screens/>
</template>
</templates>
<triggers>
<trigger>
<expression>{Template Nginx Web Status Monitor:nginx_status[active].last()}>50</expression>
<recovery_mode>0</recovery_mode>
<recovery_expression/>
<name>Excessive number of active links in nginx</name>
<correlation_mode>0</correlation_mode>
<correlation_tag/>
<url/>
<status>0</status>
<priority>4</priority>
<description/>
<type>0</type>
<manual_close>0</manual_close>
<dependencies/>
<tags/>
</trigger>
<trigger>
<expression>{Template Nginx Web Status Monitor:nginx_status[ping].last()}=0</expression>
<recovery_mode>0</recovery_mode>
<recovery_expression/>
<name>Nginx down on {HOST.NAME}</name>
<correlation_mode>0</correlation_mode>
<correlation_tag/>
<url/>
<status>0</status>
<priority>4</priority>
<description/>
<type>0</type>
<manual_close>0</manual_close>
<dependencies/>
<tags/>
</trigger>
</triggers>
<graphs>
<graph>
<name>Nginx_Status</name>
<width>900</width>
<height>200</height>
<yaxismin>0.0000</yaxismin>
<yaxismax>100.0000</yaxismax>
<show_work_period>1</show_work_period>
<show_triggers>1</show_triggers>
<type>0</type>
<show_legend>1</show_legend>
<show_3d>0</show_3d>
<percent_left>0.0000</percent_left>
<percent_right>0.0000</percent_right>
<ymin_type_1>0</ymin_type_1>
<ymax_type_1>0</ymax_type_1>
<ymin_item_1>0</ymin_item_1>
<ymax_item_1>0</ymax_item_1>
<graph_items>
<graph_item>
<sortorder>1</sortorder>
<drawtype>0</drawtype>
<color>1A7C11</color>
<yaxisside>0</yaxisside>
<calc_fnc>2</calc_fnc>
<type>0</type>
<item>
<host>Template Nginx Web Status Monitor</host>
<key>nginx_status[accepts]</key>
</item>
</graph_item>
<graph_item>
<sortorder>2</sortorder>
<drawtype>0</drawtype>
<color>F63100</color>
<yaxisside>0</yaxisside>
<calc_fnc>2</calc_fnc>
<type>0</type>
<item>
<host>Template Nginx Web Status Monitor</host>
<key>nginx_status[active]</key>
</item>
</graph_item>
<graph_item>
<sortorder>3</sortorder>
<drawtype>0</drawtype>
<color>2774A4</color>
<yaxisside>0</yaxisside>
<calc_fnc>2</calc_fnc>
<type>0</type>
<item>
<host>Template Nginx Web Status Monitor</host>
<key>nginx_status[handled]</key>
</item>
</graph_item>
<graph_item>
<sortorder>4</sortorder>
<drawtype>0</drawtype>
<color>A54F10</color>
<yaxisside>0</yaxisside>
<calc_fnc>2</calc_fnc>
<type>0</type>
<item>
<host>Template Nginx Web Status Monitor</host>
<key>nginx_status[ping]</key>
</item>
</graph_item>
<graph_item>
<sortorder>5</sortorder>
<drawtype>0</drawtype>
<color>FC6EA3</color>
<yaxisside>0</yaxisside>
<calc_fnc>2</calc_fnc>
<type>0</type>
<item>
<host>Template Nginx Web Status Monitor</host>
<key>nginx_status[reading]</key>
</item>
</graph_item>
<graph_item>
<sortorder>6</sortorder>
<drawtype>0</drawtype>
<color>6C59DC</color>
<yaxisside>0</yaxisside>
<calc_fnc>2</calc_fnc>
<type>0</type>
<item>
<host>Template Nginx Web Status Monitor</host>
<key>nginx_status[requests]</key>
</item>
</graph_item>
<graph_item>
<sortorder>7</sortorder>
<drawtype>0</drawtype>
<color>AC8C14</color>
<yaxisside>0</yaxisside>
<calc_fnc>2</calc_fnc>
<type>0</type>
<item>
<host>Template Nginx Web Status Monitor</host>
<key>nginx_status[waiting]</key>
</item>
</graph_item>
<graph_item>
<sortorder>8</sortorder>
<drawtype>0</drawtype>
<color>611F27</color>
<yaxisside>0</yaxisside>
<calc_fnc>2</calc_fnc>
<type>0</type>
<item>
<host>Template Nginx Web Status Monitor</host>
<key>nginx_status[writing]</key>
</item>
</graph_item>
</graph_items>
</graph>
</graphs>
</zabbix_export>以上がzabbix で nginx 監視を設定する方法の詳細内容です。詳細については、PHP 中国語 Web サイトの他の関連記事を参照してください。

ホットAIツール

Undresser.AI Undress
リアルなヌード写真を作成する AI 搭載アプリ

AI Clothes Remover
写真から衣服を削除するオンライン AI ツール。

Undress AI Tool
脱衣画像を無料で

Clothoff.io
AI衣類リムーバー

AI Hentai Generator
AIヘンタイを無料で生成します。

人気の記事
ホットツール

メモ帳++7.3.1
使いやすく無料のコードエディター

SublimeText3 中国語版
中国語版、とても使いやすい

ゼンドスタジオ 13.0.1
強力な PHP 統合開発環境

ドリームウィーバー CS6
ビジュアル Web 開発ツール

SublimeText3 Mac版
神レベルのコード編集ソフト(SublimeText3)
ホットトピック
 7470
7470
 15
1377
52
77
11
19
29
15
1377
52
77
11
19
29

 Tomcat サーバーへの外部ネットワーク アクセスを許可する方法
Apr 21, 2024 am 07:22 AM
Tomcat サーバーへの外部ネットワーク アクセスを許可する方法
Apr 21, 2024 am 07:22 AM
Tomcat サーバーが外部ネットワークにアクセスできるようにするには、以下を行う必要があります。 外部接続を許可するように Tomcat 構成ファイルを変更します。 Tomcat サーバー ポートへのアクセスを許可するファイアウォール ルールを追加します。 Tomcat サーバーのパブリック IP を指すドメイン名を指す DNS レコードを作成します。オプション: リバース プロキシを使用して、セキュリティとパフォーマンスを向上させます。オプション: セキュリティを強化するために HTTPS を設定します。
 thinkphpの実行方法
Apr 09, 2024 pm 05:39 PM
thinkphpの実行方法
Apr 09, 2024 pm 05:39 PM
ThinkPHP フレームワークをローカルで実行する手順: ThinkPHP フレームワークをローカル ディレクトリにダウンロードして解凍します。 ThinkPHP ルート ディレクトリを指す仮想ホスト (オプション) を作成します。データベース接続パラメータを構成します。 Webサーバーを起動します。 ThinkPHP アプリケーションを初期化します。 ThinkPHP アプリケーションの URL にアクセスして実行します。
 nginx へようこそ!それを解決するにはどうすればよいですか?
Apr 17, 2024 am 05:12 AM
nginx へようこそ!それを解決するにはどうすればよいですか?
Apr 17, 2024 am 05:12 AM
「nginx へようこそ!」エラーを解決するには、仮想ホスト構成を確認し、仮想ホストを有効にし、Nginx をリロードする必要があります。仮想ホスト構成ファイルが見つからない場合は、デフォルト ページを作成して Nginx をリロードすると、エラー メッセージが表示されます。が消え、ウェブサイトは通常のショーになります。
 HTMLファイルからURLを生成する方法
Apr 21, 2024 pm 12:57 PM
HTMLファイルからURLを生成する方法
Apr 21, 2024 pm 12:57 PM
HTML ファイルを URL に変換するには Web サーバーが必要です。これには次の手順が含まれます。 Web サーバーを取得します。 Webサーバーをセットアップします。 HTMLファイルをアップロードします。ドメイン名を作成します。リクエストをルーティングします。
 Nodejsプロジェクトをサーバーにデプロイする方法
Apr 21, 2024 am 04:40 AM
Nodejsプロジェクトをサーバーにデプロイする方法
Apr 21, 2024 am 04:40 AM
Node.js プロジェクトのサーバー デプロイメント手順: デプロイメント環境を準備します。サーバー アクセスの取得、Node.js のインストール、Git リポジトリのセットアップ。アプリケーションをビルドする: npm run build を使用して、デプロイ可能なコードと依存関係を生成します。コードをサーバーにアップロードします: Git またはファイル転送プロトコル経由。依存関係をインストールする: サーバーに SSH で接続し、npm install を使用してアプリケーションの依存関係をインストールします。アプリケーションを開始します。node Index.js などのコマンドを使用してアプリケーションを開始するか、pm2 などのプロセス マネージャーを使用します。リバース プロキシの構成 (オプション): Nginx や Apache などのリバース プロキシを使用して、トラフィックをアプリケーションにルーティングします。
 dockerfile で最も一般的な命令は何ですか
Apr 07, 2024 pm 07:21 PM
dockerfile で最も一般的な命令は何ですか
Apr 07, 2024 pm 07:21 PM
Dockerfile で最も一般的に使用される命令は次のとおりです。 FROM: 新しいイメージを作成するか、新しいイメージを派生します。 RUN: コマンドを実行します (ソフトウェアのインストール、システムの構成) COPY: ローカル ファイルをイメージにコピーします。 ADD: COPY と同様に、自動的に解凍できます。 tar アーカイブまたは URL ファイルを取得します。 CMD: コンテナーの起動時にコマンドを指定します。 EXPOSE: コンテナーのリスニング ポートを宣言します (ただし、パブリックではありません) ENV: 環境変数を設定します。 VOLUME: ホスト ディレクトリまたは匿名ボリュームをマウントします。 WORKDIR: 作業ディレクトリをコンテナ ENTRYPOINT: コンテナ起動時に実行する内容を指定します。 実行可能ファイル (CMD に似ていますが、上書きできません)
 外部からnodejsにアクセスできますか?
Apr 21, 2024 am 04:43 AM
外部からnodejsにアクセスできますか?
Apr 21, 2024 am 04:43 AM
はい、Node.js には外部からアクセスできます。次の方法を使用できます。 Cloud Functions を使用して関数をデプロイし、一般にアクセスできるようにします。 Express フレームワークを使用してルートを作成し、エンドポイントを定義します。 Nginx を使用して、Node.js アプリケーションへのリバース プロキシ リクエストを実行します。 Docker コンテナを使用して Node.js アプリケーションを実行し、ポート マッピングを通じて公開します。
 PHP を使用して Web サイトを展開および維持する方法
May 03, 2024 am 08:54 AM
PHP を使用して Web サイトを展開および維持する方法
May 03, 2024 am 08:54 AM
PHP Web サイトを正常に展開して維持するには、次の手順を実行する必要があります。 Web サーバー (Apache や Nginx など) を選択する PHP をインストールする データベースを作成して PHP に接続する コードをサーバーにアップロードする ドメイン名と DNS を設定する Web サイトのメンテナンスを監視する手順には、PHP および Web サーバーの更新、Web サイトのバックアップ、エラー ログの監視、コンテンツの更新が含まれます。
