Nginx を使用して Windows で画像サーバーを構築する方法
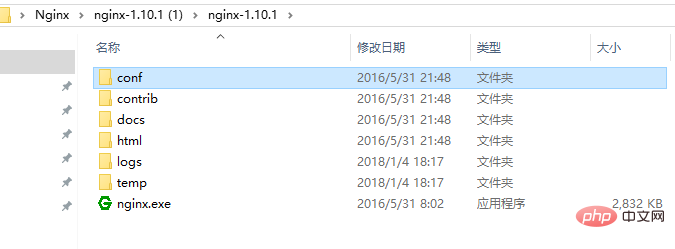
1. 公式 Web サイトにアクセスして、nginx 圧縮パッケージをダウンロードします。解凍されたディレクトリは次のとおりです。

#2. 解凍された conf/nginx.conf 設定内ファイルを追加または変更し、色付きの領域のコードを追加または変更します。
#user nobody;
worker_processes 1;
#error_log logs/error.log;
#error_log logs/error.log notice;
#error_log logs/error.log info;
#pid logs/nginx.pid;

events {
worker_connections 1024;
}

http {
include mime.types;
default_type application/octet-stream;

#log_format main '$remote_addr - $remote_user [$time_local] "$request" '
# '$status $body_bytes_sent "$http_referer" '
# '"$http_user_agent" "$http_x_forwarded_for"';

#access_log logs/access.log main;

sendfile on;
#tcp_nopush on;

#keepalive_timeout 0;
keepalive_timeout 65;

#gzip on;

server {
listen 8089;
server_name localhost;

#charset utf-8;
#access_log logs/host.access.log main;

#添加博客的代码
location ~ .*\.(gif|jpg|jpeg|png)$ {
expires 24h;
root g:/images/;#指定图片存放路径
access_log g:/images/log;#图片路径
proxy_store on;
proxy_store_access user:rw group:rw all:rw;
proxy_temp_path g:/images/;#图片路径
proxy_redirect off;

proxy_set_header host 127.0.0.1;
proxy_set_header x-real-ip $remote_addr;
proxy_set_header x-forwarded-for $proxy_add_x_forwarded_for;
client_max_body_size 10m;
client_body_buffer_size 1280k;
proxy_connect_timeout 900;
proxy_send_timeout 900;
proxy_read_timeout 900;
proxy_buffer_size 40k;
proxy_buffers 40 320k;
proxy_busy_buffers_size 640k;
proxy_temp_file_write_size 640k;
if ( !-e $request_filename)
{
proxy_pass http://169.254.140.133:8089; #代理访问地址
}
}

location / {
root html;
index index.html index.htm;
}

#error_page 404 /404.html;

# redirect server error pages to the static page /50x.html
#
error_page 500 502 503 504 /50x.html;
location = /50x.html {
root html;
}

# proxy the php scripts to apache listening on 127.0.0.1:80
#
#location ~ \.php$ {
# proxy_pass http://127.0.0.1;
#}

# pass the php scripts to fastcgi server listening on 127.0.0.1:9000
#
#location ~ \.php$ {
# root html;
# fastcgi_pass 127.0.0.1:9000;
# fastcgi_index index.php;
# fastcgi_param script_filename /scripts$fastcgi_script_name;
# include fastcgi_params;
#}

# deny access to .htaccess files, if apache's document root
# concurs with nginx's one
#
#location ~ /\.ht {
# deny all;
#}
}


# another virtual host using mix of ip-, name-, and port-based configuration
#
#server {
# listen 8000;
# listen somename:8080;
# server_name somename alias another.alias;

# location / {
# root html;
# index index.html index.htm;
# }
#}


# https server
#
#server {
# listen 443 ssl;
# server_name localhost;

# ssl_certificate cert.pem;
# ssl_certificate_key cert.key;

# ssl_session_cache shared:ssl:1m;
# ssl_session_timeout 5m;

# ssl_ciphers high:!anull:!md5;
# ssl_prefer_server_ciphers on;

# location / {
# root html;
# index index.html index.htm;
# }
#}
}3. 緑色の nginx.exe アイコンをクリックしてサーバーを起動します。タスク マネージャーに次のメッセージが表示されれば、起動は成功です。

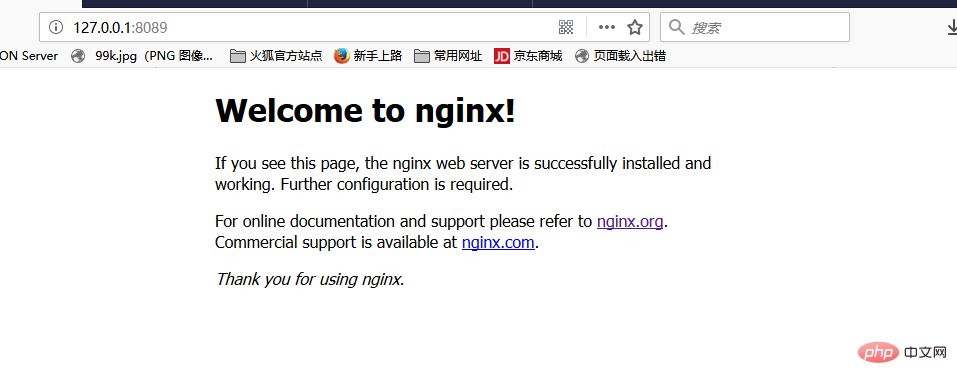
4. ブラウザに http://127.0.0.1:8089 と入力して、

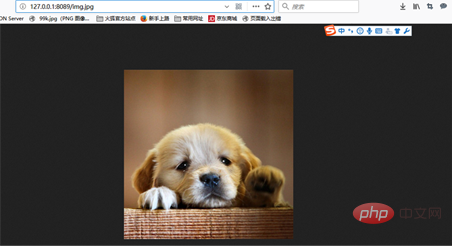
5 を確認します。g:/images/ の下に、画像を配置します。ブラウザのアドレスバーに http://127.0.0.1:8089/img.jpg と入力して、サーバー上の画像にアクセスします。

以上がNginx を使用して Windows で画像サーバーを構築する方法の詳細内容です。詳細については、PHP 中国語 Web サイトの他の関連記事を参照してください。

ホットAIツール

Undresser.AI Undress
リアルなヌード写真を作成する AI 搭載アプリ

AI Clothes Remover
写真から衣服を削除するオンライン AI ツール。

Undress AI Tool
脱衣画像を無料で

Clothoff.io
AI衣類リムーバー

AI Hentai Generator
AIヘンタイを無料で生成します。

人気の記事

ホットツール

メモ帳++7.3.1
使いやすく無料のコードエディター

SublimeText3 中国語版
中国語版、とても使いやすい

ゼンドスタジオ 13.0.1
強力な PHP 統合開発環境

ドリームウィーバー CS6
ビジュアル Web 開発ツール

SublimeText3 Mac版
神レベルのコード編集ソフト(SublimeText3)

ホットトピック
 7510
7510
 15
15
 1378
1378
 52
52
 78
78
 11
11
 19
19
 64
64
 nginx403を解く方法
Apr 14, 2025 am 10:33 AM
Nginx 403禁止エラーを修正する方法は?ファイルまたはディレクトリの許可を確認します。 2。HTACCESSファイルを確認します。 3. nginx構成ファイルを確認します。 4。nginxを再起動します。他の考えられる原因には、ファイアウォールルール、Selinux設定、またはアプリケーションの問題が含まれます。
 Linuxでnginxを開始する方法
Apr 14, 2025 pm 12:51 PM
Linuxでnginxを開始する手順:nginxがインストールされているかどうかを確認します。 systemctlを使用して、nginxを開始してnginxサービスを開始します。 SystemCTLを使用して、NGINXがシステムスタートアップでNGINXの自動起動を有効にすることができます。 SystemCTLステータスNGINXを使用して、スタートアップが成功していることを確認します。 Webブラウザのhttp:// localhostにアクセスして、デフォルトのウェルカムページを表示します。
 nginx403エラーを解く方法
Apr 14, 2025 pm 12:54 PM
サーバーには、要求されたリソースにアクセスする許可がなく、NGINX 403エラーが発生します。ソリューションには以下が含まれます。ファイル許可を確認します。 .htaccess構成を確認してください。 nginx構成を確認してください。 SELINUXアクセス許可を構成します。ファイアウォールルールを確認してください。ブラウザの問題、サーバーの障害、その他の可能なエラーなど、他の原因をトラブルシューティングします。
 Nginxが開始されるかどうかを確認する方法
Apr 14, 2025 pm 01:03 PM
nginxが開始されるかどうかを確認する方法:1。コマンドラインを使用します:SystemCTLステータスnginx(Linux/unix)、netstat -ano | FindStr 80(Windows); 2。ポート80が開いているかどうかを確認します。 3.システムログのnginx起動メッセージを確認します。 4. Nagios、Zabbix、Icingaなどのサードパーティツールを使用します。
 Windowsでnginxを構成する方法
Apr 14, 2025 pm 12:57 PM
Windowsでnginxを構成する方法は? nginxをインストールし、仮想ホスト構成を作成します。メイン構成ファイルを変更し、仮想ホスト構成を含めます。 nginxを起動またはリロードします。構成をテストし、Webサイトを表示します。 SSLを選択的に有効にし、SSL証明書を構成します。ファイアウォールを選択的に設定して、ポート80および443のトラフィックを許可します。
 Nginxクロスドメインの問題を解決する方法
Apr 14, 2025 am 10:15 AM
Nginxクロスドメインの問題を解決するには2つの方法があります。クロスドメイン応答ヘッダーの変更:ディレクティブを追加して、クロスドメイン要求を許可し、許可されたメソッドとヘッダーを指定し、キャッシュ時間を設定します。 CORSモジュールを使用します。モジュールを有効にし、CORSルールを構成して、ドメインクロスリクエスト、メソッド、ヘッダー、キャッシュ時間を許可します。
 nginx304エラーを解く方法
Apr 14, 2025 pm 12:45 PM
質問への回答:304変更されていないエラーは、ブラウザがクライアントリクエストの最新リソースバージョンをキャッシュしたことを示しています。解決策:1。ブラウザのキャッシュをクリアします。 2.ブラウザキャッシュを無効にします。 3.クライアントキャッシュを許可するようにnginxを構成します。 4.ファイル許可を確認します。 5.ファイルハッシュを確認します。 6. CDNまたは逆プロキシキャッシュを無効にします。 7。nginxを再起動します。
 Nginxが起動されているかどうかを確認する方法は?
Apr 14, 2025 pm 12:48 PM
Linuxでは、次のコマンドを使用して、nginxが起動されるかどうかを確認します。SystemCTLステータスNGINXコマンド出力に基づいて、「アクティブ:アクティブ(実行)」が表示された場合、NGINXが開始されます。 「アクティブ:非アクティブ(dead)」が表示されると、nginxが停止します。


