1. nginx のインストール Nginx は軽量の Web サーバー/リバース プロキシ サーバーおよび電子メール (imap/pop3) プロキシ サーバーであり、bsd のようなライセンスでリリースされています。 nginx の特徴は、メモリ占有量が少なく、強力な同時実行機能を備えていることですが、実際、nginx の同時実行機能は、同じ種類の Web サーバー間ではパフォーマンスが優れています。
nginx も非常に人気のある Web サーバーです。ここでは、Django をデプロイするためにそれを使用する方法についても簡単に紹介します。
nginx 公式 Web サイト:
ubuntu コンソール (ctrl alt t) を開き、ubuntu ウェアハウスを使用してインストールします。
fnngj@ubuntu:~$ sudo apt-get install nginx #安装
nginx の起動:
fnngj@ubuntu:~$ /etc/init.d/nginx start #启动
fnngj@ubuntu:~$ /etc/init.d/nginx stop #关闭
fnngj@ubuntu:~$ /etc/init.d/nginx restart #重启
nginx のデフォルトのポート番号を変更し、/etc/nginx/nginx.conf ファイルを開いて、ポート番号を変更します。
 server {
  listen    8088;  # 修改端口号
  server_name localhost;

  #charset koi8-r;

  #access_log logs/host.access.log main;

  location / {
    root  html;
    index index.html index.htm;
}ファイルの 36 行目あたりで、デフォルトのポート番号 80 を別のポート番号 (8088 など) に変更します。デフォルトのポート番号 80 は他のアプリケーションによって占有されやすいためです。
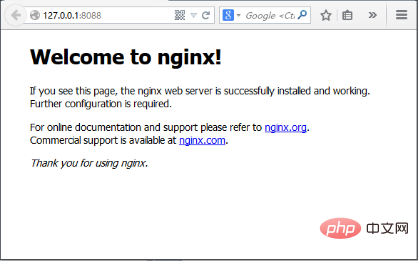
次に、上記のコマンドで nginx を再起動します。アクセス: http://127.0.0.1:8088/
 上記の画像が表示された場合は、nginx が正常に開始されたことを意味します。
pip を通じて uwsgi をインストールします。
root@ubuntu:/etc# python3 -m pip install uwsgi
def application(env, start_response):
  start_response('200 ok', [('content-type','text/html')])
  return [b"hello world"]
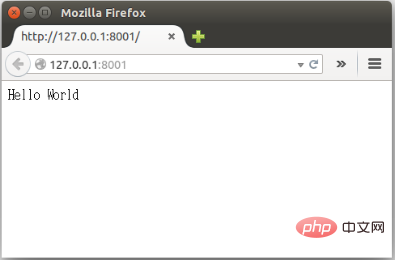
fnngj@ubuntu:~/pydj$ uwsgi --http :8001 --wsgi-file test.py
次に、django と uwsgi の間の接続を設定します。ここで、私の django プロジェクトの想定される場所は次のとおりです: /home/fnngj/pydj/myweb
コードをコピーしますコードは次のとおりです:
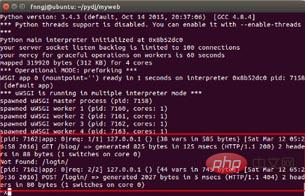
uwsgi --http :8001 -- chdir / home/fnngj/pydj/myweb/ --wsgi-file myweb/wsgi.py --master --processes 4 --threads 2 --stats 127.0.0.1:9191
一般的に使用されるオプション:
processes: 開始されたプロセスの数
workers: 開始されたプロセスの数 (プロセスに相当)公式 Web サイトによると) 指定された数のワーカー/プロセスが生成されます) chdir: 実行ディレクトリを指定します (アプリをロードする前に指定されたディレクトリに chdir します) wsgi-file: wsgi- をロードしますファイル (.wsgi ファイルをロード) stats: 指定されたアドレスの統計サーバーを有効にする threads: スレッドを実行します。ギルの存在により、これは本当に駄目だと思います。 (各ワーカーを指定されたスレッド数のプリスレッド モードで実行します)master: マスター プロセスの存在を許可します (マスター プロセスを有効にします)daemonize: プロセスをバックグラウンドで実行させ、ログを記録します指定されたログ ファイルまたは udp サーバー (uwsgi をデーモン化) に送信します。実際、最も一般的に使用される方法は、実行レコードをローカル ファイルに出力することです。 pidfile: pid ファイルの場所を指定し、メイン プロセスの pid 番号を記録します。 vacuum: サーバーの終了時に環境を自動的にクリーンアップし、unix ソケット ファイルと pid ファイルを削除します (生成されたファイル/ソケットをすべて削除してみてください)3. nginx uwsgi django
次に、3つを組み合わせる必要があります。まず、プロジェクトに必要なファイルをリストします。myweb/ ├── manage.py ├── myweb/ │ ├── __init__.py │ ├── settings.py │ ├── urls.py │ └── wsgi.py └── myweb_uwsgi.ini
# myweb_uwsgi.ini file
[uwsgi]

# django-related settings

socket = :8000

# the base directory (full path)
chdir      = /home/fnngj/pydj/myweb

# django s wsgi file
module     = myweb.wsgi

# process-related settings
# master
master     = true

# maximum number of worker processes
processes    = 4

# ... with appropriate permissions - may be needed
# chmod-socket  = 664
# clear environment on exit
vacuum     = true
接下来,切换到myweb项目目录下,通过uwsgi命令读取myweb_uwsgi.ini文件启动项目。
fnngj@ubuntu:~$ cd /home/fnngj/pydj/myweb/
fnngj@ubuntu:~/pydj/myweb$ uwsgi --ini myweb_uwsgi.ini
[uwsgi] getting ini configuration from myweb_uwsgi.ini
*** starting uwsgi 2.0.12 (32bit) on [sat mar 12 13:05:06 2016] ***
compiled with version: 4.8.4 on 26 january 2016 06:14:41
os: linux-3.19.0-25-generic #26~14.04.1-ubuntu smp fri jul 24 21:18:00 utc 2015
nodename: ubuntu
machine: i686
clock source: unix
detected number of cpu cores: 2
current working directory: /home/fnngj/pydj/myweb
detected binary path: /usr/local/bin/uwsgi
!!! no internal routing support, rebuild with pcre support !!!
chdir() to /home/fnngj/pydj/myweb
your processes number limit is 15962
your memory page size is 4096 bytes
detected max file descriptor number: 1024
lock engine: pthread robust mutexes
thunder lock: disabled (you can enable it with --thunder-lock)
uwsgi socket 0 bound to tcp address :8000 fd 3
python version: 3.4.3 (default, oct 14 2015, 20:37:06) [gcc 4.8.4]
*** python threads support is disabled. you can enable it with --enable-threads ***
python main interpreter initialized at 0x8b52dc0
your server socket listen backlog is limited to 100 connections
your mercy for graceful operations on workers is 60 seconds
mapped 319920 bytes (312 kb) for 4 cores
*** operational mode: preforking ***
wsgi app 0 (mountpoint='') ready in 1 seconds on interpreter 0x8b52dc0 pid: 7158 (default app)
*** uwsgi is running in multiple interpreter mode ***
spawned uwsgi master process (pid: 7158)
spawned uwsgi worker 1 (pid: 7160, cores: 1)
spawned uwsgi worker 2 (pid: 7161, cores: 1)
spawned uwsgi worker 3 (pid: 7162, cores: 1)
spawned uwsgi worker 4 (pid: 7163, cores: 1)
注意查看uwsgi的启动信息,如果有错,就要检查配置文件的参数是否设置有误。
再接下来要做的就是修改nginx.conf配置文件。打开/etc/nginx/nginx.conf文件,添加如下内容。
……
server {
  listen     8099;
  server_name  127.0.0.1
  charset utf-8;
  access_log   /var/log/nginx/myweb_access.log;
  error_log    /var/log/nginx/myweb_error.log;

  client_max_body_size 75m;

  location / {
    include uwsgi_params;
    uwsgi_pass 127.0.0.1:8000;
    uwsgi_read_timeout 2;
  }
  location /static {
    expires 30d;
    autoindex on;
    add_header cache-control private;
    alias /home/fnngj/pydj/myweb/static/;
   }
 }
……listen 指定的是nginx代理uwsgi对外的端口号。
server_name 网上大多资料都是设置的一个网址(例,www.example.com),我这里如果设置成网址无法访问,所以,指定的到了本机默认ip。
在进行配置的时候,我有个问题一直想不通。nginx到底是如何uwsgi产生关联。现在看来大概最主要的就是这两行配置。
include uwsgi_params;
uwsgi_pass 127.0.0.1:8000;
include 必须指定为uwsgi_params;而uwsgi_pass指的本机ip的端口与myweb_uwsgi.ini配置文件中的必须一直。
现在重新启动nginx,翻看上面重启动nginx的命令。然后,访问:http://127.0.0.1:8099/
通过这个ip和端口号的指向,请求应该是先到nginx的。如果你在页面上执行一些请求,就会看到,这些请求最终会转到uwsgi来处理。

以上がubuntu ベースの Nginx を介して Django をデプロイする方法の詳細内容です。詳細については、PHP 中国語 Web サイトの他の関連記事を参照してください。