

Spring Boot が Thymeleaf を統合する方法

Thymeleaf
基本的な紹介
Spring Boot では、テンプレート エンジンとして Thymeleaf を使用することを公式に推奨しています。 SpringBoot は、Thymeleaf の一連のデフォルト構成を提供し、Thymeleaf のビュー リゾルバーを提供します。 Thymeleaf の依存関係がプロジェクトにインポートされると、対応する自動構成 (ThymeleafAutoConfiguration) が自動的に有効になるため、Thymeleaf を Spring Boot と完全に統合できます。 Thymeleaf テンプレート エンジンは HTML タグと完全に組み合わせることができ、データのバックエンド レンダリングを容易にします。 Thymeleaf は、静的効果と動的効果をサポートしています。動的なデータがない場合、静的効果が表示されます。テンプレート エンジンは、ユーザー インターフェイスとビジネス データ (コンテンツ) を分離するために作成されます。ドキュメントのフォーマット。Web サイトに使用されるテンプレート エンジンは標準 HTML ドキュメントを生成します。テンプレート ファイルとデータを使用して、テンプレート エンジンを通じて HTML コードを生成します。**一般的なテンプレート エンジンは、jsp、freemarker、velocity、 thymeleafThymeleaf のデフォルト 書き込み場所は、templates ディレクトリ下です。 Thymeleaf 公式 Web サイト: https://www.thymeleaf.org/
<dependency>
  <groupId>org.springframework.boot</groupId>
  <artifactId>spring-boot-starter-thymeleaf</artifactId>
</dependency>
Thymeleaf のデフォルトのビュー パスは、/resources/templates です。このディレクトリに以下の HTML を作成し、thymeleaf
<html lang="en" xmlns:th="http://www.thymleaf.org">
xmlns:th="http://www.thymleaf.org">
基本構文
を導入します。 ${ドメイン属性名}: リクエストドメインのドメイン属性値を取得して表示
${セッション.ドメイン属性名}: セッションドメインのドメイン属性値を取得して表示
< p th:text="${name}">aaa</p>データを取得できた場合は動的画像、そうでない場合は静止画像(学生管理システムの文字のみが表示されます)

th:text text Replacement
<span th:text="${user.name}">Tom</span>th:if and th:unless text replace
条件判定には th:if 属性と th:unless 属性を使用します。th:unlessth: until はその逆で、式のみです。 条件が満たされない場合にのみコンテンツが表示されます。
#th:href と @{} リンク式
<h3 id="成年">=18}">成年</h3>
<h3 id="未成年">=18}">未成年</h3>
ログイン後にコピー
<h3 id="成年">=18}">成年</h3> <h3 id="未成年">=18}">未成年</h3>
th:switch と th:case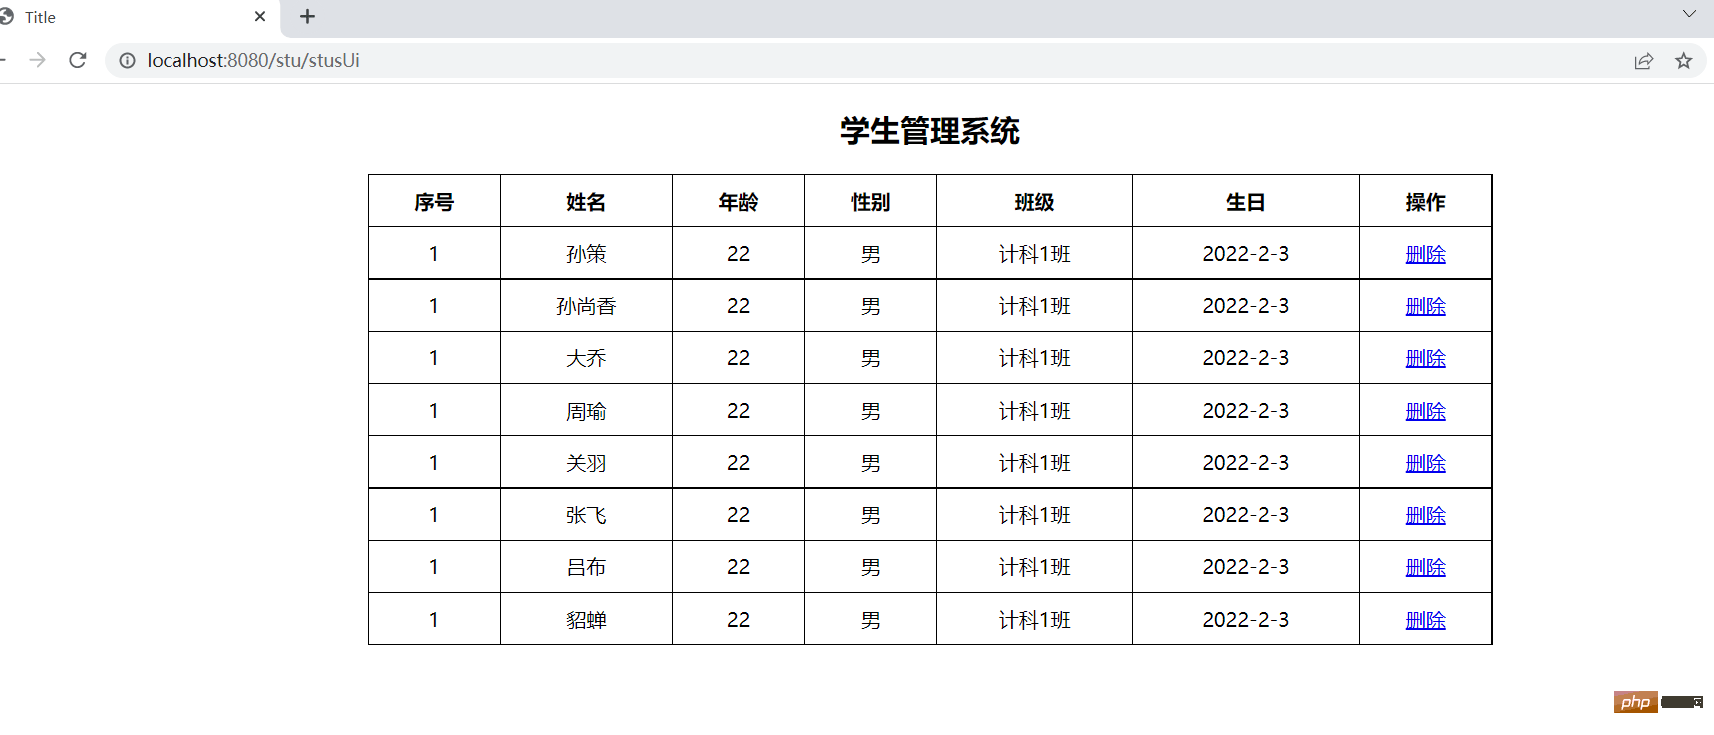
<html lang="en" xmlns:th="http://www.thymleaf.org">
Title
学生管理系统
| 序号 | 姓名 | 年龄 | 性别 | 班级 | 生日 | 操作 |
|---|---|---|---|---|---|---|
| 1 | aa | 22 | 男 | 计科1班 | 2022-2-3 | 删除 |