

axiosをカプセル化してvue3とtsでmock.jsを使う方法は何ですか?

まえがき
Axios と Ajax の区別に注意する必要があります。
Ajax はテクノロジーの一般用語であり、技術的なコンテンツには、HTML または XHTML 、CSS、JavaScript、DOM、XML、XSLT、および最も重要な XMLHttpRequest が含まれます。XMLHttpRequest は、ブラウザとサーバーの間で非同期データ送信 (HTTP リクエスト) を使用し、ローカル リクエストを作成してローカル更新を実現するために使用されます。使用は XMLHttpRequest に基づいています。
Axios は Promise ベースの HTTP ライブラリおよびサードパーティ ライブラリです
主要なテクノロジ スタック: vue3、ts、axios、mock.js、 elementPlus
1. axios の依存関係のインストールと処理
1. 依存関係のインストール
非同期ネットワーク リクエストの使用は、読み込み、メッセージ、その他のプロンプトから切り離すことはできません。 elementPlus で使用します;
// 安装axios
npm install axios --save

// 安装 elementPlus
npm install element-plus --save
2. Global axios package
src ディレクトリ下の utils ディレクトリに、新しい request.ts を作成します。TS を使用するため、データ形式を事前に定義する必要があります:
リクエストデータの返却形式を定義します。事前に確認が必要です。
axios を定義します。基本的な構成情報
リクエスト インターセプタ: すべてのリクエストが最初に到着する場所。ここでリクエスト ヘッダー情報 (トークン、多言語など) をカスタマイズできます。
レスポンス インターセプタ: データが最初に到着する場所を返します。ここで例外情報を処理できます (例: コード 401 はログインにリダイレクトし、コード 500 はエラー メッセージを表示します)
import axios, { AxiosInstance, AxiosError, AxiosRequestConfig, AxiosResponse } from "axios";
import { ElMessage, ElLoading, ElMessageBox } from "element-plus";
// response interface { code, msg, success }
// 不含 data
interface Result {
code: number,
success: boolean,
msg: string
}
// request interface,包含 data
interface ResultData<T = any> extends Result {
data?: T
}
enum RequestEnums {
TIMEOUT = 10000, // 请求超时 request timeout
FAIL = 500, // 服务器异常 server error
LOGINTIMEOUT = 401, // 登录超时 login timeout
SUCCESS = 200, // 请求成功 request successfully
}
// axios 基础配置
const config = {
// 默认地址,可以使用 process Node内置的,项目根目录下新建 .env.development
baseURL: process.env.VUE_APP_BASE_API as string,
timeout: RequestEnums.TIMEOUT as number, // 请求超时时间
withCredentials: true, // 跨越的时候允许携带凭证
}
class Request {
service: AxiosInstance;
constructor(config: AxiosRequestConfig) {
// 实例化 serice
this.service = axios.create(config);
/**
* 请求拦截器
* request -> { 请求拦截器 } -> server
*/
this.service.interceptors.request.use(
(config: AxiosRequestConfig) => {
const token = localStorage.getItem('token') ?? '';
return {
...config,
headers: {
'customToken': "customBearer " + token
}
}
},
(error: AxiosError) => {
// 请求报错
Promise.reject(error)
}
);
/**
* 响应拦截器
* response -> { 响应拦截器 } -> client
*/
this.service.interceptors.response.use(
(response: AxiosResponse) => {
const { data, config } = response;
if (data.code === RequestEnums.LOGINTIMEOUT) {
// 表示登录过期,需要重定向至登录页面
ElMessageBox.alert("Session expired", "System info", {
confirmButtonText: 'Relogin',
type: 'warning'
}).then(() => {
// 或者调用 logout 方法去处理
localStorage.setItem('token', '');
location.href = '/'
})
}
if (data.code && data.code !== RequestEnums.SUCCESS) {
ElMessage.error(data);
return Promise.reject(data);
}
return data
},
(error: AxiosError) => {
const { response } = error;
if (response) {
this.handleCode(response.status);
}
if (!window.navigator.onLine) {
ElMessage.error("网络连接失败,请检查网络");
// 可以重定向至404页面
}
}
)
}
public handleCode = (code: number): void => {
switch (code) {
case 401:
ElMessage.error("登陆失败,请重新登录");
break;
case 500:
ElMessage.error("请求异常,请联系管理员");
break;
default:
ElMessage.error('请求失败');
break;
}
}
// 通用方法封装
get<T>(url: string, params?: object): Promise<ResultData<T>> {
return this.service.get(url, { params });
}
post<T>(url: string, params?: object): Promise<ResultData<T>> {
return this.service.post(url, params);
}
put<T>(url: string, params?: object): Promise<ResultData<T>> {
return this.service.put(url, params);
}
delete<T>(url: string, params?: object): Promise<ResultData<T>> {
return this.service.delete(url, { params });
}
}
export default new Request(config)3. 実際の使用方法
src ディレクトリに api/index.ts を追加します
パラメータの型を定義しますrequest
応答の特定のパラメータ タイプを定義します
ここでは ts の名前空間を使用します。実際の開発では、多くのAPI は同じ名前でも意味が異なる場合があるため、定義には名前空間を使用します。
import request from "@/utils/request";
namespace User {
// login
export interface LoginForm {
userName: string,
password: string
}
}
export namespace System {
export interface Info {
path: string,
routeName: string
}
export interface ResponseItem {
code: number,
items: Array<Sidebar>,
success: boolean
}
export interface Sidebar {
id: number,
hashId: string | number,
title: string,
routeName: string,
children: Array<SidebarItem>,
}
export interface SidebarItem {
id: number,
parentId: number,
hashId: string | number,
title: string,
}
}
export const info = (params: System.Info) => {
// response
if (!params || !params.path) throw new Error('Params and params in path can not empty!')
// 这里因为是全局的一个info,根据路由地址去请求侧边栏,所需不用把地址写死
return request.post<System.Sidebar>(params.path, { routeName: params.routeName })
}Vue ファイルでの呼び出し
<script lang="ts" setup name="Sidebar">
import { ref, reactive, onBeforeMount } from "vue"
import { info } from "@/api"
import { useRoute } from "vue-router"
const route = useRoute();
let loading = ref<boolean>(false);
let sidebar = ref<any>({});
const _fetch = async (): Promise<void> => {
const routeName = route.name as string;
const path = '/' + routeName.replace(routeName[0], routeName[0].toLocaleLowerCase()) + 'Info'
try {
loading.value = true;
const res = await info({ path, routeName });
if (!res || !res.data) return;
sidebar.value = res.data;
} finally {
loading.value = false
}
}
onBeforeMount(() => {
_fetch();
})
</script>2. 依存関係のインストールとモックの処理。 js
1. 依存関係のインストール
# 安装
npm install mockjs --save
ts で使用する場合、モジュールを shims-vue.d.ts ファイルにスローする必要があります。そうしないと、エラーが発生するという問題が発生します
/* eslint-disable */
declare module '*.vue' {
import type { DefineComponent } from 'vue'
const component: DefineComponent<{}, {}, any>
export default component
}
declare module 'mockjs';2. 新しいモックに必要なファイル
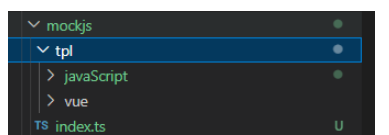
index.ts (mockjs グローバル設定ファイルに属します)、mockjs/javaScript/index を作成します。 ts (特定のデータ ファイル)、この 2 つは注意する必要がありますが、その他は注意する必要はありません
1. 新しいmockjs /javaScript/index.ts (特定のデータ ファイル) を作成します
ここでのデータは主にサイドバー内のデータであり、すべて固定されているため、データの生成にはmockjsのルールは使用されません。
import { GlobalSidebar, Sidebar } from "../../sidebar";
namespace InfoSidebar {
export type InfoSidebarParams = {
body: string,
type: string,
url: string
}
}
const dataSource: Array<GlobalSidebar> = [
{
mainTitle: 'JavaScript基础问题梳理',
mainSidebar: [
{
id: 0,
hashId: 'This',
title: 'this指向',
routeName: 'JsBasic',
children: [
{
id: 1,
parentId: 0,
hashId: 'GlobalFunction',
title: '全局函数'
},
{
id: 2,
parentId: 0,
hashId: 'ObjectMethod',
title: '对象方法'
},
{
id: 3,
parentId: 0,
hashId: 'Constructor',
title: '构造函数'
},
{
id: 4,
parentId: 0,
hashId: 'SetTimeout',
title: '定时器、回调函数'
},
{
id: 5,
parentId: 0,
hashId: 'EventFunction',
title: '事件函数'
},
{
id: 6,
parentId: 0,
hashId: 'ArrowFunction',
title: '箭头函数'
},
{
id: 7,
parentId: 0,
hashId: 'CallApplyBind',
title: 'call、apply、bind'
},
]
},
{
id: 2,
hashId: 'DeepClone',
title: '深拷贝和浅拷贝',
routeName: 'JsBasic',
children: []
}
]
},
];
export default {
name: 'jsBasicInfo',
jsBasicInfo(params: InfoSidebar.InfoSidebarParams) {
const param = JSON.parse(params.body)
if (!param) throw new Error("Params can not empty!");
const data = dataSource.find((t: GlobalSidebar) => {
return t.mainSidebar.filter((x: Sidebar) => {
return x.routeName === param.routeName
})
})
return {
data,
success: true,
code: 200
}
}
}/**
* @param { number } id Unique value
* @param { string } hashId href Unique value
* @param { string } title show current title
* @param { string } routeName page find data
*/
interface GlobalSidebar {
mainTitle: string,
mainSidebar: Array<Sidebar>
}
interface Sidebar {
id: number,
hashId: string | number,
title: string,
routeName: string,
children: Array<SidebarItem>,
}
interface SidebarItem {
id: number,
parentId: number,
hashId: string | number,
title: string,
}
export {
GlobalSidebar,
Sidebar,
SidebarItem
}import Mock from "mockjs";
import jsBasicInfo from "./tpl/javaScript/index";
const requestMethod = 'post';
const BASE_URL = process.env.VUE_APP_BASE_API;
const mocks = [jsBasicInfo];
for (let i of mocks) {
Mock.mock(BASE_URL + '/' + i.name, requestMethod, i.jsBasicInfo);
}
export default Mockimport { createApp } from 'vue'
import App from './App.vue'
if(process.env.NODE_ENV == 'development'){
require('./mockjs/index')
}
const app = createApp(App);
app.mount('#app');ログイン後にコピー を呼び出したコード
import { createApp } from 'vue'
import App from './App.vue'

if(process.env.NODE_ENV == 'development'){
    require('./mockjs/index')
}

const app = createApp(App);
app.mount('#app');以上がaxiosをカプセル化してvue3とtsでmock.jsを使う方法は何ですか?の詳細内容です。詳細については、PHP 中国語 Web サイトの他の関連記事を参照してください。

ホットAIツール

Undresser.AI Undress
リアルなヌード写真を作成する AI 搭載アプリ

AI Clothes Remover
写真から衣服を削除するオンライン AI ツール。

Undress AI Tool
脱衣画像を無料で

Clothoff.io
AI衣類リムーバー

AI Hentai Generator
AIヘンタイを無料で生成します。

人気の記事
ホットツール

メモ帳++7.3.1
使いやすく無料のコードエディター

SublimeText3 中国語版
中国語版、とても使いやすい

ゼンドスタジオ 13.0.1
強力な PHP 統合開発環境

ドリームウィーバー CS6
ビジュアル Web 開発ツール

SublimeText3 Mac版
神レベルのコード編集ソフト(SublimeText3)
ホットトピック
 7569
7569
 15
1386
52
87
11
28
107
15
1386
52
87
11
28
107

 Vue アプリケーションで axios を使用しているときに「Uncaught (in Promise) Error: Request failed with status code 500」が発生した場合はどうすればよいですか?
Jun 24, 2023 pm 05:33 PM
Vue アプリケーションで axios を使用しているときに「Uncaught (in Promise) Error: Request failed with status code 500」が発生した場合はどうすればよいですか?
Jun 24, 2023 pm 05:33 PM
Vue アプリケーションで axios を使用するのは非常に一般的です。axios は、ブラウザーと Node.js で使用できる Promise ベースの HTTP クライアントです。開発プロセス中に、「Uncaught(inpromise)Error: Requestfailedwithstatuscode500」というエラー メッセージが表示されることがありますが、開発者にとって、このエラー メッセージは理解および解決が難しい場合があります。この記事ではこれについて説明します
 Vue でのデータ リクエストの選択: Axios または Fetch?
Jul 17, 2023 pm 06:30 PM
Vue でのデータ リクエストの選択: Axios または Fetch?
Jul 17, 2023 pm 06:30 PM
Vue でのデータ リクエストの選択: AxiosorFetch? Vue 開発では、データ リクエストの処理は非常に一般的なタスクです。データリクエストにどのツールを使用するかを選択することは、考慮する必要がある問題です。 Vue で最も一般的なツールは、Axios と Fetch の 2 つです。この記事では、両方のツールの長所と短所を比較し、選択に役立つサンプル コードをいくつか示します。 Axios は、ブラウザおよび Node.js で動作する Promise ベースの HTTP クライアントです。
 Vue アプリケーションで axios を使用するときに「TypeError: Failed to fetch」が発生した場合はどうすればよいですか?
Jun 24, 2023 pm 11:03 PM
Vue アプリケーションで axios を使用するときに「TypeError: Failed to fetch」が発生した場合はどうすればよいですか?
Jun 24, 2023 pm 11:03 PM
最近、Vue アプリケーションの開発中に、「TypeError: Failedtofetch」エラー メッセージという一般的な問題に遭遇しました。この問題は、axios を使用して HTTP リクエストを作成し、バックエンド サーバーがリクエストに正しく応答しない場合に発生します。このエラー メッセージは通常、ネットワーク上の理由またはサーバーが応答していないことが原因で、リクエストがサーバーに到達できないことを示します。このエラーメッセージが表示された後はどうすればよいでしょうか?以下にいくつかの回避策を示します。
 Vue アプリケーションで axios を使用するときに発生する「エラー: ネットワーク エラー」の問題を解決するにはどうすればよいですか?
Jun 25, 2023 am 08:27 AM
Vue アプリケーションで axios を使用するときに発生する「エラー: ネットワーク エラー」の問題を解決するにはどうすればよいですか?
Jun 25, 2023 am 08:27 AM
Vue アプリケーションで axios を使用するときに発生する「エラー: NetworkError」の問題を解決するにはどうすればよいですか? Vue アプリケーションの開発では axios を使って API リクエストをしたり、データを取得したりすることが多いのですが、axios リクエストで「Error: NetworkError」が発生することがあります。まず、「Error:NetworkError」の意味を理解する必要があります。これは通常、ネットワーク接続が切断されていることを意味します。
 Vue と Axios を効率的に活用してフロントエンド データのバッチ処理を実装する
Jul 17, 2023 pm 10:43 PM
Vue と Axios を効率的に活用してフロントエンド データのバッチ処理を実装する
Jul 17, 2023 pm 10:43 PM
Vue と Axios を効率的に活用して、フロントエンド データのバッチ処理を実装します。フロントエンド開発ではデータ処理が一般的なタスクです。大量のデータを処理する必要がある場合、効果的な方法がなければ、データの処理は非常に煩雑で非効率的になってしまいます。 Vue は優れたフロントエンド フレームワークであり、Axios は人気のあるネットワーク リクエスト ライブラリであり、連携してフロントエンド データのバッチ処理を実装できます。この記事では、Vue と Axios を効率的に使用してデータのバッチ処理を行う方法を詳しく紹介し、関連するコード例を示します。
 Vue3 でアバターを選択してトリミングする方法
May 29, 2023 am 10:22 AM
Vue3 でアバターを選択してトリミングする方法
May 29, 2023 am 10:22 AM
最終的な効果は、VueCropper コンポーネントのyarnaddvue-cropper@next をインストールすることです。上記のインストール値は Vue3 用です。Vue2 の場合、または他の方法を参照したい場合は、公式 npm アドレス: 公式チュートリアルにアクセスしてください。また、コンポーネント内で参照して使用するのも非常に簡単です。必要なのは、対応するコンポーネントとそのスタイル ファイルを導入することだけです。ここではグローバルに参照しませんが、import{userInfoByRequest}from'../js/api を導入するだけです。 ' コンポーネント ファイルにインポートします。import{VueCropper}from'vue-cropper&
 DefineCustomElement を使用して Vue3 でコンポーネントを定義する方法
May 28, 2023 am 11:29 AM
DefineCustomElement を使用して Vue3 でコンポーネントを定義する方法
May 28, 2023 am 11:29 AM
Vue を使用してカスタム要素を構築する WebComponents は、開発者が再利用可能なカスタム要素 (カスタム要素) を作成できるようにする一連の Web ネイティブ API の総称です。カスタム要素の主な利点は、フレームワークがなくても、任意のフレームワークで使用できることです。これらは、異なるフロントエンド テクノロジ スタックを使用している可能性のあるエンド ユーザーをターゲットにする場合、または最終アプリケーションを使用するコンポーネントの実装の詳細から切り離したい場合に最適です。 Vue と WebComponents は補完的なテクノロジであり、Vue はカスタム要素の使用と作成に対する優れたサポートを提供します。カスタム要素を既存の Vue アプリケーションに統合したり、Vue を使用してビルドしたりできます。
 Vue アプリケーションで axios を使用するときに「エラー: xxxms のタイムアウトを超えました」が発生した場合はどうすればよいですか?
Jun 24, 2023 pm 03:27 PM
Vue アプリケーションで axios を使用するときに「エラー: xxxms のタイムアウトを超えました」が発生した場合はどうすればよいですか?
Jun 24, 2023 pm 03:27 PM
Vue アプリケーションで axios を使用するときに「エラー: timeoutofxxxmsexceeded」が発生した場合はどうすればよいですか?インターネットの急速な発展に伴い、フロントエンド技術は常に更新され、改良が重ねられており、Vue は優れたフロントエンド フレームワークとして近年皆様に歓迎されています。 Vue アプリケーションでは、ネットワーク リクエストを行うために axios を使用する必要があることがよくありますが、「エラー: timeoutofxxxmsexceeded」というエラーが発生することがあります。
