2、3 週間 Canvas で遊んでいますが、平面オブジェクトで遊ぶのは同じなので、3D をいじり始めました。
Canvas キャンバスは結局のところまだ平面なので、3D にしたい場合は Z 軸を抽象化する必要があります。次に、3D 座標を 2D 座標に変換し、キャンバス上に描画し、回転やその他の変形効果を使用して 3D 感を作成します。 3D を行うには、通常、点から線へ、そして線から面へという作業が伴います。
【ポイント】
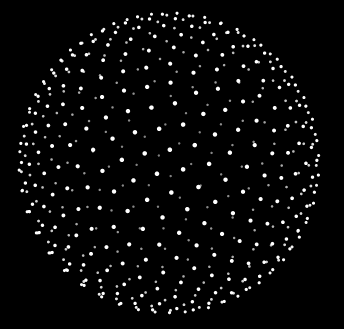
クリックしていただければ、以前に 3D に関するブログ記事を書きました 3D タグ クラウドの解析は実際には非常に簡単です このブログ記事では div を使用して実装された 3D タグ クラウドについて説明していますが、根本的な原因は3D の原理も同じで、点から構成される最も単純な 3D です。各ラベルがポイントになります。このデモを直接見ることもできます:

3DBall
中には合計 500 個のポイント オブジェクトがあり、各ポイント オブジェクトは Z 軸に従ってサイズと透明度を変更し、球上に均等に分散します。点球。
【ライン】
点の作り方がわかれば、点と点を結ぶだけの簡単な線になります。これについてはデモを行っていませんが、実際には難しくありません。 moveTo をループしてから lineTo をループするだけで、ラインが出力されます。
【麺類】
このブログ記事は主に顔について話します。
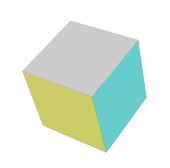
早速、まずデモをやってみましょう:

3D キューブ
立方体を作成するために、点オブジェクト、面オブジェクト、立方体自体の 3 つのオブジェクトを使用しました。
以下は点オブジェクトです。x、y、z は点の 3 次元座標です。_get2d メソッドは 3 次元座標を 2 次元レベルに変換します。 fallLength は焦点距離です。
XML/HTML コードコンテンツをクリップボードにコピー
- var ベクトル = 関数(x,y,z){
-
this.x = x;
-
this.y = y;
this.z-
= z;
this._get2d
= -
関数(){
var scale
= -
fallLength/(fallLength this.z);
var x =
centerX-
this.x*scale;
var y = centerY
this.y*scale;
-
戻り値 {x:x, y:y};
次に対象ユーザー:
面オブジェクトのプロパティページはわかりやすいです。面は正方形であり、v1v2v3v4 は面のレベルを表します。外側または内側。キャンバスで描画するときに、このサーフェスが前面に描画され、他のサーフェスで覆われないようにするには、これを [はい] にする必要があります。 zIndex の値も理解しやすいですが、これは頂点の平均 Z 軸座標であり、実際には中心点の Z 軸座標です。色はこの表面の色です。
XML/HTML コードコンテンツをクリップボードにコピー
- var 顔 = function(vector1,vector2,vector3,vector4,color){
-
this.v1 = vector1;
-
this.v2 = vector2;
-
this.v3 = vector3;
-
this.v4 = vector4;
-
this.color = 色;
-
this.zIndex = (this.v1.z this.v2.z this.v3.z this.v4.z)/4;
-
this.draw = function(){
- ctx.save();
- ctx.beginPath();
- ctx.moveTo(this.v1._get2d().x , this.v1._get2d().y);
- ctx.lineTo(this.v2._get2d().x , this.v2._get2d().y);
- ctx.lineTo(this.v3._get2d().x , this.v3._get2d().y);
- ctx.lineTo(this.v4._get2d().x , this.v4._get2d().y);
- ctx.closePath();
-
//ctx.fillStyle = "rgba(" parseInt(Math.random()*255) "," parseInt(Math.random()*255) "," parseInt(Math.random()*255) ",0.2)";
-
ctx.fillStyle = this.color;
- ctx.fill();
- }
- }
最後は立方体本身对象:
立方体が最後に回転するため、立方体オブジェクトの背面には面オブジェクトがなく、点回転後に面の回転が開始されます。length は立方体の長さ、_initVector は初期化された立方体の各頂点、_draw方法は、すべてのポイントが面を形成し、面のグループを配置し、その後面を並べ替え(つまり、面の zIndex に基づいて並べ替え)、並べ替えた後、各面の描画方法を調整することです。 🎜>
XML/HTML コード
复制コンテンツ到剪贴板
- var Cube = function(長さ){
-
this.length = 長さ;
-
this.faces = [];
-
this.vectors = [];
- }
-
Cube.prototype = {
- _initVector:function(){
- this.vectors[0] = 新しい Vector(-this.length/2 , -this.length/2 , this.length/2);
- this.vectors[1] = 新しい Vector(-this.length/2 , this.length/2 , this.length/2);
- this.vectors[2] = 新しい Vector(this.length/2 , -this.length/2 , this.length/2);
- this.vectors[3] = 新しい Vector(this.length/2 , this.length/2 , this.length/2);
- this.vectors[4] = 新しい Vector(this.length/2 , -this.length/2 , -this.length/2);
- this.vectors[5] = 新しい Vector(this.length/2 , this.length/2 , -this.length/2);
- this.vectors[6] = 新しい Vector(-this.length/2 , -this.length/2 , -this.length/2);
- this.vectors[7] = 新しい Vector(-this.length/2 , this.length/2 , -this.length/2);
- },
- _draw:function(){
- this.faces[0] = new Face(this.vectors[0] , this.vectors[1] , this.vectors[3] , this.vectors[2] , "#6c6");
- this.faces[1] = new Face(this.vectors[2] , this.vectors[3] , this.vectors[5] , this.vectors[4] , "#6cc");
- this.faces[2] = new Face(this.vectors[4] , this.vectors[5] , this.vectors[7] , this.vectors[6] , "#cc6");
- this.faces[3] = new Face(this.vectors[6] , this.vectors[7] , this.vectors[1] , this.vectors[0] , "#c6c");
- this.faces[4] = new Face(this.vectors[1] , this.vectors[3] , this.vectors[5] , this.vectors[7] , "#666");
- this.faces[5] = new Face(this.vectors[0] , this.vectors[2] , this.vectors[4] , this.vectors[6] , "#ccc");
-
- this.faces.sort(function(a , b){
- return b.zIndex - a.zIndex;
- });
- this.faces.foreach(function(){
- this.draw();
- })
- }
- }
立方体の動作が完了すると、次に起動できるようになります。マウスの位置に応じて立方体の回転角度を変更します。rotateX およびrotateY の方法は、すべての点を X 軸および Y 軸を中心に回転します。当然のことながら、さらに理解したい場合は、X 軸および Y 軸を中心としたコンピューターの図形の 3D 変換を独自に検討することもできます。これには利点があり、本来は魔方を倒すために使用することを考えていますが、いくつかの問題に遭遇せず、問題は解決されません。
およびrotateY の 2 つのメソッドは、各ポイントが次のフレームの位置を取得して、アニメーション サイクル中に繰り返し実行されます。
XML/HTML コード复制コンテンツ到剪贴板
- if("addEventListener" in window){
- window.addEventListener("mousemove" , function(event){
-
var x = event.clientX - canvas.offsetLeft - centerX;
-
var y = event.clientY - canvas.offsetTop - centerY;
-
角度 Y = x*0.0001;
-
角度X = y*0.0001;
- });
- }
- else {
- window.attachEvent("onmousemove" , function(event){
-
var x = event.clientX - canvas.offsetLeft - centerX;
-
var y = event.clientY - canvas.offsetTop - centerY;
-
角度 Y = x*0.0001;
-
角度X = y*0.0001;
- });
- }
-
-
- 関数 rotateX(ベクトル){
-
var cos = Math.cos(angleX);
-
var sin = Math.sin(angleX);
- vectors.foreach(function(){
-
var y1 = this.y * cos - this.z * sin;
-
var z1 = this.z * cos this.y * sin;
-
this.y = y1;
-
this.z = z1;
- });
- }
-
- 関数 rotateY(ベクトル){
-
var cos = Math.cos(angleY);
-
var sin = Math.sin(angleY);
- vectors.foreach(function(){
-
var x1 = this.x * cos - this.z * sin;
-
var z1 = this.z * cos this.x * sin;
-
this.x = x1;
-
this.z = z1;
- })
- }
-
-
-
-
キューブ = 新しい Cube(80);
- cube._initVector();
- 関数 initAnimate(){
- cube._draw();
-
- animate();
- }
-
- 関数 animate(){
- ctx.clearRect(0,0,canvas.width,canvas.height)
-
- rotateY(cube.vectors);
- rotateX(cube.vectors);
- cube._draw();
- if("requestAnimationFrame" in window){
- requestAnimationFrame(animate);
- }
- else if("webkitRequestAnimationFrame" in window){
- webkitRequestAnimationFrame(animate);
- }
- else if("msRequestAnimationFrame" in window){
- msRequestAnimationFrame(animate);
- }
- else if("mozRequestAnimationFrame" in window){
- mozRequestAnimationFrame(animate);
- }
- else {
- setTimeout(animate , 16);
- }
- }
すべてのコードは投稿しません。デモのコンソールから確認できます。他のフレームワークなどは参照していません。コピーするだけで使用できます。
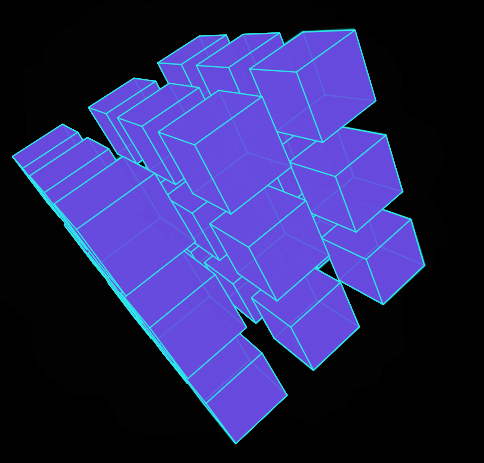
回転立方体を作成できたら、複数の回転立方体を作成することもできます。

ポケデモ: 顔: 3D Cube 2 3D Cube Line (顔なしのほうがかっこいいと思います)


