
HBuilder is a web development IDE launched by DCloud (Digital Paradise) that supports HTML5. This software can not only support web code writing, but also package already written project codes into mobile APPs.
HBuilder provides two types of packaging: cloud packaging and local packaging. The characteristic of cloud packaging is that DCloud has officially configured a native packaging environment and can compile HTML and other files into native installation packages. .
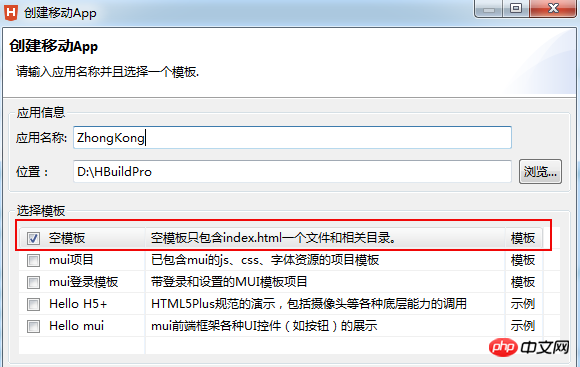
1. Download HBuilder, register and log in. First open "File" - "New" - "Mobile APP", enter the "Application Name", and the "Location" can be selected according to your needs. "Select Template" recommends choosing an empty template;
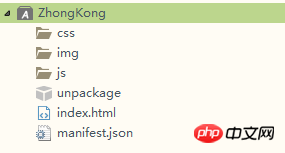
2. After the new creation is completed, the newly created project directory will be displayed in the project manager, in which the css, img, js and index.html files can be deleted, modified or replaced.
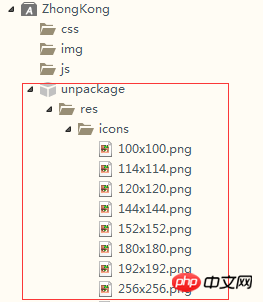
The unpackage folder is where the app icon and startup interface pictures are placed.
The manifest.json file is the configuration file of the mobile App. It is used to specify the display name, icon, application entry file address and required device permissions and other information. Users can use HBuilder Use the visual interface view or source code view to configure the mobile App information.
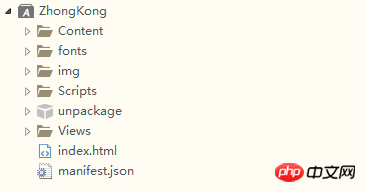
3. If you delete the css, img, js folder and index.html file, copy other project files to the file accordingly. folder, please note that the reference path in the html file needs to be correct.
Copy the project as shown below:
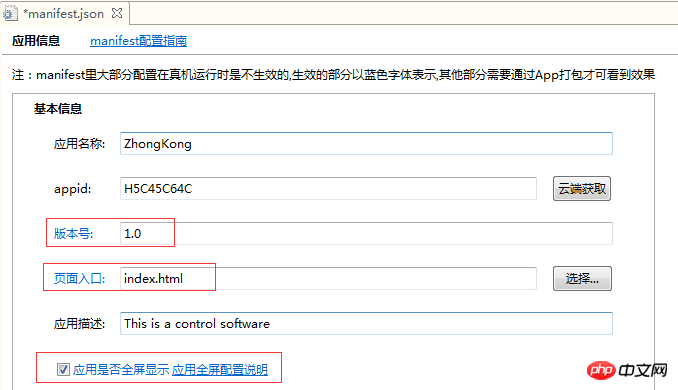
4, Copy the file After completion, refresh the update and double-click to open the manifest.json file to configure the App.
appid: Click on the cloud to get it. Version number: Edit as needed. Page entry: The default is index.html. Change the startup page of the APP according to your project needs. Application description: Fill it out yourself. Whether the application is displayed in full screen: Check it to display in full screen.
5. Icon configuration: Click the icon configuration at the bottom of the page to configure the APP display icon.
1) Click the square box with the "+" sign, select the path of the icon material to find the icon material, and then click the "Automatically generate all icons and replace" button to complete the icon generation and replacement .
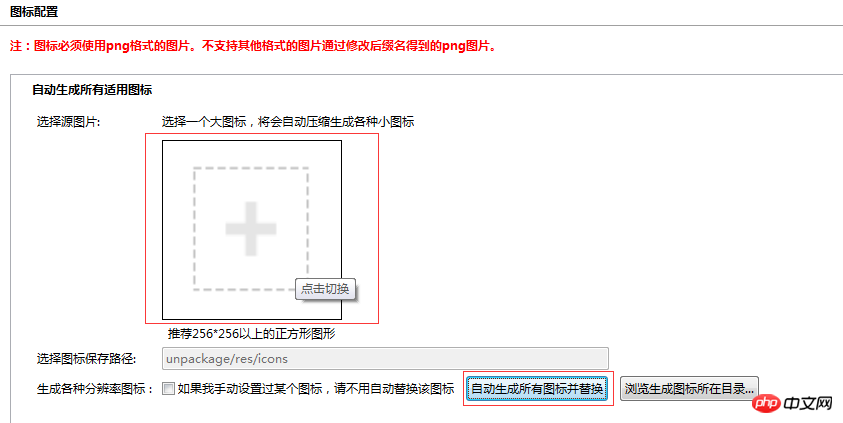
2), the generated icon is automatically in the unpackage folder
6, Startup image (splash) configuration, click to switch to startup image configuration
1), Startup options: Default
2), set the startup image, depending on whether it is an Android or iOS platform, and then make a startup image according to different devices
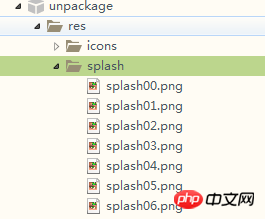
3), create a new one under unpackage→res file Name the file "splash" and put the completed startup image into this file.
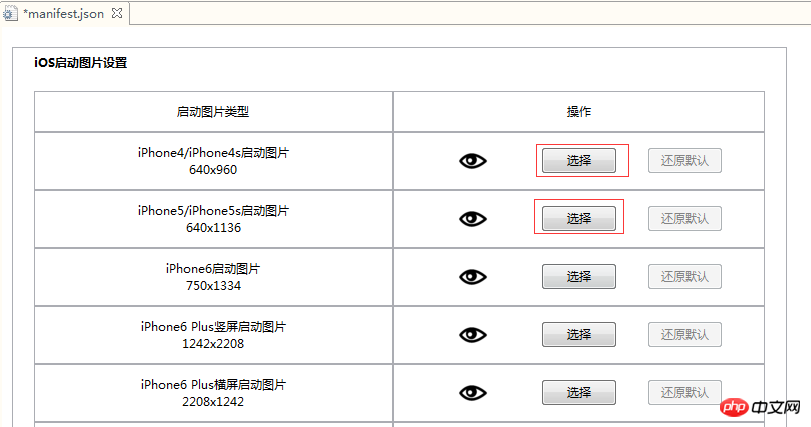
4), click "Select" in the startup image settings and find the startup image you just put in
7, SDK configuration: Configure if necessary, if not, just default.
8. Module permission configuration: Configure if necessary, otherwise just default.
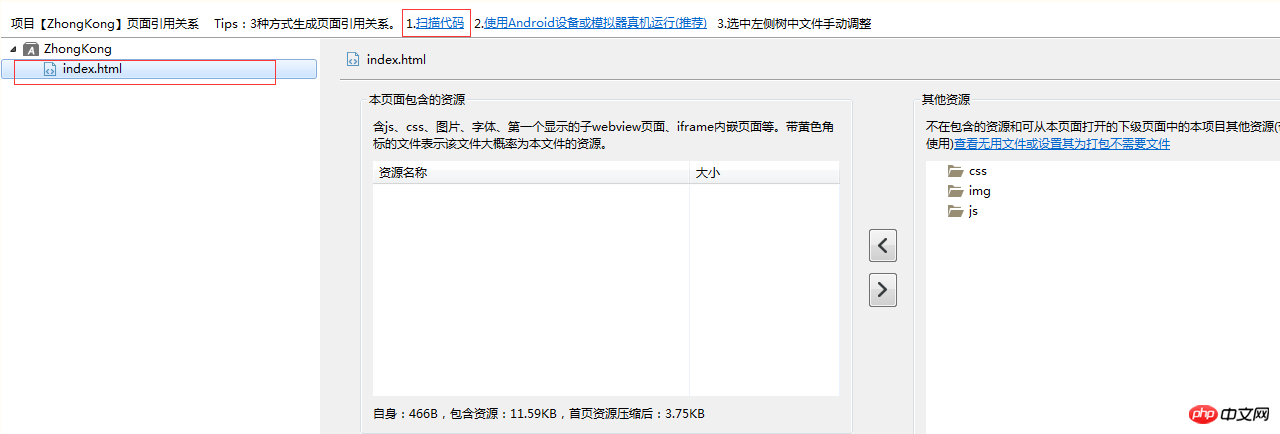
9, page reference relationship:
First click "Scan Code", then click on the index.html file on the left
What does this function mean: Click on the html file on the left, and different files, pictures, etc. will be displayed on the right. It can represent the resources required when loading the html file on the left.
10, Code view: Check whether the settings are correct in the code view, and then ctrl+s to save.
11, set the configuration options and officially enter the packaging stage
HBuilder click: "Release"-"Release as native installation package" Start packaging
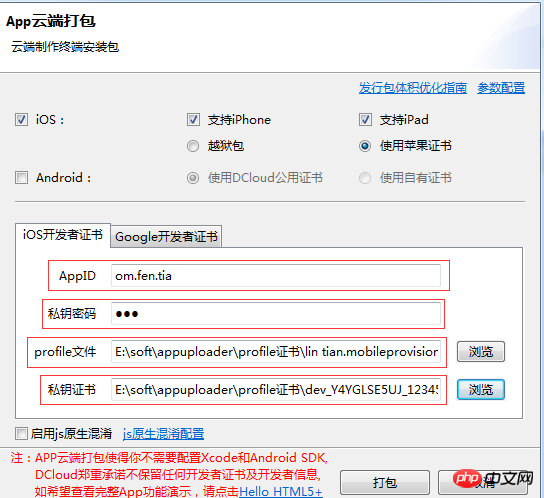
Here is an introduction to iOS packaging
1), if you choose the jailbreak package, it will not An Apple certificate is required and the package can be successfully packaged with default settings. However, the packaged App can only be installed on jailbroken phones, and cannot be installed without jailbreak.
2), if you use Apple certificate, here is a tool to apply for iOS certificate Appuploader. Without an Apple paid developer account, you can use Appuploader to apply for an ios test certificate, package the ipa and install it on a non-jailbroken device using a normal Apple ID.
Tool installation URL: http://www.applicationloader.net/blog/zh/72.html
No developer account required Tutorial on applying for iOS certificate: http://www.applicationloader.net/blog/zh/1073.html
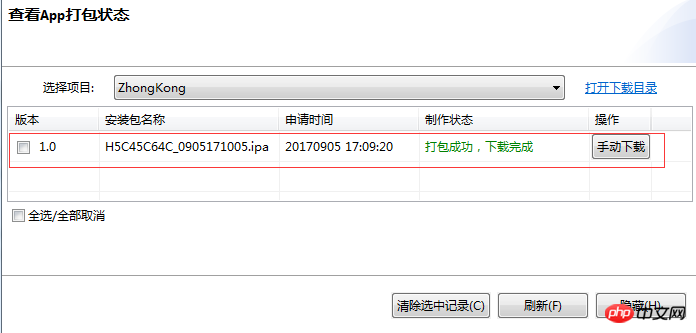
12. Click OK after successful submission. Check the App packaging status

When the packaging is successful, you can click manual download and install it on the iPad through the third-party tool Apple Assistant.
13. Debugging and installing the simulator
If you need to debug locally on the computer You need to install the simulator, please refer to http://ask.dcloud.net.cn/article/151 How to install and configure the mobile phone simulator, or in HBuilder→→Run→→Mobile phone run→→How to install and configure the mobile phone simulator to enter Check.
If you need to install it on a mobile phone for real-machine debugging, connect the mobile phone to the computer with a data cable, then restart HBuilder→→run→→run the phone→→connect to the real machine.
The above is the detailed content of How to use HBuilder to package App. For more information, please follow other related articles on the PHP Chinese website!
 How to make charts and data analysis charts in PPT
 Android voice playback function implementation method
 AC contactor use
 The difference between vscode and visual studio
 The difference between Java and Java
 Introduction to hard disk interface types
 nagios configuration method
 How to delete a folder in linux


