This article mainly introduces the method of configuring the React Native development environment in VSCode. The editor thinks it is quite good, so I will share it with you now and give it as a reference. Let’s follow the editor to take a look, I hope it can help everyone.
1.InstallVSCode
2.Install the plug-in
Press F1 and enter ext install and press Enter, or use
to enter react-native to install React Native Tools
Assume you have already installed react native on the device,
If it is not installed, please use npm install -g react-native-cli to install it
Or follow the official documentation
Create a new RN project and open it with VSCode
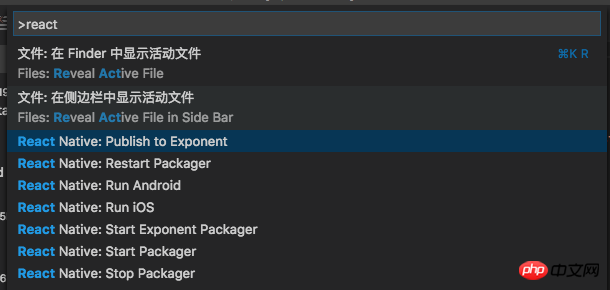
After the installation is complete, press F1 to see that there are many more options for React Native in the command

React Native Command
3. Configure debugging environment
a. Automatic configuration
Type shift+cmd+D or click icon

shift+cmd+D
Click again

Settings
Select React Native:

will automatically generate a launch.json file with 4 configuration options Debug Android, Debug iOS, Debug iOS, Debug iOS
{
  "version": "0.2.0",
  "configurations": [
    {
      "name": "Debug Android",
      "program": "${workspaceRoot}/.vscode/launchReactNative.js",
      "type": "reactnative",
      "request": "launch",
      "platform": "android",
      "sourceMaps": true,
      "outDir": "${workspaceRoot}/.vscode/.react"
    },
    {
      "name": "Debug iOS",
      "program": "${workspaceRoot}/.vscode/launchReactNative.js",
      "type": "reactnative",
      "request": "launch",
      "platform": "ios",
      "target": "iPhone 5s",
      "sourceMaps": true,
      "outDir": "${workspaceRoot}/.vscode/.react"
    },
    {
      "name": "Attach to packager",
      "program": "${workspaceRoot}/.vscode/launchReactNative.js",
      "type": "reactnative",
      "request": "attach",
      "sourceMaps": true,
      "outDir": "${workspaceRoot}/.vscode/.react"
    },
    {
      "name": "Debug in Exponent",
      "program": "${workspaceRoot}/.vscode/launchReactNative.js",
      "type": "reactnative",
      "request": "launch",
      "platform": "exponent",
      "sourceMaps": true,
      "outDir": "${workspaceRoot}/.vscode/.react"
    }
  ]
}b. Manual configuration
Next we clear the configurations

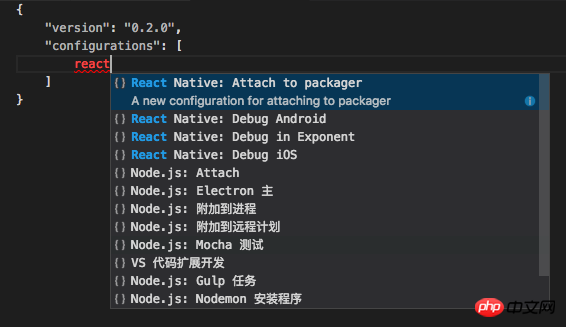
Click the Add Configuration button and select configuration

Add configuration
The results are as follows:
{
  "version": "0.2.0",
  "configurations": [

  ]
}Click the Add Configuration button here and select React Native: Debug iOS

Configuration options
In this way, running iOS After configuration
{
  "version": "0.2.0",
  "configurations": [
    {
      "name": "Debug iOS",
      "program": "${workspaceRoot}/.vscode/launchReactNative.js",
      "type": "reactnative",
      "request": "launch",
      "platform": "ios",
      "sourceMaps": true,
      "target": "iPhone 6s",
      "outDir": "${workspaceRoot}/.vscode/.react"
    }
  ]
}Click on the option on the left side of the settings, there will be Debug iOS option

Debug iOS
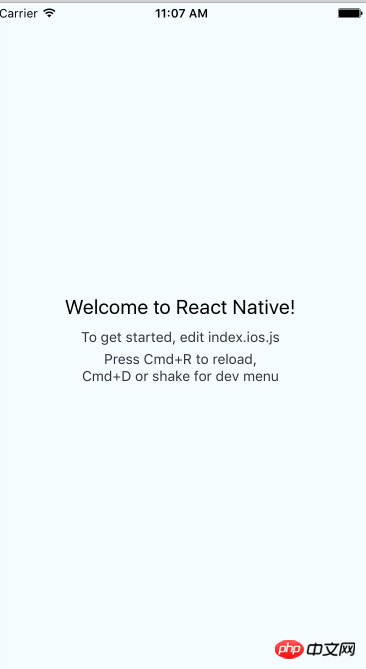
Next, you can click the run button of the above option to successfully run iOS

Hello world
4. Other practical plug-ins
Auto Close Tag
Detailed examples of steps to configure react development environment with VSCode
Example detailed explanation of vue-cli vscode configuration eslint
Essential plug-ins and configurations for using VSCode for PHP development
The above is the detailed content of Detailed example of VSCode configuring React Native development environment. For more information, please follow other related articles on the PHP Chinese website!


