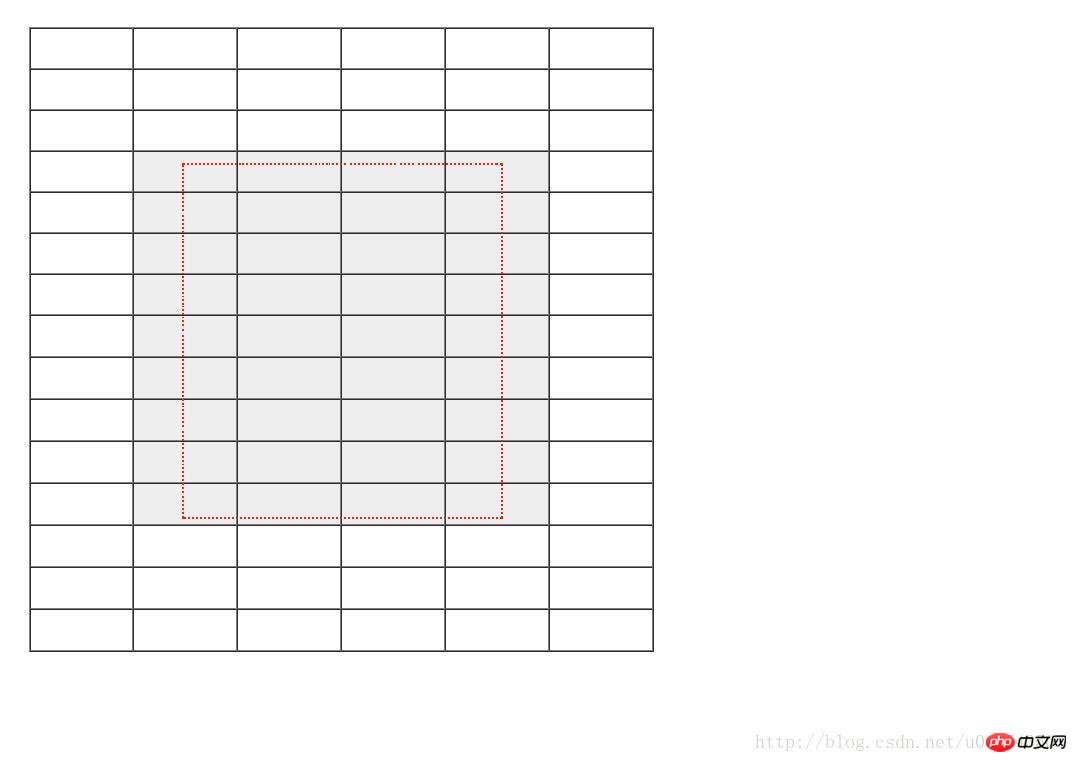
Is everyone able to implement a mouse drawing frame with jQuery and select the data in the frame? This article introduces you to the example code of jQuery to implement the mouse frame and select the data in the frame through example code. It is very good and has reference value. Friends who need it can refer to it.
jquery library:
jquery -1.10.2.min.js, jQuery UI - v1.12.1.
jQuery code
I won’t say much more, let’s get into the code. If you don’t understand something, read the comments.
<script type="text/javascript">
//鼠标按下时的X Y坐标
var mouseDownX;
var mouseDownY;
//鼠标按下时移动的X Y 坐标
var mouseMoveX;
var mouseMoveY;
//移动的状态
var isMove = false;
/*初始化 选择框 */
function init() {
$("#selected").css("display", "none");
$("#selected").css("top", "0");
$("#selected").css("left", "0");
$("#selected").css("width", "0");
$("#selected").css("height", "0");
}
$(document).ready(function() {
init();
var selectedTD = new Array();//创建被选中表格数组
var TD = $("td");//获取所有表格信息
for ( var i = 0; i < TD.length; i++) {
selectedTD.push(TD[i]);
}
$("#tablep").mousedown(function(event) {
mouseDownX = event.clientX - $(this).offset().left;;
mouseDownY = event.clientY - $(this).offset().top;
console.log("mouseDownX=" + mouseDownX +" mouseDownY=" + mouseDownY );
if(event.target.id.match(/selected/)) {
isMove = true;
}
//鼠标按下并移动时进行判断(拖拽 or 画框)
$("#tablep").mousemove(function(event) {
mouseMoveX = event.clientX - $(this).offset().left;
mouseMoveY = event.clientY - $(this).offset().top;
var selectp = document.getElementById("selected");
if (isMove) {
//拖拽的代码,因为实在不想算 xy 了,所以使用了jquery ui
$("#selected").draggable();
//这部分是负责画框的时候,实时把框住的表格变色的,(代码和下面的代码重复了)
var left = selectp.offsetLeft, top = selectp.offsetTop; width = selectp.offsetWidth, height = selectp.offsetHeight;
for ( var i = 0; i < selectedTD.length; i++) {
var sl = selectedTD[i].offsetWidth + selectedTD[i].offsetLeft;
var st = selectedTD[i].offsetHeight + selectedTD[i].offsetTop;
if (sl > left && st > top && selectedTD[i].offsetLeft < left + width && selectedTD[i].offsetTop < top + height) {
if (selectedTD[i].className.indexOf("selected") == -1) {
selectedTD[i].className = "selected";
}
} else {
if (selectedTD[i].className.indexOf("selected") != -1) {
selectedTD[i].className = "TD";
}
}
}
} else {
//重复的代码,完了再把它抽取出来
var left = selectp.offsetLeft, top = selectp.offsetTop; width = selectp.offsetWidth, height = selectp.offsetHeight;
for ( var i = 0; i < selectedTD.length; i++) {
var sl = selectedTD[i].offsetWidth + selectedTD[i].offsetLeft;
var st = selectedTD[i].offsetHeight + selectedTD[i].offsetTop;
if (sl > left && st > top && selectedTD[i].offsetLeft < left + width && selectedTD[i].offsetTop < top + height) {
if (selectedTD[i].className.indexOf("selected") == -1) {
selectedTD[i].className = "selected";
}
} else {
if (selectedTD[i].className.indexOf("selected") != -1) {
selectedTD[i].className = "TD";
}
}
}
//鼠标抬起结束画框,和拖动
$("#tablep").mouseup(function() {
console.log("mouseUpX=" + mouseMoveX + " mouseUpY=" + mouseMoveX);
isMove = false;
$(this).unbind('mousemove');
})
//画框
displaySelected(mouseDownY, mouseDownX, mouseMoveX, mouseMoveY);
}
})
})
//当鼠标在已经画好的框上时,改变鼠标指针样式,就是十字形了
$("#selected").mouseenter(function() {
$("#selected").css("cursor", "move");
});
});
function displaySelected(mouseDownY, mouseDownX, mouseUpX, mouseUpY) {
$("#selected").css("display", "block");
$("#selected").css("top", mouseDownY);
$("#selected").css("left", mouseDownX);
var moveX = mouseMoveX - mouseDownX;
var moveY = mouseMoveY - mouseDownY;
if (moveY < 0) {
$("#selected").css("top", event.clientY - $("#table").offset().top);
}
if (moveX < 0) {
$("#selected").css("left", event.clientX - $("#table").offset().left);
}
$("#selected").css("width", Math.abs(moveX));
$("#selected").css("height", Math.abs(moveY));
}
</script>HTML for testing
Test using table:
<p id="tablep" style="width: 1500px; height: 1500px;top: 100px; left:100px; position: absolute;">
  <p id="selected" style="border:5px dotted rgb(239, 37, 17);position: absolute;display: none;"></p>
  <table border="1" style=" width: 1500px; height: 1500px;" id="table">
  <tr>
   <td id="1" class="TD"></td>
   <td id="2" class="TD"></td>
   <td id="3" class="TD"></td>
   <td id="4" class="TD"></td>
   <td id="5" class="TD"></td>
   <td id="6" class="TD"></td>
  </tr>
  <tr>
   <td id="7" class="TD"></td>
   <td id="8" class="TD"></td>
   <td id="9" class="TD"></td>
   <td id="10" class="TD"></td>
   <td id="11" class="TD"></td>
   <td id="12" class="TD"></td>
  </tr>
  <tr>
   <td id="1" class="TD"></td>
   <td id="2" class="TD"></td>
   <td id="3" class="TD"></td>
   <td id="4" class="TD"></td>
   <td id="5" class="TD"></td>
   <td id="6" class="TD"></td>
  </tr>
  </table>
 <!--表格代码太多所以...-->
 </p>
Rendering

Related recommendations:
Example to explain jquery mouse hover navigation underline slide-out effect
jquery code to achieve interesting special effects of mouse click text
The above is the detailed content of Master jQuery to implement mouse drawing frame and select the data in the frame. For more information, please follow other related articles on the PHP Chinese website!


